0. Intro
글 소개
이 글은 강의를 따라가며, 핵심적인 내용을 정리하는 용도로 작성할 것이다.
강의보면서 노트에 필기한다는 느낌이다.
공부이유
어느새 5개월차 개발자에 접어들었다.
회사생활에 적응하기도 했고, 매일 개인적으로 업무일지를 기록하다 보니 투두리스트가 만들고 싶어졌다.
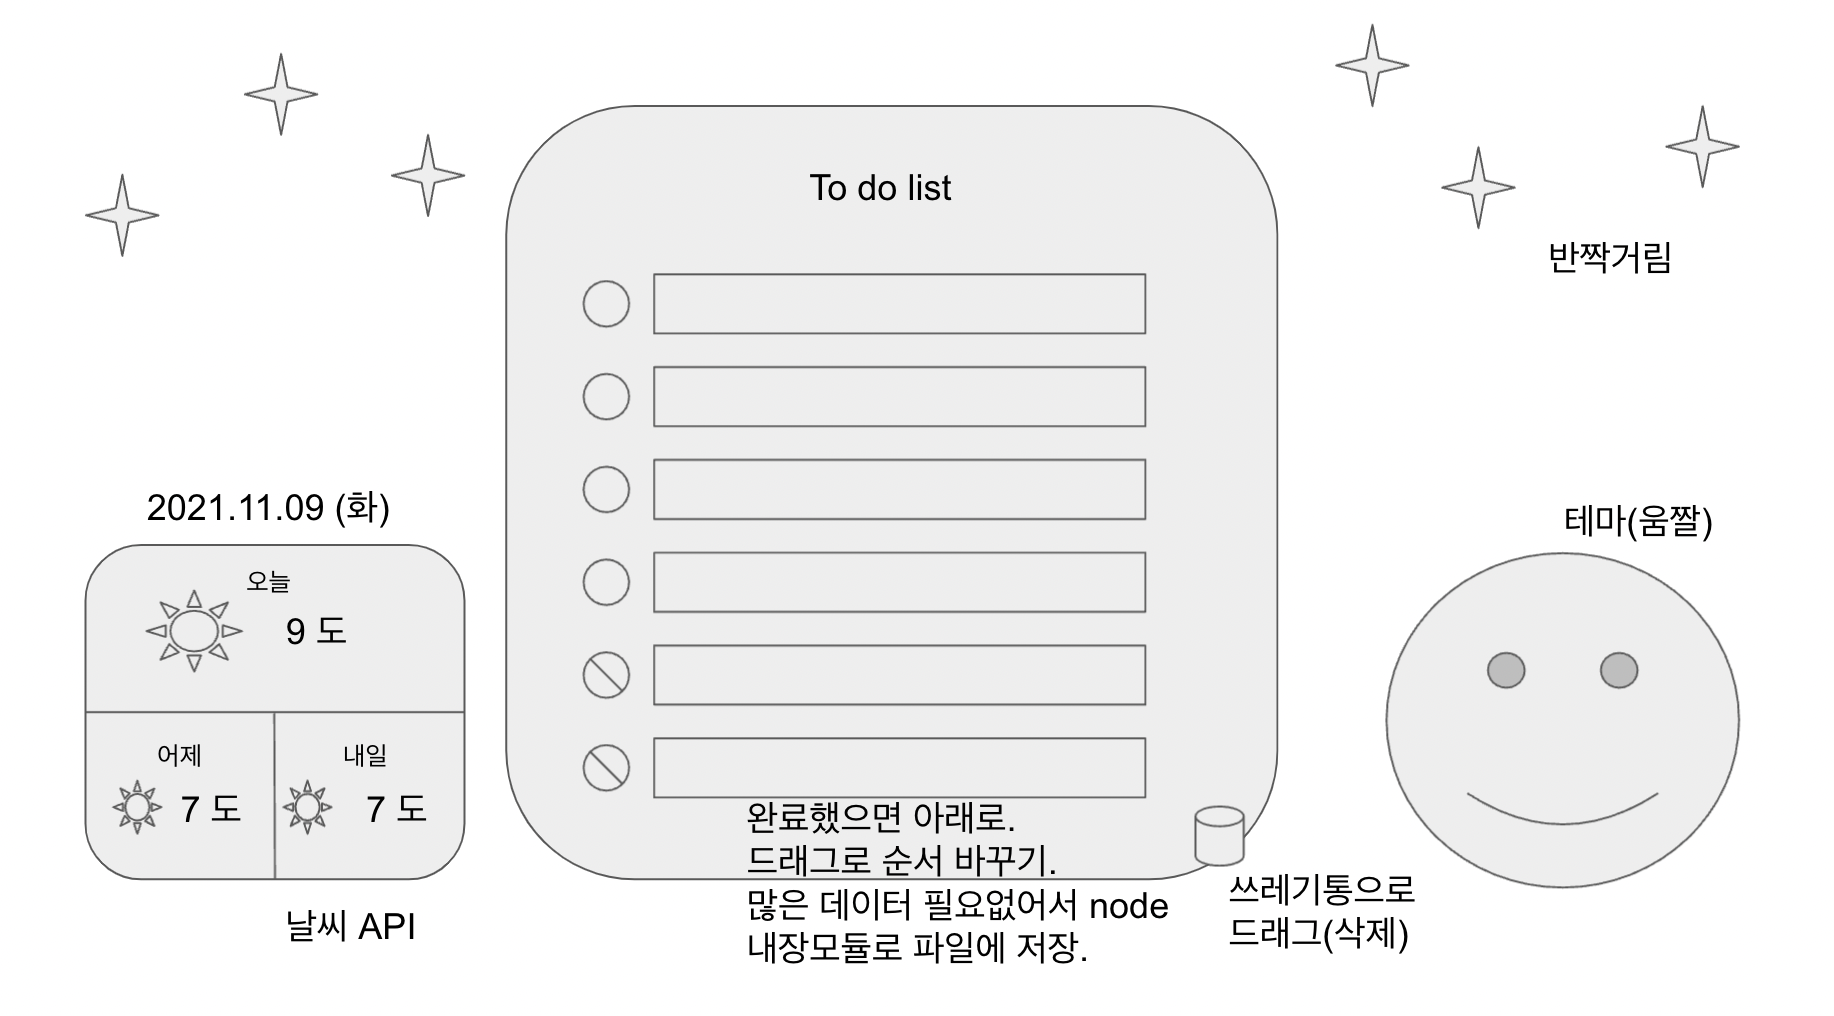
시간도 넣고, 내가 원하는 배경도 넣고 (크리스마스가 다가오니 산타를 넣고싶다), 날씨도 추가하고 싶었다.
나름 목업도 그려봤는데, 막상 시작하려니 막막했다.
평소 api서버, DB만 작업하다보니 프론트 작업에 대한 가이드라인이 필요했다.
분명 열심히 만들었었는데 다 잊어버렸다..ㅎ
이 기회에 강의를 찾아봤고 내가 원하는 요소 모두 충족하는 강의가 있었다..!
빠르게 강의를 들으며 배웠던 내용을 상기시키고 목업대로 만들고 싶다 !
1. Hello World
html에 css, js 연결하기
아래처럼 기본적인 내용을 만들고,
크롬에서 html파일을 열면 베이지색 화면에서 알림창이 뜨는 걸 확인할 수 있다.
// momemtum 폴더 내

// app.js
alert('hello');

// style.css
body {
  background-color: beige;
}

// index.html
<!DOCTYPE html>
<html lang="en">

<head>
  <meta charset="UTF-8">
  <meta http-equiv="X-UA-Compatible" content="IE=edge">
  <meta name="viewport" content="width=device-width, initial-scale=1.0">
  <link rel="stylesheet" href="style.css" />
  <title>Momentum</title>
</head>

<body>
  <script src="app.js"></script>
</body>

</html>
2. prompt
// app.js
const age = prompt("How old are you?")

console.log(age)
사용자의 응답을 받을 수 있는 오래된 방법(지금은 많이 쓰지 않음)
3. document
개발자도구에서 document를 쳐보면 우리가 html에 작성한 코드가 들어있다.
console.dir(document)를 쳐보면 우리가 html에서 타이틀로 작성한 momentum이 title의 값으로 들어가있다.
그리고 이건 객체처럼 보인다.
-> 자바스크립트로 이 객체를 가져올 수 있다.
document.title 라고 치면 momentum이라고 출력된다.
이처럼 js는 html을 접근하고 읽을 수 있다.
document.title = 'hi' 라고 치면 브라우저 타이틀이 변경된다.
document.location 이라고 치면 우리가 어디에 있는지도 보여준다.
4. HTML in JS
// index.html

<!DOCTYPE html>
<html lang="en">

<head>
  <meta charset="UTF-8">
  <meta http-equiv="X-UA-Compatible" content="IE=edge">
  <meta name="viewport" content="width=device-width, initial-scale=1.0">
  <link rel="stylesheet" href="style.css" />
  <title>Momentum</title>
</head>

<body>
  <h1 class="helllllo!" id="title">Grab me!</h1> // 추가된 부분
  <script src="app.js"></script>
</body>

</html>

// app.js

const title = document.getElementById("title")

console.dir(title) // h1에서 가져올 수 있는 것들
console.log(title) // <h1 id="title">Grab me!</h1>

title.innerHTML = "Got you!" // 화면 문장이 바뀐다.

console.log(title.id) // title
console.log(title.className) // helllllo!
5. querySelector
// index.html
<!DOCTYPE html>
<html lang="en">

<head>
  <meta charset="UTF-8">
  <meta http-equiv="X-UA-Compatible" content="IE=edge">
  <meta name="viewport" content="width=device-width, initial-scale=1.0">
  <link rel="stylesheet" href="style.css" />
  <title>Momentum</title>
</head>

<body>
  <div class="hello">
    <h1>Grab me!</h1>
  </div>
  <div class="hello">
    <h1>Grab me!</h1>
  </div>
  <div class="hello">
    <h1>Grab me!</h1>
  </div>
  <script src="app.js"></script>
</body>

</html>

// app.js

const title = document.querySelector(".hello h1")

console.log(title) // <h1>Grab me!</h1>

const title1 = document.querySelectorAll(".hello h1")

console.log(title) // NodeList(3) [h1,h1,h1]
querySelector은 같은 클래스 hello에 태그 h1이 여러개 있어도
하나의 엘리멘트만 가져온다. (Returns the first element)
querySelectorAll는 모든 엘리멘트를 가져온다.
6. console.dir
const title = document.querySelector(".hello h1")

console.dir(title) 해서 객체를 뒤져보면 여러가지를 활용할 수 있다.

title.innerHTML = "hello"

title.style.color = "blue" // 이런식으로 색깔도 바꿀 수 있다.
7. event
const title = document.querySelector(".hello h1")

function handleTitleClick() {
  title.style.color = "blue"
}

function handleMouseEnter() {
  title.innerHTML = "Mouse is here"
}

function handleMouseleave() {
  title.innerHTML = "Mouse is gone"
}

// 방법 1 (삭제 리스너를 걸 수 있어서 좋다.)
title.addEventListener("click", handleTitleClick) // 클릭 이벤트
title.addEventListener("mouseenter", handleMouseEnter) // 커서 올리기
title.addEventListener("mouseleave", handleMouseleave) // 커서 내리기

// 방법 2
title.onclick = handleTitleClick
title.onmouseenter = handleMouseEnter
title.onmouseleave = handleMouseleave
handleTitleClick()이 아닌 handleTitleClick 이름만 넘겨주는 이유는 바로 실행하고 싶은 게 아니라 리스너에게 담아두기 위함이다.
해당 이벤트가 발생할 때 함수가 작동한다.
어떤 이벤트를 적용하고 싶은지 아래 링크에서 볼 수 있다.
참고 : https://developer.mozilla.org/en-US/docs/Web/API/HTMLElement
이게 좀 지루하면 console.dir(element) 에서 on으로 시작하는 메소드를 확인하면 된다.
8. window
function handelWindowResize() {
  document.body.style.backgroundColor = "tomato"
}

function handleWindowCopy() {
  alert("copier!")
}

function handleWindowOffline() {
  alert("SOS no wifi")

function handleWindowOnline() {
  alert("All Goood!")
}

window.addEventListener("resize", handelWindowResize)
window.addEventListener("copy", handleWindowCopy)
window.addEventListener("offline", handleWindowOffline)
window.addEventListener("online", handleWindowOnline)
윈도우 크기를 조정하면 발생하는 이벤트,
복사를 하면 일어나는 이벤트,
와이파이가 끊어지면 일어나는 이벤트,
와이파이가 다시 연결되면 일어나는 이벤트이다.
window에도 이벤트가 많으니 찾아보면 좋다.