
android
android 폴더 안에는 local.properties가 있다.
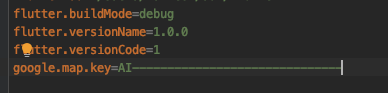
그 안에 key, value 쌍으로 google map api key를 추가한다.
그 후 app수준의 build.gradle파일에서 해당 key, value를 manifest에서 쓰게 등록한다.
app/build.gradle 상단 부분 local.properties파일 을 불러와 파일 안의 key value를 이용해 변수를 선언하고 최기화 하는 부분이 있다.
def localProperties = new Properties()
def localPropertiesFile = rootProject.file('local.properties')
if (localPropertiesFile.exists()) {
    localPropertiesFile.withReader('UTF-8') { reader ->
        localProperties.load(reader)
    }
}

def flutterRoot = localProperties.getProperty('flutter.sdk')
if (flutterRoot == null) {
    throw new GradleException("Flutter SDK not found. Define location with flutter.sdk in the local.properties file.")
}

def flutterVersionCode = localProperties.getProperty('flutter.versionCode')
if (flutterVersionCode == null) {
    flutterVersionCode = '1'
}

def flutterVersionName = localProperties.getProperty('flutter.versionName')
if (flutterVersionName == null) {
    flutterVersionName = '1.0'
}

// 이 부분
def googleMapApiKey = localProperties.getProperty('google.map.key')
그 아래쪽에 googleMapApiKey라는 이름으로 선언하고 google.map.key라는 key값의 value로 초기화 해준다.
초기화 후 아래쪽을 보면
android {
    compileSdkVersion 31

    compileOptions {
        sourceCompatibility JavaVersion.VERSION_1_8
        targetCompatibility JavaVersion.VERSION_1_8
    }

    kotlinOptions {
        jvmTarget = '1.8'
    }

    sourceSets {
        main.java.srcDirs += 'src/main/kotlin'
    }

    defaultConfig {
        // TODO: Specify your own unique Application ID (https://developer.android.com/studio/build/application-id.html).
        applicationId "com.example.ex"
        minSdkVersion 20
        targetSdkVersion 30
        versionCode flutterVersionCode.toInteger()
        versionName flutterVersionName
		// 이 부분
		manifestPlaceholders["googleMapApiKey"] = googleMapApiKey
    }
defaultConfig 가장 아래에
manifestPlaceholders["googleMapApiKey"] = googleMapApiKey를 추가해준다.
이 방법으로 에러가 난다면
manifestPlaceholders = [googleMapApiKey:googleMapApiKey] 이런 식으로 다시 시도해 보자. manifest build 참고 url
마지막으로 manifest파일에서
<application
        android:label="ex"
        android:name="${applicationName}"
        android:icon="@mipmap/ic_launcher">
        // 이 아래 android:value 부분
       <meta-data
           android:name="com.google.android.geo.API_KEY"
           android:value="${googleMapApiKey}"
           />
build.gradle파일에서 설정한 변수를 가져다 쓰면 된다.
iOS
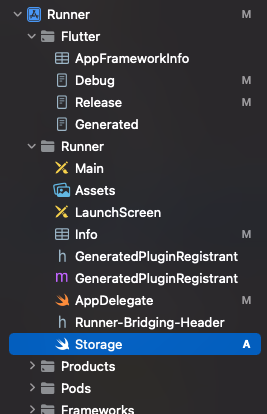
Flutter프로젝트 아래의 ios폴더로 xcode를 킨 후 Runner폴더 안에 Storage.swift파일을 생성한다. 파일 이름은 원하는 대로 ㄱㄱ
//
//  Storage.swift
//  Runner
//
//  Created by 이시헌 on 2022/05/05.
//

import Foundation

struct Storage{
    let googleMapApiKey = "AI-------------------------------"
}
그 후 Storage.swift파일 안에 위와 같이 struct를 정의한다.
import UIKit
import Flutter
import GoogleMaps

@UIApplicationMain
@objc class AppDelegate: FlutterAppDelegate {
  override func application(
    _ application: UIApplication,
    didFinishLaunchingWithOptions launchOptions: [UIApplication.LaunchOptionsKey: Any]?
  ) -> Bool {
  	// 이 부분
    GMSServices.provideAPIKey(Storage().googleMapApiKey)
    GeneratedPluginRegistrant.register(with: self)
    return super.application(application, didFinishLaunchingWithOptions: launchOptions)
  }
}
그 다음 GMSServices.provideAPIKey안에 직접 추가했던 String값을 빼고 Storage 객체의 googleMapApiKey변수를 대입해준다.
마무리
두 os에서의 작업이 끝나면 Flutter 프로젝트 내의 .gitignore파일 안에 android폴더 안의 local.properties와 ios/Runner/ 안에 Storage.swift파일을 추가한 후 원격 저장소에 push를 할 수있다.
google map api key뿐만 아니라 다른 서비스를 이용하면서 필요한 api key를 숨기는 방법으로 활용할 수가 있겠다.
++ .gitignore가 적용되지 않을 때
Storage.swift를 .gitignore에 추가 했는데 원격 저장소에 올라가는 경우가 있는데 git cache에 문제가 있는거라 cache 삭제 후 다시 올리면 된다.
git rm -r --cached .
git add .
git commit -m "cache 삭제"
원격 저장소가 public인 경우 내 api키가 노출된거니 노출된 api key를 지우고 다시만드는게 좋을거같다.


좋은 글 감사합니다.