안녕하세요.
오늘은 앱에 다크 모드와 라이트 모드를 구현하는 방법과 제가 구현하는 과정에서 겪은 실패(?) 경험에 대한 내용에 대해 포스팅을 해보겠습니다.
우선 iOS 13.0 이전 버전은 다크 모드를 지원하지 않습니다!!
그럼 프로젝트를 생성하여 다크 모드와 라이트 모드를 구현 해보겠습니다!
1. 프로젝트 생성 및 UI컴포넌트 배치
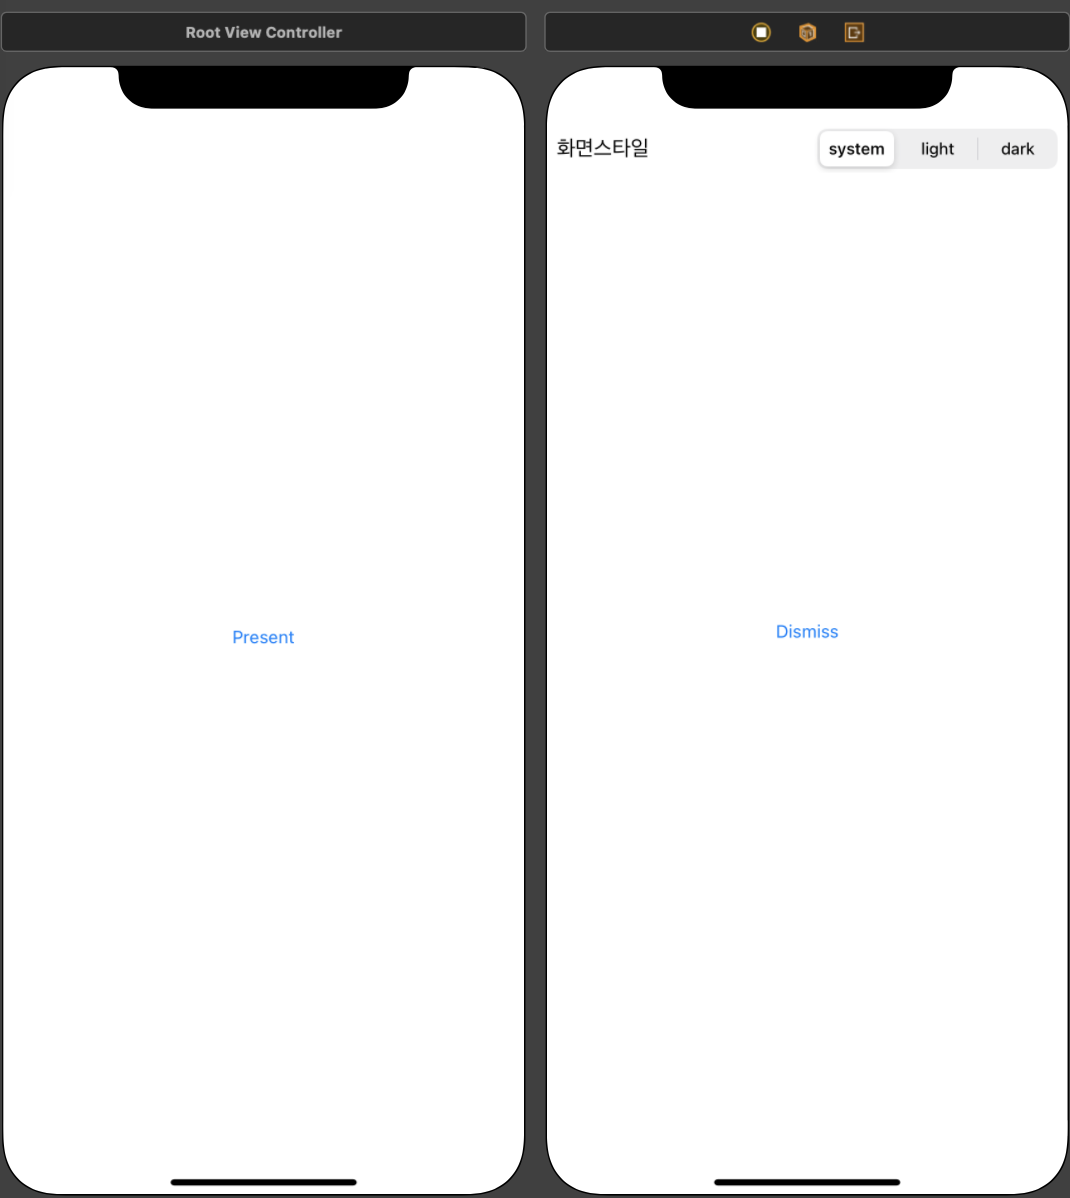
저는 간편하게 만들기 위해 UISegmentedControl을 사용하여 만들어 볼텐데요.
UIButton과 ActionSheet 또는 UIButton과 UIMenu를 활용하여도 구현할 수 있으니 원하시는 방법으로 만들어 사용하세요😊
뷰 컨트롤러를 두 개 만든 이유는 아래에서 확인하실 수 있습니다.
2. SegmentedContol outlet 변수 및 IBAction 메소드 생성
 @IBOutlet weak var segmentedControl: UISegmentedControl!

 @IBAction func selectAppearance(_ sender: Any) {

 }
Action 메소드의 이벤트는 ValueChanged로 설정해주시면 됩니다
3. IBAction 메소드 내 화면 스타일 설정 로직 작성
화면에 다크 모드와 화이트 모드를 적용시키기 위해서는 overrideUserInterfaceStyle이라는 프로퍼티가 필요합니다.
overrideUserInterfaceStyle은 UIViewController와 UIView에 선언되어 있는 프로퍼티입니다.
이 overrideUserInterfaceStyle의 기본값은 UIUserInterfaceStyle.unspecified이며 .unspecified로 설정되어 있을 경우 앱은 System의 InterfaceStyle을 따라가게 됩니다.
overrideUserInterfaceStyle은 UIUserInterfaceStyle.unspecified 외에도 UIUserInterfaceStyle.light, UIUserInterfaceStyle.dark의 값도 가질 수 있습니다.
다크 모드로 설정할 때는 UIUserInterfaceStyle.dark로,
라이트 모드로 설정할 때는 UIUserInterfaceStyle.light로 설정해 주시면 됩니다.
추가로 overrideUserInterfaceStyle은 UIUserInterfaceStyle(rawValue: Int)로 UIUserInterfaceStyle을 설정해 줄 수 있습니다.
rawValue는 0, 1, 2 세 개의 값을 가질 수 있으며 각각 .unspecified, .light, .dark와 대응됩니다.
저는 이 rawValue를 통해 InterfaceStyle을 변경하겠습니다.
정상적인 결과에 앞서 제가 라이트모드, 다크 모드를 구현하며 실패한 케이스부터 확인해보겠습니다.
실패 케이스
 @IBAction func selectAppearance(_ sender: Any) {
	 overrideUserInterfaceStyle = UIUserInterfaceStyle(
     rawValue: segmentedControl.selectedSegmentIndex
     ) ?? .unspecified
 }
 // or
 @IBAction func selectAppearance(_ sender: Any) {
	 view.overrideUserInterfaceStyle = UIUserInterfaceStyle(
     rawValue: segmentedControl.selectedSegmentIndex
     ) ?? .unspecified
 }
우선 코드의 내용을 살펴 보겠습니다.
ViewController, View가 가진 overrideUserInterface 프로퍼티의 rawValue에 SegmentedControl의 선택된 segment의 index를 넣어 주었습니다.
segment의 순서를 system, light, dark로 두었기 때문에 seletedSegmentIndex는 각각 .unspecified, .light, .dark에 대응하게 됩니다.
위의 코드를 추가한 뒤 실행을 해보면 아래와 같은 결과를 확인하실 수 있는데요.
"제대로 동작하는거 아닌가요?!" 하실 수 있지만 다크 모드로 변경하였을 때 시간과 배터리 등의 정보가 표시되는 StatusBar가 검은색 배경 때문에 안보이게 되는 현상이 발생합니다.

또 하나의 문제는 바로 두번째 뷰컨트롤러에서 다크모드로 설정 후 첫번째 뷰컨트롤러로 돌아갔을 때 첫번째 뷰컨트롤러에 InterfaceStyle이 적용되지 않는 현상이 발생하는데요.
If you assign a different value, the new style applies to the view and all of the subviews owned by the same view controller
만약 다른 값을 할당하게되면 새 스타일은 뷰와 동일한 뷰컨트롤러가 소유한 모든 서브 뷰에 적용된다.
애플 공식 문서를 보면 위와 같은 내용이 있습니다. 새 스타일을 적용하면 동일 계층의 뷰와 해당 뷰의 서브뷰에 새 스타일이 적용된다는 내용을 확인할 수 있습니다.
즉! 새 스타일을 적용한 뷰보다 상위 계층에 있는 뷰는 적용이 안된다는 얘기입니다
그렇다면 어떻게 해야할까요??
성공 케이스
@IBAction func selectAppearance(_ sender: Any) {
	 view.window?.overrideUserInterfaceStyle = UIUserInterfaceStyle(
     rawValue: segmentedControl.selectedSegmentIndex
     ) ?? .unspecified
 }
위에서 작성하였던 view.overrideUserInterfaceStyle에 window?를 추가하여 뷰의 최상위 계층인 window의 InterfaceStyle을 변경해 주었습니다.
결과를 확인해보면
StatusBar가 정상적으로 나오며 첫번째 뷰컨트롤러에도 다크 모드가 잘 적용되었습니다.

UserDefaults에 현재 InterfaceStyle 저장
마지막 단계입니다.
위까지의 과정을 통해 InterfaceStyle을 성공적으로 변경하였으나, 문제는 앱을 재실행 시켰을 때 다시 overrideUserInterfaceStyle이 .unspecified로 설정됩니다.
따라서 앱을 재실행 시켰을 때 마지막으로 정한 스타일을 적용시켜 주어야 합니다.
UserDefaults.standard.set(segmentedControl.selectedSegmentIndex, forKey: "Appearance")우선 Action 메소드 안에 selectedSegmentIndex 값을 UserDefaults에 저장시켜 줍니다.
그 후, SceneDelegate의 func scene(_ scene:, willConnectTo session:, options connectionOptions:) 안에
let rawValue = UserDefaults.standard.integer(forKey: "Appearance")
window?.overrideUserInterfaceStyle = UIUserInterfaceStyle(rawValue: rawValue) ?? .unspecified
위의 내용을 넣어주면 앱을 종료 시킨 후 다시 실행시켜도 마지막으로 선택한 InterfaceStyle로 앱이 실행됩니다.
이렇게 다크 모드, 라이트 모드 구현 예제는 모두 끝이 났습니다.
읽어주셔서 감사합니다☺️
References
https://developer.apple.com/documentation/uikit/uiview/3238086-overrideuserinterfacestyle
https://developer.apple.com/documentation/uikit/uiuserinterfacestyle