
JSP
이클립스 JSP 환경설정
(지금까지 Java연습한 위치와 다르게 Workspace 변경함)
‣ 인코딩 설정
-
모두
UTF-8로 변경 -
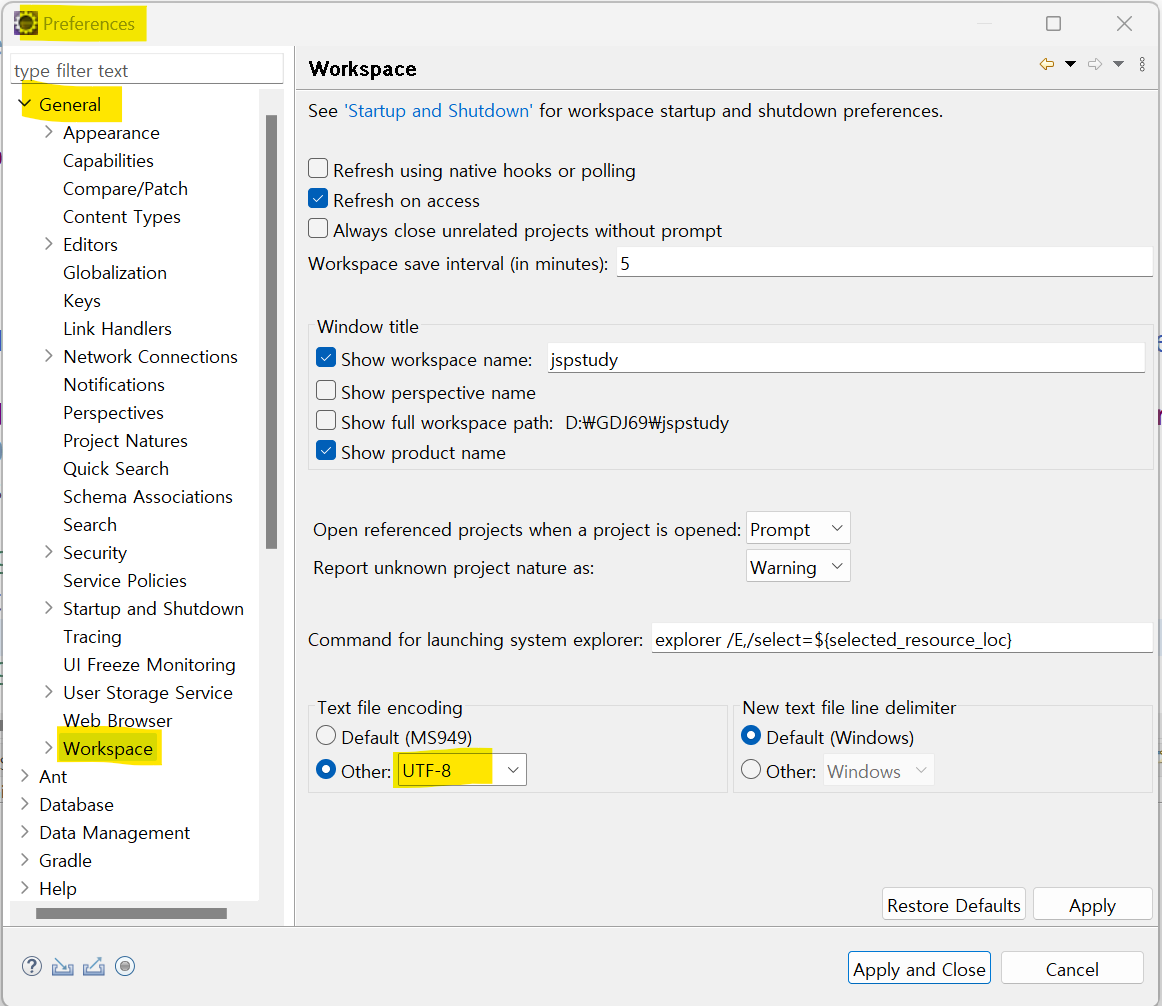
Window - Preferences -
- General - Workspace - Other :
UTF-8
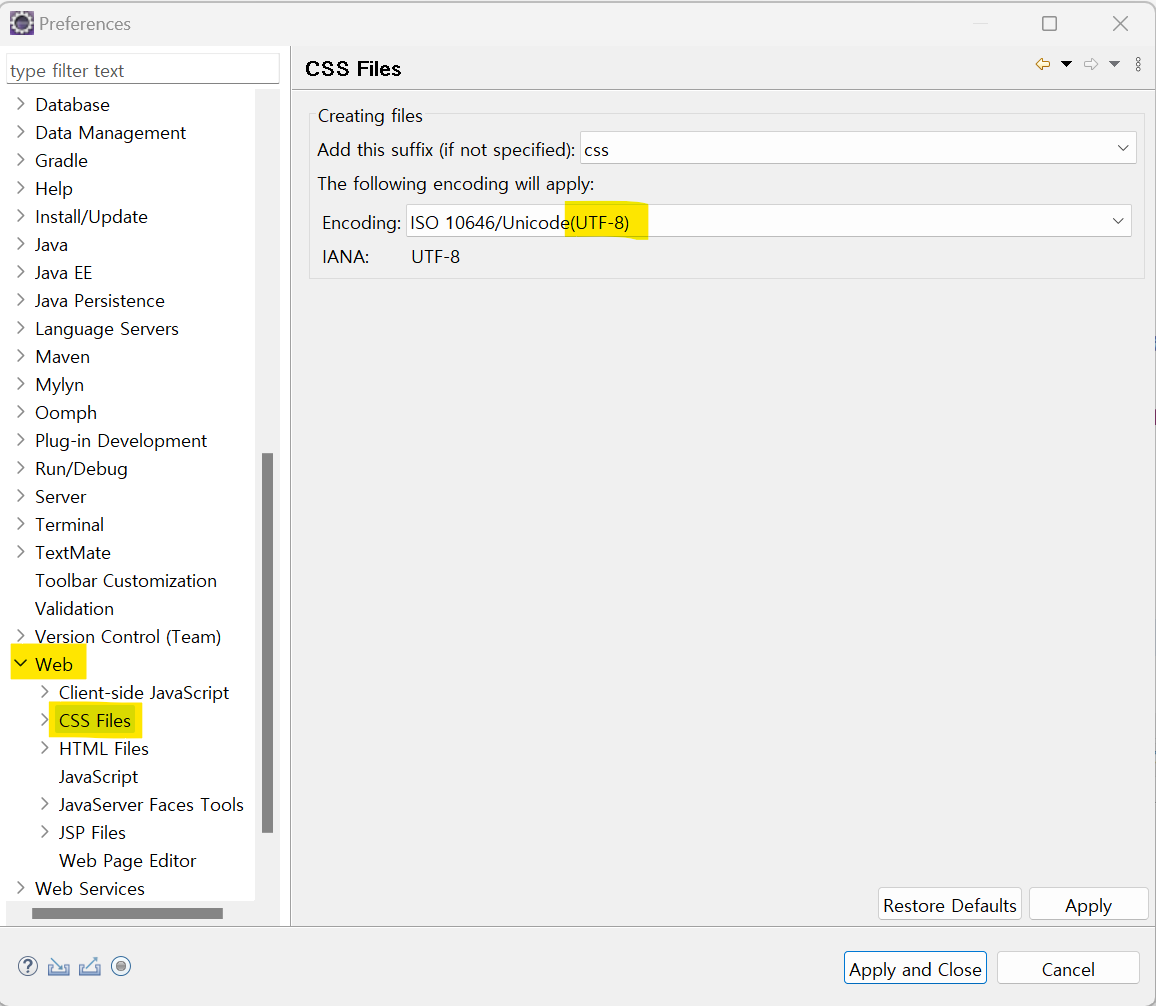
- Web - CSS Files - Encoding :
UTF-8
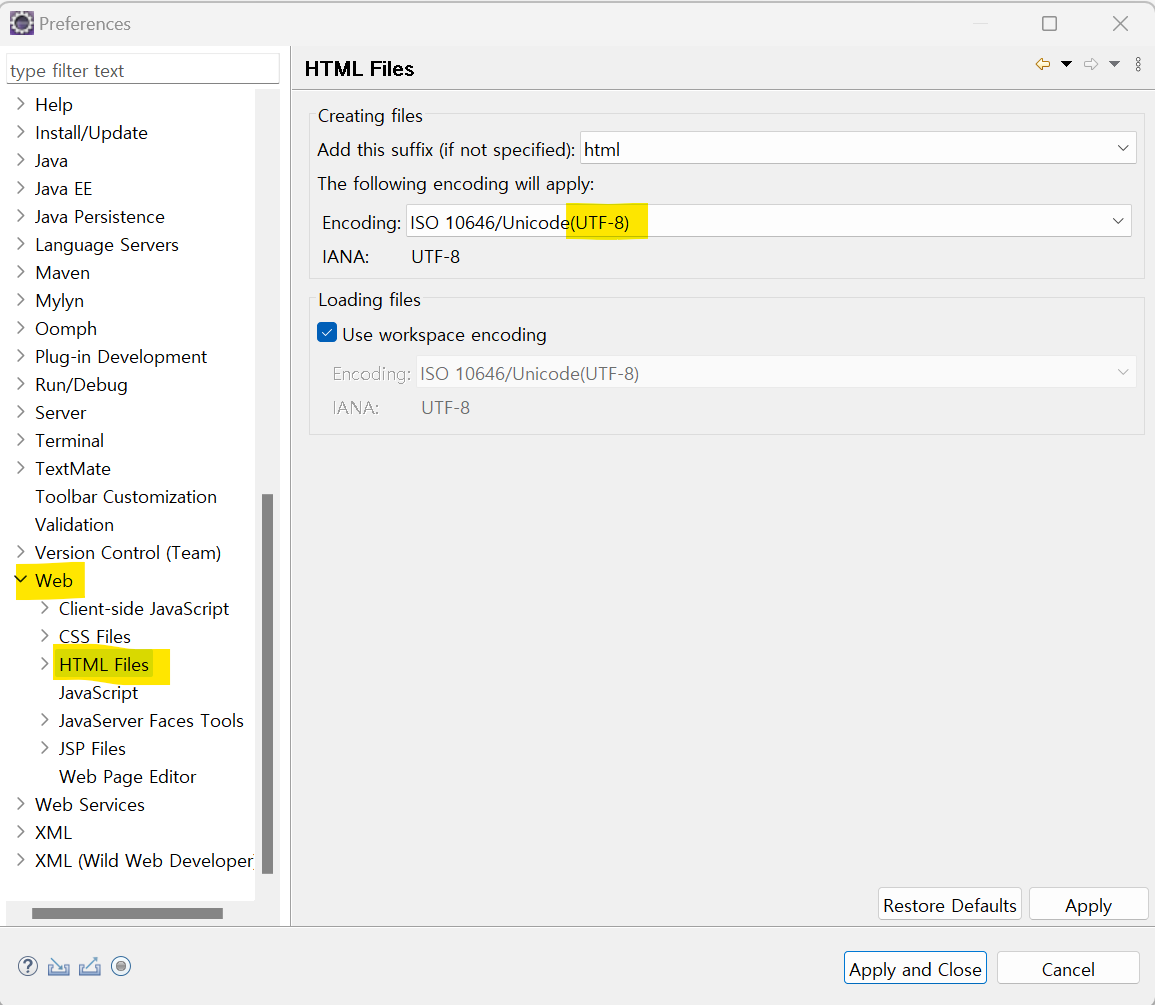
- Web - HTML Files - Encoding :
UTF-8
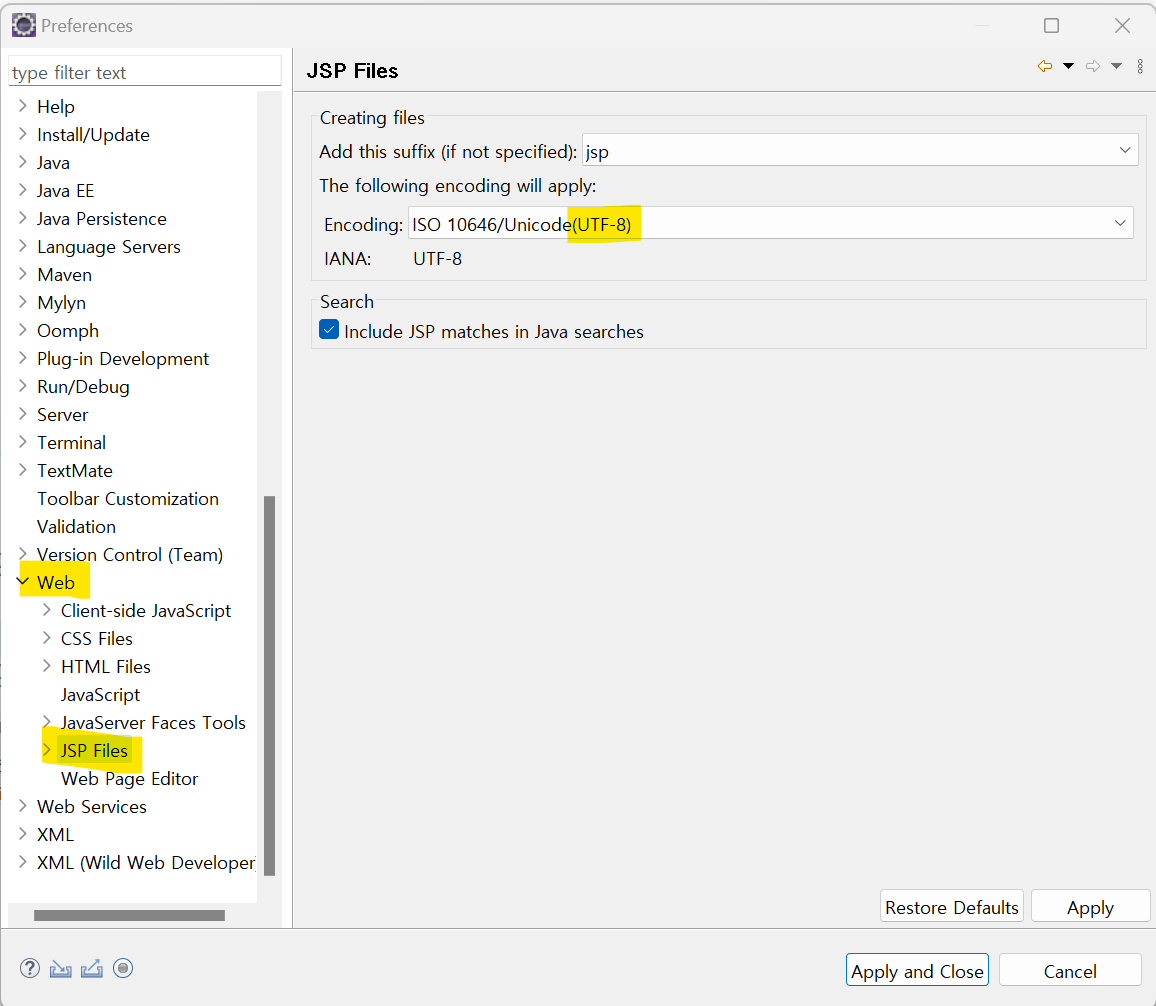
- Web - JSP Files - Encoding :
UTF-8
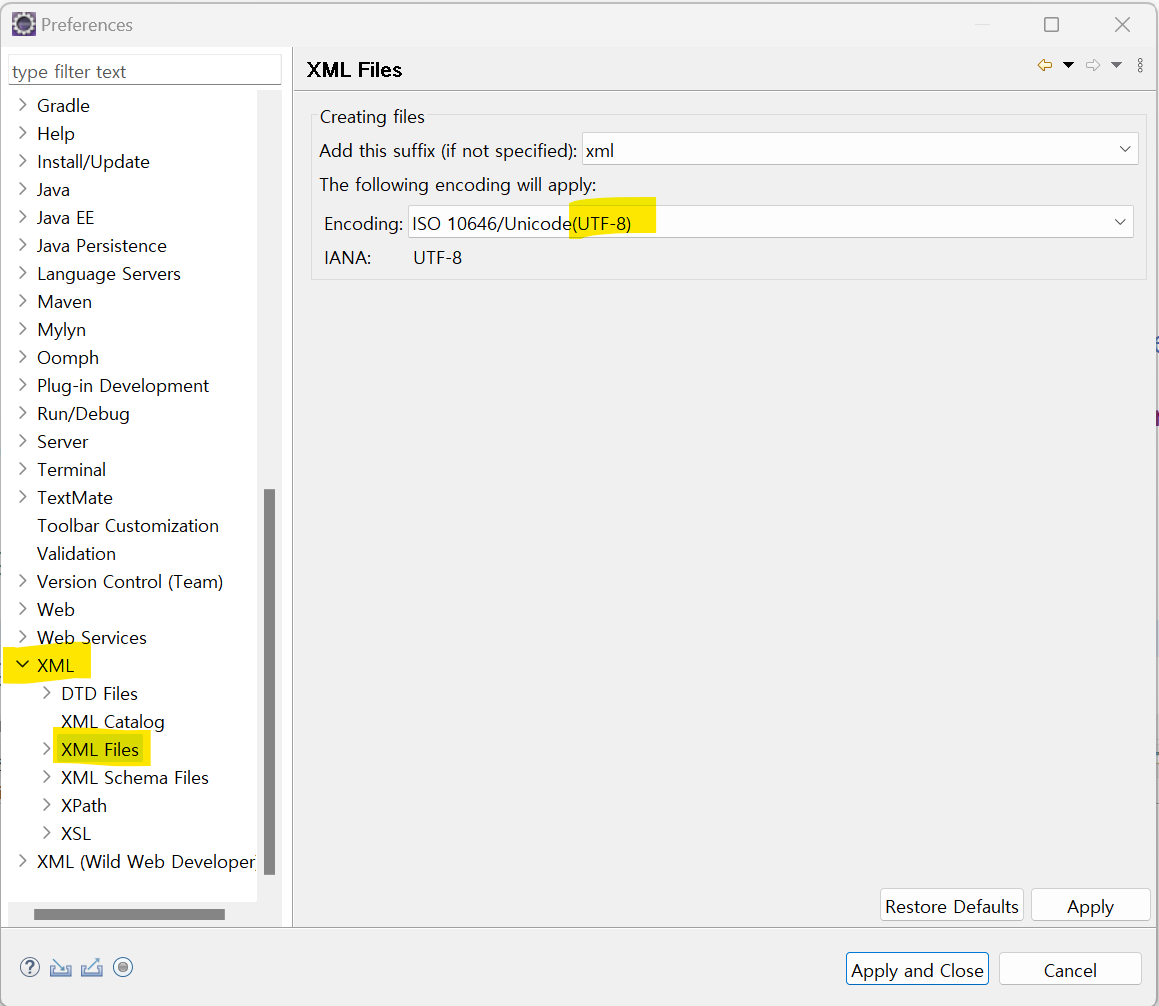
- XML - XML Files - Encoding :
UTF-8- 자동으로 설정되어 있음
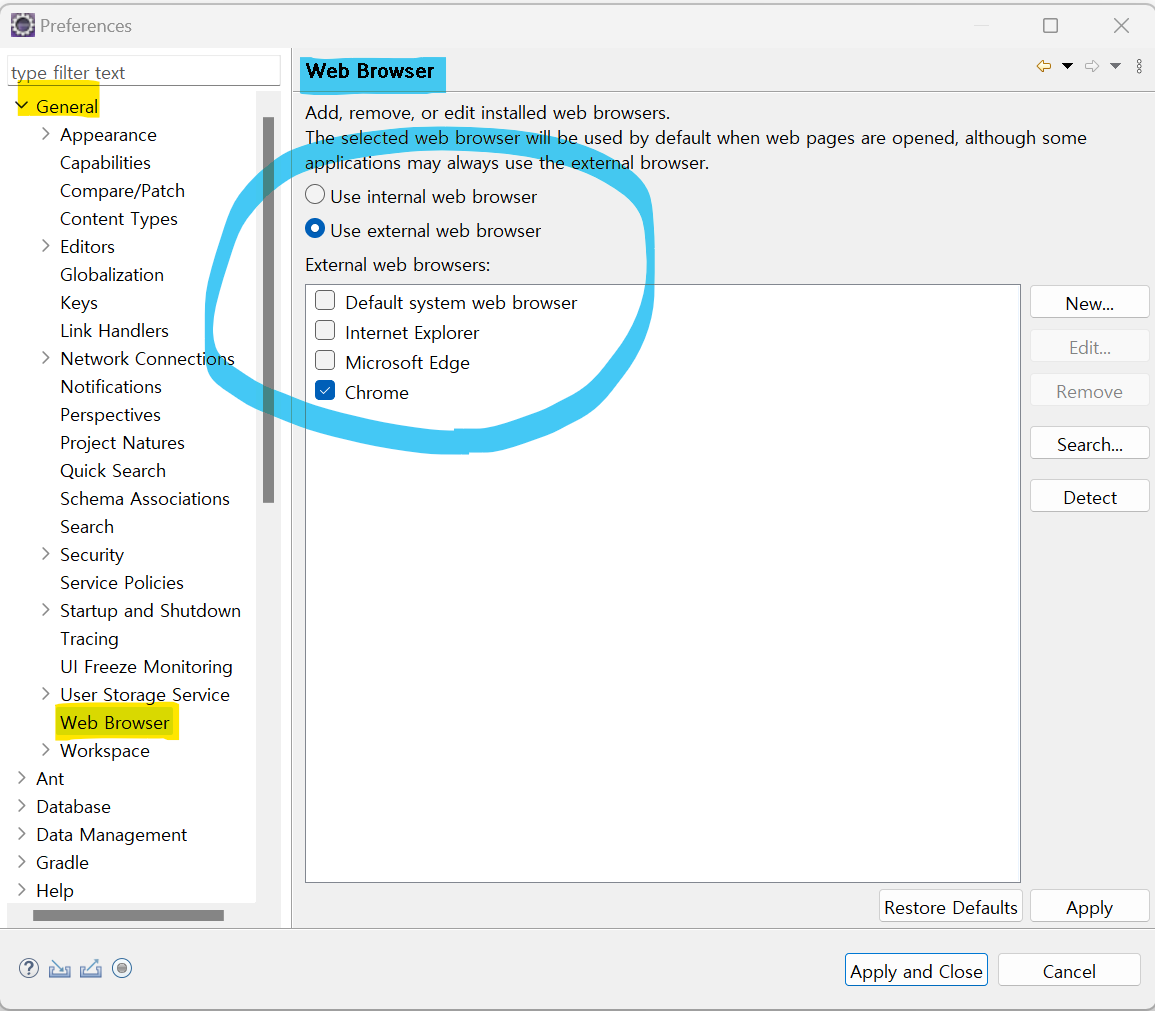
‣ 웹 브라우저 설정
- Window - Preferences - General - Web Brower
- 크롬으로 변경
다른 환경설정은 취향대로 세팅하기 (자동완성, 테마, 폰트 등)
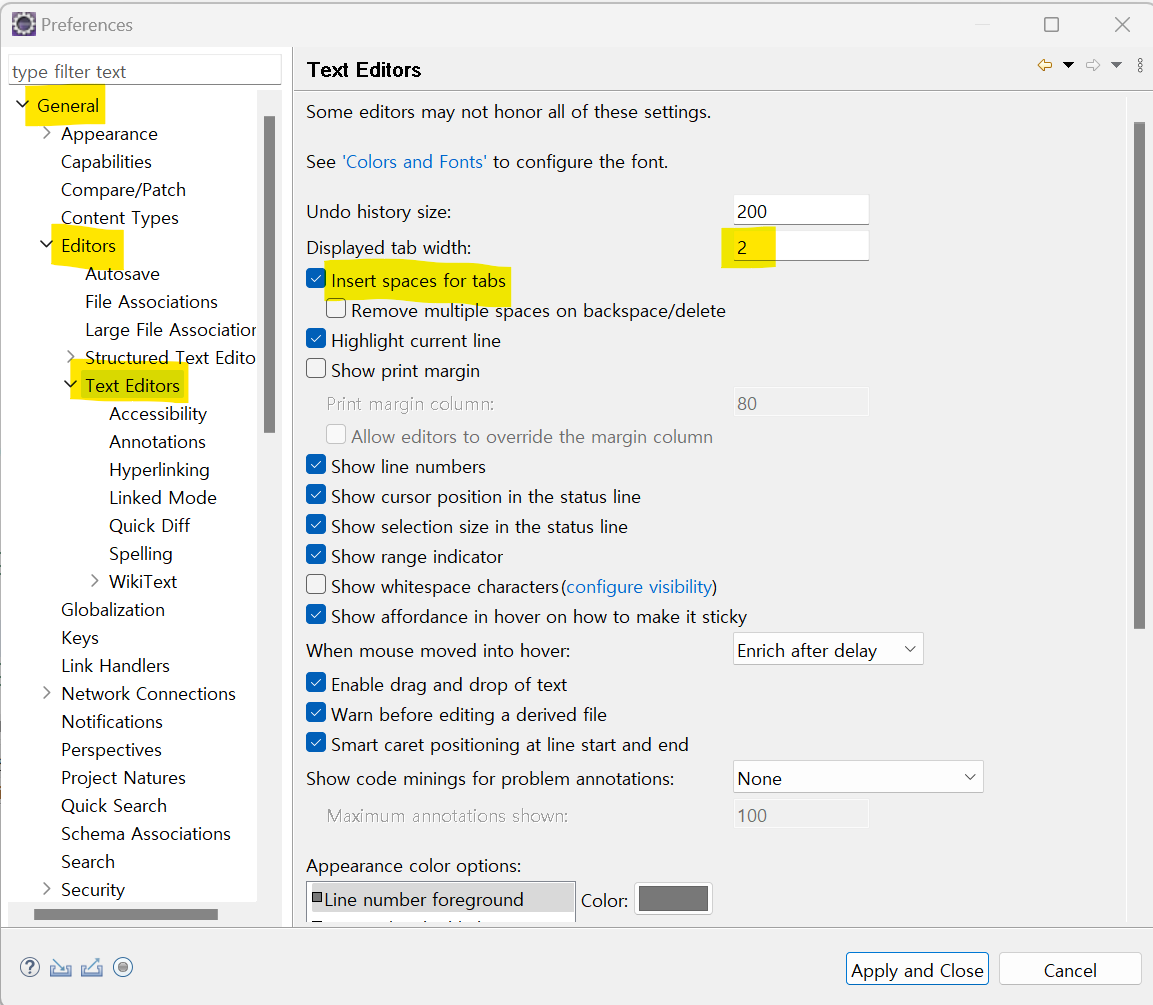
‣ 일반적인 에디터 들여쓰기 세팅
- Window - Preferences - General - Editors - Text Editors
- Displayed tab width :
2로 변경 (탭키 눌럿을때 스페이스 2칸) - Insert space for tabs ⇒ 체크
- Displayed tab width :
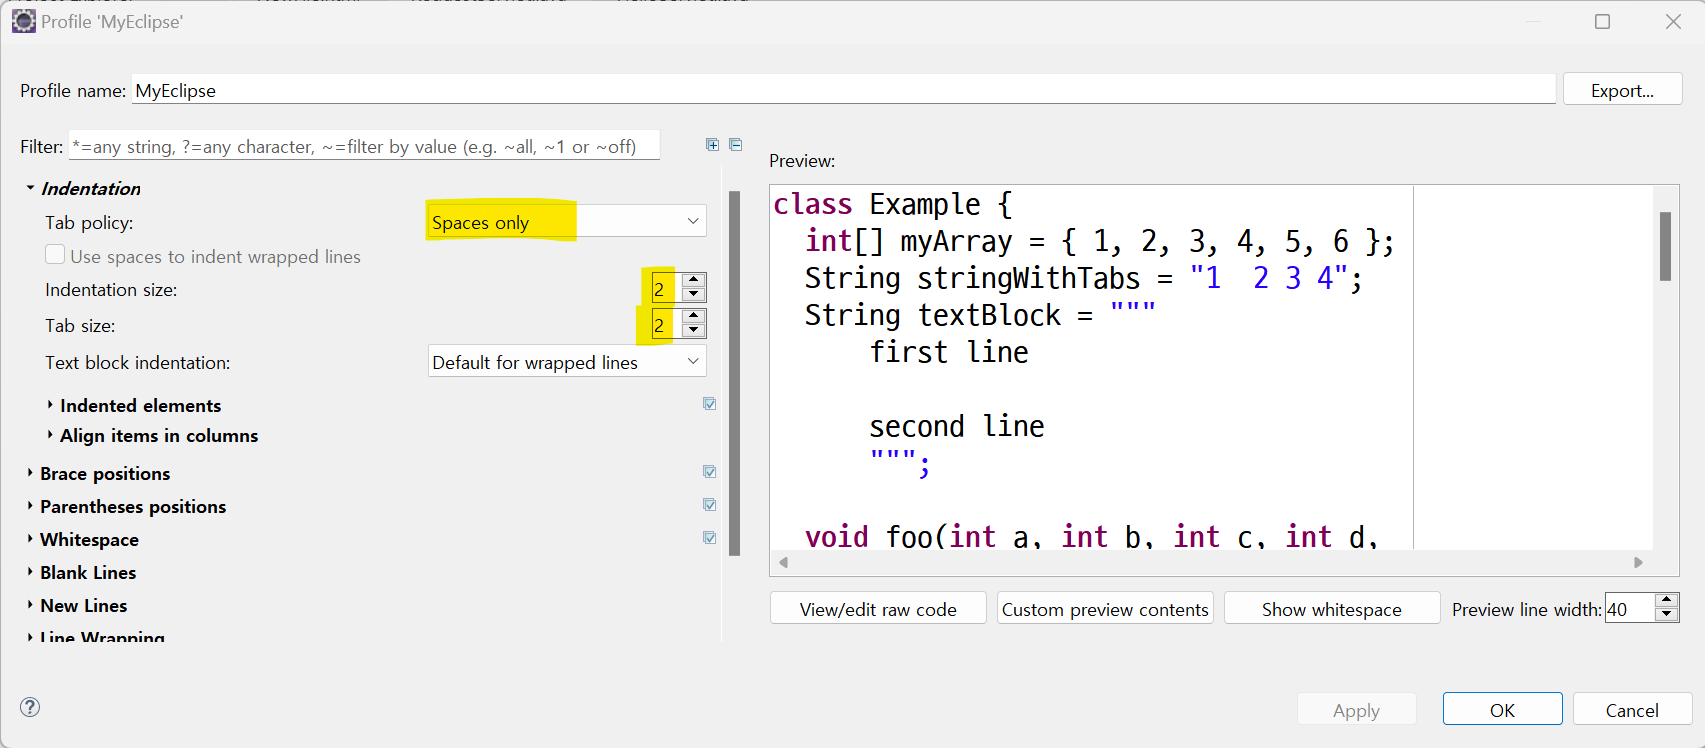
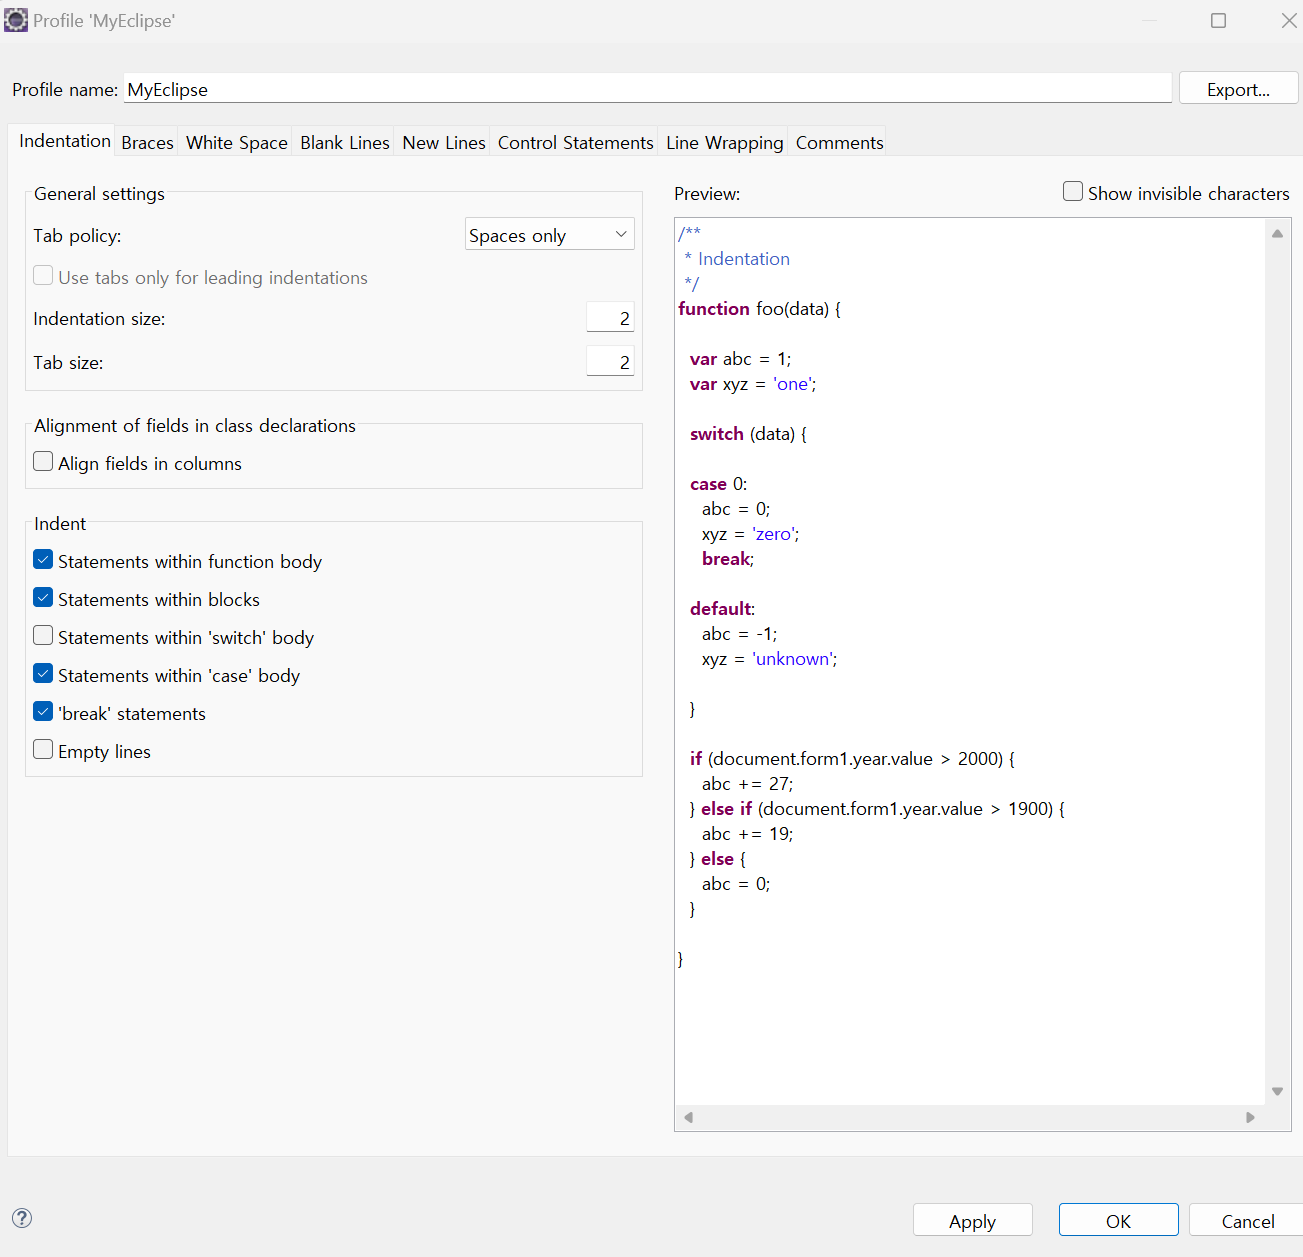
‣ 자바 파일 들여쓰기 세팅
- Window - Preferences - Java - Code Style - Formatter
- New 눌러서
MyEclipse생성
- New 눌러서
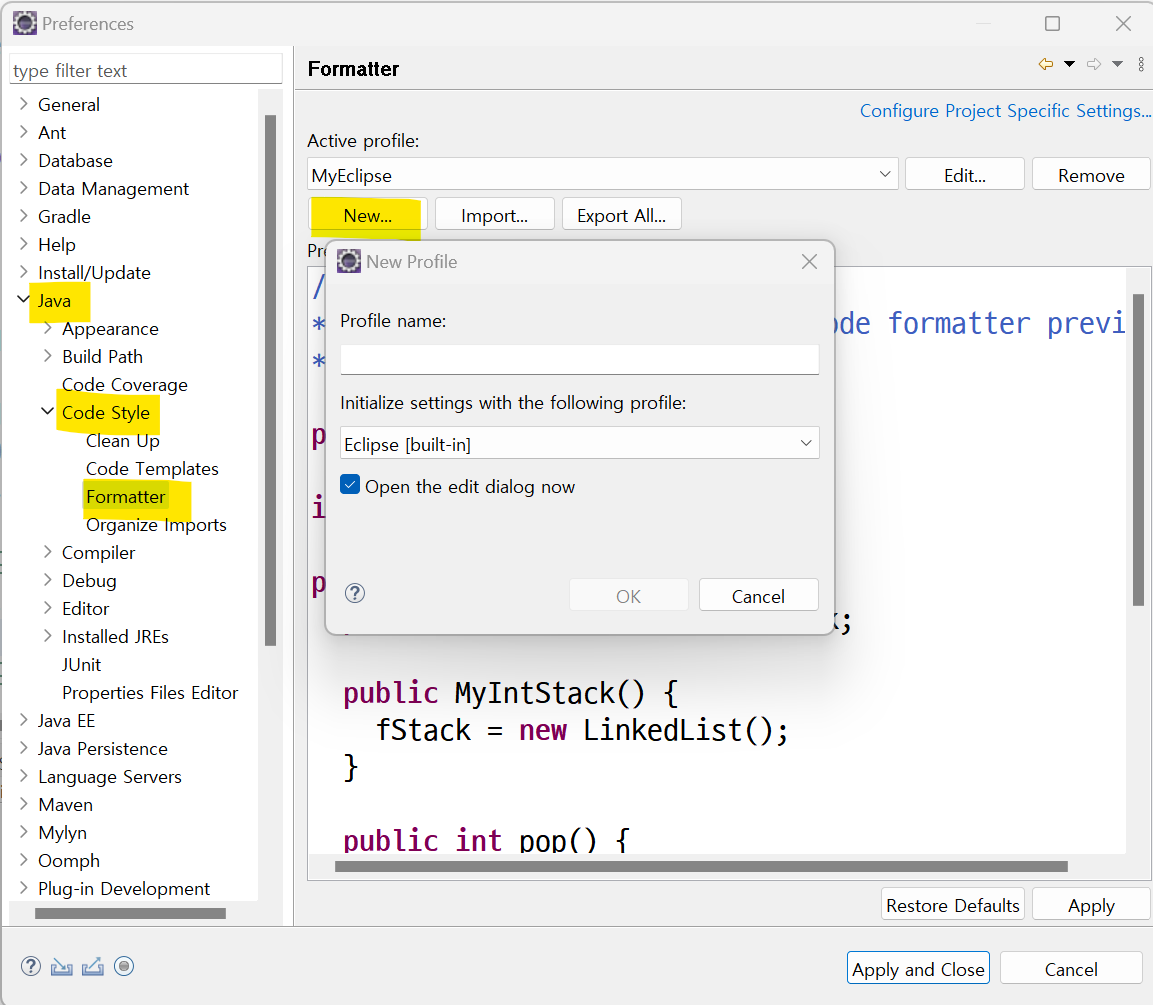
- Indentation 설정 변경
- Tab policy :
Spaces only - Indentation size :
2 - Tab size :
2
- Tab policy :
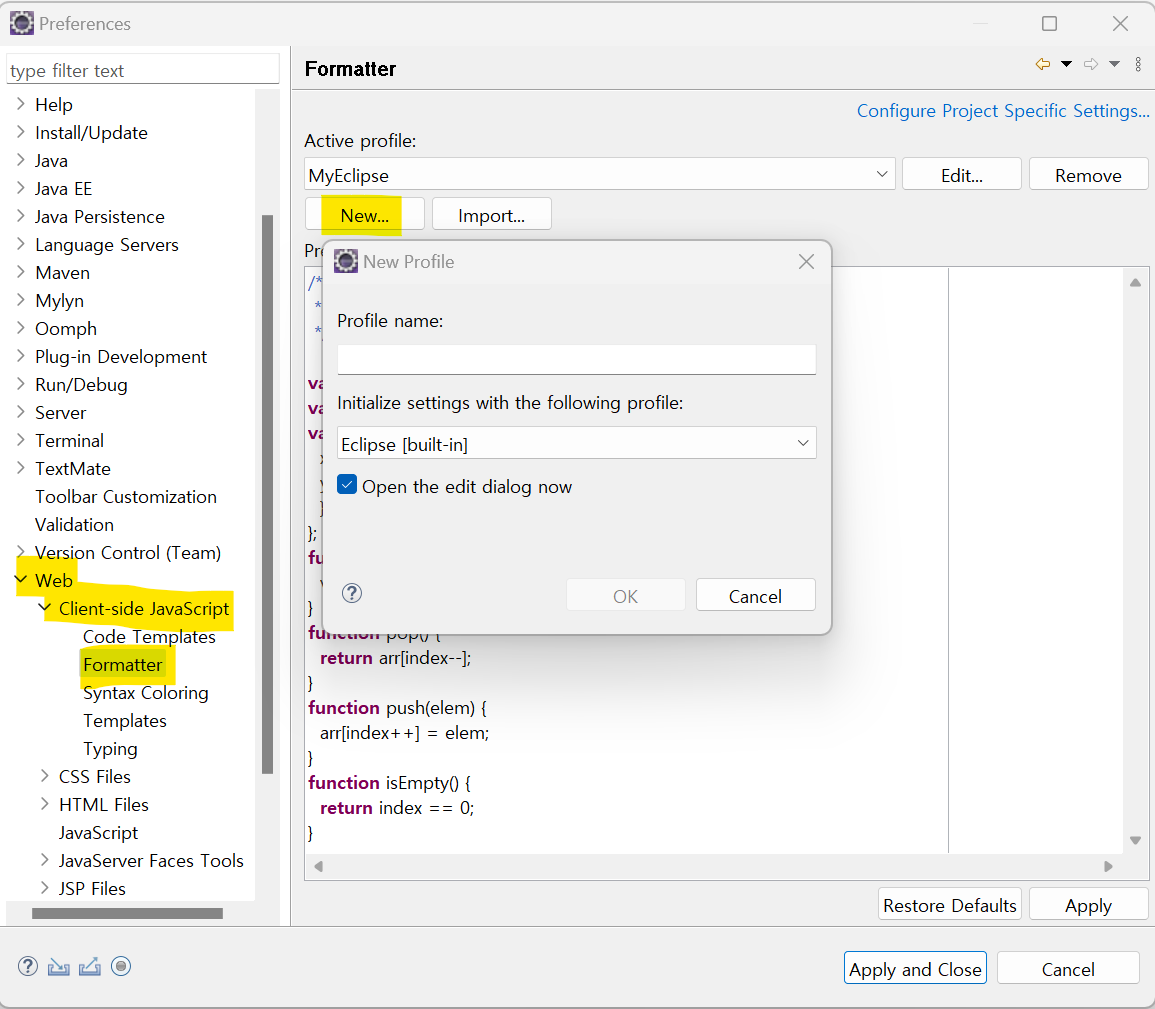
‣ 웹 들여쓰기 세팅
- Window - Preferences - Web
-
Client-side JavaScript - Formatter
- New 눌러서
MyEclipse생성
- New 눌러서
-
Indentation 설정 변경
- Tab policy :
Spaces only - Indentation size :
2 - Tab size :
2
- Tab policy :
(New 생성 / Indentation 세팅 과정 모두 자바파일 들여쓰기 세팅과 동일)
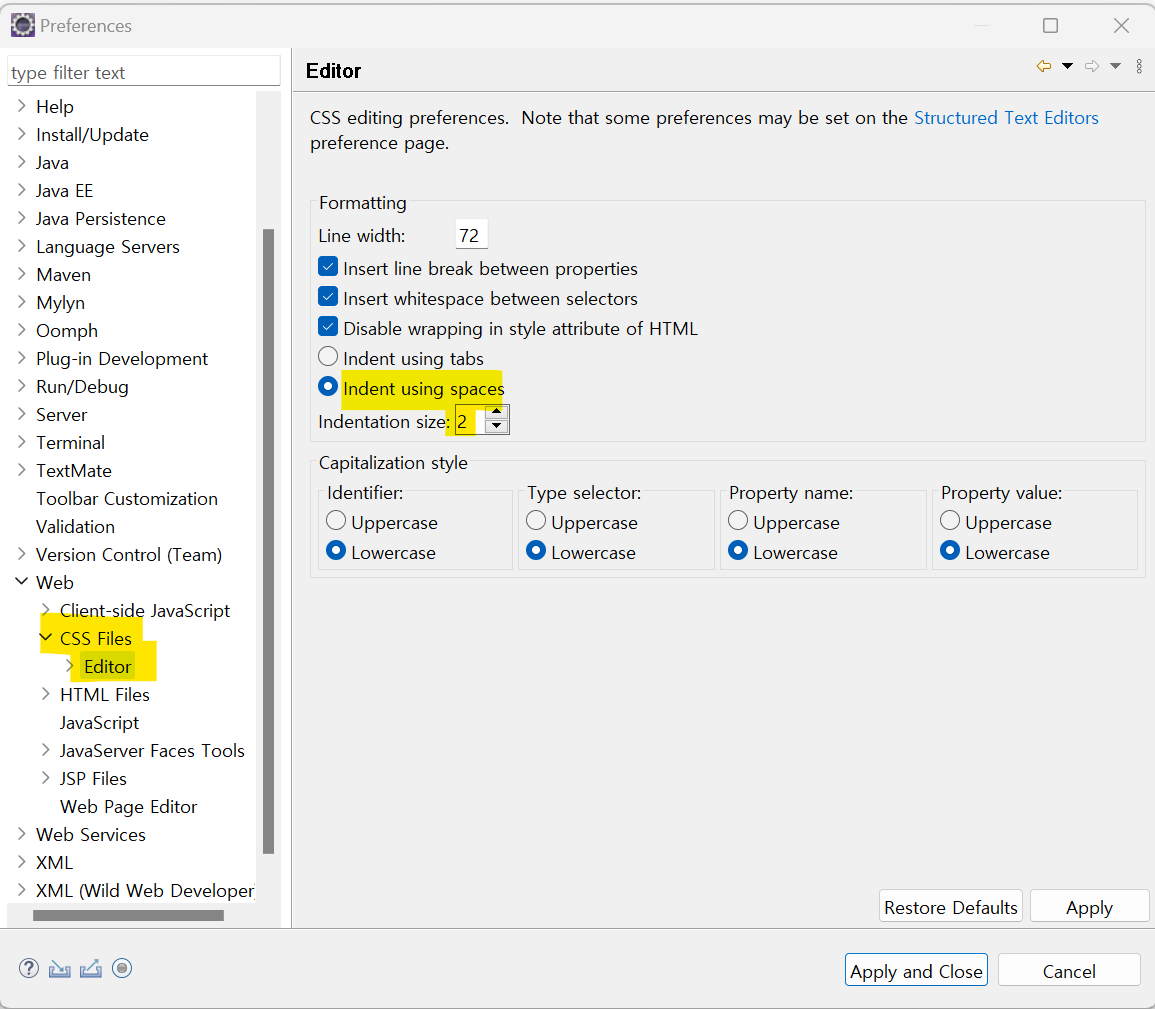
- CSS Files - Editor
Indent using spaces⇒ 체크- Indentation size :
2
- HTML Files - Editor
Indent using spaces⇒ 체크- Indentation size :
2

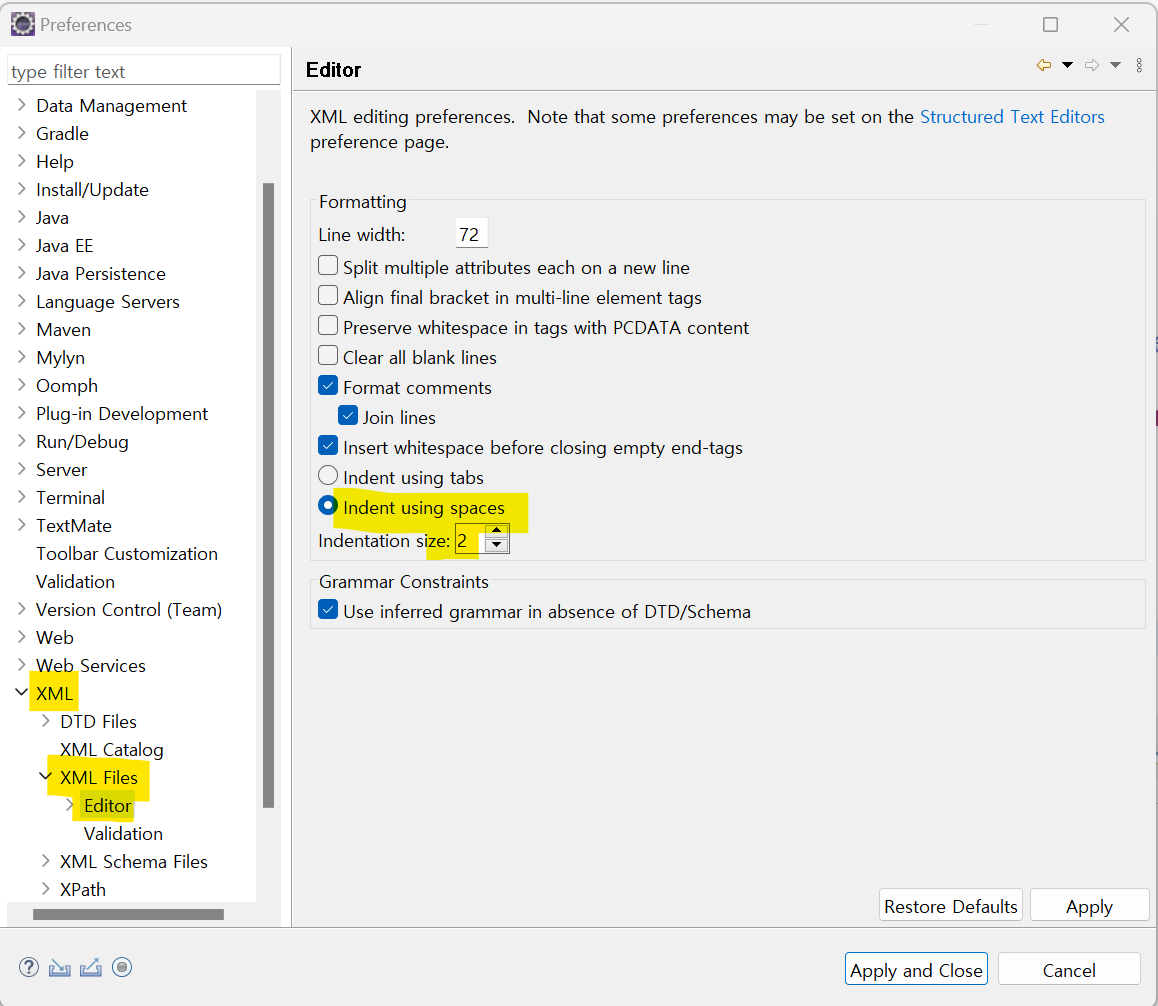
‣ XML 들여쓰기 세팅
- Window - Preferences - XML - XML Files - Editor
Indent using spaces⇒ 체크- Indentation size :
2
톰캣
- 홈페이지: https://tomcat.apache.org/
- WAS : Web Application Server
- Apache Software Foundation(아파치 소프트웨어 재단)에서 개발한 Java 기반의 서블릿 컨테이너이자 웹 서버
- Tomcat은 수컷 고양이를 의미함
- Jsp/Spring을 이용한 웹 사이트 구축에서 거의 필수적으로 사용되는 웹 애플리케이션 서버(WAS)
‣ 웹 서버
- 정적파일을 실행할 때 사용하는 서버이다.
- 정적파일 :
HTMl,CSS,JS(=static)
‣ 웹 애플리케이션 서버 (WAS)
- 동적파일인 JSP를 실행할 수 있는 서버
- 별도로 톰캣을 다운 받아서 사용
- 톰캣 : jsp 실행을 해주는 가장 대표적인 서버(없으면 jsp실행이 불가능하다.)
‣ JSP
- JavaServer Pages
- (
HTML+JAVA)- 변수처리 가능
- 동적파일 (=
dynamic)
‣ 톰캣 다운로드
- 버전 9.0
- 코어버전 zip
(으로 다운받아서 사용함)
C드라이브 프로그램 파일에 옮겨놓음
환경변수설정
CATALINA_HOME 만들기
- 시스템 속성 - 고급 - 환경 변수 - 시스템 변수 - 새로 만들기
- 변수 이름 :
CATALINA_HOME - 변수 값 : CATALINA_HOME 위치로 설정
- 변수 이름 :
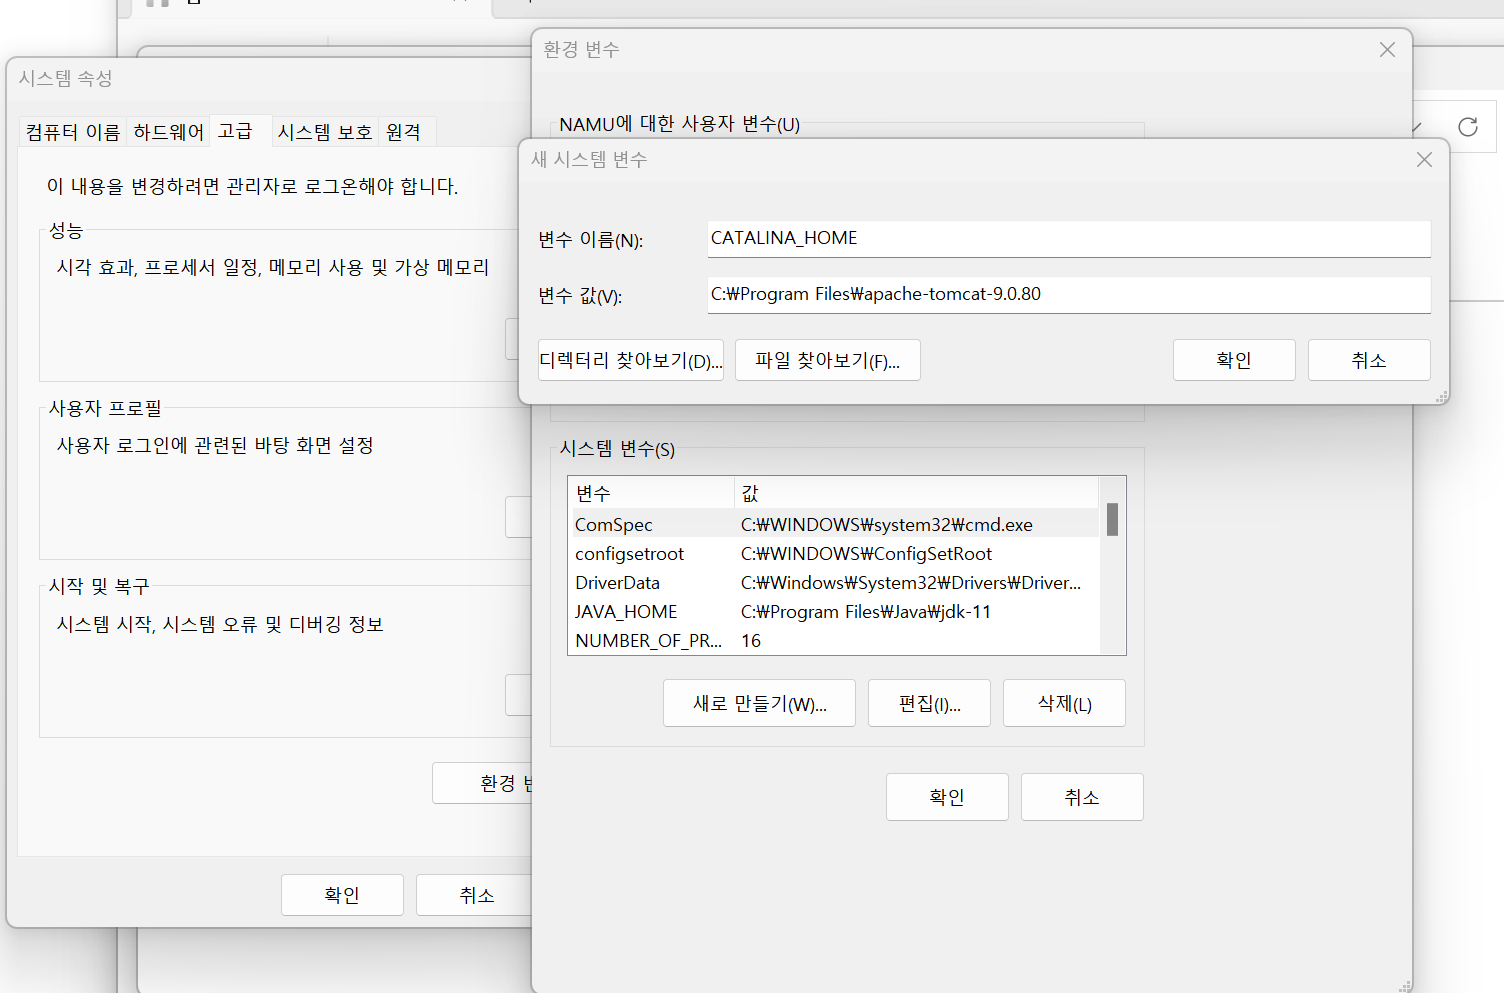
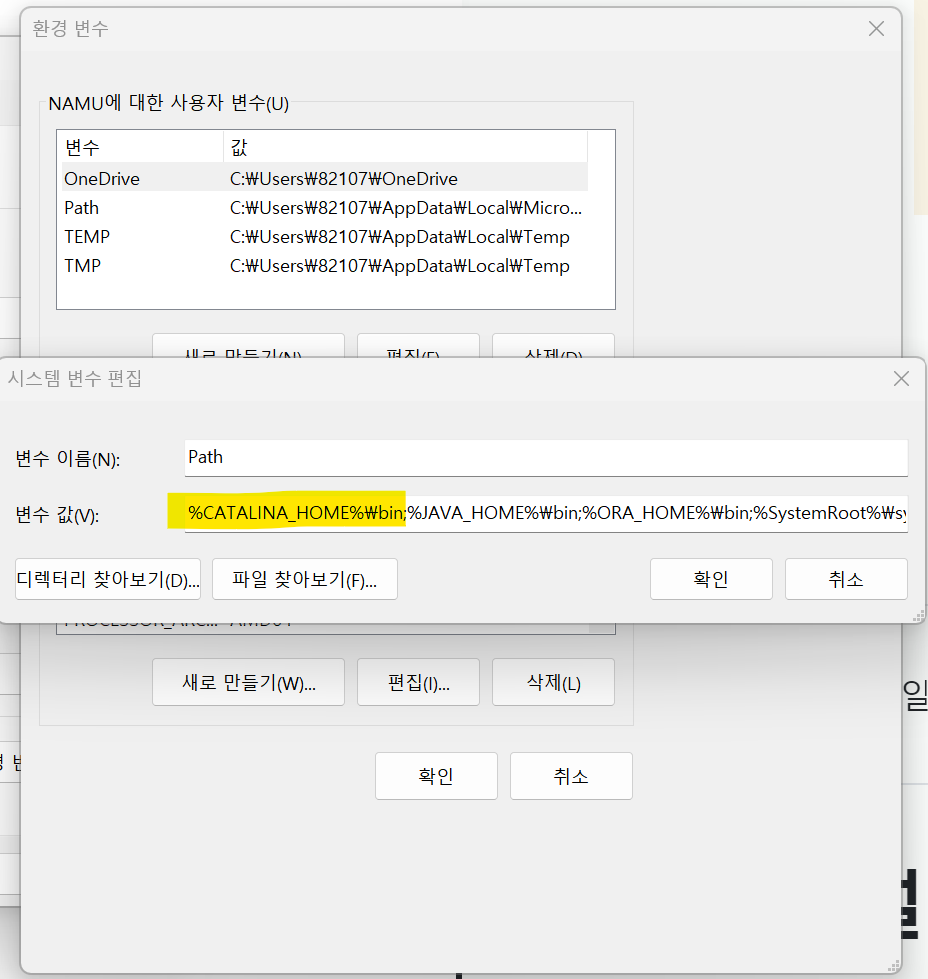
Path 설정
- 시스템 변수 - Path
- 맨 앞쪽에 %CATALINA_HOME%\bin; 추가
- 항목 구분은 세미콜론(
;) 으로 함 - 공백 들어가지 않도록 조심!
- 항목 구분은 세미콜론(
- 맨 앞쪽에 %CATALINA_HOME%\bin; 추가
이클립스에서 톰캣 추가
- Window - Preferences - Server
- 화면 하단 콘솔창 쪽에 Server 탭
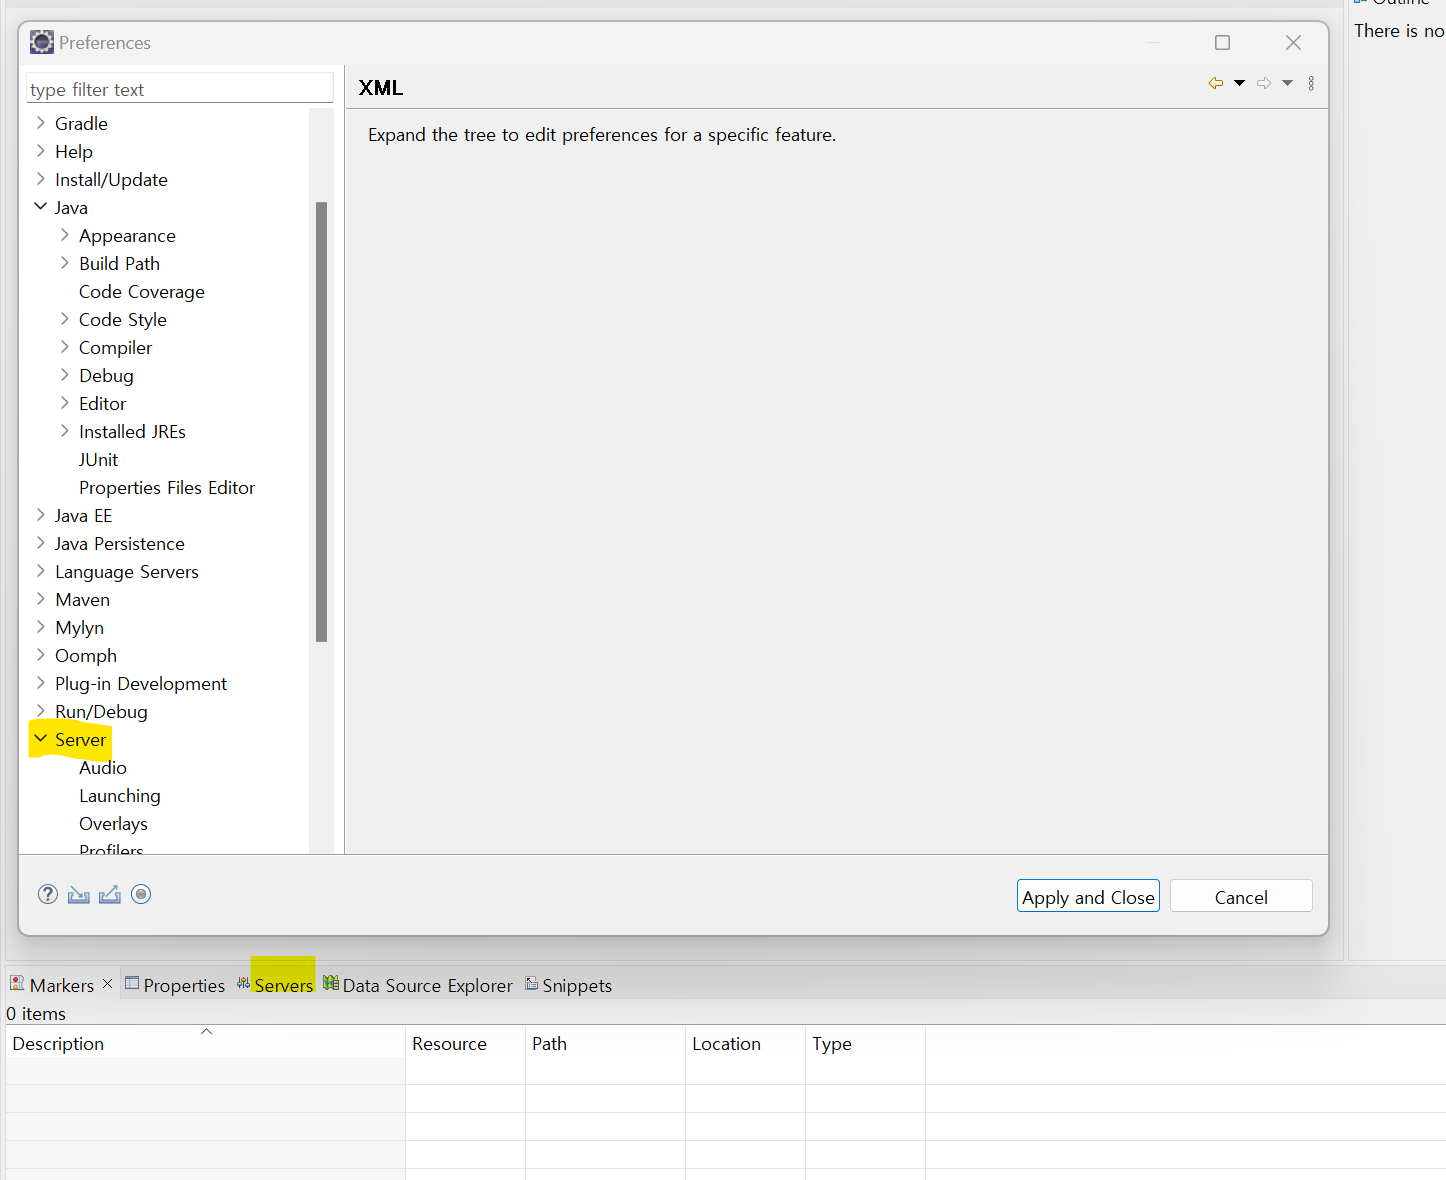
- Preferences - Server - Runtime Environments
- Apache Tomcat v9.0 (내가 다운받은 버전 찾기)
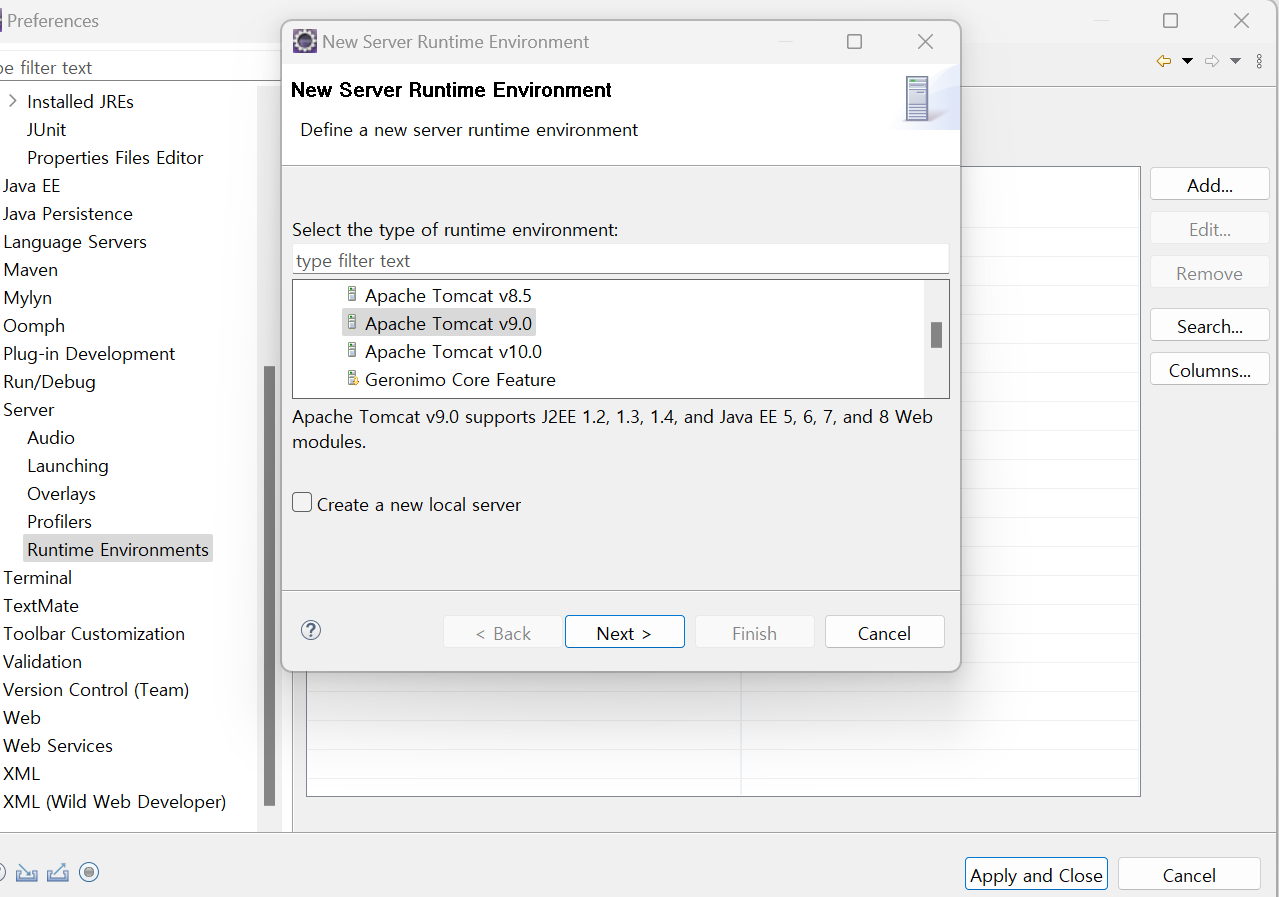
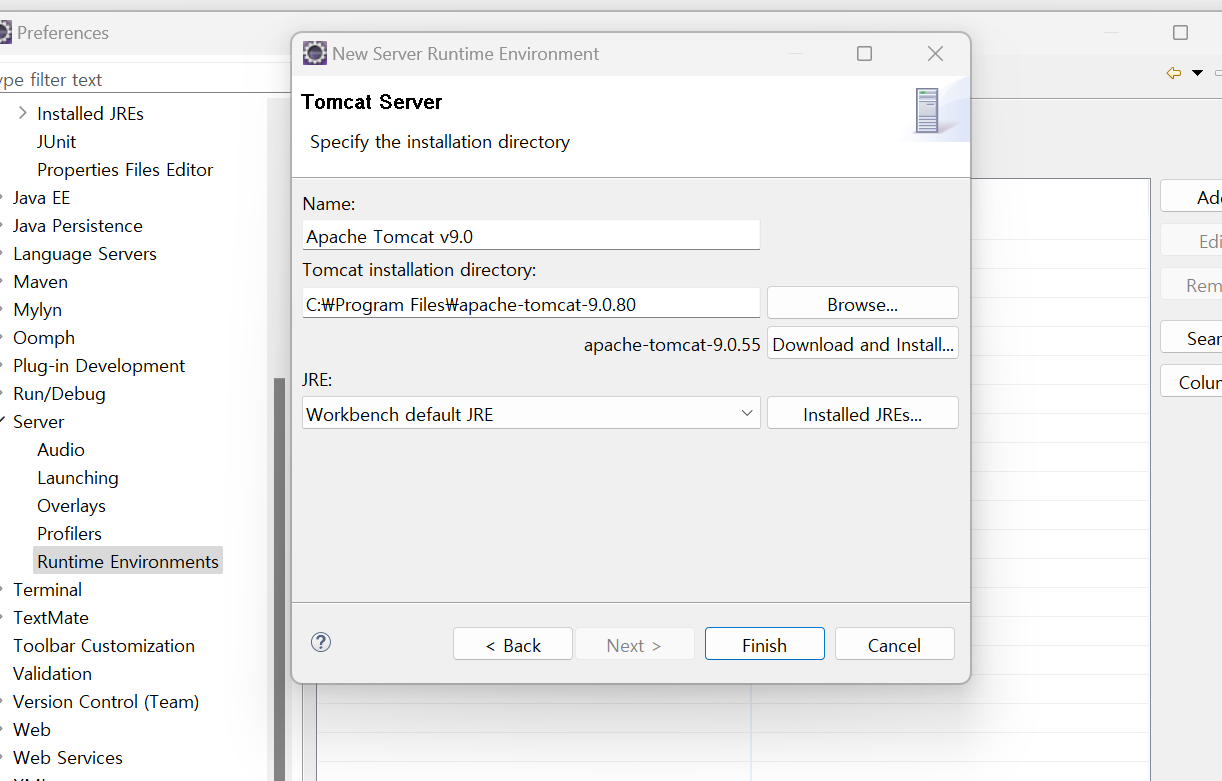
- Next >
- Brower 등록
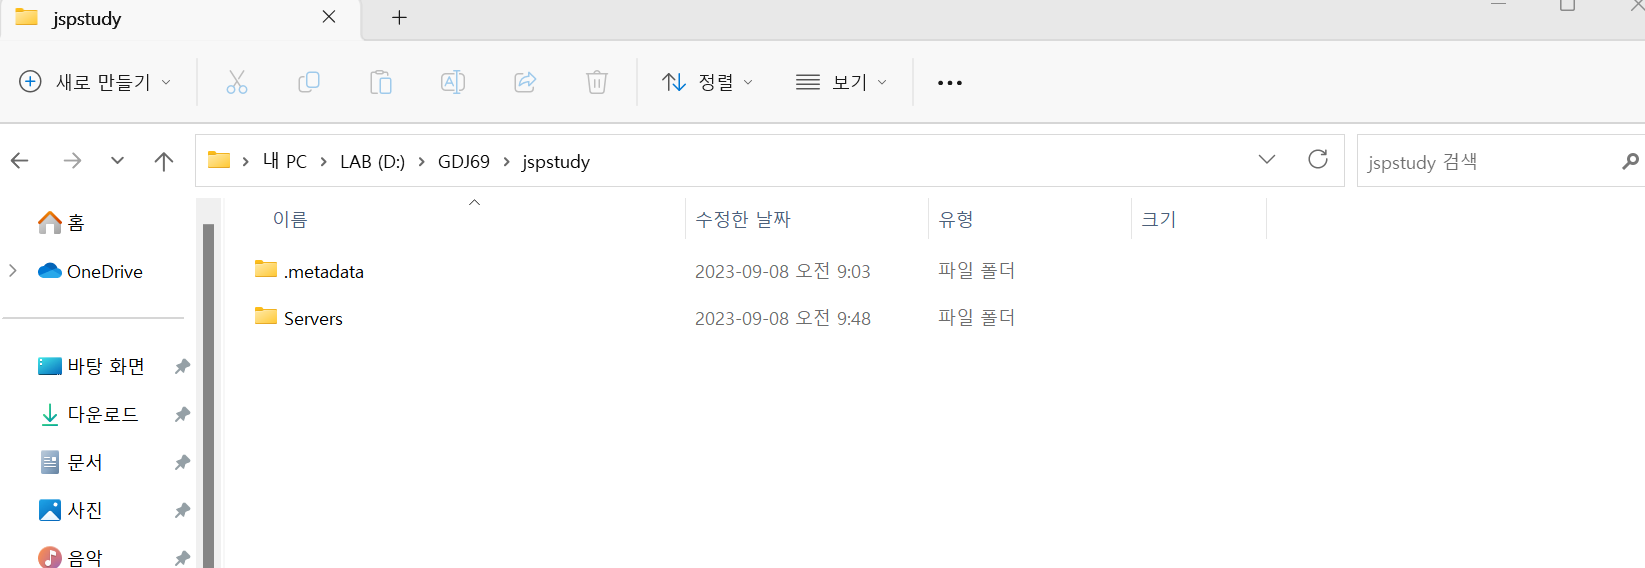
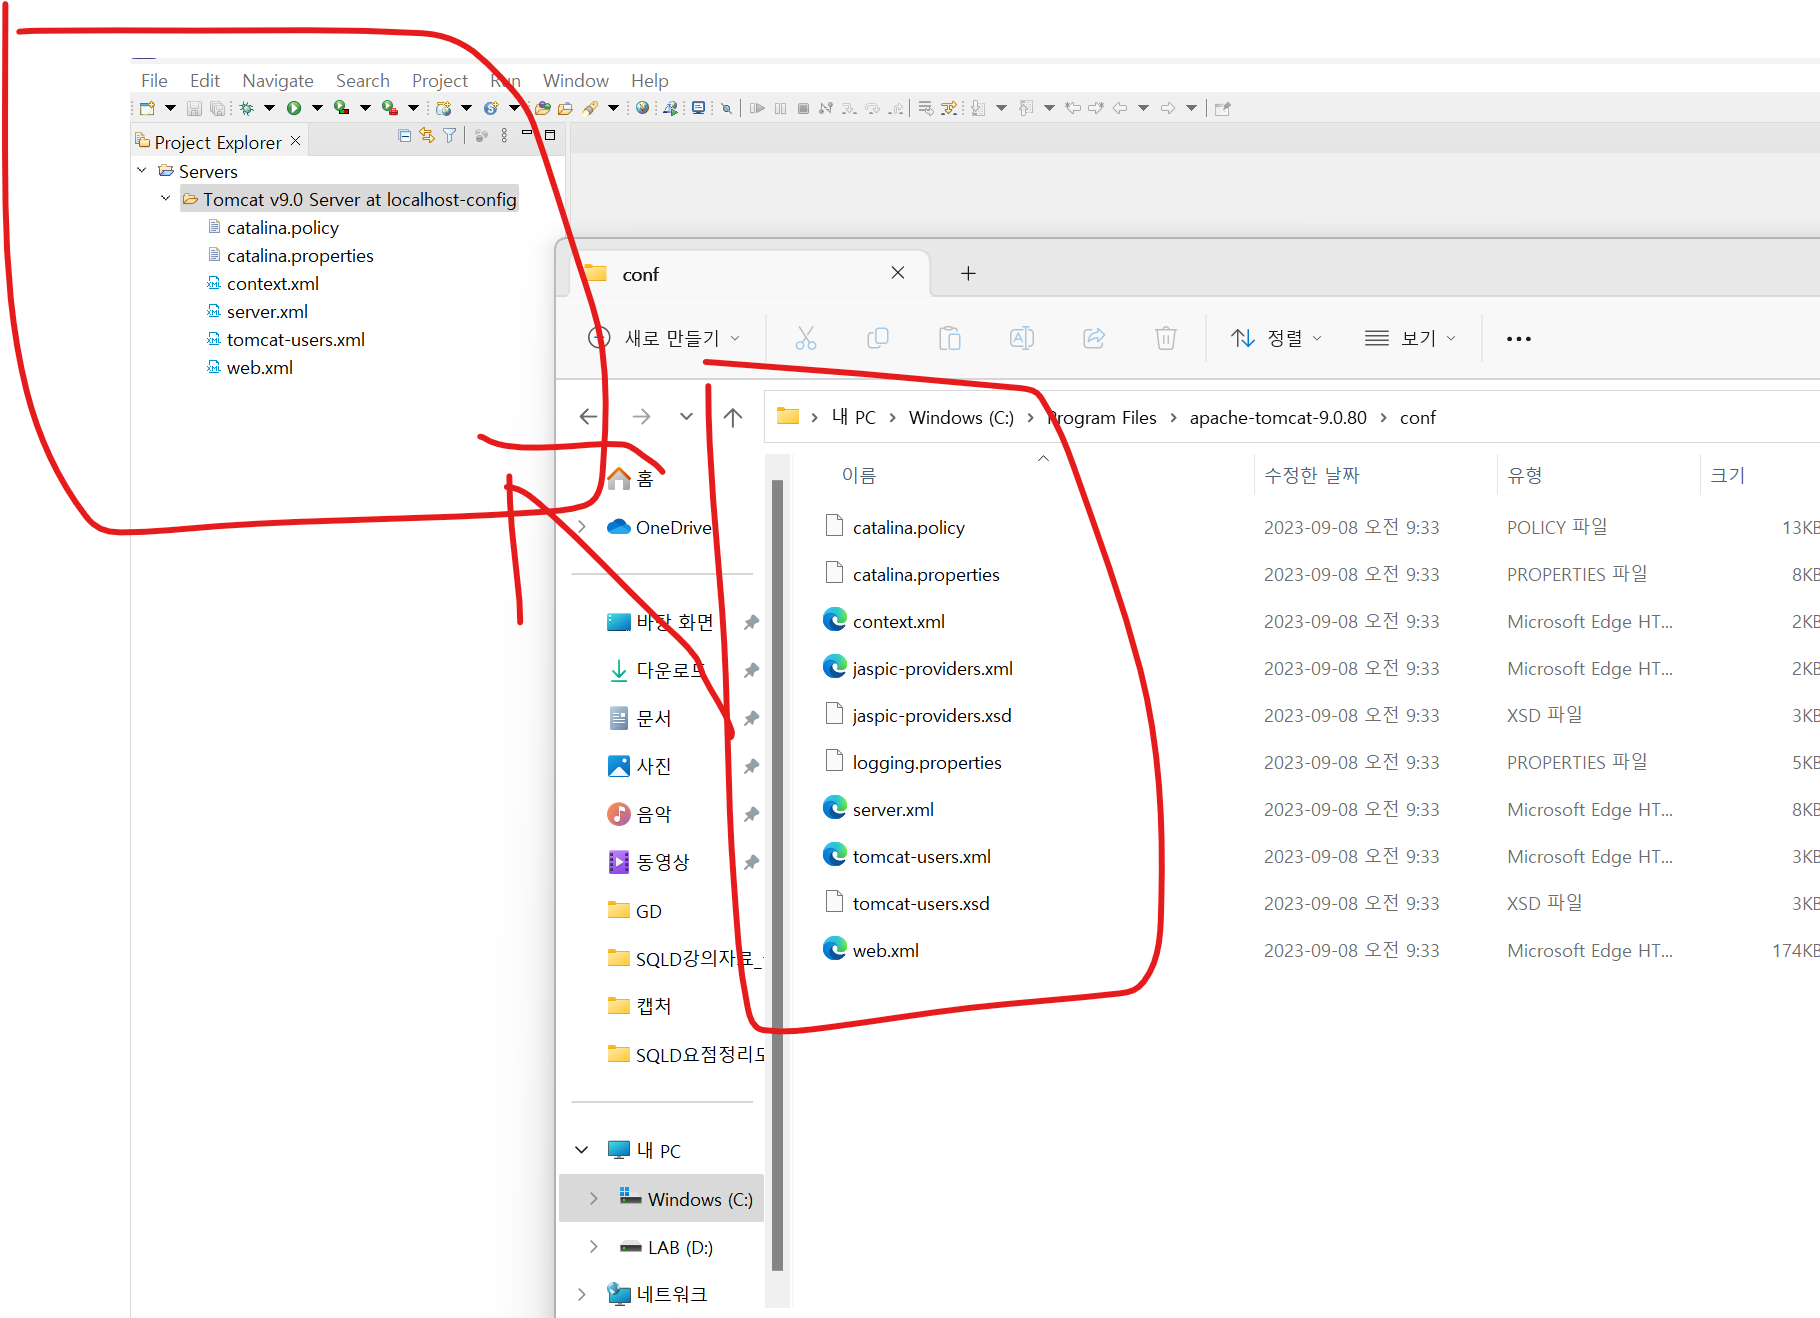
- 모두 다 하고나면 Project Explorer에 Servers 생성 됨
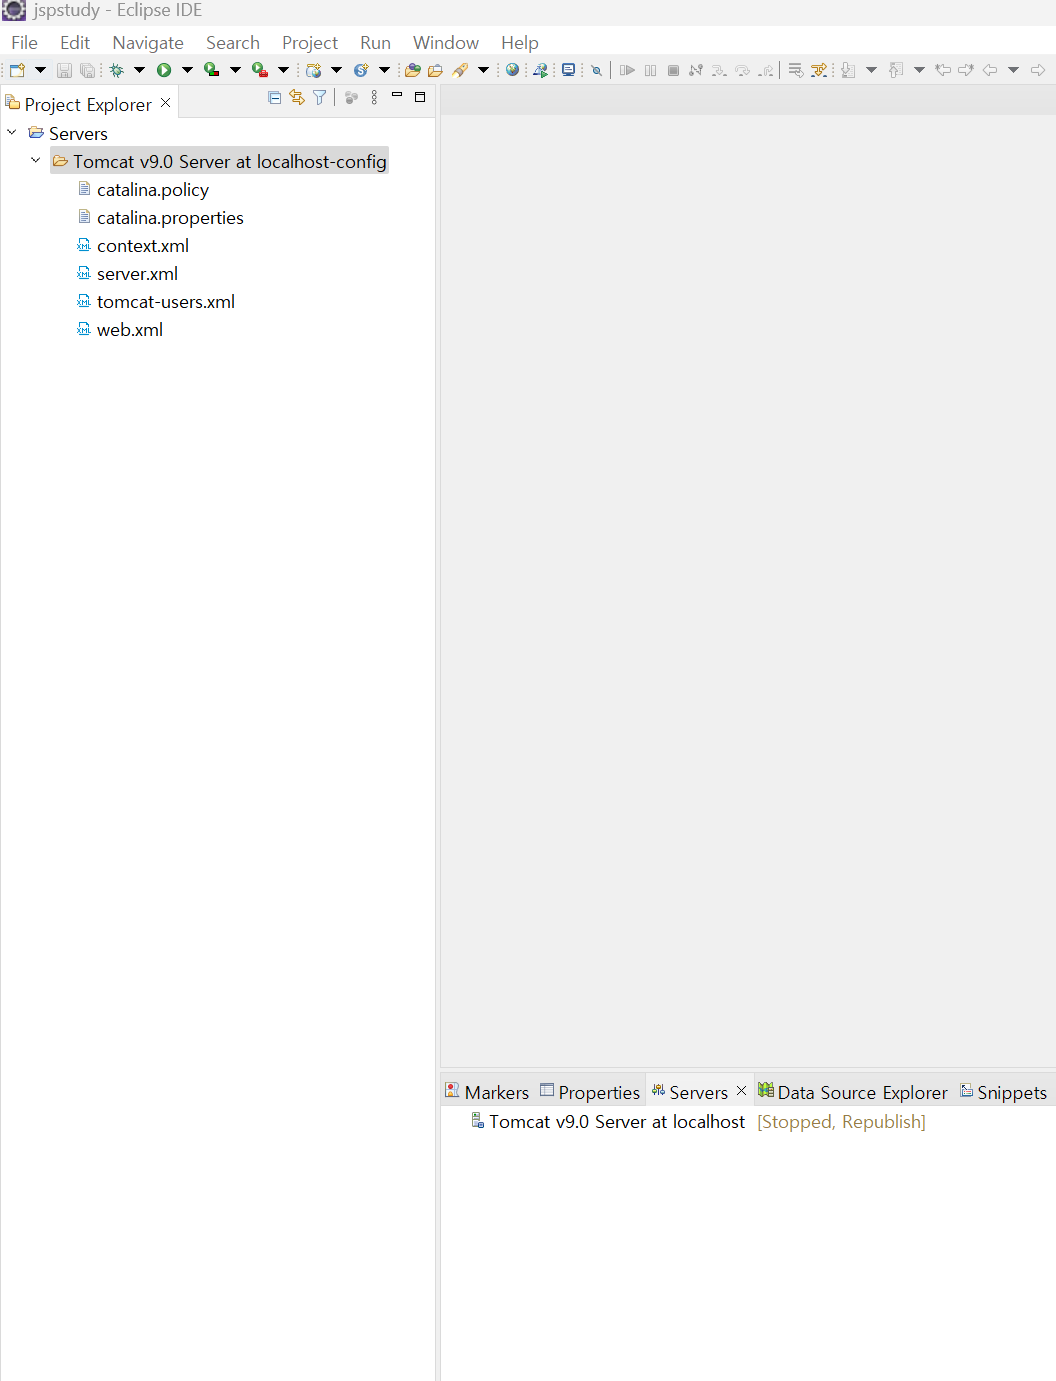
- Servers폴더 생성 됨
- 아래 XML파일 : 각종 설정들을 담고있는 파일
- 본진파일(우) 에서 이클립스(좌)로 copy 된 상태임
- 때문에 이후에 본진파일(우)을 수정하면 적용 되지 않는다.(주의!)
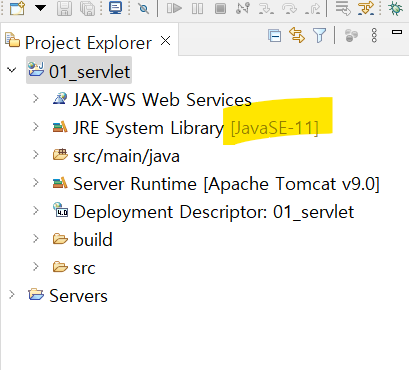
- Java Compiler의 자바 버전이 맞도록 변경한다.
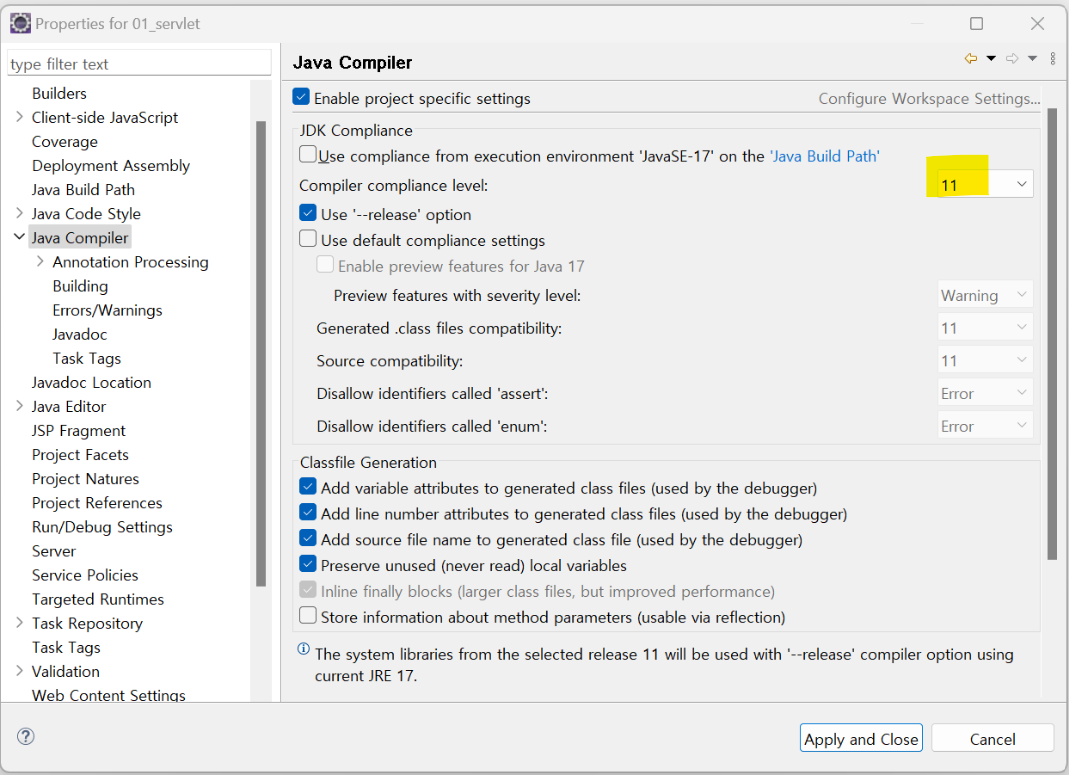
- Project Facets도 본인의 자바 버전으로 변경해서 설정을 맞춘다.
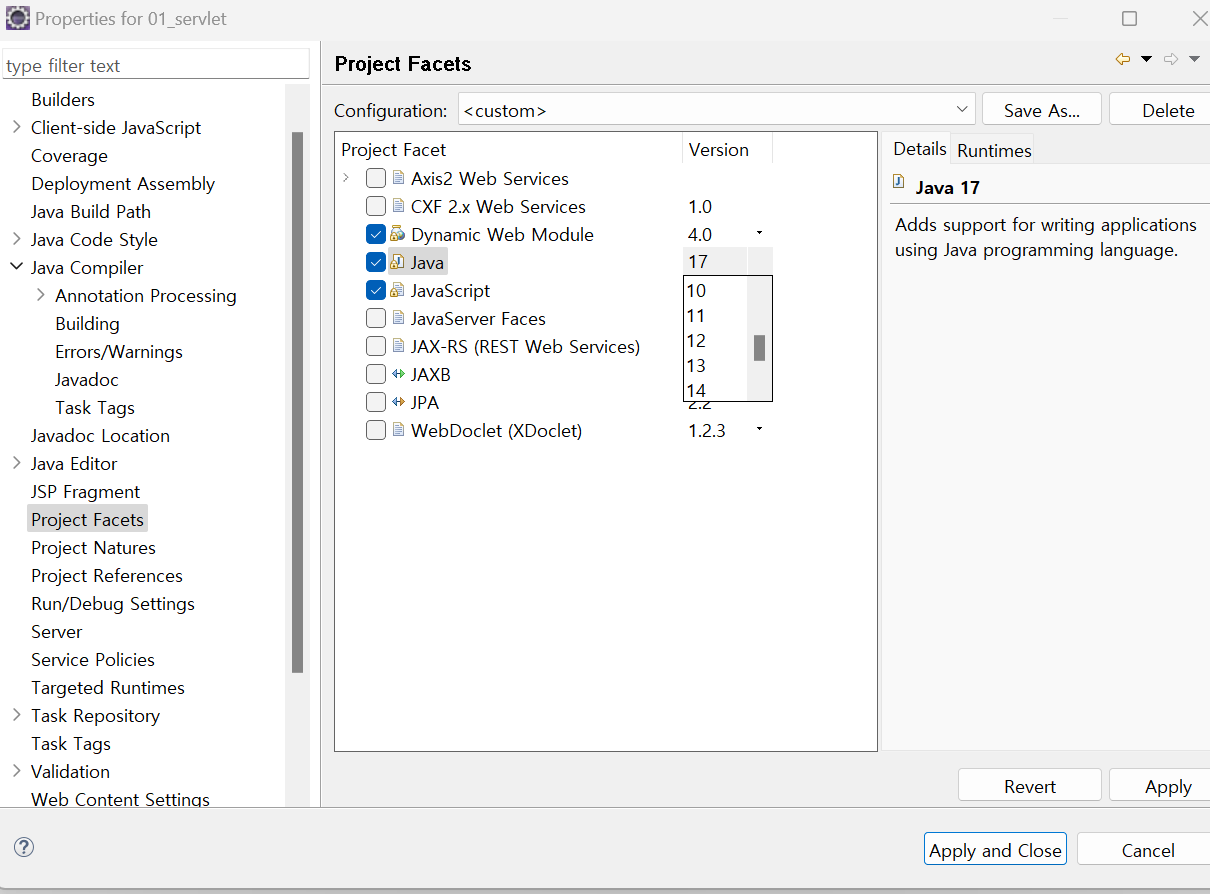
- 반영 완료
(세팅 끝)
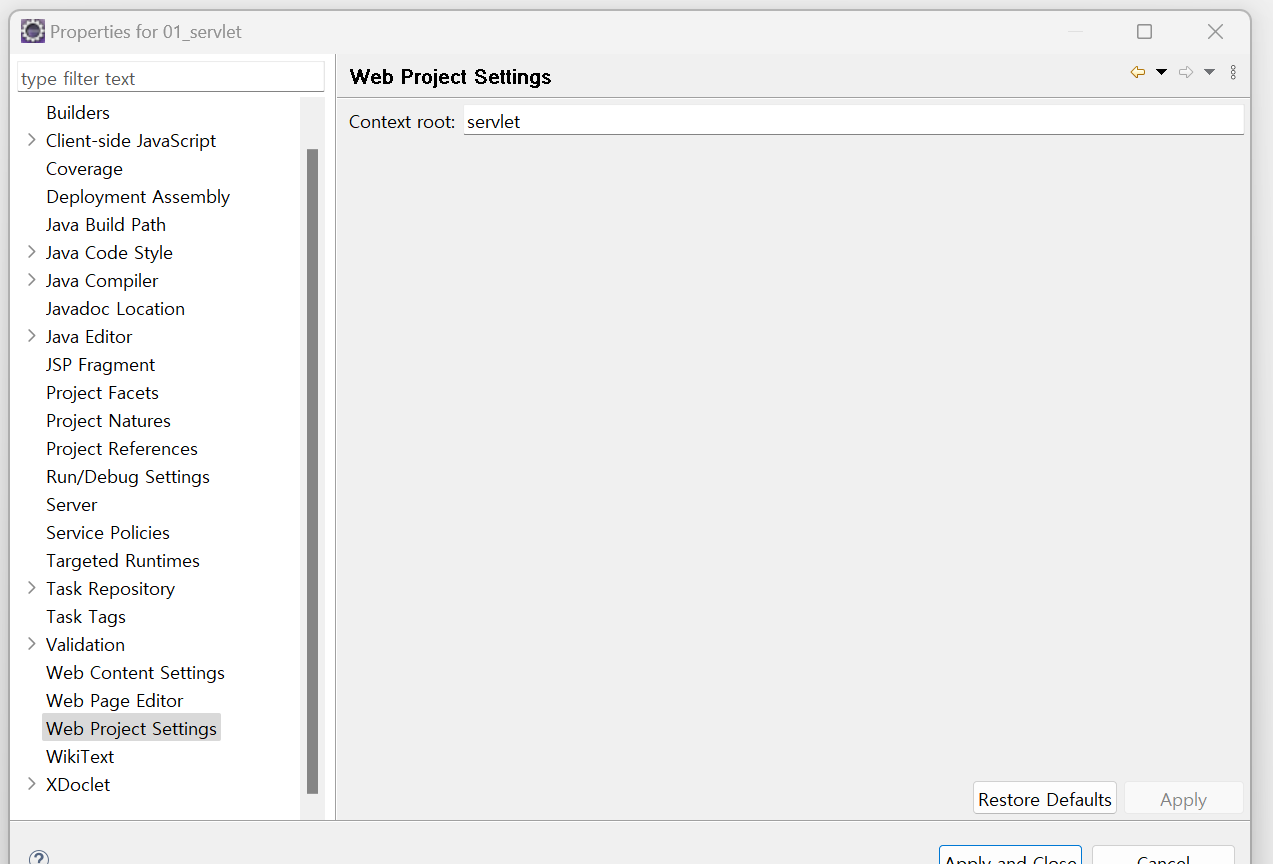
경로(주소)
Context root=Context Path: 경로(주소창에 붙는 기본 주소)
- 프로젝트마다 Context root는 다르다.
URL mapping:Context root뒤에 붙는 주소Context root와URL mapping모두 수정이 가능하다.
- 수정은 해당 프로젝트 세팅에서 가능(명칭 변경 가능)
예)
‣ 웹 주소 구조 ⭐⭐⭐
- 서버 프로그램의 주소 체계는 아래와 같다.
protocol://host:port/contextRoot/urlMapping
(웹개발하는 사람이라면 웹 주소 구조를 무조건 외워야함!)
- 각종 경로(주소)를 정할 때 Context root부터 적음(⇒ 진짜 개발 경로)
(포트넘버는 생략가능)- 주소와 자바파일과 연결
- Java의 서블릿(Context root)이 JavaScript의 Submit을 받는 역할을 한다

개발이 세상에서 제일 재밌어요