AWS Services needed for the full flow
Amazon S3, Cloudfront, Route53, and the AWS Certificate Manager are needed in order to have a fully functioning Frontend for your service
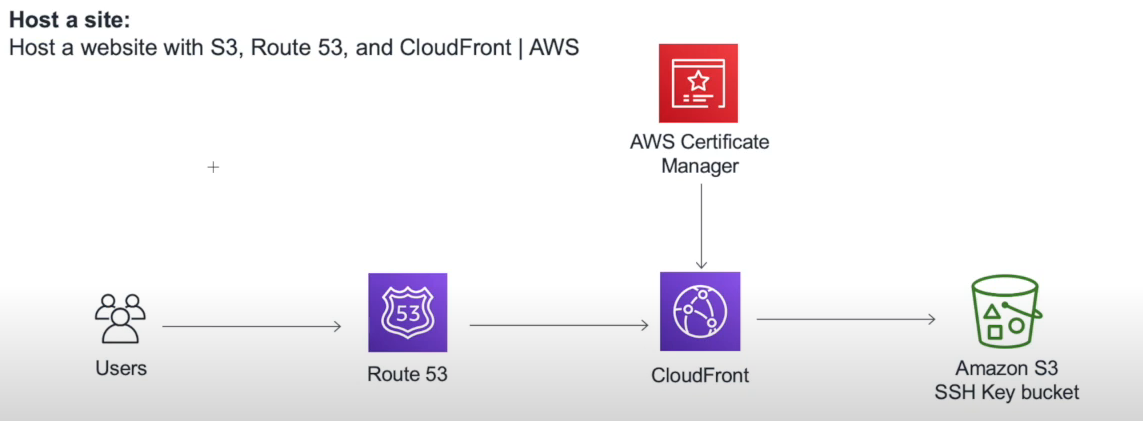
Amazon S3
The Amazon S3 is the base of your frontend deployment. The frontend app that you have built goes into this portion of the flow.
S3 allows users to create Buckets in which you can upload you built code.

When creating your bucket make sure you allow public access to the bucket.
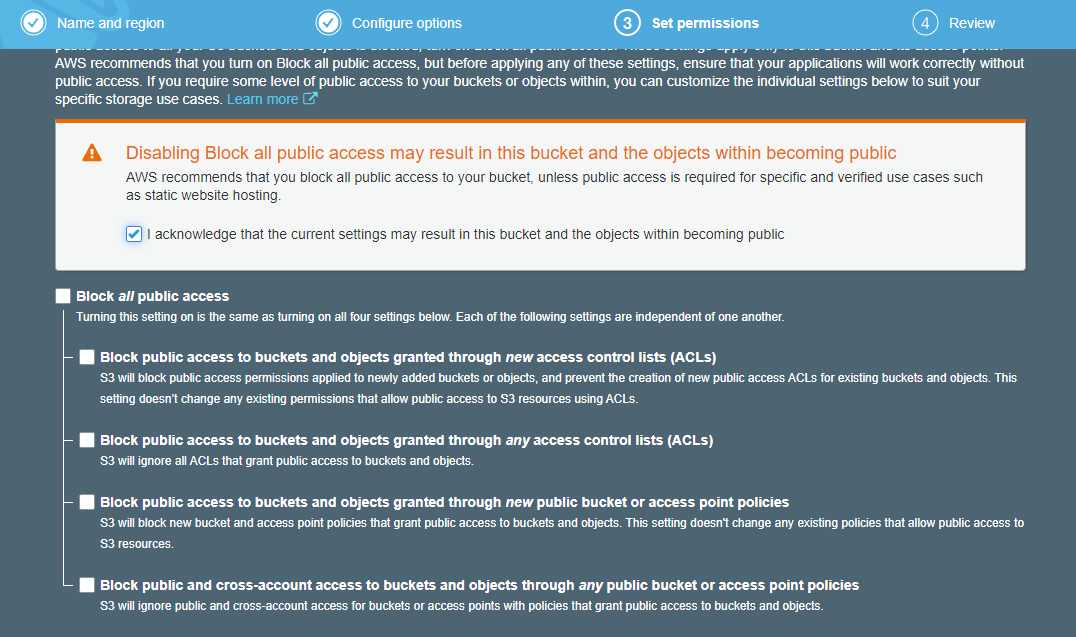
Once that is done go to Permissions and go into the Bucket Policy section. Within the editor
copy and paste the following text (Replace the BUCKETNAME with the name of you bucket!)
{
    "Version": "2012-10-17",
    "Id": "Policy1568691946888",
    "Statement": [
        {
            "Sid": "Stmt1568691936002",
            "Effect": "Allow",
            "Principal": "*",
            "Action": "s3:*",
            "Resource": "arn:aws:s3:::BUCKETNAME/*"
        }
    ]
}
Then move on to the Properties page and click on Static website hosting.
Choose "Use this bucket to host a website" and type in index.html for the Index document and Error document and save. (type in corresponding html file if you have an error page)
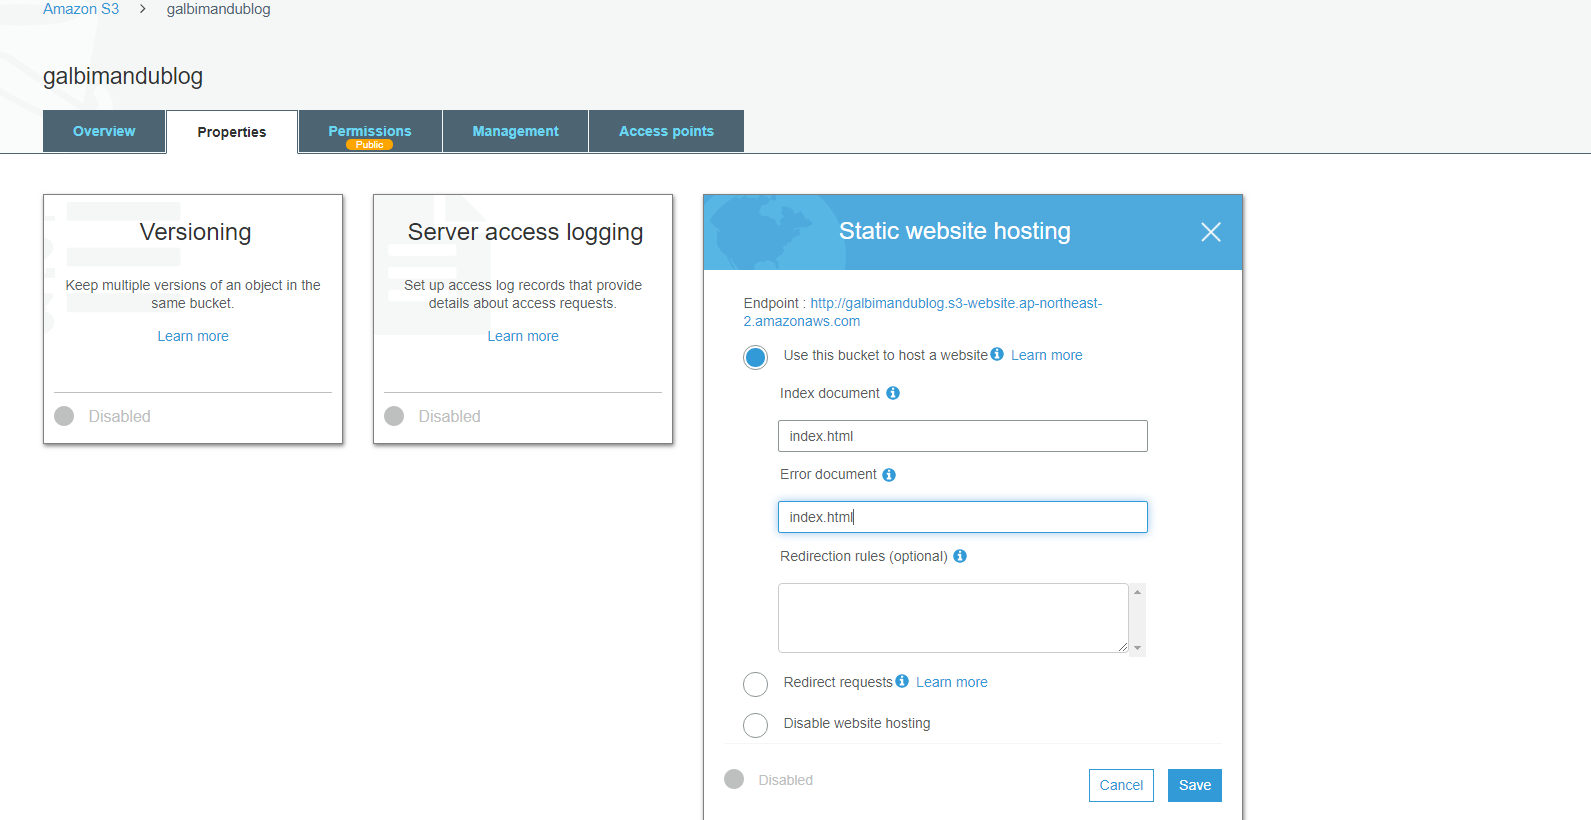
We are done with the S3 for now.
Route 53
We will do one simpe thing in Route 53 for now but will come back later to configure more.
For now click on Create Hosted Zone and Type in your domain name without the www.

P.S. you can find free domains on this website http://www.freenom.com/en/index.html
AWS Certificate Manager
Now we need to Request a Certificate for our domain from AWS.
Go to the AWS Certificate Manager and click on Request a certificate.
Choose Request a public certificate and continue

You then enter in your domain name but replace the www. with *.. This will allow you to use this certificate for all subdomains of your domain.

Then choose DNS validation and continue

You can ignore the tags and click on review then Confirm and request on the next page
On the last page of this process toggle down the domain and click on Create record in Route 53
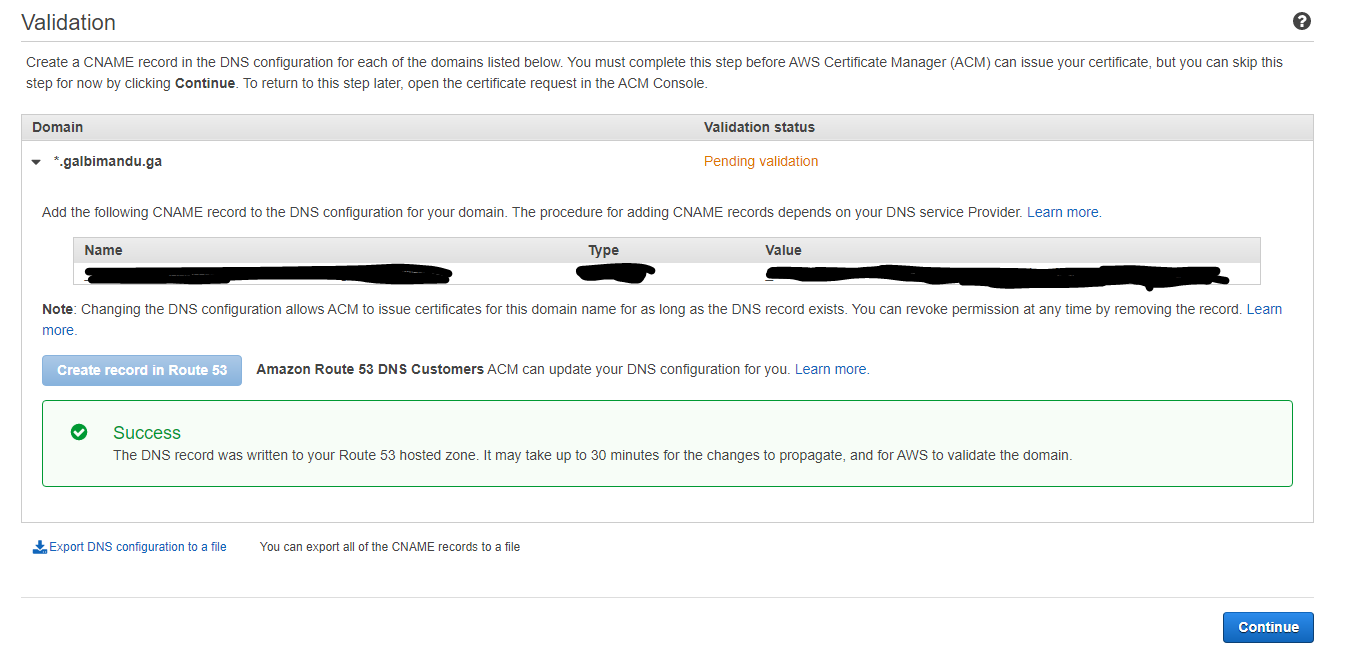
Continue and wait for the Validation to complete. It can take a few minute to validate.
CloudFront
CloudFront is a caching device that allows for faster access to the Website. Instead of having to directly access the S2 bucket users can access the CloudFront servers that are located around the world which allows for faster connection.

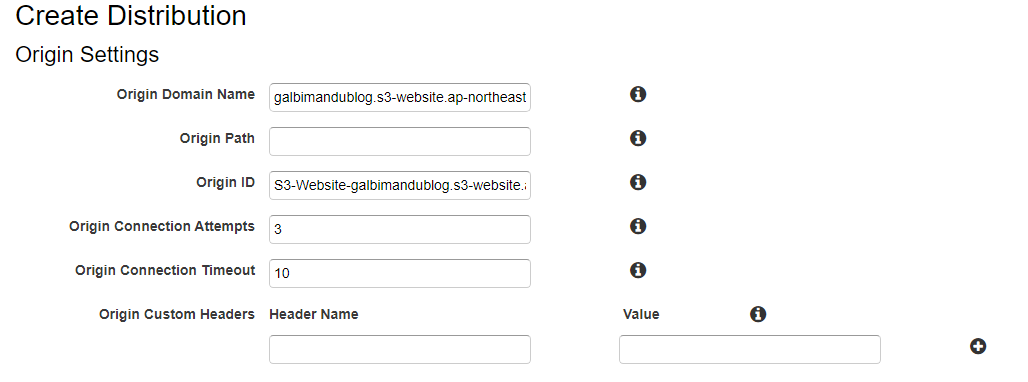
Click on Create Distribution to start setup

Then click on Get Started on the Web portion.
Copy the Endpoint from the S3 bucket excluding the http:// section and paste it into the Origin Domain Name

AWS will auto generate the Origin ID
In the Default Cache Behavior Settings select Redirect HTTP to HTTPS

Thank you for sharing this distinct guide on deploying a service's frontend through AWS. It's exquisite to see that you have covered all the necessary steps for putting up the front end of a provider using AWS services like Amazon S3, CloudFront, Route53, and the AWS Certificate Manager. Using these offerings can help to ensure the security, stability, and scalability of a frontend.
It's additionally helpful to see that you have included guidelines for configuring each of these services, including developing a bucket in Amazon S3, creating a hosted zone in Route 53, inquiring for a certificate from the AWS Certificate Manager, and setting up a cache the use of CloudFront. By following these steps, users can ensure that their frontend is functioning effectively and efficiently.
Overall, this is a useful guide for all of us who is looking to deploy a service's frontend via AWS, and I appreciate the time and effort you put into creating it. My AWS Blog: https://www.tampabaynewswire.com/2023/03/28/the-power-of-aws-lambda-its-functions-and-use-cases-117513