1. 공부배경
- API문서 작성을 자동화하기 위해 Spring RestDocs를 사용했는데, RestDocs보다 asciidoctor설정에 더 애를 먹었다.
- 온라인에 나와있는 글들과 버전이 달라 문제가 되기도 했고 무엇보다도 Gradle과 Groovy문법을 잘 모르니 엄청 고생을 했다. Gradle과 Groovy를 아직 완전히 이해는 못하겠지만 asciidoctor를 적용할 수 있는 수준까지는 정리하였다.
- Asciidoctor 설정 공식문서 : Reference
* 주의 : 검색 및 ChatGPT를 통해 확인한 내용들로 내용이 일부 부정확할 수는 있습니다. asciidoctor가 작동하지 않을 때 참고하는 용도로만 읽어주세요
---
2. 공부내용
- 작성된 build.gradle은 아래와 같다. 일단 당장 본인의 프로젝트에서 Rest API문서를 확인하고 싶다면
1. 1 ~ 8설정을 본인 build.gradle에 넣고
2. src/docs/asciidoc 경로에 asciidoctor 템플릿(.adoc)파일을 생성한 후
3. (톱니모양)build를 더블클릭한다.
plugins {
	id 'application'
	id 'java'
	id 'org.springframework.boot' version '2.7.11'
	id 'io.spring.dependency-management' version '1.0.15.RELEASE'
	id "org.asciidoctor.jvm.convert" version "3.3.2" --- 1
}

group = 'com.myproject'
version = '0.0.1-SNAPSHOT'
sourceCompatibility = '17'

application {
	mainClass.set("com.myproject.demoApp.DemoAppApplication")
}

configurations {
	compileOnly {
		extendsFrom annotationProcessor
	}
}


repositories {
	mavenCentral()
}

dependencies {
	testImplementation 'org.springframework.restdocs:spring-restdocs-mockmvc' --- 2

	implementation 'org.springframework.boot:spring-boot-starter-data-jpa'
	implementation 'org.springframework.boot:spring-boot-starter-web'
	implementation 'org.springframework.boot:spring-boot-starter-validation'
	compileOnly 'org.projectlombok:lombok'
	runtimeOnly 'com.mysql:mysql-connector-j'
	annotationProcessor 'org.projectlombok:lombok'
	implementation 'org.springframework.boot:spring-boot-starter-thymeleaf'

	testImplementation 'org.springframework.boot:spring-boot-starter-test'
}

/******* asciidoctor 관련 설정 시작 *******/

ext {
	snippetsDir = file("$buildDir/generated-snippets")
} --- 3


test {
	useJUnitPlatform()
	outputs.dir snippetsDir --- 4-1
} --- 4

asciidoctor {
	doFirst {
		delete file("src/main/resources/static/docs")
	}
	dependsOn test
	inputs.dir snippetsDir
} --- 5


bootJar {
	dependsOn asciidoctor
	from asciidoctor.outputDir
	into 'static/docs'
} --- 6

task copyDocument(type: Copy) {
	dependsOn asciidoctor
	from file("${asciidoctor.outputDir}")
	into file("src/main/resources/static/docs")
} --- 7

build {
	dependsOn copyDocument
} --- 8
/******* asciidoctor 관련 설정 끝 *******/
0. 배경 지식
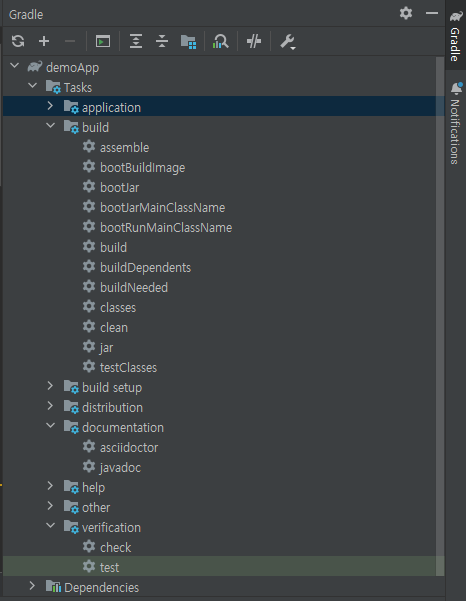
- 기본적으로 gradle task로 구성되는데 plugin은 남이 미리 만들어둔 task의 집합이라고 보면 된다. 설명글
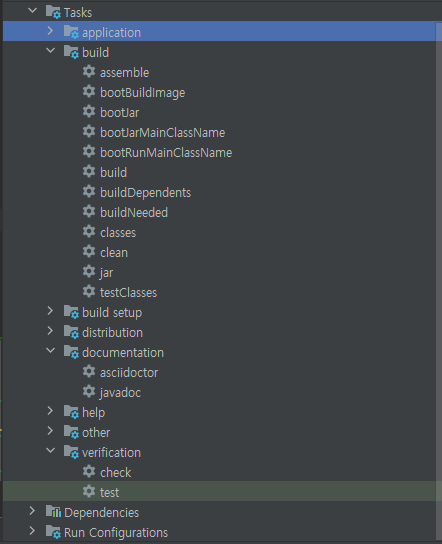
- intellij gradle 메뉴를 살펴보면 뒤에서 설명할 task가 등록되어 있는 것을 볼 수 있다. 해당 task를 더블클릭하면 task를 실행시킬 수 있다.
- asciidoctor는 Spring restdocs가 만들어낸 snippet을 html이나 pdf형식으로 만들어주는 오픈소스이다.(snippet 자체는 Spring restdocs가 만들어낸다는 의미)
1. id "org.asciidoctor.jvm.convert" version "3.3.2"
- 설명 : gradle plugins에 asciidoctor를 추가하는 선언이다. 즉 asciidoctor가 동작하는데 필요한 task들을 사용하는 것이다.
2. testImplementation 'org.springframework.restdocs:spring-restdocs-mockmvc'
- 설명 : Spring restdocs 사용을 위한 의존성 설정
3. ext { 생략 }
- 설명 : project 객체에서 사용할 custom extra property를 설정하는 코드블록이다. 블록 내에 설정한 변수는 스크립트 내에서 활용할 수 있다.(메소드는 아님)
여기서는 snippetDir 변수에 file("$buildDir/generated-snippets")이 반환하는 File객체를 할당하고 있다. $buildDir는 사전 정의된 gradle property로 내 프로젝트의 build 경로를 나타낸다. generated-snippets는 Spring Restdocs가 생성하는 snippet이 저장되는 공간이다.
4. test { 생략 }
- 설명 : test task에 수행할 내용을 지정하는 코드 블록이다. 여기서는 useJUnitPlatform()을 이용해 junit테스트를 수행한다고 선언하였다.
4 -1에서 outputs.dir snippetsDir은 test task의 outputs directory를 snippetdir로 지정하는 것이다.(이는 gradle task의 output directory를 지정하는 것이지 Spring Restdoc이 생성하는 snippet저장 디렉토리와는 관련 없다.)No, it's not a mistake. Setting the generated snippets directory as an output of the test task and an input of the asciidoctor task allows Gradle to figure out task dependencies and perform accurate up-to-date checks. stackoverflow 글
- snippet 생성 directory를 변경하고 싶다면 JAVA testcode 클래스에 넣어줘야 한다.(방법) 기본 디렉토리 설정은 아래와 같다.
Spring Restdoc package 중 일부

	private static File getDefaultOutputDirectory() {
		if (new File("pom.xml").exists()) {
			return new File("target/generated-snippets");
		}
		return new File("build/generated-snippets");
	}
5. asciidoctor { 생략 }
- 설명 : asciidoctor task를 설정하는 블록이다.
doFirst()구문은 해당 task를 수행할 때 가장 먼저 수행한는 블록이다. 기존에 생성된 rest api 문서가 있다면 삭제한다는 의미이다.
depends on은 이 task가 test task에 의존한다는 의미이며, test task가 완료되어야만 asciidoctor가 수행된다.
inpu.dir은 asciidoctor가 converting을 수행하기 위한 snippet의 경로를 input.dir로 지정해 주고 있다.
어떤 글에서는 아래와 같은 구문을 사용하기도 하는데 미리 선언된 asciidoctor task에 doFirst를 추가한다는 의미로 기능상 차이는 없다.
asciidoctor.doFirst {
    delete file('src/main/resources/static/docs')
}
- 추가로 asciidoctor 3.x버전 기준 default로 설정된 프로퍼티 중 sourceDir(src/docs/asciidoc) 템플릿이 저장되는 디렉토리이고, outputDir(${buildDir}/docs/asciidoc)는 asciidoc converting 결과가 저장되는 공간이다.
By convention it sets the sourceDir to src/docs/asciidoc outputDir to ${buildDir}/docs/asciidoc
6. bootjar { 생략 }
- 설명 : bootJar를 설정하는 블록이다. 배포용 Jar 파일을 만들 때 asciidoctor가 생성한 html파일을 포함시키기 위한 설정이다. bootJar task는 asciidoctor에 의존하고 있으므로 asciidoctor수행 후 실행된다.
코드에서는 asciidoctor.outputDir(${buildDir}/docs/asciidoc) 를 Jar파일 내 'static/docs'로 복사하고 있다.
7. copyDocument { 생략 }
- 설명 : 배포용 Jar파일을 생성하기 전 resources/static에 asciidoctor 결과를 복사하기 위한 task이다.
task copyDocument(type : copy) 구문은 사용자 정의 task를 선언하는 구문이다. (type : copy)를 선언하여 내장 task인 copy의 기능을 이용하겠다는 의미이다.(from, into 등은 이미 copy에 정의된 프로퍼티라는 의미)
이 task는 asciidoctor에 의존하고 있으므로 asciidoctor이후에 수행될 수 있다. src/main/resources/static은 spring boot 정적 리소스의 고정 경로이므로 그대로 쓰고 docs는 원하는 하위 디렉토리로 변경가능하다.
- build { 생략}
- 설명 : build task가 copyDocument를 의존하고 있음을 나타낸다. 그러므로 build task 실행 시 상위 task인 copyDocument가 수행어야 한다.
copyDocument는 다시 asciidoctor를 의존하고 있으므로 asciidoctor가 수행되어야 한다.
asciidoctor는 또다시 test task를 의존하고 있으므로 test task가 수행된다.
결론적으로 build task를 수행하면 test task(test 코드 수행) -> asciidoctor task(snippet을 html로 변환) -> copyDocument task(html을 static 경로로 복사) -> build task 이 진행된다.
이때 build가 bootJar를 의존하고 있지 않음에도 bootJar가 수행되는데, 이는 gradle에 사전 정의된 내용이 아닌가 싶다. bootJar에 depends on을 지울 경우 bootJar가 asciidoctor보다 먼저 수행되지만 depens on을 설정할 경우 asciidoctor가 수행되고 나서 task가 수행된ㄷ.(task는 무조건 수행되다는 소리)
3. 정리
- asciidoctor는 Spring Restdocs가 만들어낸 API snippet을 html이나 pdf 등으로 변환해주는 플러그인이다.
- asciidoctor 버전에 따라 설정 방법이 다르므로 왠만하면 최신버전을 이용하고 Reference 를 확인하자. * 구글 검색을 통해 나오는 내용을 그대로 사용했다가 많이 고생할 수 있음
- 설정을 이해할 수 없고 최신버전 asciidoctor를 사용할 거라면 본문에 있는 gradle 설정을 그대로 사용해도 무방하다.(사용되는 경로가 모두 springboot 프로젝트 기본 폴더 설정들이다.) 이때 src/docs/asciidoc 경로에 asciidoctor 템플릿(.adoc)파일을 저장해 두어야 한다.

ㆍ
구글링해도 아래 오류가 계속 떠서 공식 문서에 나온대로 처리해서 해결했습니다.