BACKEND 생성, 설정 및 첫 페이지 접속
TOOL
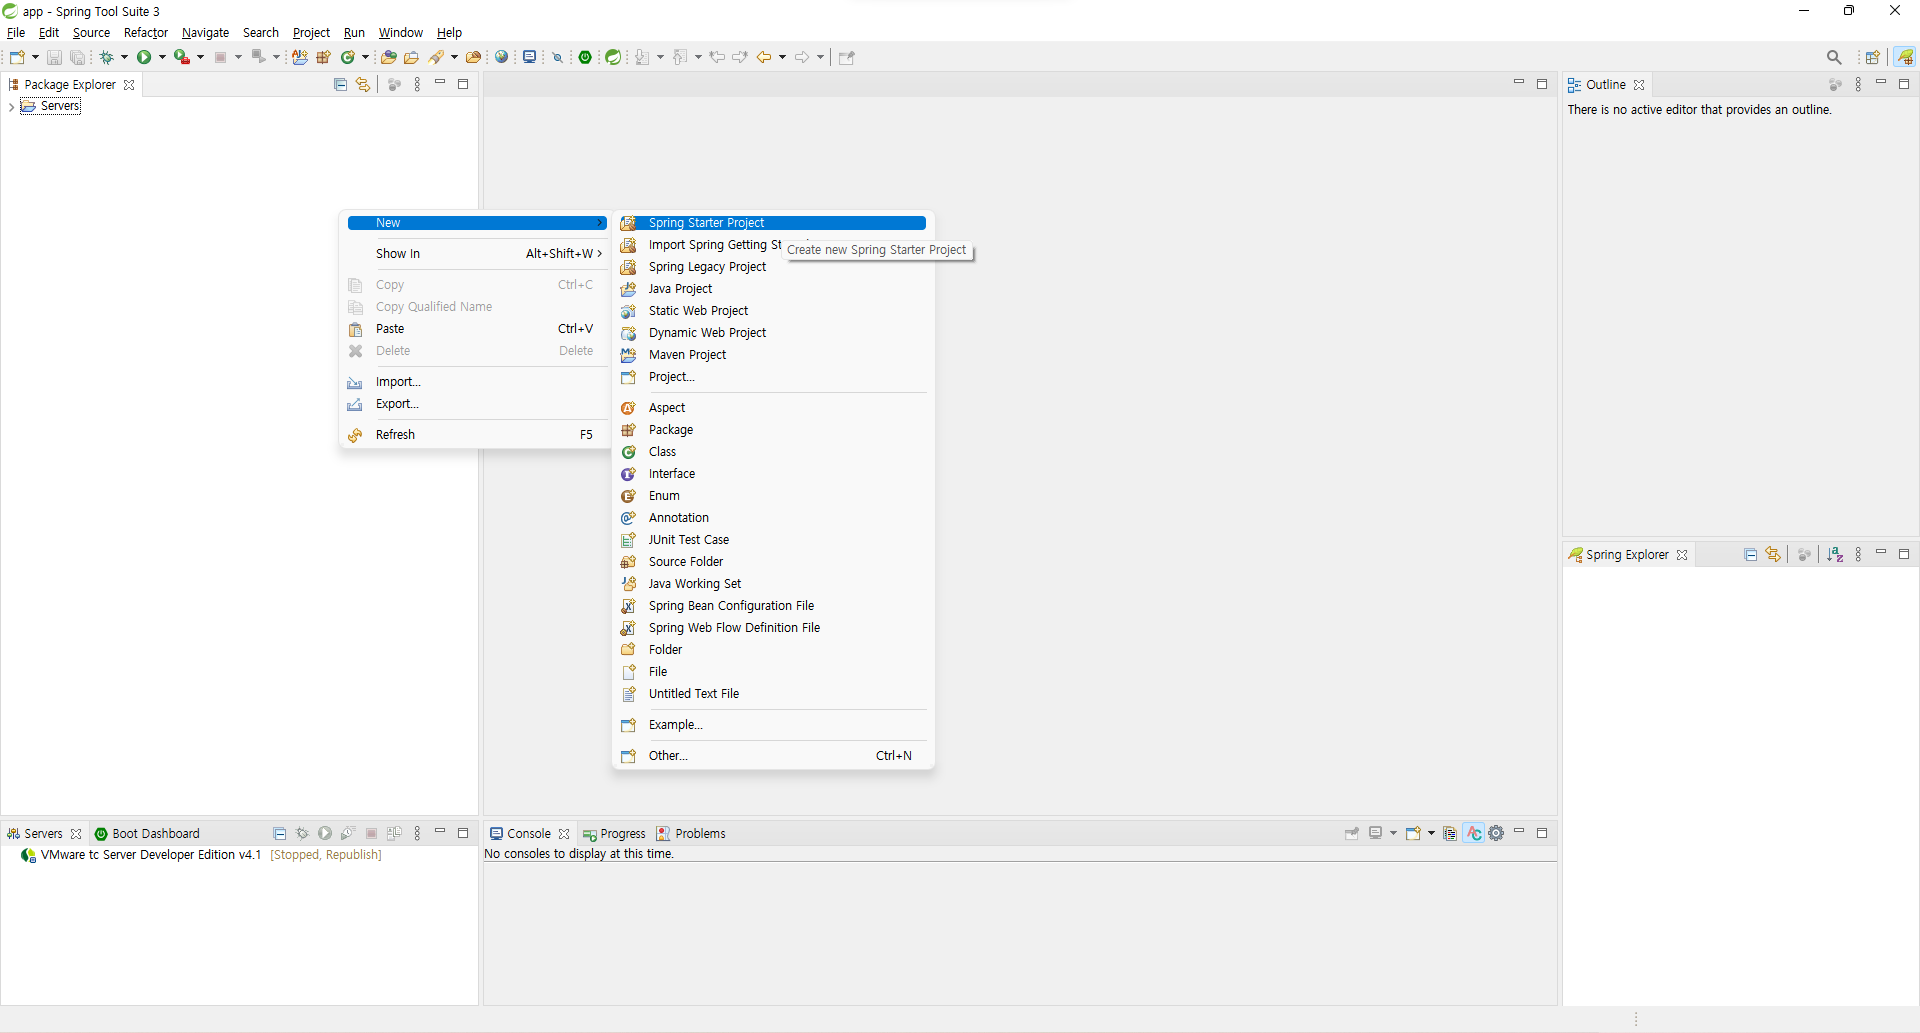
Spring Tool Suite
프로젝트 생성
- Spring Starter Project 를 선택해서 프로젝트 생성
- 생성할 프로젝트의 이름, type, java version 등 설정
- maven / gradle 설정이 가능하며 해당 프로젝트는 gradle 사용
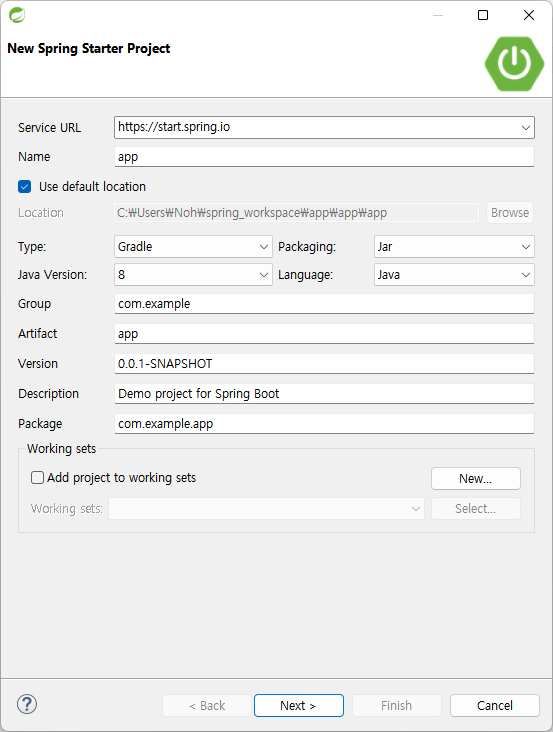
- maven / gradle 설정이 가능하며 해당 프로젝트는 gradle 사용
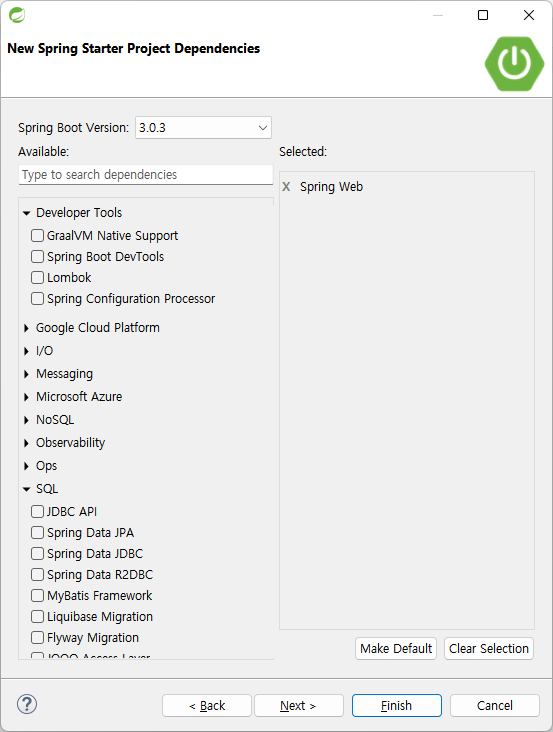
- Spring Boot Version 선택 및 자동으로 설치가 될 dependencies 선택
- 해당 프로젝트에서는 2.7.9버전 사용
- 필요한 dependencies는 미리 선택해서 설치가 되며 추후에 추가 가능
※ 콘솔에 출력되는 버퍼 사이즈에 대한 경고창이 나오는 경우 설정 방법
   Window - Preferences - Run/Debug - Console 에서 'Limit  console output' 체크 해제
프로젝트 설정
build.gradle - dependencies 관리
application.properties - 설정 관리
# ORACLE CLOUD - DB 설정
https://velog.io/@garamnoh/ORACLE-CLOUD-DB**
- application.properties
- port 설정
접속할 port 설정 (8080 포트는 사용중이기 때문에 해당 프로젝트는 8090 사용)#SERVER server.port=8090 - DB 설정
#DB #thin:@DB이름_high #TNS_ADMIN=해당경로 spring.datasource.driver-class-name=oracle.jdbc.OracleDriver spring.datasource.url=jdbc:oracle:thin:@{app_high}?TNS_ADMIN={./src/main/resources/Wallet} spring.datasource.username=ADMIN spring.datasource.password=패스워드 - JPA 설정
#JPA
spring.jpa.hibernate.ddl-auto=none
spring.jpa.generate-ddl=false
spring.jpa.show-sql=true
spring.jpa.database=oracle
spring.jpa.database-platform=org.hibernate.dialect.Oracle12cDialect
spring.jpa.properties.hibernate.format_sql=true
#log
logging.level.org.hibernate=info
- port 설정
- build.gradle
jpa를 사용하는 경우dependencies { ... implementation 'com.oracle.database.security:oraclepki' implementation 'com.oracle.database.security:osdt_core' implementation 'com.oracle.database.security:osdt_cert' ... }
참고
The Network Adapter could not establish the connection 오류 발생시
build.gradle의 dependencies에 추가해준 'oraclepki', 'osdt_core', 'osdt_cert' jar 파일 직접 등록
해당 프로젝트의 경우 ojdbc8을 사용했으며 아래 링크에서 ojdbc8-full.tar.gz 파일을 다운받아 압축 해제 후 oraclepki.jar, osdt_core.jar, osdt_cert.jar를 library에 추가하여 해결
https://www.oracle.com/database/technologies/appdev/jdbc-downloads.html
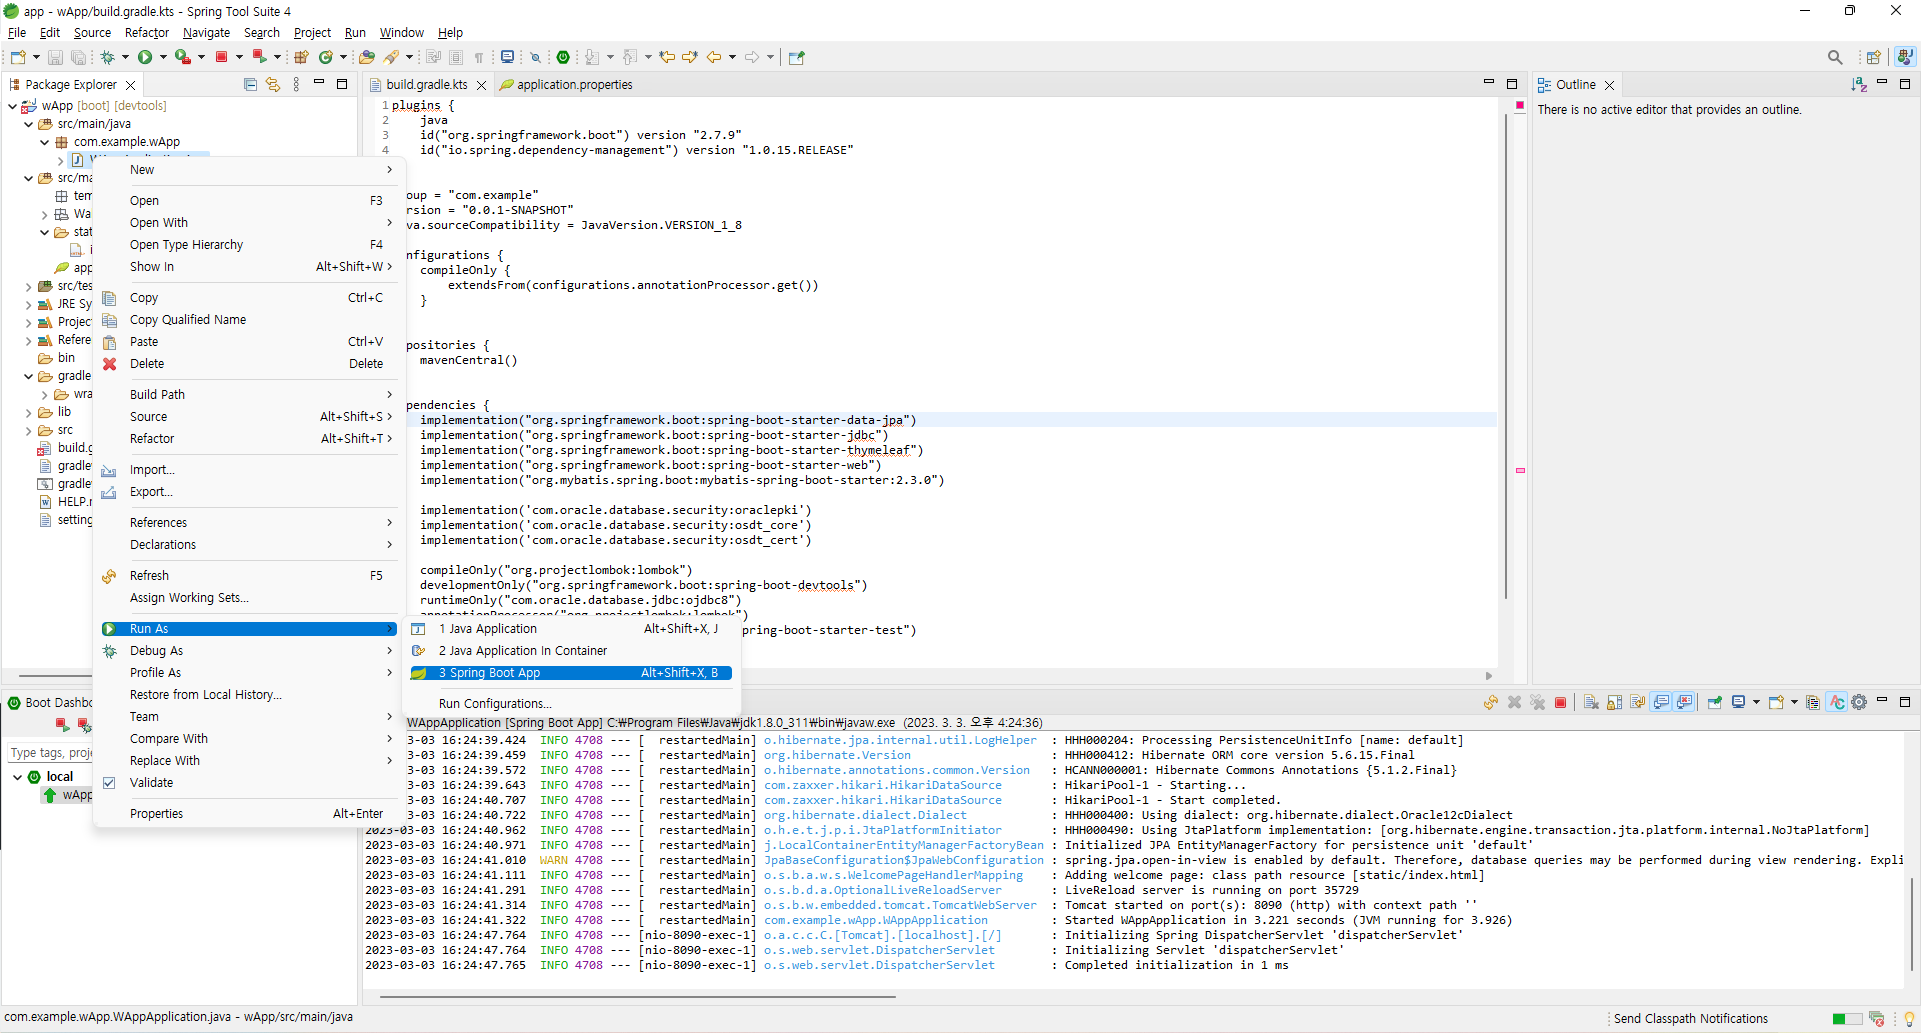
프로젝트 실행
- run
src/main/java/com/example/{project명}
{project명}Application.java 우클릭 - Run As - Spring Boot App 실행
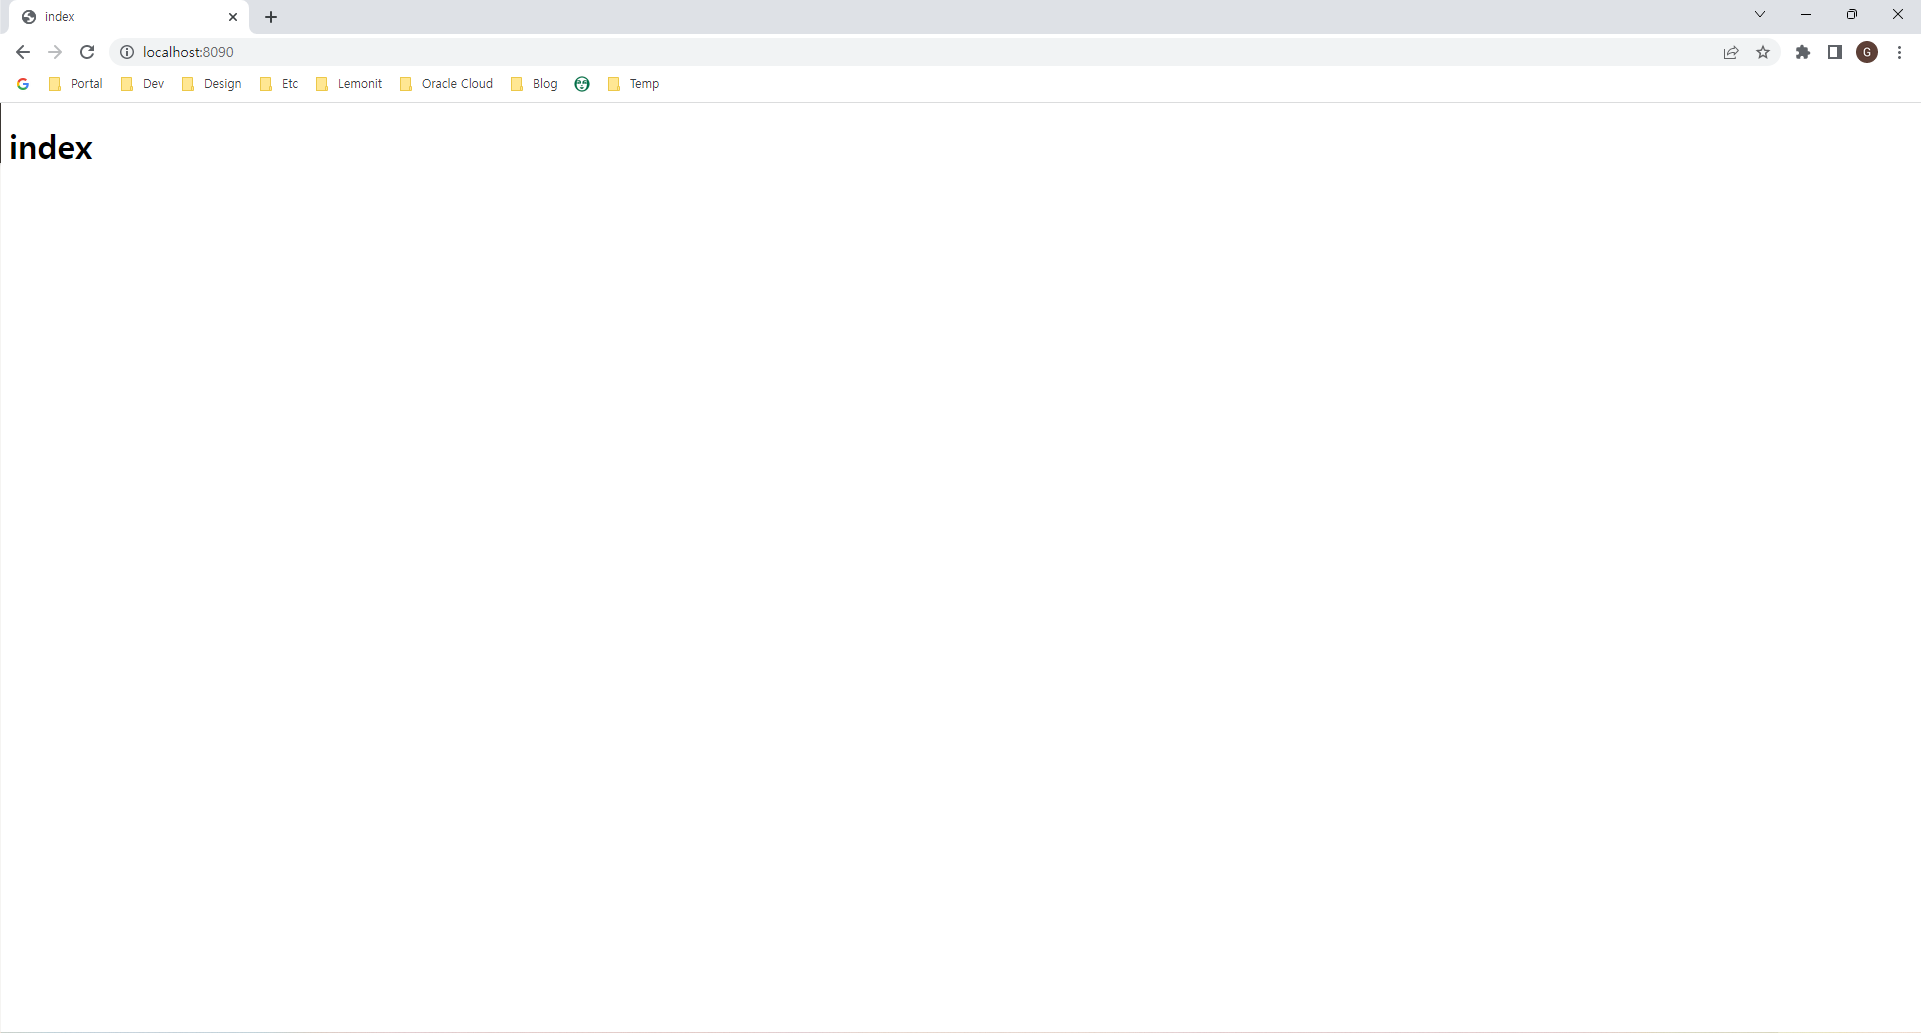
- localhost 접속
- index.html 생성
- 경로 : src/main/resources/templates/index.html
<!DOCTYPE html> <html> <head> <meta charset="UTF-8"> <title>index</title> </head> <body> <h1>index</h1> </body> </html> - 접속
http://localhost:8090