TIL(Today I Learned)
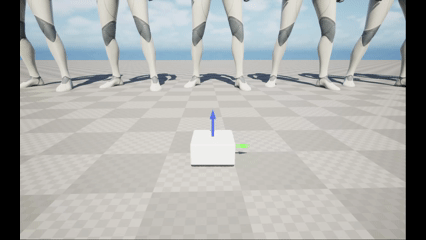
이번 과제는 Pawn 클래스로부터 캐릭터를 만들고, 나아가 드론과 같이 6개의 자유도를 가진 비행체를 만드는 것이다.
Pawn 클래스를 생성하고, 이를 상속하여 삼인칭 캐릭터와 드론을 만들어주었다.
먼저 헤더 파일을 선언한다. 캡슐 컴포턴트, 스켈레탈 메시, 스프링암, 카메라, 무브먼트 컴포넌트를 선언해주었다.
#pragma once

#include "CoreMinimal.h"
#include "GameFramework/Pawn.h"
#include "PawnBase.generated.h"

class USpringArmComponent;
class UCameraComponent;
class UFloatingPawnMovement;

UCLASS()
class ASSIGNMENT7_API APawnBase : public APawn
{
	GENERATED_BODY()

public:

	UPROPERTY(VisibleAnywhere, BlueprintReadOnly, Category = "Capsule Component|Components")
	class UCapsuleComponent* CapsuleComp;

	UPROPERTY(VisibleAnywhere, BlueprintReadOnly, Category = "Skeletal Mesh|Components")
	class USkeletalMeshComponent* SkeletalMeshComp;

	UPROPERTY(VisibleAnywhere, BlueprintReadOnly, Category = "Camera|Components")
	USpringArmComponent* SpringArmComp;

	UPROPERTY(VisibleAnywhere, BlueprintReadOnly, Category = "Camera|Components")
	UCameraComponent* CameraComp;

	UPROPERTY(VisibleAnywhere, BlueprintReadOnly, Category = "Movement Component|Components")
	class UFloatingPawnMovement* MovementComp;

	APawnBase();

protected:
	virtual void BeginPlay() override;

public:
	virtual void Tick(float DeltaTime) override;
};
소스파일의 생성자에서 물리 충돌은 직접 구현하기 떄문에 SetSimulatePhysics에 false를 넣어준다.
스프링암은 pawn의 회전을 직접 제어하기 때문에 bUsePawnControlRotation을 true로 설정한다.
APawnBase::APawnBase()
{

	CapsuleComp = CreateDefaultSubobject<UCapsuleComponent>(TEXT("CapsuleComponent"));
	CapsuleComp->SetSimulatePhysics(false);

	SkeletalMeshComp = CreateDefaultSubobject<USkeletalMeshComponent>(TEXT("SkeletalMesh"));
	SkeletalMeshComp->SetupAttachment(CapsuleComp);
	SkeletalMeshComp->SetSimulatePhysics(false);

	SpringArmComp = CreateDefaultSubobject<USpringArmComponent>(TEXT("SpringArm"));
	SpringArmComp->SetupAttachment(CapsuleComp);
	SpringArmComp->TargetArmLength = 300.0f;
	SpringArmComp->bUsePawnControlRotation = true;

	CameraComp = CreateDefaultSubobject<UCameraComponent>(TEXT("Camera"));
	CameraComp->SetupAttachment(SpringArmComp, USpringArmComponent::SocketName);
	CameraComp->bUsePawnControlRotation = false;

	MovementComp = CreateDefaultSubobject<UFloatingPawnMovement>(TEXT("MovementComponent"));

	PrimaryActorTick.bCanEverTick = true;
}
이후 Tick()함수를 오버라이드하여 컨트롤러의 회전방향에 따라 액터의 방향도 맞추어준다.
void APawnBase::Tick(float DeltaTime)
{
	Super::Tick(DeltaTime);

	if (Controller)
	{
		FRotator ControlRot = Controller->GetControlRotation();
		FRotator YawOnlyRot(0.f, ControlRot.Yaw, 0.f);
		SetActorRotation(YawOnlyRot);
	}
}
지금까지는 PawnBase 클래스에서 기본적인 설정을 해주었고,
자손 클래스를 만들어 입력을 바인딩하고 입력매핑 컨텍스트와 연결하여 입력에 따른 움직임과 회전을 구현한다.
먼저 사전에 만든 입력매핑 컨텍스트와 입력액션을 연결할 컨트롤러 클래스를 생성한다.
헤더파일에서 입력매핑컨텍스트와 입력액션을 선언하고,
#pragma once

#include "CoreMinimal.h"
#include "GameFramework/PlayerController.h"
#include "MyPlayerController.generated.h"

class UInputMappingContext;
class UInputAction;

UCLASS()
class ASSIGNMENT7_API AMyPlayerController : public APlayerController
{
	GENERATED_BODY()

public:
	AMyPlayerController();

	UPROPERTY(EditAnywhere, BlueprintReadWrite, Category = "Input")
	UInputMappingContext* InputMappingContext;
	UPROPERTY(EditAnywhere, BlueprintReadWrite, Category = "Input")
	UInputAction* MoveAction;
	UPROPERTY(EditAnywhere, BlueprintReadWrite, Category = "Input")
	UInputAction* LookAction;

protected:
	virtual void BeginPlay() override;

};
소스파일의 BeginPlay()에서 컨트롤러의 입력 매핑 컨텍스트와
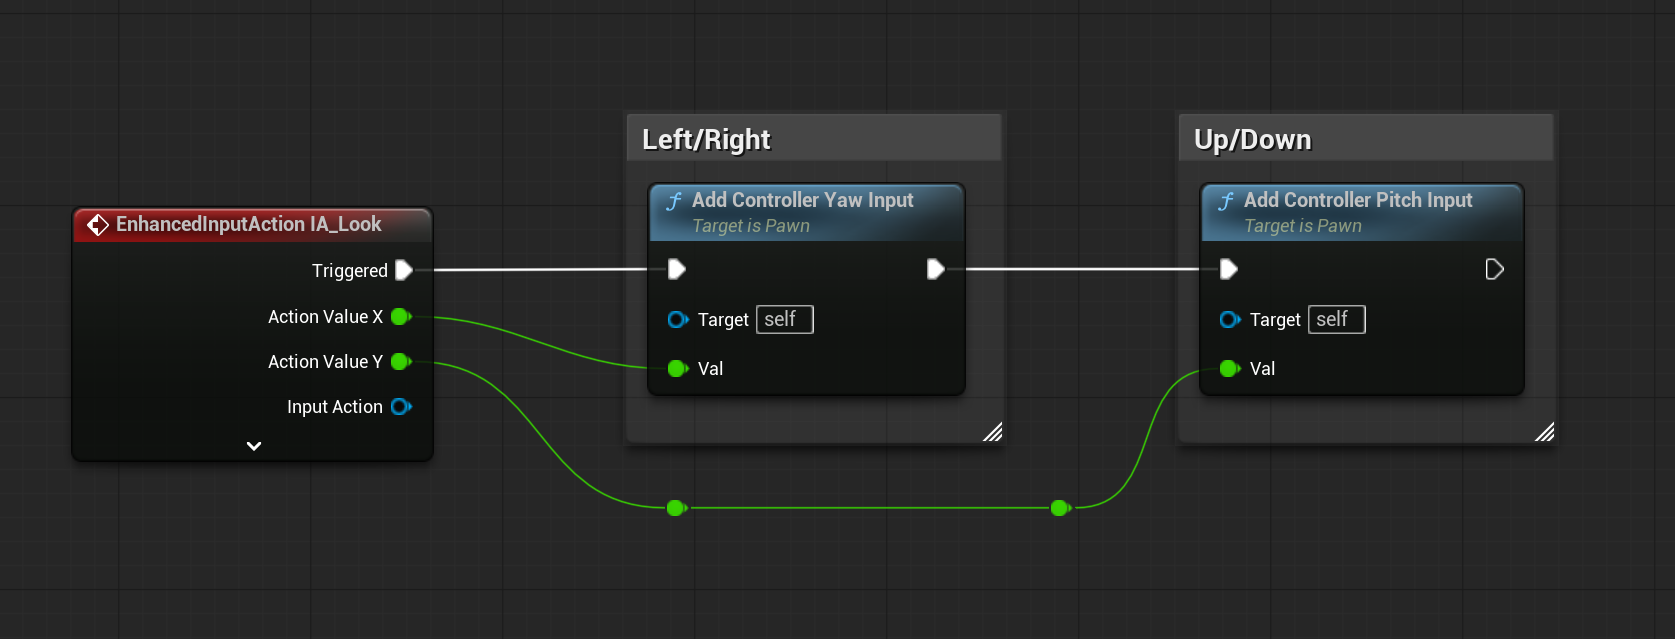
비슷한 역할을 하는 블루프린트도 아래에 첨부하였다.
현재 캐릭터를 조종하는 로컬 플레이어를 가져와,
로컬 플레이어로부터 Enhanced Input 기능을 담당하는 입력 서브시스템을 가져온다.
그리고 입력 매핑 컨텍스트를 서브시스템에 등록한다.
void AMyPlayerController::BeginPlay()
{
	Super::BeginPlay();

	if (ULocalPlayer* LocalPlayer = GetLocalPlayer())
	{
		if (UEnhancedInputLocalPlayerSubsystem* Subsystem =
			LocalPlayer->GetSubsystem<UEnhancedInputLocalPlayerSubsystem>())
		{
			if (InputMappingContext)
			{
				Subsystem->AddMappingContext(InputMappingContext, 0);
			}
		}
	}
}

이제 Pawn의 자손 클래스로 이동과 회전을 구현한다.
헤더 파일부터 보면,
SetupPlayerInputComponent 함수는 플레이어의 입력을 바인딩하는 함수이다.
위 함수에서 바인딩 된 입력 이벤트에서 호출할 함수인 Move와 Look도 선언해준다.
#pragma once

#include "CoreMinimal.h"
#include "PawnBase.h"
#include "ThirdPersonCharacter.generated.h"

UCLASS()
class ASSIGNMENT7_API AThirdPersonCharacter : public APawnBase
{
	GENERATED_BODY()
public:

	virtual void SetupPlayerInputComponent(class UInputComponent* PlayerInputComponent) override;

	UFUNCTION()
	void Move(const FInputActionValue& value);

	UFUNCTION()
	void Look(const FInputActionValue& value);

};
소스파일로 가서 SetupPlayerInputComponent 함수를 정의한다.
향상된 입력 시스템 컴포넌트와 캐릭터의 컨트롤러를 각각 캐스팅한 후,
컨트롤러에서, 입력 매핑 컨텍스트에 등록한 액션을 BindAction으로 이동이나 회전을 구현한 함수와 연결시켜준다.
void AThirdPersonCharacter::SetupPlayerInputComponent(UInputComponent* PlayerInputComponent)
{
	Super::SetupPlayerInputComponent(PlayerInputComponent);

	if (UEnhancedInputComponent* EnhancedInput = Cast<UEnhancedInputComponent>(PlayerInputComponent))
	{
		if (AMyPlayerController* PlayerController = Cast<AMyPlayerController>(GetController()))
		{
			if (PlayerController->MoveAction)
			{
				EnhancedInput->BindAction(
					PlayerController->MoveAction,
					ETriggerEvent::Triggered,
					this,
					&AThirdPersonCharacter::Move
				);
			}

			if (PlayerController->LookAction)
			{
				EnhancedInput->BindAction(
					PlayerController->LookAction,
					ETriggerEvent::Triggered,
					this,
					&AThirdPersonCharacter::Look
				);
			}

		}
	}

}
Move 함수는 입력 벡터의 각 축 값을 AddMovmentInput() 함수에 액터의 Forward 또는 Right Vector와 함께 넣어주었다.
void AThirdPersonCharacter::Move(const FInputActionValue& value)
{
	if (!Controller) return;

	const FVector2D MoveInput = value.Get<FVector2D>();

	if (!FMath::IsNearlyZero(MoveInput.X))
	{
		AddMovementInput(GetActorForwardVector(), MoveInput.X);
	}
	if (!FMath::IsNearlyZero(MoveInput.Y))
	{
		AddMovementInput(GetActorRightVector(), MoveInput.Y);
	}
}
Look함수도 마찬가지로, AddControllerYawInput이나 AddControllerPitchInput으로 간단하게 구현하였다.
void AThirdPersonCharacter::Look(const FInputActionValue& value)
{
	if (!Controller) return;
	FVector2D LookInput = value.Get<FVector2D>();

	AddControllerYawInput(LookInput.X);
	AddControllerPitchInput(LookInput.Y);

}
무브먼트 방향으로 회전은 따로 설정하지 않아서 약간은 부자연스럽게 움직인다.

다음으로 드론을 구현해보면,
위 아래 움직임과, Roll 회전을 만들었다.
중력에 영향을 받다보니 AddMovementInput() 함수로는 위로 날 수가 없어 속도 벡터의 Z값에 더 강한 값을 더하었다.
void ADrone::UpDown(const FInputActionValue& value)
{
	if (!Controller) return;
	float UpDownInput = value.Get<float>();
	if (!FMath::IsNearlyZero(UpDownInput))
	{
		Velocity.Z += UpDownInput * 2000.f * GetWorld()->GetDeltaSeconds();
	}
}

void ADrone::Roll(const FInputActionValue& value)
{
	if (!Controller) return;
	if (!IsInAir) return;
	float RollInput = value.Get<float>();

	//AddControllerRollInput(RollInput);

	FRotator RollRot = FRotator(0.f, 0.f, RollInput);
	StaticMeshBody->AddLocalRotation(RollRot);
}
중력은 Tick함수에 구현하였다.
중력 상수 (float Gravity = -980.f) 만큼 속도 벡터의 Z값을 계속해서 더해주고,
액터의 위치를 속도 벡터만큼 변한 값으로 설정해주었다.
충돌을 판정하는 IsOnGround()로 지면에 충돌한 경우 중력의 영향을 받지 않아, Z값이 변하지 않게 된다.
void ADrone::Tick(float Deltatime)
{
	Super::Tick(Deltatime);

	if (IsOnGround() && Velocity.Z <= 0.f)
	{
		FVector CorrectedLocation = GetActorLocation();
		CorrectedLocation.Z = 10.f;
		SetActorLocation(CorrectedLocation);
		IsInAir = false;
		Velocity.Z = 0.f;
		MovementComp->MaxSpeed = GroundSpeed;
	}
	else
	{
		IsInAir = true;
		MovementComp->MaxSpeed = InAirSpeed;
	}

	if (IsInAir)
	{
		Velocity.Z += Gravity * Deltatime;

		FVector NewLocation = GetActorLocation() + Velocity * Deltatime;
		SetActorLocation(NewLocation);
	}
}
충돌 판정은 LineTraceSingleByChannel 함수를 사용했다.
레이 캐스팅의 시작 지점과 끝 지점을 설정하는데
지면과의 충돌만 판정하기 위해 끝점은 시작지점보다 50만큼 아래로 설정한다.
그리고 Hit(레이케스트 결과)과 Params(충돌 검사의 조건)를 설정하고,
ECC_WorldStatic 채널에 대해서 충돌을 검사한다.
bool ADrone::IsOnGround()
{
	FVector Start = GetActorLocation();
	FVector End = Start - FVector(0.f, 0.f, 50.f);

	FHitResult Hit;
	FCollisionQueryParams Params;
	Params.AddIgnoredActor(this);

	return GetWorld()->LineTraceSingleByChannel(Hit, Start, End, ECC_WorldStatic, Params);
}