
📖폼 데이터 사용하기
❗책 내용은 FORM 아님. 그냥
request parameter임 아마 뒤에 나올 듯
📌IntelliJ로 프로젝트 만들기
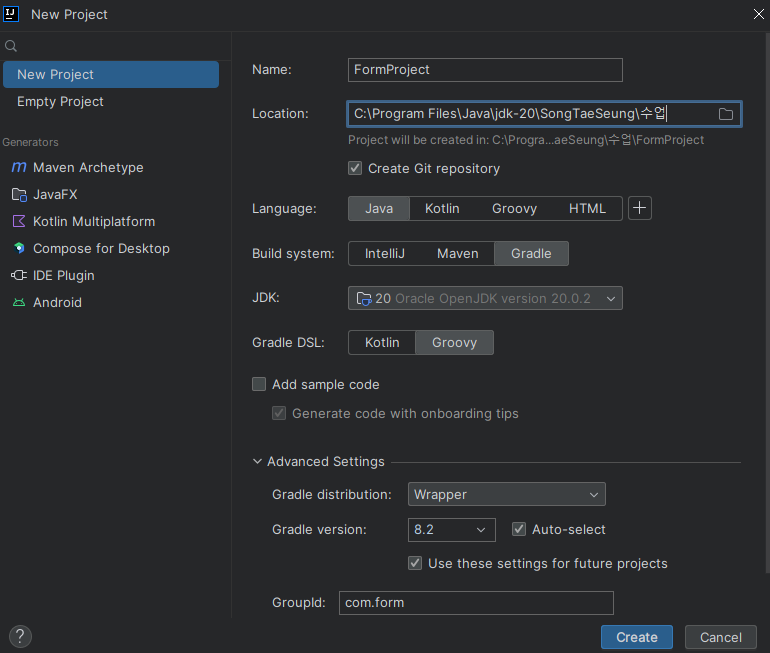
👉 gradle, maven 셋팅 눌러야함
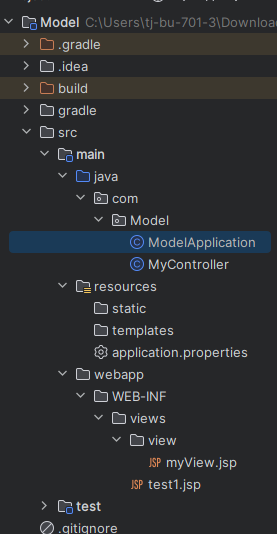
👉 폴더, 클래스, 메인문, 프로퍼티 등 똑같이 만들자.. innitiallizer 홈페이지 쓰는 이유...
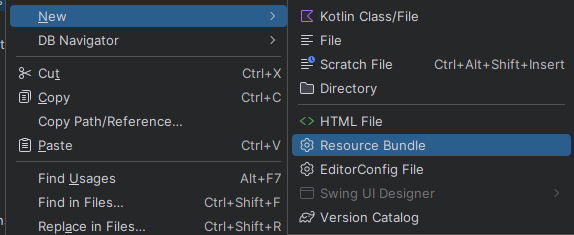
👉 application.properties 만드는 법
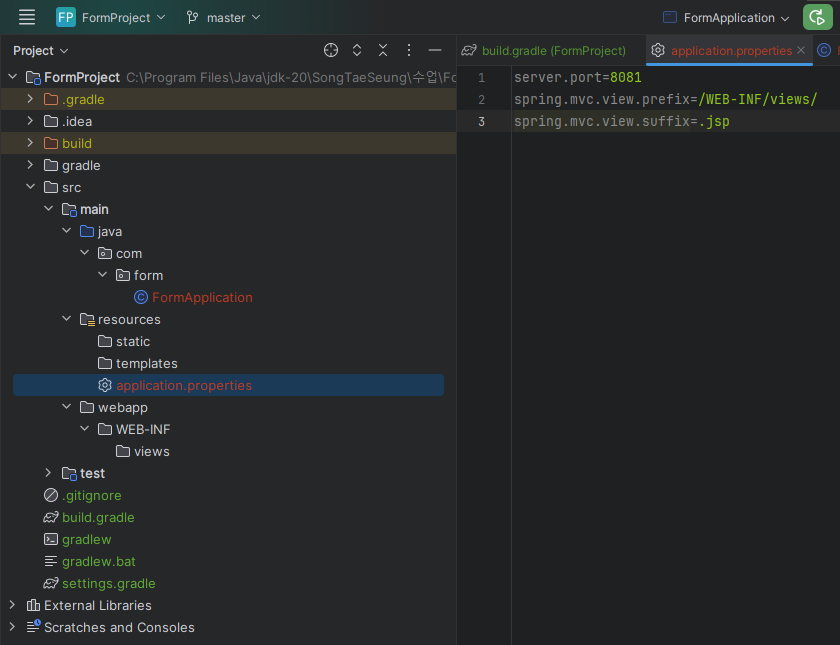
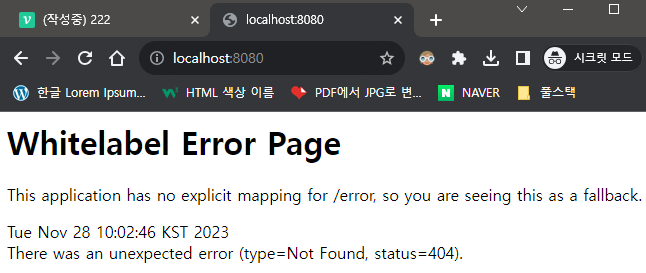
👉 서버 작동 잘 된다.
📌form 패키지 생성
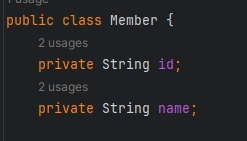
📍Member 클래스
package com.form;

public class Member {
    private String id;
    private String name;

    public String getId() {
        return id;
    }

    public void setId(String id) {
        this.id = id;
    }

    public String getName() {
        return name;
    }

    public void setName(String name) {
        this.name = name;
    }
}
📍MyController 클래스
package com.form;
import jakarta.servlet.http.HttpServletRequest;
import org.springframework.stereotype.Controller;
import org.springframework.ui.Model;
import org.springframework.web.bind.annotation.PathVariable;
import org.springframework.web.bind.annotation.RequestMapping;
import org.springframework.web.bind.annotation.RequestParam;
import org.springframework.web.bind.annotation.ResponseBody;
@Controller
public class MyController {
@RequestMapping("/")
public @ResponseBody String rood(){
return "Form 데이터 전달받아 사용하기";
}
@RequestMapping("/test1")
public String test1(HttpServletRequest httpServletRequest, Model model){
String id = httpServletRequest.getParameter("name");
String name = httpServletRequest.getParameter("name");
model.addAttribute("id", id);
model.addAttribute("name", name);
return "test1";
}
@RequestMapping("/test2")
public String test2(@RequestParam("id") String id,
@RequestParam("name") String name,
Model model){
// 파라미터가 많아지면 불편해진다.
model.addAttribute("id", id);
model.addAttribute("name", name);
return "test2";
}
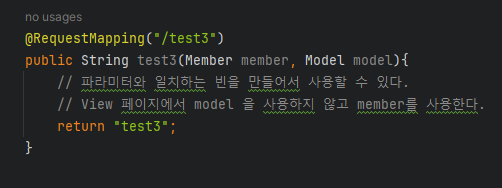
@RequestMapping("/test3")
public String test3(Member member, Model model){
// 파라미터와 일치하는 빈을 만들어서 사용할 수 있다.
// View 페이지에서 model 을 사용하지 않고 member를 사용한다.
return "test3";
}
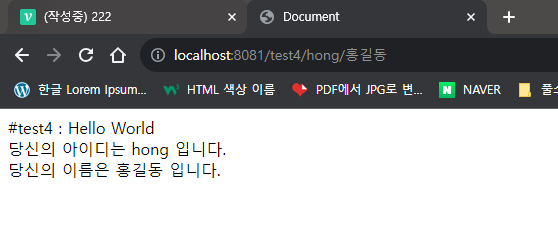
@RequestMapping("/test4/{studentId}/{name}")
public String getStudent(@PathVariable String studentId,
@PathVariable String name,
Model model){
model.addAttribute("id", studentId);
model.addAttribute("name", name);
return "test4";
}
}
📍test.jsp
<%@ page language="java" contentType="text/html; charset=UTF-8"
pageEncoding="UTF-8" %>
<%@ taglib prefix="c" uri="http://java.sun.com/jsp/jstl/core" %>
<!DOCTYPE html>
<html lang="ko">
<head>
<meta http-equiv="Content-Type" content="text/html"; charset="UTF-8">
<title>Document</title>
</head>
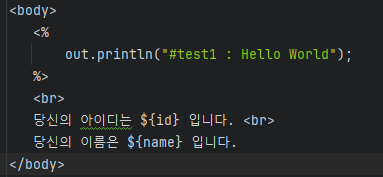
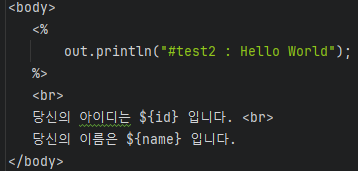
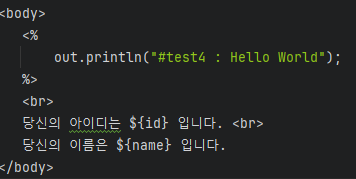
<body>
<%
out.println("#test1 : Hello World");
%>
<br>
당신의 아이디는 ${id} 입니다. <br>
당신의 이름은 ${name} 입니다.
</body>
</html>👉 4개 다 이런 식
📍결과
❓⚡어떤 구조로 실행? Get, Set의 중요성⚡
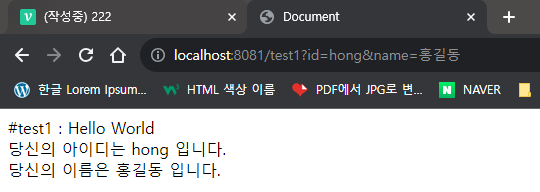
test1
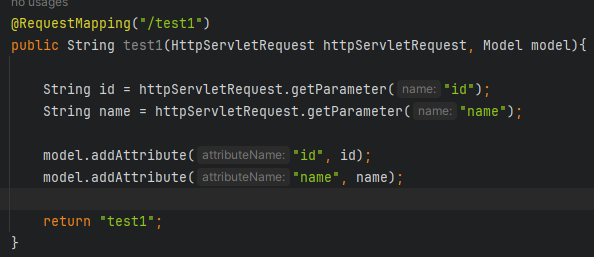
👉 request parameter, 서블릿에서 통으로 들어옴 , jsp 처럼 쓰는 것인데 Spring에서는 이렇게 안쓴다.
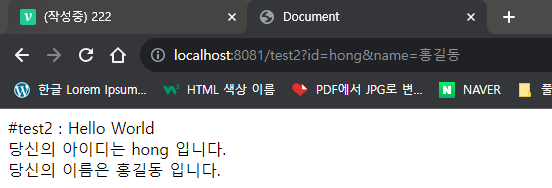
test2
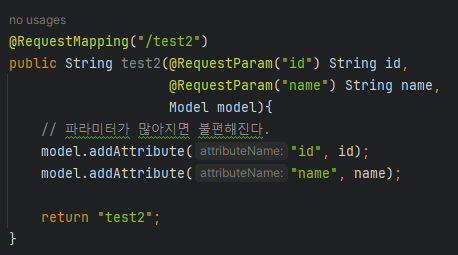
👉 request parameter. 서블릿에서 분리해서 변수명과 맞춰서 입력
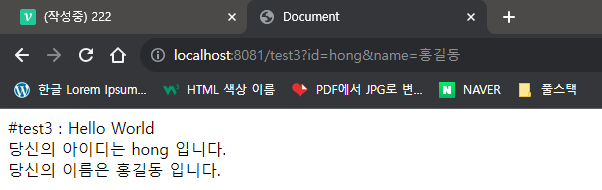
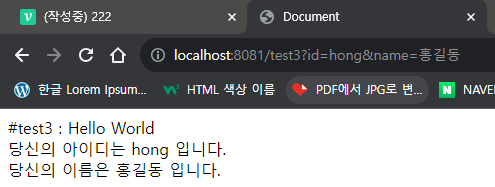
⚡test3⚡
👉 member.set
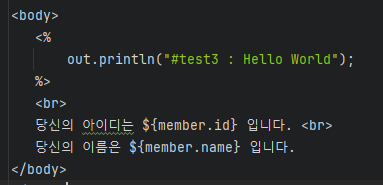
👉 member.get
👉 Member 클래스의 id와 name을 get, set(public)으로 http://localhost:8081/test3?id=hong&name=홍길동 에 갖다 쓴다
즉, 데이터 클래스를 만들어서 바로 갖다 쓰는 것. 제일 많이 사용하는 방법이다. Data가 들어가는 경우, 4번 방법과 같이 사용되는 경우 더 길어진다
test4
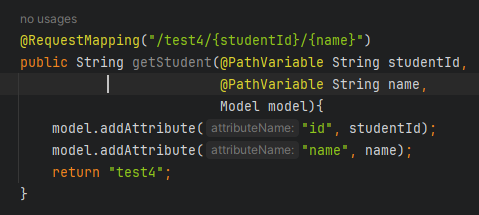
👉 Model 객체를 사용, 3번보다 길어져 안쓸 것 같지만, list 같은 것들을 보낼 때 사용한다. 3, 4번 방법을 알아두고 있자.
📖롬복 사용하기
Getter,Setter같은 코드들을@로 자동으로 만들어 주는 유틸리티 라이브
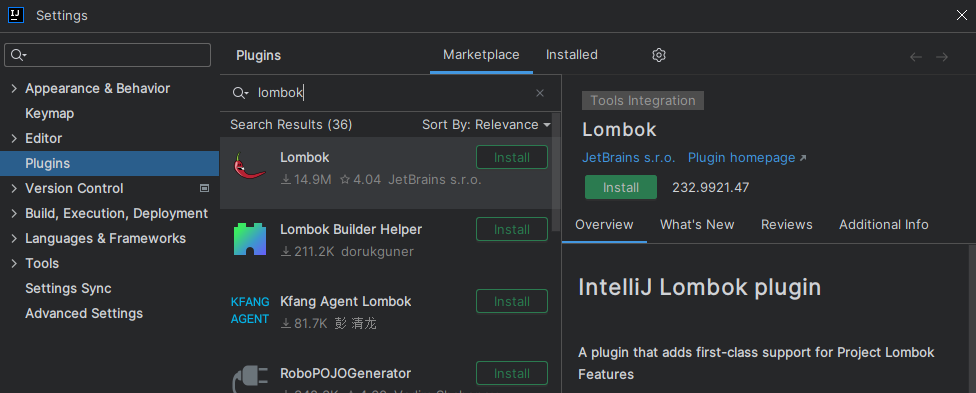
👉 플러그인에서 설치
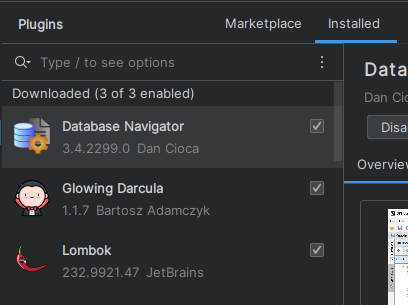
👉 설치 완료
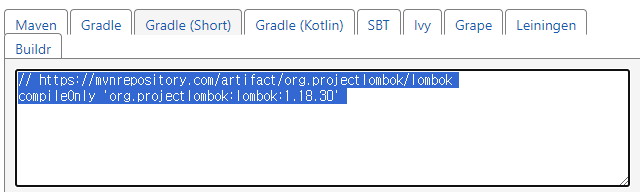
compileOnly 'org.projectlombok:lombok'
    annotationProcessor 'org.projectlombok:lombok'
👉 annotationProcessor 'org.projectlombok:lombok' 을 넣어줘야 @ 를 쓸 수 있다
plugins {
    id 'java'
    id 'org.springframework.boot' version '3.2.0'
    id 'io.spring.dependency-management' version '1.1.4'
}

group = 'com.form'
version = '1.0-SNAPSHOT'

repositories {
    mavenCentral()
}

dependencies {
    implementation 'org.springframework.boot:spring-boot-starter-web'
    testImplementation 'org.springframework.boot:spring-boot-starter-test'
    testImplementation platform('org.junit:junit-bom:5.9.1')
    testImplementation 'org.junit.jupiter:junit-jupiter'
    implementation 'jakarta.servlet.jsp.jstl:jakarta.servlet.jsp.jstl-api:3.0.0'
    compileOnly 'jakarta.servlet:jakarta.servlet-api:6.0.0'
    implementation 'org.glassfish.web:jakarta.servlet.jsp.jstl:3.0.1'
    implementation 'org.apache.tomcat:tomcat-jasper:10.1.16'
    compileOnly 'org.projectlombok:lombok'
    annotationProcessor 'org.projectlombok:lombok'
}

test {
    useJUnitPlatform()
}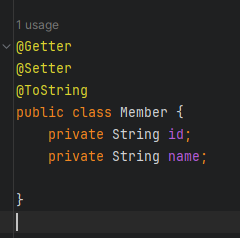
👉 Member 클래스, get set 삭제 후 @ 로 간단하게 사용 가능하다 이것도 귀찮다?
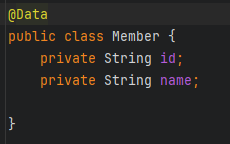
👉 @Data
//
// Source code recreated from a .class file by IntelliJ IDEA
// (powered by FernFlower decompiler)
//

package com.form;

public class Member {
    private String id;
    private String name;

    public Member() {
    }

    public String getId() {
        return this.id;
    }

    public String getName() {
        return this.name;
    }

    public void setId(final String id) {
        this.id = id;
    }

    public void setName(final String name) {
        this.name = name;
    }

    public boolean equals(final Object o) {
        if (o == this) {
            return true;
        } else if (!(o instanceof Member)) {
            return false;
        } else {
            Member other = (Member)o;
            if (!other.canEqual(this)) {
                return false;
            } else {
                Object this$id = this.getId();
                Object other$id = other.getId();
                if (this$id == null) {
                    if (other$id != null) {
                        return false;
                    }
                } else if (!this$id.equals(other$id)) {
                    return false;
                }

                Object this$name = this.getName();
                Object other$name = other.getName();
                if (this$name == null) {
                    if (other$name != null) {
                        return false;
                    }
                } else if (!this$name.equals(other$name)) {
                    return false;
                }

                return true;
            }
        }
    }

    protected boolean canEqual(final Object other) {
        return other instanceof Member;
    }

    public int hashCode() {
        int PRIME = true;
        int result = 1;
        Object $id = this.getId();
        result = result * 59 + ($id == null ? 43 : $id.hashCode());
        Object $name = this.getName();
        result = result * 59 + ($name == null ? 43 : $name.hashCode());
        return result;
    }

    public String toString() {
        String var10000 = this.getId();
        return "Member(id=" + var10000 + ", name=" + this.getName() + ")";
    }
}
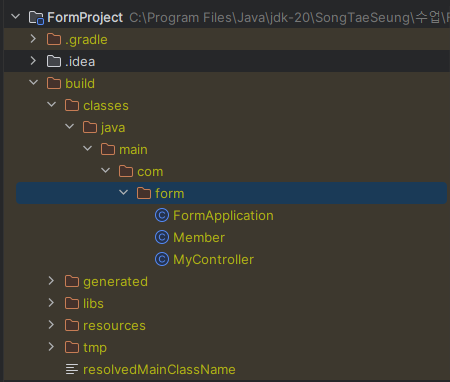
👉 컴파일 시 자동으로 넣어졌다.
📖Validator(유효성 검증) 사용하기
각 필드마다 입력에 대한 값이 유효한지
Spring으로 확인.JSP,HTML(required 등)에서 한 것은 이제 안쓴다.Spring으로 기본 적인 것은 제공해준다
📌폼 데이터의 유효성 검증 validator 프로젝트 생성
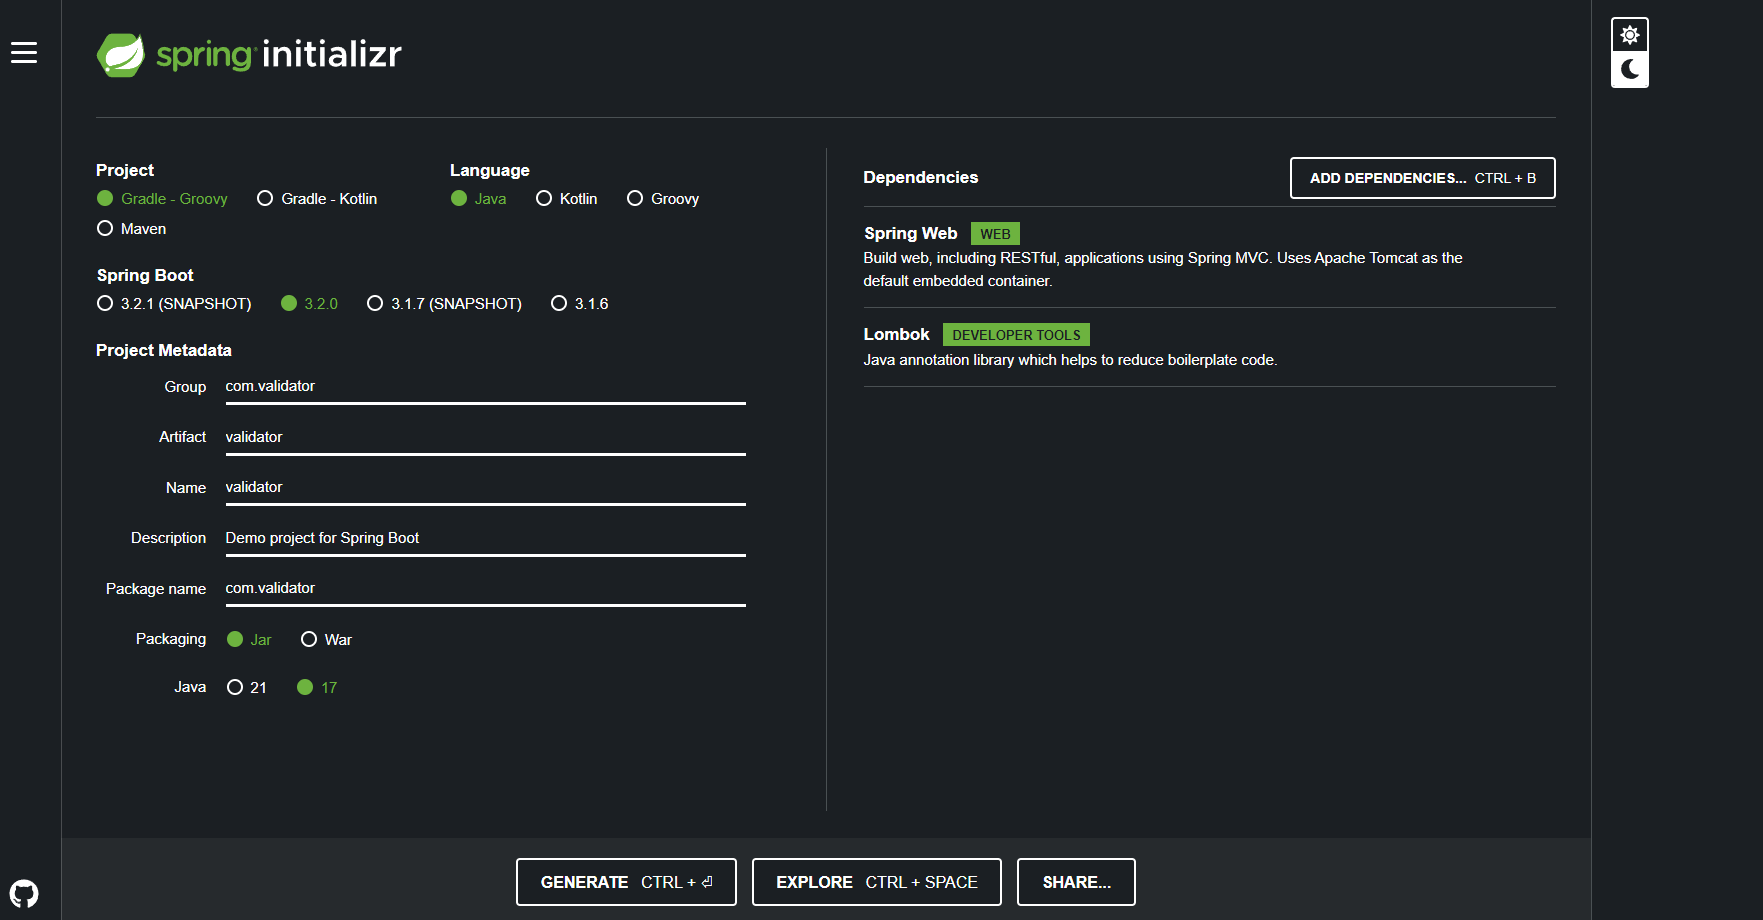
이쯤되면 설정은 알아서 하자..
dependencies {
	implementation 'org.springframework.boot:spring-boot-starter-web'
	compileOnly 'org.projectlombok:lombok'
	annotationProcessor 'org.projectlombok:lombok'
	testImplementation 'org.springframework.boot:spring-boot-starter-test'
	implementation 'jakarta.servlet.jsp.jstl:jakarta.servlet.jsp.jstl-api:3.0.0'
	compileOnly 'jakarta.servlet:jakarta.servlet-api:6.0.0'
	implementation 'org.glassfish.web:jakarta.servlet.jsp.jstl:3.0.1'
	implementation 'org.apache.tomcat:tomcat-jasper:10.1.16'
}server.port=8081
spring.mvc.view.prefix=/WEB-INF/views/
spring.mvc.view.suffix=.jsp

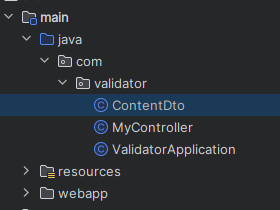
📍Validator 패키지 생성
ContentDto 클래스
package com.validator;
import lombok.Data;
@Data
public class ContentDto {
private int id;
private String writer;
private String content;
}
ContentValidator 클래스
package com.validator;
import org.springframework.validation.Errors;
import org.springframework.validation.Validator;
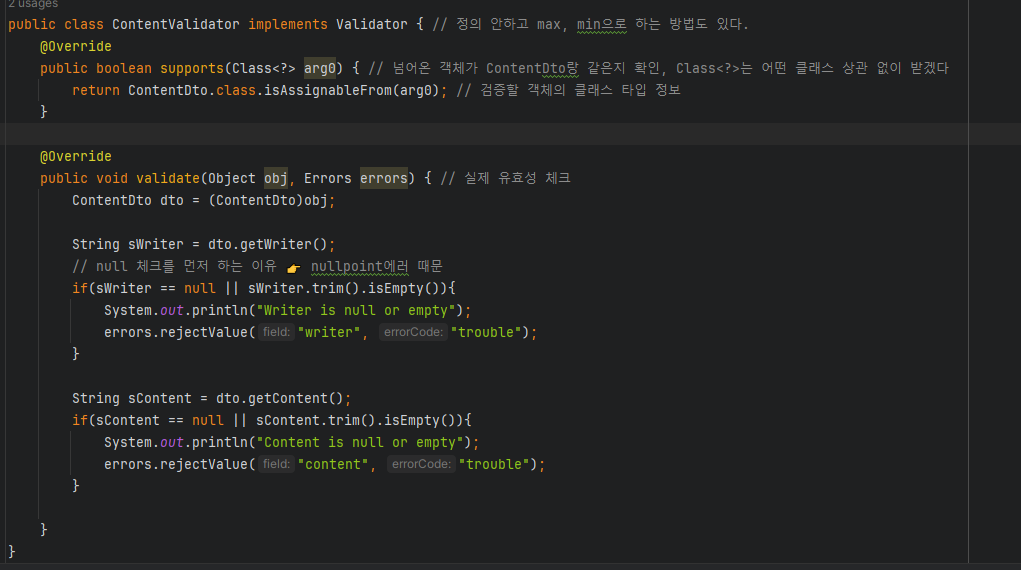
public class ContentValidator implements Validator { // 정의 안하고 max, min으로 하는 방법도 있다.
@Override
public boolean supports(Class<?> arg0) { // 넘어온 객체가 ContentDto랑 같은지 확인, Class<?>는 어떤 클래스 상관 없이 받겠다
return ContentDto.class.isAssignableFrom(arg0); // 검증할 객체의 클래스 타입 정보
}
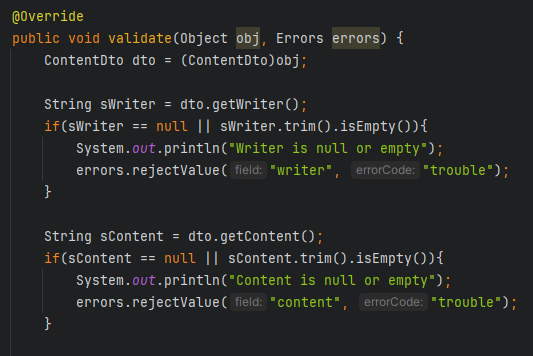
@Override
public void validate(Object obj, Errors errors) { // 실제 유효성 체크
ContentDto dto = (ContentDto)obj;
String sWriter = dto.getWriter();
// null 체크를 먼저 하는 이유 👉 nullpoint에러 때문
if(sWriter == null || sWriter.trim().isEmpty()){
System.out.println("Writer is null or empty");
errors.rejectValue("writer", "trouble");
}
String sContent = dto.getContent();
if(sContent == null || sContent.trim().isEmpty()){
System.out.println("Content is null or empty");
errors.rejectValue("content", "trouble");
}
}
}
MyController 클래스
package com.validator;
import org.springframework.stereotype.Controller;
import org.springframework.validation.BindingResult;
import org.springframework.web.bind.annotation.ModelAttribute;
import org.springframework.web.bind.annotation.RequestMapping;
import org.springframework.web.bind.annotation.ResponseBody;
@Controller
public class MyController {
@RequestMapping("/")
public @ResponseBody String root(){
return "Validator (1)";
}
@RequestMapping("/insertForm")
public String insert1(){
return "createPage";
}
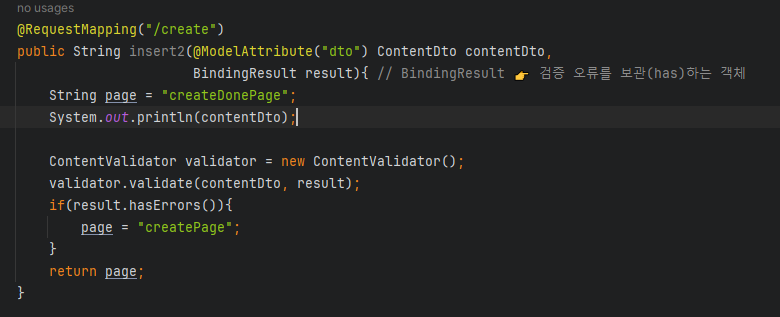
@RequestMapping("/create")
public String insert2(@ModelAttribute("dto") ContentDto contentDto,
BindingResult result){ // BindingResult 👉 검증 오류를 보관(has)하는 객체
String page = "createDonePage";
System.out.println(contentDto);
ContentValidator validator = new ContentValidator();
validator.validate(contentDto, result);
if(result.hasErrors()){
page = "createPage";
}
return page;
}
}
createPage.jsp
<%@ page language="java" contentType="text/html; charset=UTF-8"
pageEncoding="UTF-8" %>
<%@ taglib prefix="c" uri="http://java.sun.com/jsp/jstl/core" %>
<!DOCTYPE html>
<html lang="ko">
<head>
<meta http-equiv="Content-Type" content="text/html"; charset="UTF-8">
<title>Document</title>
</head>
<body>
createPage.jsp
<br />
<%
String conPath = request.getContextPath();
%>
<form action="<%= conPath %>/create">
작성자 : <input type="text" name="writer" value="${dto.writer}"> <br /> 👉 (@ModelAttribute("dto")
내 용 : <input type="text" name="content" value="${dto.content}"> <br /> 👉 (@ModelAttribute("dto")
<input type="submit" value="전송"> <br />
</form>
</body>
</html>createDonePage.jsp
<%@ page language="java" contentType="text/html; charset=UTF-8"
pageEncoding="UTF-8" %>
<%@ taglib prefix="c" uri="http://java.sun.com/jsp/jstl/core" %>
<!DOCTYPE html>
<html lang="ko">
<head>
<meta http-equiv="Content-Type" content="text/html"; charset="UTF-8">
<title>Document</title>
</head>
<body>
createDonePage.jsp
<br />
이 름 : ${dto.writer} <br />
내 용 : ${dot.content}
</body>
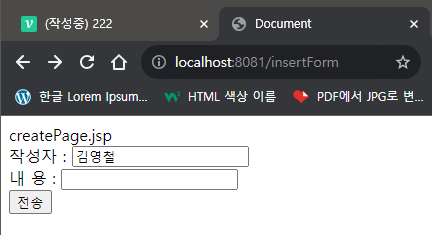
</html>📍결과

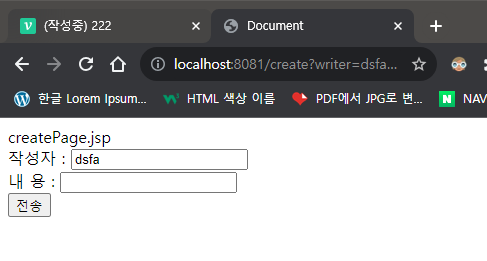
👉 전송 클릭, createPage

👉 잘 넘어 왔다. createDonePage
👉 내용이 입력 되지 않았을 때 유효성 검사
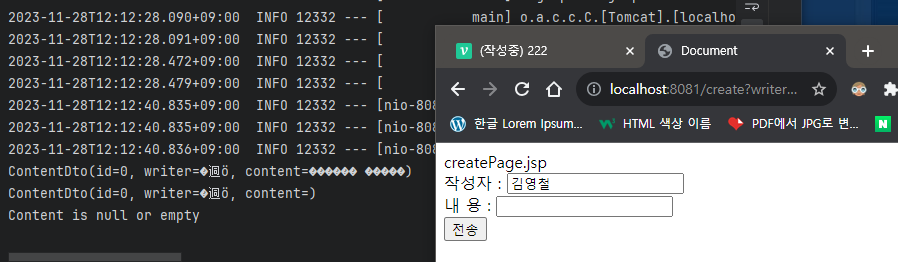

👉 createDonePage 로 넘어가지 않고 console 창에 다음이 출력된다
❓어떤 구조로 실행?
구조는 계속 비슷하니까 새로 나운 내용 위주
유효성 검사 :
Validator,BindingResult
👉createPage에서 유효성 검사를 한다.
BindingResult: 검증 오류를 보관(has)하는 객체
📖ValidationUtils 사용하기
📌ValidationUtils 사용하기 프로젝트
복붙해서 이름 바꾸자
👉 변경
서버 실행 잘 된다

📍ContentValidator 클래스 수정
package com.validator;
import org.springframework.validation.Errors;
import org.springframework.validation.ValidationUtils;
import org.springframework.validation.Validator;
public class ContentValidator implements Validator { // 정의 안하고 max, min으로 하는 방법도 있다.
@Override
public boolean supports(Class<?> arg0) { // 넘어온 객체가 ContentDto랑 같은지 확인, Class<?>는 어떤 클래스 상관 없이 받겠다
return ContentDto.class.isAssignableFrom(arg0); // 검증할 객체의 클래스 타입 정보
}
@Override
public void validate(Object obj, Errors errors) { // 실제 유효성 체크
ContentDto dto = (ContentDto)obj;
ValidationUtils.rejectIfEmptyOrWhitespace(errors, "writer", "writer is empty");
String sWriter = dto.getWriter();
if(sWriter.length() < 3){
errors.rejectValue("writer", "writer is to short");
}
ValidationUtils.rejectIfEmptyOrWhitespace(errors , "content", "contetn is empty");
}
}
📍MyController 클래스 수정
package com.validator;
import org.springframework.stereotype.Controller;
import org.springframework.validation.BindingResult;
import org.springframework.web.bind.annotation.ModelAttribute;
import org.springframework.web.bind.annotation.RequestMapping;
import org.springframework.web.bind.annotation.ResponseBody;
@Controller
public class MyController {
@RequestMapping("/")
public @ResponseBody String root(){
return "Validator (2)";
}
@RequestMapping("/insertForm")
public String insert1(){
return "createPage";
}
@RequestMapping("/create")
public String insert2(@ModelAttribute("dto") ContentDto contentDto,
BindingResult result){ // BindingResult 👉 검증 오류를 보관(has)하는 객체
String page = "createDonePage";
System.out.println(contentDto);
ContentValidator validator = new ContentValidator();
validator.validate(contentDto, result);
if(result.hasErrors()){
System.out.println("getAllErros : " + result.getAllErrors());
if(result.getFieldError("writer") != null){
System.out.println("1. writer : " + result.getFieldError("writer").getCode());
}
if(result.getFieldError("content") != null){
System.out.println("2. content : " + result.getFieldError("content").getCode());
}
page = "createPage";
}
return page;
}
}
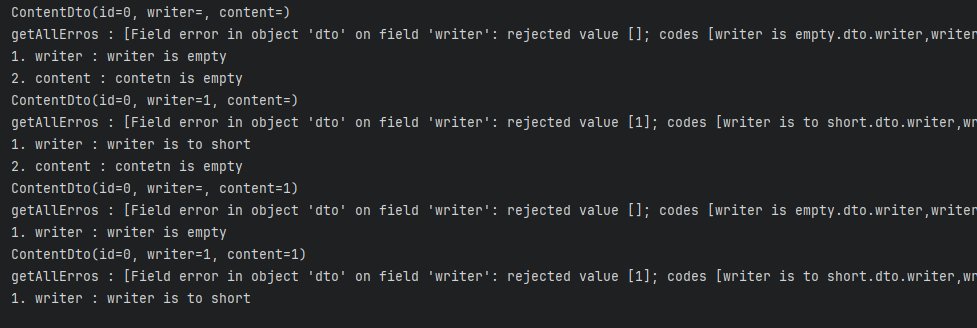
📍결과
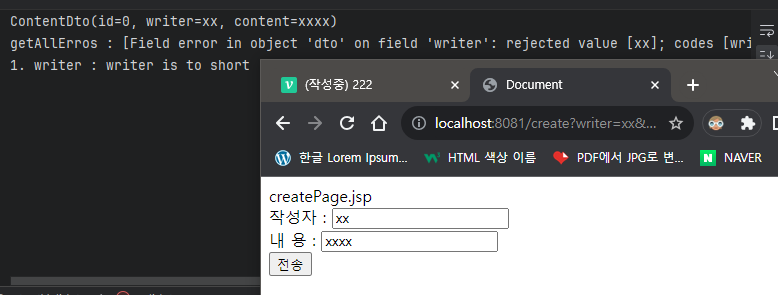
👉 작성자 길이가 3보다 작을 때 에러
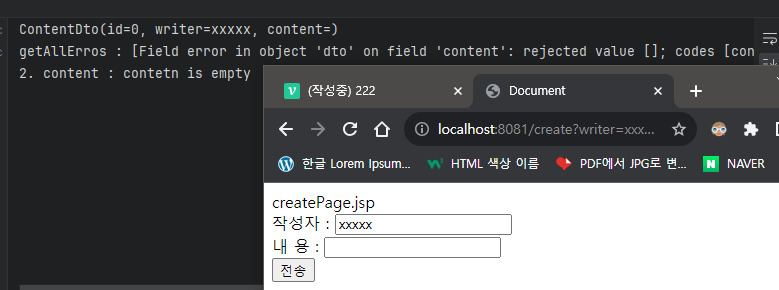
👉 내용 입력 안했을 때 에러
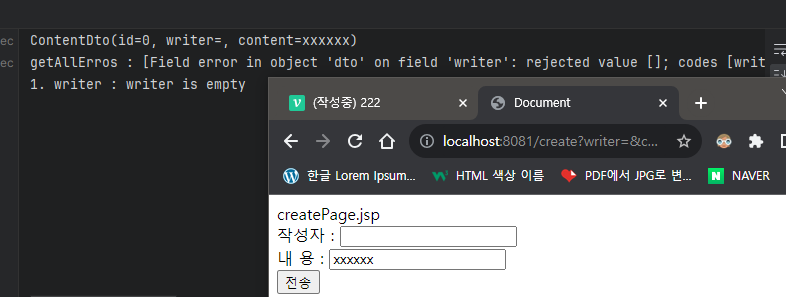
👉 작성자 입력 안했을 때 에러
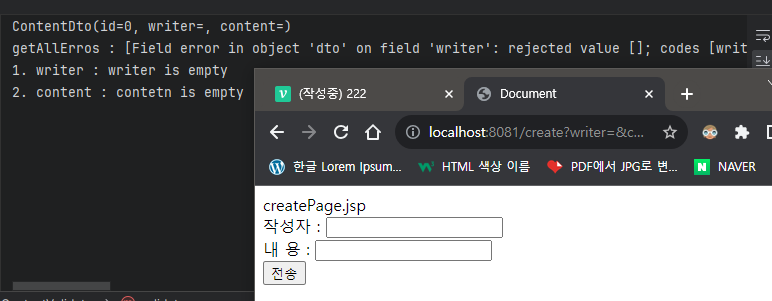
👉 둘 다 입력 안했을 때 에러
📖initBinder 사용하기
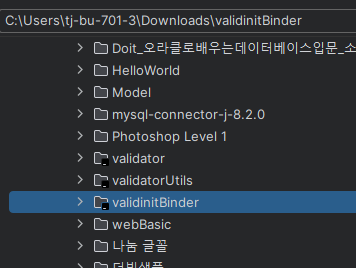
📌validinitBinder 프로젝트 생성
validatorUtils복붙해서 폴더 만들고 프로젝트 생성
implementation 'org.springframework.boot:spring-boot-starter-validation'👉 추가
📍MyController 클래스 수정 및 추가
package com.validator;
import jakarta.validation.Valid;
import org.springframework.stereotype.Controller;
import org.springframework.validation.BindingResult;
import org.springframework.web.bind.WebDataBinder;
import org.springframework.web.bind.annotation.InitBinder;
import org.springframework.web.bind.annotation.ModelAttribute;
import org.springframework.web.bind.annotation.RequestMapping;
import org.springframework.web.bind.annotation.ResponseBody;
@Controller
public class MyController {
@RequestMapping("/")
public @ResponseBody String root(){
return "Validator (3)";
}
@RequestMapping("/insertForm")
public String insert1(){
return "createPage";
}
@RequestMapping("/create")
public String insert2(@ModelAttribute("dto") @Valid ContentDto contentDto,
BindingResult result){ // BindingResult 👉 검증 오류를 보관(has)하는 객체
String page = "createDonePage";
System.out.println(contentDto);
if(result.hasErrors()){
System.out.println("getAllErros : " + result.getAllErrors());
if(result.getFieldError("writer") != null){
System.out.println("1. writer : " + result.getFieldError("writer").getCode());
}
if(result.getFieldError("content") != null){
System.out.println("2. content : " + result.getFieldError("content").getCode());
}
page = "createPage";
}
return page;
}
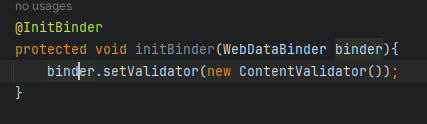
@InitBinder
protected void initBinder(WebDataBinder binder){
binder.setValidator(new ContentValidator());
}
}
👉 validatorUtils 와 에러가 똑같이 발생한다.
❓어떤 구조로 동작?
👉@Valid사용가능, 유효성 검증이 필요한 객체임을 지정
👉@Valid붙은 애들만 검사.@Valid붙은 유효성 검증이 필요하다고 한 객체를 가져오기전에 수행해야할method를 지정
👉@Valid ContentDto contentDto
👉ContentDto와 일치 하므로
👉 실행


📖@Valid 사용하기
📌validAnnotation 프로젝트 생성

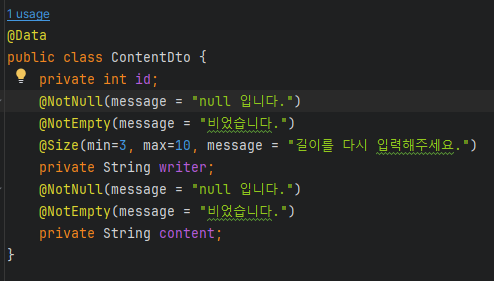
📍ContentDto 클래스 수정
package com.validator;
import jakarta.validation.constraints.NotEmpty;
import jakarta.validation.constraints.NotNull;
import jakarta.validation.constraints.Size;
import lombok.Data;
@Data
public class ContentDto {
private int id;
@NotNull(message = "null 입니다.")
@NotEmpty(message = "비었습니다.")
@Size(min=3, max=10, message = "길이를 다시 입력해주세요.")
private String writer;
@NotNull(message = "null 입니다.")
@NotEmpty(message = "비었습니다.")
private String content;
}
📍MyController 수정
package com.validator;
import jakarta.validation.Valid;
import org.springframework.stereotype.Controller;
import org.springframework.validation.BindingResult;
import org.springframework.web.bind.WebDataBinder;
import org.springframework.web.bind.annotation.InitBinder;
import org.springframework.web.bind.annotation.ModelAttribute;
import org.springframework.web.bind.annotation.RequestMapping;
import org.springframework.web.bind.annotation.ResponseBody;
@Controller
public class MyController {
@RequestMapping("/")
public @ResponseBody String root(){
return "Validator (4)";
}
@RequestMapping("/insertForm")
public String insert1(){
return "createPage";
}
@RequestMapping("/create")
public String insert2(@ModelAttribute("dto") @Valid ContentDto contentDto,
BindingResult result){ // BindingResult 👉 검증 오류를 보관(has)하는 객체
String page = "createDonePage";
System.out.println(contentDto);
if(result.hasErrors()){
System.out.println("getAllErros : " + result.getAllErrors());
if(result.getFieldError("writer") != null){
System.out.println("1. writer : " + result.getFieldError("writer").getDefaultMessage());
}
if(result.getFieldError("content") != null){
System.out.println("2. content : " + result.getFieldError("content").getDefaultMessage());
}
page = "createPage";
}
return page;
}
}
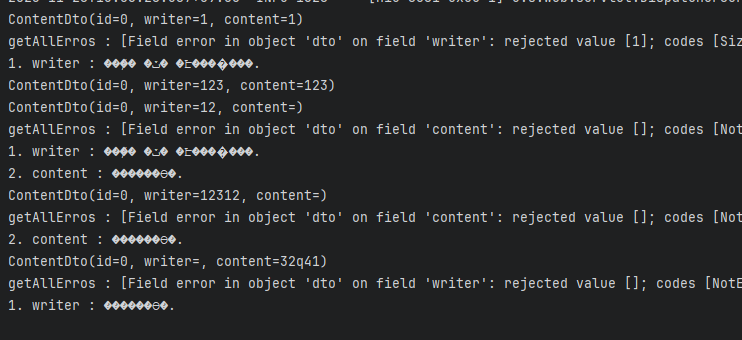
👉 한글이라 깨지는 것이지 유효성 검사는 잘 되고 있다. 코드가 계속해서 간결해 진다.
❓어떤 구조로 실행?
순서로 실행 된다.


📖JdbcTemplate 사용하기
어렵고 복잡하다
📌JDBC 프로젝트 생성

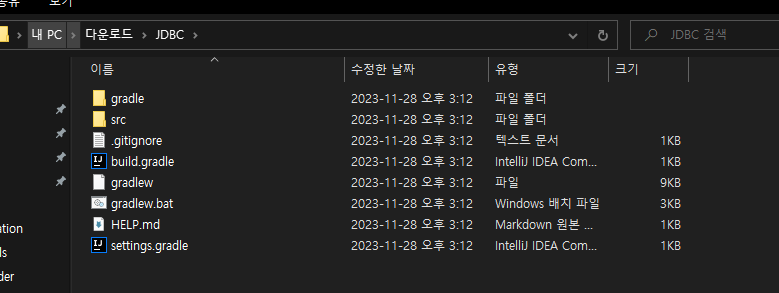
dependencies {
implementation 'org.springframework.boot:spring-boot-starter-web'
compileOnly 'org.projectlombok:lombok'
annotationProcessor 'org.projectlombok:lombok'
testImplementation 'org.springframework.boot:spring-boot-starter-test'
implementation 'jakarta.servlet.jsp.jstl:jakarta.servlet.jsp.jstl-api:3.0.0'
compileOnly 'jakarta.servlet:jakarta.servlet-api:6.0.0'
implementation 'org.glassfish.web:jakarta.servlet.jsp.jstl:3.0.1'
implementation 'org.apache.tomcat:tomcat-jasper:10.1.16'
implementation 'org.springframework.boot:spring-boot-starter-validation'
implementation 'org.springframework.boot:spring-boot-starter-jdbc:3.2.0'
implementation 'mysql:mysql-connector-java:8.0.33'
}
MySQL 연동하기
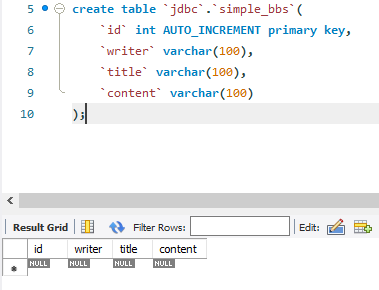
👉 jdbc 스키마 생성

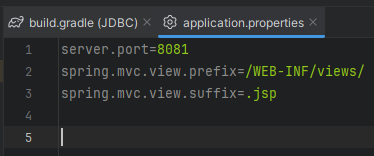
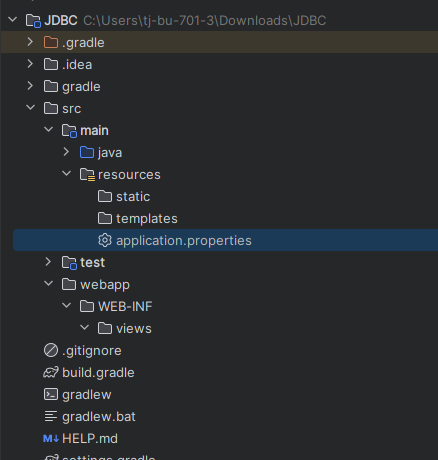
📍application.properties
server.port=8081
spring.mvc.view.prefix=/WEB-INF/views/
spring.mvc.view.suffix=.jsp
spring.datasource.driver-class-name=com.mysql.cj.jdbc.Driver
spring.datasource.url=jdbc:mysql://localhost:3306/jdbc
spring.datasource.username=root
spring.datasource.password=1234📍DTO, DAO 추가
MyUserDTO 클래스
package com.JDBC;

import lombok.Data;

@Data
public class MyUserDTO {
    private String id;
    private String name;
}
MyUserDAO 클래스
package com.JDBC;
import org.springframework.beans.factory.annotation.Autowired;
import org.springframework.jdbc.core.BeanPropertyRowMapper;
import org.springframework.jdbc.core.JdbcTemplate;
import org.springframework.stereotype.Repository;
import java.util.List;
@Repository // 저장소
public class MyUserDAO {
@Autowired
private JdbcTemplate jdbcTemplate;
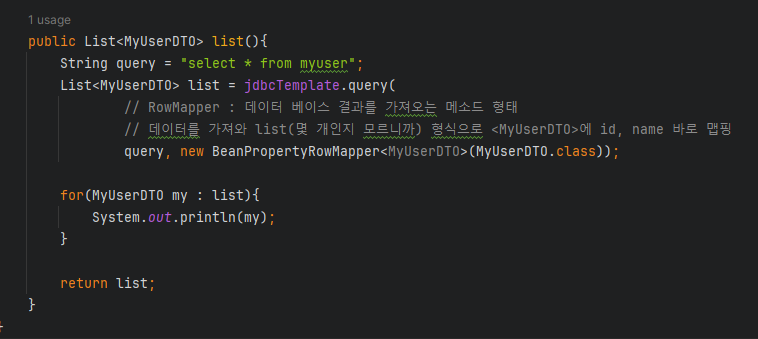
public List<MyUserDTO> list(){
String query = "select * from myuser";
List<MyUserDTO> list = jdbcTemplate.query(query,
new BeanPropertyRowMapper<MyUserDTO>(MyUserDTO.class));
return list;
}
}
MyController 클래스
package com.JDBC;
import org.springframework.beans.factory.annotation.Autowired;
import org.springframework.stereotype.Controller;
import org.springframework.ui.Model;
import org.springframework.web.bind.annotation.GetMapping;
import org.springframework.web.bind.annotation.RequestMapping;
import org.springframework.web.bind.annotation.RequestMethod;
import org.springframework.web.bind.annotation.ResponseBody;
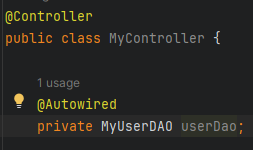
@Controller
public class MyController {
@Autowired
private MyUserDAO userDao;
@RequestMapping("/")
public @ResponseBody String root(){
return "JdbcTemplate 사용하기";
}
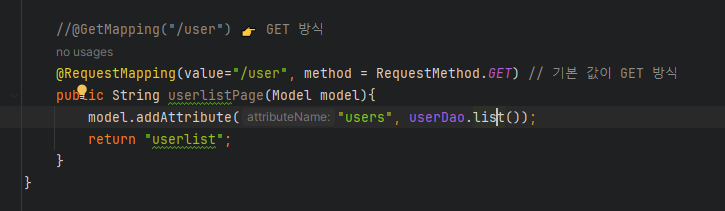
//@GetMapping("/user") 👉 GET 방식
@RequestMapping(value="/user", method = RequestMethod.GET) // 기본 값이 GET 방식
public String userlistPage(Model model){
model.addAttribute("users", userDao.list());
return "userlist";
}
}
userlist.jsp
<%@ page language="java" contentType="text/html; charset=UTF-8"
pageEncoding="UTF-8" %>
<%@ taglib prefix="c" uri="http://java.sun.com/jsp/jstl/core" %>
<!DOCTYPE html>
<html lang="ko">
<head>
<meta http-equiv="Content-Type" content="text/html"; charset="UTF-8">
<title>Document</title>
</head>
<body>
<%
out.println("JdbcTemplate : Hello World")
%>
<br>
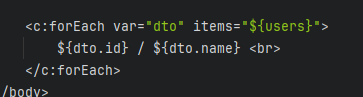
<c:forEach var="dto" items="${users}">
${dto.id} / ${dto.name} <br>
</c:forEach>
</body>
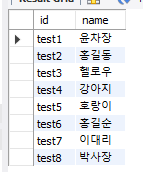
</html>jdbc 테이블 생성
CREATE TABLE `jdbc`.`myuser` (
	`id` VARCHAR(30) NULL,
	`name` VARCHAR(45) NULL
    );
insert into myuser values('test1', '윤차장');
insert into myuser values('test2', '홍길동');
insert into myuser values('test3', '헬로우');
insert into myuser values('test4', '강아지');
insert into myuser values('test5', '호랑이');
insert into myuser values('test6', '홍길순');
insert into myuser values('test7', '이대리');
insert into myuser values('test8', '박사장');👉 값 넣어주기
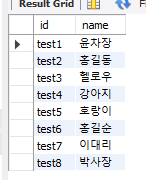
📍결과
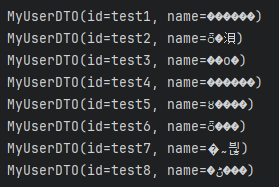
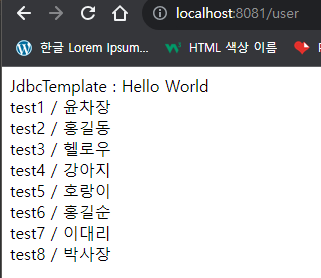
❓어떤 구조로 실행?
JDBC 연결
DAO
👉resultset,pstmt등 반복적으로 쓸 필요 없이jdbcTemplate하나면 다 된다.
👉 저장소 역할을 하며 쿼리문을 실행한다.BeanPropertyRowMapper로 데이터를 맵핑해서 가져온다MyController
👉 객체 어떻게 쓴거지? 👉@Autowired로 컨테이너에서 가져온 것. 자바를 알고 이해하여 쓰자
👉BeanPropertyRowMapper로 데이터를 맵핑해서 가져온list를users에 넣는다

📖🔥간단한 게시판 만들기🔥
📌simpleBBS 프로젝트 생성
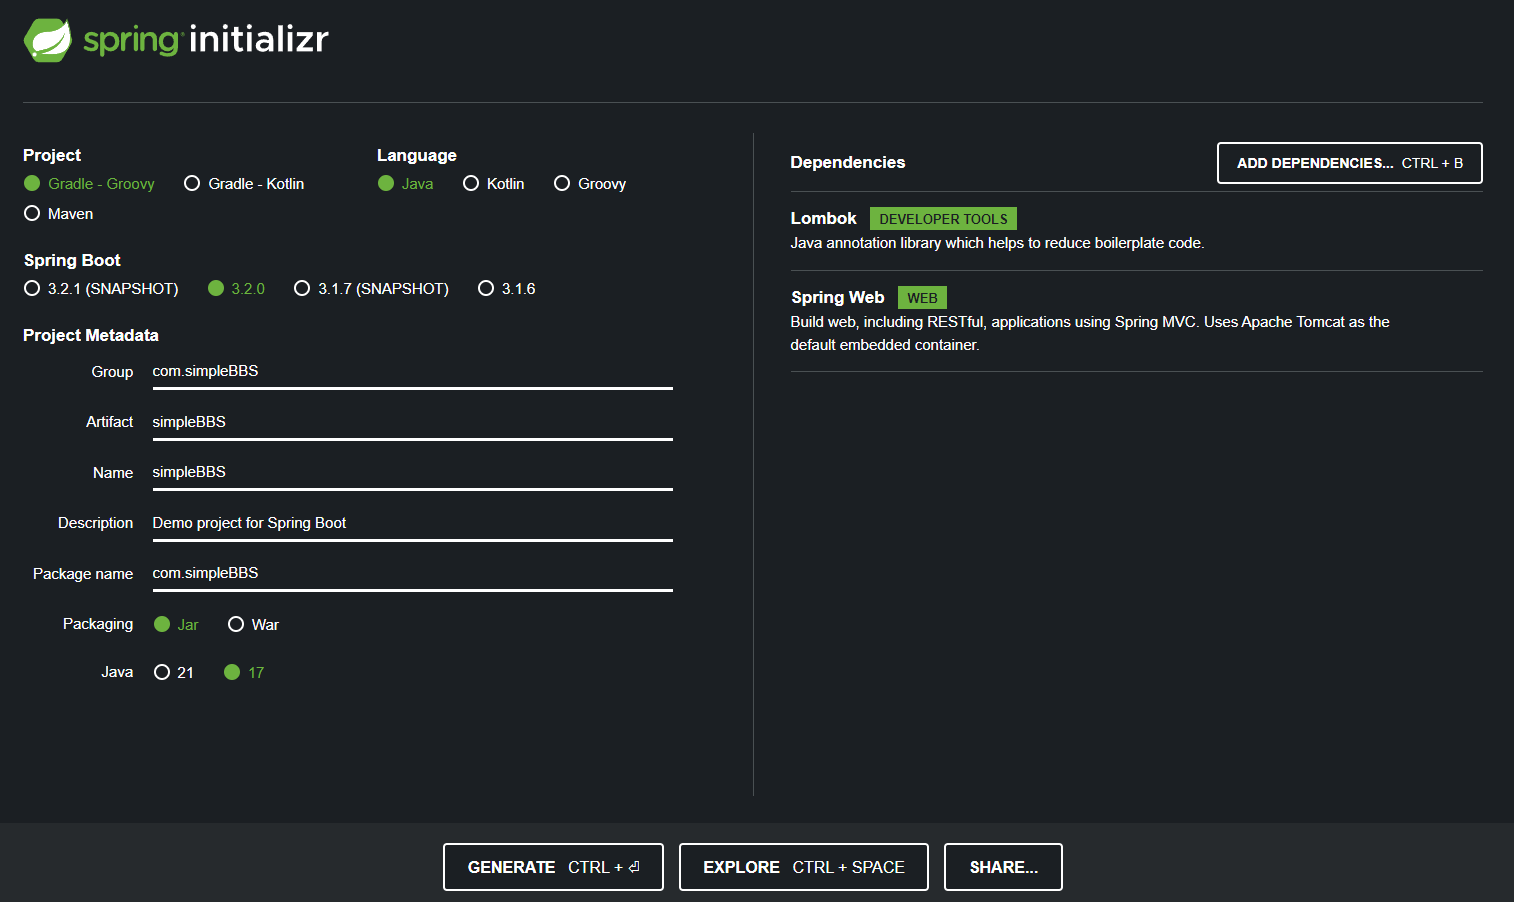
👉 방금 한 JDBC 관련 내용들 추가해주면 된다
📍border 패키지
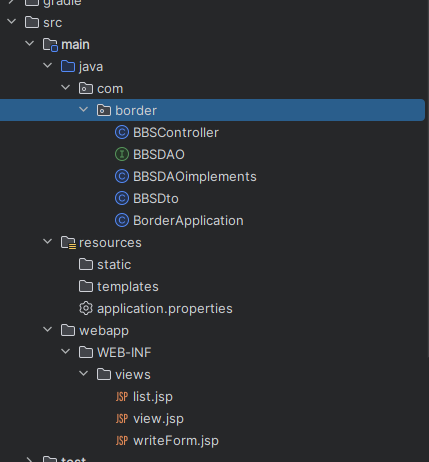
BBSDto 클래스
package com.border;

import lombok.Data;

@Data
public class BBSDto {
    private int id;
    private String writer;
    private String title;
    private String content;

}
BBSDAO 인터페이스
package com.border;

import java.util.List;

public interface BBSDAO {
    // 메소드(재정의) : 상속 받으려면 재정의 해
    public List<BBSDto> listDao();
    public BBSDto viewDao(String id);
    public int writeDao(BBSDto bbsDto);
    public int deleteDao(String id);
}
BBSDAOimplements 클래스 (책에서 중복되는 부분, 길어지는 부분 변경)
package com.border;

import org.springframework.beans.factory.annotation.Autowired;
import org.springframework.jdbc.core.BeanPropertyRowMapper;
import org.springframework.jdbc.core.JdbcTemplate;
import org.springframework.stereotype.Repository;

import java.util.List;

// 상속받는 DAO, 오버라이딩/어캐스팅해서 사용한다.
@Repository
public class BBSDAOimplements implements BBSDAO {  // 앞으로 BBSDAO만 사용
    @Autowired
    JdbcTemplate template;

    @Override
    public List<BBSDto> listDao(){
        System.out.println("listDao()");

        String query = "select * from simple_bbs order by id desc";
        List<BBSDto> dtos = template.query(
                query,
                new BeanPropertyRowMapper<BBSDto>(BBSDto.class)
        );

        return dtos;
    }

    @Override
    public BBSDto viewDao(String id){
        System.out.println("viewDao()");

        String query = "select * from simple_bbs where id = " + id;
        BBSDto dto = template.queryForObject( //객체 하나 나옴
                query,
                new BeanPropertyRowMapper<BBSDto>(BBSDto.class)
        );
        return dto;
    }

    @Override
    public int writeDao(BBSDto bbsDto){
        System.out.println("writeDao()");

        String query = "insert into simple_bbs(writer, title, content)"
                + "values(?,?,?)";

        return template.update(query, bbsDto.getWriter(), bbsDto.getTitle(), bbsDto.getContent()); // 값 하나 리턴
    }

    @Override
    public int deleteDao(String id){
        System.out.println("deleteDao()");

        String query = "delete from simple_bbs where id = " + Integer.parseInt(id);
        return template.update(query);
    }
}
BBSController 클래스
package com.border;
import jakarta.servlet.http.HttpServletRequest;
import org.springframework.beans.factory.annotation.Autowired;
import org.springframework.stereotype.Controller;
import org.springframework.ui.Model;
import org.springframework.web.bind.annotation.RequestMapping;
import org.springframework.web.bind.annotation.RequestMethod;
import org.springframework.web.bind.annotation.RequestParam;
@Controller
public class BBSController {
@Autowired // 자식인 객체
BBSDAO bbsdao;
@RequestMapping("/")
public String root(){
return "redirect:list";
}
@RequestMapping("/list")
public String userListPage(Model model){
model.addAttribute("list", bbsdao.listDao());
return "list";
}
@RequestMapping("/view")
public String view(@RequestParam("id") String id, Model model){
model.addAttribute("dto", bbsdao.viewDao(id));
return "view";
}
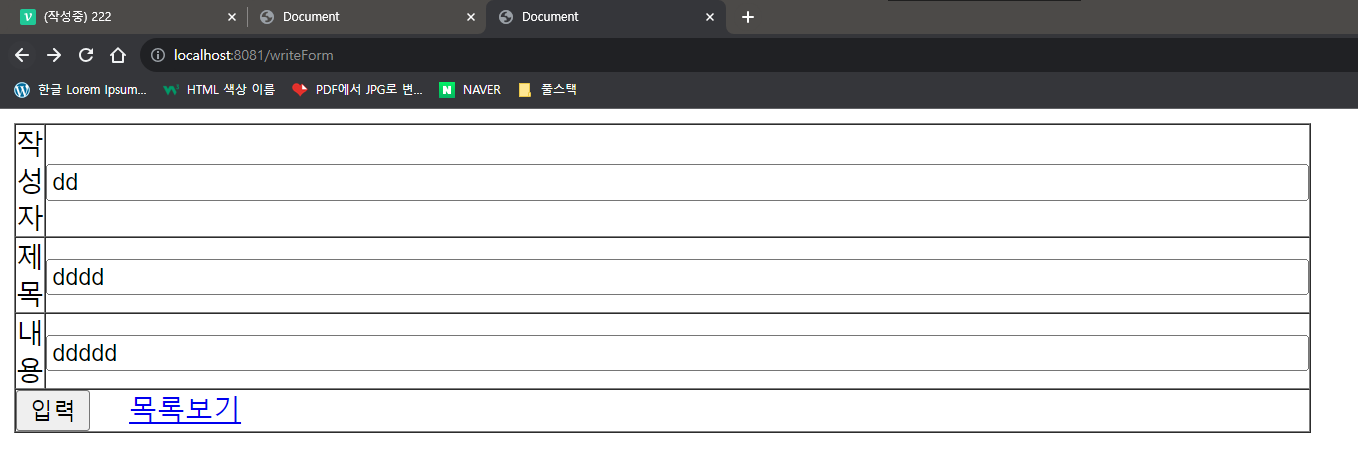
@RequestMapping("/writeForm")
public String writeForm(){
return "writeForm"; // 화면만 나온다
}
@RequestMapping(value = "/write", method = RequestMethod.POST) // POST 방식으로 보낸다
public String write(Model model, BBSDto bbsDto){ //HttpRequest 필요없이 BBSDto에 담으면 된다
bbsdao.writeDao(bbsDto);
return "redirect:list";
}
@RequestMapping("/delete")
public String delete(@RequestParam("id") String id){
bbsdao.deleteDao(id);
return "redirect:list";
}
}
list.jsp
<%@ page language="java" contentType="text/html; charset=UTF-8"
  pageEncoding="UTF-8" %>
<%@ taglib prefix="c" uri="http://java.sun.com/jsp/jstl/core" %>
<!DOCTYPE html>
<html lang="ko">
<head>
    <meta http-equiv="Content-Type" content="text/html"; charset="UTF-8">
    <title>게시판</title>
</head>
<body>
    <table width="500" cellpadding="0" cellspacing="0" border="1">
            <tr>
                <th>번 호</th>
                <th>작성자</th>
                <th>제 목</th>
                <th>삭 제</th>
            </tr>
            <tr>
                <c:forEach items="${list}" var="dto">
            </tr>
            <tr>
                <td>${dto.id}</td>
                <td>${dto.writer}</td>
                <td><a href="view?id=${dto.id}">${dto.title}</a></td>
                <td><a href="delete?id=${dto.id}">X</a></td>
            </tr>
            <tr>
                </c:forEach>
            </tr>
    </table>

    <p><a href="writeForm">글 작성</a></p>
</body>
</html>
writeForm.jsp
<%@ page language="java" contentType="text/html; charset=UTF-8"
  pageEncoding="UTF-8" %>
<%@ taglib prefix="c" uri="http://java.sun.com/jsp/jstl/core" %>
<!DOCTYPE html>
<html lang="ko">
<head>
    <meta http-equiv="Content-Type" content="text/html"; charset="UTF-8">
    <title>Document</title>
</head>
<body>
    내용보기 <br>

    <hr>

    작성자 : ${dto.writer} <br>
    제 목 : ${dto.title} <br>
    내 용 : ${dto.content} <br>

    <hr>

    <br><p>
        <a href="list">목록보기</a>
    </p>
</body>
</html>
view.jsp
<%@ page language="java" contentType="text/html; charset=UTF-8"
pageEncoding="UTF-8" %>
<%@ taglib prefix="c" uri="http://java.sun.com/jsp/jstl/core" %>
<!DOCTYPE html>
<html lang="ko">
<head>
<meta http-equiv="Content-Type" content="text/html"; charset="UTF-8">
<title>Document</title>
</head>
<body>
<table width="500" cellpadding="0" cellspacing="0" border="1">
<form action="write" method="post">
<tr>
<td>작성자</td>
<td><input type="text" name="writer" size="100"></td>
</tr>
<tr>
<td>제 목</td>
<td><input type="text" name="title" size="100"></td>
</tr>
<tr>
<td>내 용</td>
<td><input type="text" name="content" size="100"></td>
</tr>
<tr>
<td colspan="2"><input type="submit" value="입력">
<a href="list">목록보기</a></td>
</tr>
</form>
</table>
</body>
</html>📍결과


👉 삭제