📖쿼리 메소드(Query Method)
Spring Data JPA에서 제공하는 핵심 기능 중 하나로Repository인터페이스에 간단한네이밍 룰에 따라 메소드를 작성하면, 원하는 쿼리를 실행하도록 지원하는 메소드
❗ 네이밍 실수, 띄어쓰기 실수 👉 쿼리문 실행 시 알게 된다. 상용화 할 때 실수를 하게된다면....
find + (엔티티 이름) + By + 변수이름
package com.shop.repository;

import com.shop.entity.Item;
import org.hibernate.cache.spi.support.AbstractReadWriteAccess;
import org.springframework.data.jpa.repository.JpaRepository;

import java.util.List;

// Item에 대한 쿼리문을 날리는 인터페이스. 즉, DAO 역할을 수행하는 Repository 인터페이스
// JpaRepository <Entity 타입, 주키 타입>
public interface ItemRepository extends JpaRepository<Item, Long> { // 인터페이스 상속은 인터페이스만
    // Item 엔티티 인걸 아니까 엔티티 이름 생략, 카멜 표기법
    List<Item> findByItemNm(String itemNm);
    // 👉 select * from item where item_nm = itemnNm; 과 같은 의미!!
    // String itemNm이 변수의 값이 치환 되서 실행
}
📌테스트 상품 조회해보기
package com.shop.repository;

import com.shop.constant.ItemSellStatus;
import com.shop.entity.Item;
import org.junit.jupiter.api.DisplayName;
import org.junit.jupiter.api.Test;
import org.springframework.beans.factory.annotation.Autowired;
import org.springframework.boot.test.context.SpringBootTest;
import org.springframework.test.context.TestPropertySource;

import java.time.LocalDateTime;
import java.util.List;

import static org.junit.jupiter.api.Assertions.*;

// 실제 Application 을 구동할 때 처럼 모든 Bean을 IOC 컨테이너에 생성
@SpringBootTest
// 테스트 코드 실행 시 application.properties 와 겹치는 부분은 우선순위를 갖는다
@TestPropertySource(locations = "classpath:application-test.properties")
class ItemRepositoryTest {
    @Autowired // 자동와이어
    ItemRepository itemRepository;

	@Test // 테스트 메소드
    @DisplayName("상품 저장 테스트") // 테스트 이름 설정
    // "" 안의 내용은 쿼리에 저장 되는 것으로
    // 그 아래 작성 코드 부터는 오타, 공백 전부 맞춰야 한다
    public void createItemTest(){
        Item item = new Item();
        item.setItemNm("테스트 상품");
        item.setPrice(10000);
        item.setItemDetail("테스트 상품 상세 설명");
        item.setItemSellStatus(ItemSellStatus.SELL);
        item.setStockNumber(100);
        item.setRegTime(LocalDateTime.now());
        item.setUpdateTime(LocalDateTime.now());
        // itemRepository 👉 save inset 실제 테이블
        // MySQL로 테스트? ❌ 👉 H2로 확인한다(경량화 되어 있어 빠르기 때문에 테스트에 용이)
        Item savedItem = itemRepository.save(item);
        // Object 클래스 상속 받아서 오버라이딩
        System.out.println(savedItem.toString());
    }

    // 위와 일치하게 작성하자. 이 아래부터 계속 쓰여지는 테스트 들도 마찬가지!
    public void createItemList(){
        for (int i = 1 ; i < 10; i++) {
            Item item = new Item();
            item.setItemNm("테스트 상품 " + i);
            item.setPrice(10000 + i);
            item.setItemDetail("테스트 상품 상세 설명 " + i);
            item.setItemSellStatus(ItemSellStatus.SELL);
            item.setStockNumber(100);
            item.setRegTime(LocalDateTime.now());
            item.setUpdateTime(LocalDateTime.now());
            Item savedItem = itemRepository.save(item);
        }
    }
    // 상품의 이름 (= itemNm 컬럼) 값으로 상품을 조회하는 쿼리 메소드 테스트 수행
    // select 결과로 List<Item> 객체를 반환 받음
    @Test
    @DisplayName("상품명 조회 테스트")
    public void findByItemNmTest(){
        this.createItemList();
        List<Item> itemList = itemRepository.findByItemNm("테스트 상품 1");
        for(Item item : itemList){
            System.out.println(item.toString());
        }
    }

}
📍결과
Hibernate:
    select
        i1_0.item_id,
        i1_0.item_detail,
        i1_0.item_nm,
        i1_0.item_sell_status,
        i1_0.price,
        i1_0.reg_time,
        i1_0.stock_number,
        i1_0.update_time
    from
        item i1_0
    where
        i1_0.item_nm=?
Item(id=1, itemNm=테스트 상품 1, price=10001, stockNumber=100, itemDetail=테스트 상품 상세 설명 1, itemSellStatus=SELL, regTime=2023-12-05T11:33:54.524683, updateTime=2023-12-05T11:33:54.524683)
👉 select 쿼리 전달 (where 절에 item_nm 으로 조건을 명시)
📌쿼리 메소드 Sample 및 JPQL snippet
Keyword Sample JPQL snippet Distinct findDistinctByLastnameAndFirstname select distinct … where x.lastname = ?1 and x.firstname = ?2 And findByLastnameAndFirstname … where x.lastname = ?1 and x.firstname = ?2 Or findByLastnameOrFirstname … where x.lastname = ?1 or x.firstname = ?2 Is, Equals findByFirstname, findByFirstnameIs, findByFirstnameEquals … where x.firstname = ?1 Between findByStartDateBetween … where x.startDate between ?1 and ?2 LessThan findByAgeLessThan … where x.age < ?1 LessThanEqual findByAgeLessThanEqual … where x.age <= ?1 GreaterThan findByAgeGreaterThan … where x.age > ?1 GreaterThanEqual findByAgeGreaterThanEqual … where x.age >= ?1 After findByStartDateAfter … where x.startDate > ?1 Before findByStartDateBefore … where x.startDate < ?1 IsNull, Null findByAge(Is)Null … where x.age is null IsNotNull, NotNull findByAge(Is)NotNull … where x.age not null Like findByFirstnameLike … where x.firstname like ?1 NotLike findByFirstnameNotLike … where x.firstname not like ?1 StartingWith findByFirstnameStartingWith … where x.firstname like ?1 ( % added at the end of the parameter) EndingWith findByFirstnameEndingWith … where x.firstname like ?1 ( % added at the beginning of the parameter) Containing findByFirstnameContaining … where x.firstname like ?1 ( % wrapped around the parameter) OrderBy findByAgeOrderByLastnameDesc … where x.age = ?1 order by x.lastname desc Not findByLastnameNot … where x.lastname <> ?1 In findByAgeIn(Collection ages) … where x.age in ?1 NotIn findByAgeNotIn(Collection ages) … where x.age not in ?1 True findByActiveTrue() … where x.active = true False findByActiveFalse() … where x.active = false IgnoreCase findByFirstnameIgnoreCase … where UPPER(x.firstname) = UPPER(?1)
📍Or 사용 예제
ItemRepository 인터페이스에
List<Item> findByItemNmOrItemDetail(String itemNm, String itemDetail);추가
    @Test
    @DisplayName("상품명, 상품 상세 설명 Or 테스트")
    public void findByItemNmOrItemDetail(){
        this.createItemList();
        List<Item> itemList = itemRepository.findByItemNmOrItemDetail(
                "테스트 상품 1", "테스트 상품 상세 설명 5"
                // select * from item where item_nm = "테스트 상품 1" or item_detail = "테스트 상품 상세 설명 5";
        );

        for (Item item : itemList){
            System.out.println(item.toString());
        }
}Hibernate:
select
i1_0.item_id,
i1_0.item_detail,
i1_0.item_nm,
i1_0.item_sell_status,
i1_0.price,
i1_0.reg_time,
i1_0.stock_number,
i1_0.update_time
from
item i1_0
where
i1_0.item_nm=?
or i1_0.item_detail=?
Item(id=1, itemNm=테스트 상품 1, price=10001, stockNumber=100, itemDetail=테스트 상품 상세 설명 1, itemSellStatus=SELL, regTime=2023-12-05T12:29:18.050163, updateTime=2023-12-05T12:29:18.050163)
Item(id=5, itemNm=테스트 상품 5, price=10005, stockNumber=100, itemDetail=테스트 상품 상세 설명 5, itemSellStatus=SELL, regTime=2023-12-05T12:29:18.119974, updateTime=2023-12-05T12:29:18.119974)
📍LessThan 사용 예제
ItemRepository 인터페이스에
List<Item> findByPriceLessThan(Integer price);추가
    @Test
    @DisplayName("가격 LessThan 테스트")
    public void findByPriceLessThan(){
        this.createItemList();
        List<Item> itemList = itemRepository.findByPriceLessThan(10005);
        for (Item item : itemList){
            System.out.println(item.toString());
        }
}Hibernate:
select
i1_0.item_id,
i1_0.item_detail,
i1_0.item_nm,
i1_0.item_sell_status,
i1_0.price,
i1_0.reg_time,
i1_0.stock_number,
i1_0.update_time
from
item i1_0
where
i1_0.price<?
Item(id=1, itemNm=테스트 상품1, price=10001, stockNumber=100, itemDetail=테스트 상품 상세 설명1, itemSellStatus=SELL, regTime=2023-12-05T11:05:34.022912, updateTime=2023-12-05T11:05:34.022912)
Item(id=2, itemNm=테스트 상품2, price=10002, stockNumber=100, itemDetail=테스트 상품 상세 설명2, itemSellStatus=SELL, regTime=2023-12-05T11:05:34.082783, updateTime=2023-12-05T11:05:34.082783)
Item(id=3, itemNm=테스트 상품3, price=10003, stockNumber=100, itemDetail=테스트 상품 상세 설명3, itemSellStatus=SELL, regTime=2023-12-05T11:05:34.084752, updateTime=2023-12-05T11:05:34.084752)
Item(id=4, itemNm=테스트 상품4, price=10004, stockNumber=100, itemDetail=테스트 상품 상세 설명4, itemSellStatus=SELL, regTime=2023-12-05T11:05:34.086742, updateTime=2023-12-05T11:05:34.086742)
📍LessThanOrderBy 사용 예제
ItemRepository 인터페이스에
List<Item> findByPriceLessThanOrderByPriceDesc(Integer price);추가
    @Test
    @DisplayName("가격 내림차순 조회 테스트")
    public void findByPriceLessThanOrderByPriceDesc(){
        this.createItemList();
        List<Item> itemList = itemRepository.findByPriceLessThanOrderByPriceDesc(10005);
        for (Item item : itemList){
            System.out.println(item.toString());
        }
}Hibernate:
select
i1_0.item_id,
i1_0.item_detail,
i1_0.item_nm,
i1_0.item_sell_status,
i1_0.price,
i1_0.reg_time,
i1_0.stock_number,
i1_0.update_time
from
item i1_0
where
i1_0.price<?
order by
i1_0.price desc
Item(id=4, itemNm=테스트 상품4, price=10004, stockNumber=100, itemDetail=테스트 상품 상세 설명4, itemSellStatus=SELL, regTime=2023-12-05T11:09:48.254488, updateTime=2023-12-05T11:09:48.254488)
Item(id=3, itemNm=테스트 상품3, price=10003, stockNumber=100, itemDetail=테스트 상품 상세 설명3, itemSellStatus=SELL, regTime=2023-12-05T11:09:48.253492, updateTime=2023-12-05T11:09:48.253492)
Item(id=2, itemNm=테스트 상품2, price=10002, stockNumber=100, itemDetail=테스트 상품 상세 설명2, itemSellStatus=SELL, regTime=2023-12-05T11:09:48.251497, updateTime=2023-12-05T11:09:48.251497)
Item(id=1, itemNm=테스트 상품1, price=10001, stockNumber=100, itemDetail=테스트 상품 상세 설명1, itemSellStatus=SELL, regTime=2023-12-05T11:09:48.185674, updateTime=2023-12-05T11:09:48.185674)📖@Query 어노테이션
위의 네이밍만을 이용해 쿼리문을 만들면 문제가 있다 👉 복잡한 쿼리는 사용이 불가하다
@Query를 사용 하여 SQL과 유사하게 복잡한 쿼리도 사용 가능하다.
JPQL(Java Persistence Query Language)엔티티 객체를 대상으로 쿼리를 수행하며 데이터베이스를 구분 하지 않고 알아서 실행한다요약하면,
SQL과 유사한JPQL라는 객체지향 쿼리 언어를 통해 복잡한 쿼리 처리를 지원한다는 것
📌@Query 를 이용한 조회 테스트
ItemRepository 인터페이스에
    // 상품 상세 설명(itemDetail)으로 상품을 조회하고 결과는 가격순으로 정렬
    // select "엔티티명" = select "*", * 을 사용하려면 nativeQuery를 사용해야한다.
    // @Param 을 통해 매개변수로 넘어온 값을 JPQL에 들어갈 변수로 지정
    // @Param("itemDetail") String itemDetail 👉 %:itemDetail%
    // 테이블명을 Item을 쓴 이유는 클래스 명과 맞춰 이용하기 편하게 하려는 것이다.
    @Query("select i from Item i where i.itemDetail like %:itemDetail% order by i.price desc")
    List<Item> findByItemDetail(@Param("itemDetail") String itemDetail);
👉 추가
    @Test
    @DisplayName("@Query를 이용한 상품 조회 테스트")
    public void findByItemDetail(){
        this.createItemList();
        List<Item> itemList = itemRepository.findByItemDetail("테스트 상품 상세 설명");

        for (Item item : itemList){
            System.out.println(item.toString());
        }
}Hibernate:
select
i1_0.item_id,
i1_0.item_detail,
i1_0.item_nm,
i1_0.item_sell_status,
i1_0.price,
i1_0.reg_time,
i1_0.stock_number,
i1_0.update_time
from
item i1_0
where
i1_0.item_detail like ? escape ''
order by
i1_0.price desc
Item(id=9, itemNm=테스트 상품 9, price=10009, stockNumber=100, itemDetail=테스트 상품 상세 설명 9, itemSellStatus=SELL, regTime=2023-12-05T11:43:44.182702, updateTime=2023-12-05T11:43:44.182702)
Item(id=8, itemNm=테스트 상품 8, price=10008, stockNumber=100, itemDetail=테스트 상품 상세 설명 8, itemSellStatus=SELL, regTime=2023-12-05T11:43:44.181695, updateTime=2023-12-05T11:43:44.181695)
Item(id=7, itemNm=테스트 상품 7, price=10007, stockNumber=100, itemDetail=테스트 상품 상세 설명 7, itemSellStatus=SELL, regTime=2023-12-05T11:43:44.179700, updateTime=2023-12-05T11:43:44.179700)
Item(id=6, itemNm=테스트 상품 6, price=10006, stockNumber=100, itemDetail=테스트 상품 상세 설명 6, itemSellStatus=SELL, regTime=2023-12-05T11:43:44.178703, updateTime=2023-12-05T11:43:44.178703)
Item(id=5, itemNm=테스트 상품 5, price=10005, stockNumber=100, itemDetail=테스트 상품 상세 설명 5, itemSellStatus=SELL, regTime=2023-12-05T11:43:44.176708, updateTime=2023-12-05T11:43:44.176708)
Item(id=4, itemNm=테스트 상품 4, price=10004, stockNumber=100, itemDetail=테스트 상품 상세 설명 4, itemSellStatus=SELL, regTime=2023-12-05T11:43:44.175711, updateTime=2023-12-05T11:43:44.175711)
Item(id=3, itemNm=테스트 상품 3, price=10003, stockNumber=100, itemDetail=테스트 상품 상세 설명 3, itemSellStatus=SELL, regTime=2023-12-05T11:43:44.174714, updateTime=2023-12-05T11:43:44.174714)
Item(id=2, itemNm=테스트 상품 2, price=10002, stockNumber=100, itemDetail=테스트 상품 상세 설명 2, itemSellStatus=SELL, regTime=2023-12-05T11:43:44.172719, updateTime=2023-12-05T11:43:44.172719)
Item(id=1, itemNm=테스트 상품 1, price=10001, stockNumber=100, itemDetail=테스트 상품 상세 설명 1, itemSellStatus=SELL, regTime=2023-12-05T11:43:44.112890, updateTime=2023-12-05T11:43:44.112890)📌@Query nativeQuery
기존의 SQL 문을 사용할 수 있도록 지원하는
@Query어노테이션의 속성
    @Query(value = "select * from Item i where i.item_detail like %:itemDetail% "
            + "order by i.price desc", nativeQuery = true)
    List<Item> findByItemDetailByNative(@Param("itemDetail") String itemDetail);
@Test
@DisplayName("@nativeQuery를 이용한 상품 조회 테스트")
public void findByItemDetailByNative(){
this.createItemList();
List<Item> itemList = itemRepository.findByItemDetailByNative("테스트 상품 상세 설명");
for (Item item : itemList){
System.out.println(item.toString());
}
}Hibernate:
select
*
from
Item i
where
i.item_detail like ?
order by
i.price desc
Item(id=9, itemNm=테스트 상품 9, price=10009, stockNumber=100, itemDetail=테스트 상품 상세 설명 9, itemSellStatus=SELL, regTime=2023-12-05T11:52:00.196984, updateTime=2023-12-05T11:52:00.196984)
Item(id=8, itemNm=테스트 상품 8, price=10008, stockNumber=100, itemDetail=테스트 상품 상세 설명 8, itemSellStatus=SELL, regTime=2023-12-05T11:52:00.195988, updateTime=2023-12-05T11:52:00.195988)
Item(id=7, itemNm=테스트 상품 7, price=10007, stockNumber=100, itemDetail=테스트 상품 상세 설명 7, itemSellStatus=SELL, regTime=2023-12-05T11:52:00.194024, updateTime=2023-12-05T11:52:00.194024)
Item(id=6, itemNm=테스트 상품 6, price=10006, stockNumber=100, itemDetail=테스트 상품 상세 설명 6, itemSellStatus=SELL, regTime=2023-12-05T11:52:00.192995, updateTime=2023-12-05T11:52:00.192995)
Item(id=5, itemNm=테스트 상품 5, price=10005, stockNumber=100, itemDetail=테스트 상품 상세 설명 5, itemSellStatus=SELL, regTime=2023-12-05T11:52:00.191, updateTime=2023-12-05T11:52:00.191)
Item(id=4, itemNm=테스트 상품 4, price=10004, stockNumber=100, itemDetail=테스트 상품 상세 설명 4, itemSellStatus=SELL, regTime=2023-12-05T11:52:00.190003, updateTime=2023-12-05T11:52:00.190003)
Item(id=3, itemNm=테스트 상품 3, price=10003, stockNumber=100, itemDetail=테스트 상품 상세 설명 3, itemSellStatus=SELL, regTime=2023-12-05T11:52:00.188008, updateTime=2023-12-05T11:52:00.188008)
Item(id=2, itemNm=테스트 상품 2, price=10002, stockNumber=100, itemDetail=테스트 상품 상세 설명 2, itemSellStatus=SELL, regTime=2023-12-05T11:52:00.186013, updateTime=2023-12-05T11:52:00.186013)
Item(id=1, itemNm=테스트 상품 1, price=10001, stockNumber=100, itemDetail=테스트 상품 상세 설명 1, itemSellStatus=SELL, regTime=2023-12-05T11:52:00.126181, updateTime=2023-12-05T11:52:00.126181)
📖동적 쿼리 Querydsl
SQL 쿼리문을 문자열이 아닌
소스코드로 작성하도록 지원하는빌더 API (프레임워크)즉, 네이밍/띄어쓰기 등 실수를 실행 시에 알아 채는 것이 아닌 사전에 알 수 있도록 해주는 API 이다!!
Querydsl 의 장점
- 고정된 SQL 문이아닌 조건에 맞게 동적으로 쿼리 생성 가능
- 제약 조건 조립 및 가독성 향상
- 🔥컴파일 시점에 오류를 발견할 수 있음🔥
- 자동 완성 기능으로 인한 생산성 향상
📌Querydsl 적용하기
		<dependency>
			<groupId>com.querydsl</groupId>
			<artifactId>querydsl-jpa</artifactId>
			<version>5.0.0</version>
			<classifier>jakarta</classifier>
</dependency> <dependency>
<groupId>com.querydsl</groupId>
<artifactId>querydsl-apt</artifactId>
<version>5.0.0</version>
<classifier>jakarta</classifier>
</dependency>
		<dependency>
			<groupId>com.querydsl</groupId>
			<artifactId>querydsl-core</artifactId>
			<version>5.0.0</version>
</dependency>👉pom.xml 에 의존성 추가 (jakarta 로 변경됐다)
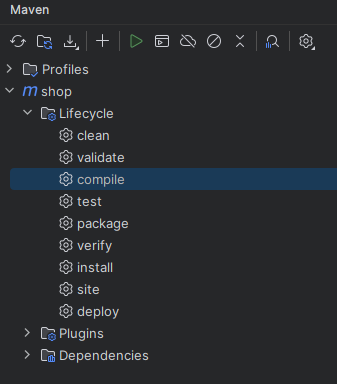
👉 compile 더블 클릭
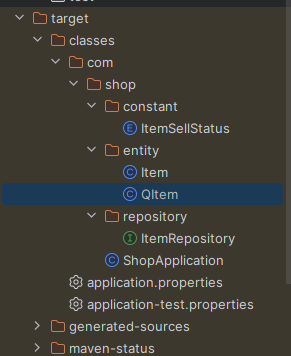
👉 target.claasses.com.shop.entity.QItem 이 생성 되면 잘 된 것
//
// Source code recreated from a .class file by IntelliJ IDEA
// (powered by FernFlower decompiler)
//

package com.shop.entity;

import com.querydsl.core.types.Path;
import com.querydsl.core.types.PathMetadata;
import com.querydsl.core.types.PathMetadataFactory;
import com.querydsl.core.types.dsl.DateTimePath;
import com.querydsl.core.types.dsl.EntityPathBase;
import com.querydsl.core.types.dsl.EnumPath;
import com.querydsl.core.types.dsl.NumberPath;
import com.querydsl.core.types.dsl.StringPath;
import com.shop.constant.ItemSellStatus;
import java.time.LocalDateTime;

public class QItem extends EntityPathBase<Item> {
    private static final long serialVersionUID = -1161068493L;
    public static final QItem item = new QItem("item");
    public final NumberPath<Long> id = this.createNumber("id", Long.class);
    public final StringPath itemDetail = this.createString("itemDetail");
    public final StringPath itemNm = this.createString("itemNm");
    public final EnumPath<ItemSellStatus> itemSellStatus = this.createEnum("itemSellStatus", ItemSellStatus.class);
    public final NumberPath<Integer> price = this.createNumber("price", Integer.class);
    public final DateTimePath<LocalDateTime> regTime = this.createDateTime("regTime", LocalDateTime.class);
    public final NumberPath<Integer> stockNumber = this.createNumber("stockNumber", Integer.class);
    public final DateTimePath<LocalDateTime> updateTime = this.createDateTime("updateTime", LocalDateTime.class);

    public QItem(String variable) {
        super(Item.class, PathMetadataFactory.forVariable(variable));
    }

    public QItem(Path<? extends Item> path) {
        super(path.getType(), path.getMetadata());
    }

    public QItem(PathMetadata metadata) {
        super(Item.class, metadata);
    }
}
👉 Item 클래스의 모든 필드들에 대해서 사용 가능한 operation을 호출하는 메소드 정의됨. 이제 실제 사용하기 위해 target 폴더를 Source 폴더로 변경하자.

📍Querydsl 예제 테스트
    // @Autowired
    @PersistenceContext // @PersistenceContext 어노테이션으로 bean 주입
    EntityManager entityManager;

...

    @Test
    @DisplayName("Querydsl 조회테스트 1")
    public void queryDslTest(){
    	// 더미데이터를 데이터베이스에 추가
        this.createItemList();

        // JPAQueryFactory 객체를 생성 시 매개변수 entityManager
        // 쿼리를 동적으로 생성하기 위해 JPAQueryFactory 객체 생성 매개변수로 엔티티 매니저 entityManager 를 받는다
        JPAQueryFactory queryFactory = new JPAQueryFactory(entityManager);

        // Querydsl을 통해 쿼리를 생성하기 위해 Qdomain 객체 생성
        // compile을 통해 자동 생성했다
        QItem qItem = QItem.item;

        // 1. querydsl 쿼리문을 받을 JPAQuery 객체 생성
		// 2. SQL 문자열이 아닌 자바 소스코드를 이용해 쿼리 생성
		// 3. select -> 조회, where -> 조건문, orderBy -> 정렬
        // queryFactory.selectFrom(qItem) 👉 select i from item i
        // JPAQuery<Item> query 👉 완성된 쿼리문 결과 받기
        JPAQuery<Item> query = queryFactory.selectFrom(qItem)
                // where i.item_sellStatus = ItemSellStatus.SELL
                .where(qItem.itemSellStatus.eq(ItemSellStatus.SELL))
                // and i.item_detail like %테스트 상품 상세 설명%
                .where(qItem.itemDetail.like("%" + "테스트 상품 상세 설명" + "%"))
                // order by i_price desc;
                .orderBy(qItem.price.desc());

        // 위 쿼리문을 완성하고 .fetch()로 실행 결과를 List<T> itemList에 담는다
        List<Item> itemList = query.fetch();

        // 나온 결과 출력
        for (Item item : itemList){
            System.out.println(item.toString());
        }

}Hibernate:
select
i1_0.item_id,
i1_0.item_detail,
i1_0.item_nm,
i1_0.item_sell_status,
i1_0.price,
i1_0.reg_time,
i1_0.stock_number,
i1_0.update_time
from
item i1_0
where
i1_0.item_sell_status=?
and i1_0.item_detail like ? escape '!'
order by
i1_0.price desc
Item(id=9, itemNm=테스트 상품 9, price=10009, stockNumber=100, itemDetail=테스트 상품 상세 설명 9, itemSellStatus=SELL, regTime=2023-12-05T12:48:29.647863, updateTime=2023-12-05T12:48:29.647863)
Item(id=8, itemNm=테스트 상품 8, price=10008, stockNumber=100, itemDetail=테스트 상품 상세 설명 8, itemSellStatus=SELL, regTime=2023-12-05T12:48:29.646865, updateTime=2023-12-05T12:48:29.646865)
Item(id=7, itemNm=테스트 상품 7, price=10007, stockNumber=100, itemDetail=테스트 상품 상세 설명 7, itemSellStatus=SELL, regTime=2023-12-05T12:48:29.644872, updateTime=2023-12-05T12:48:29.644872)
Item(id=6, itemNm=테스트 상품 6, price=10006, stockNumber=100, itemDetail=테스트 상품 상세 설명 6, itemSellStatus=SELL, regTime=2023-12-05T12:48:29.643874, updateTime=2023-12-05T12:48:29.643874)
Item(id=5, itemNm=테스트 상품 5, price=10005, stockNumber=100, itemDetail=테스트 상품 상세 설명 5, itemSellStatus=SELL, regTime=2023-12-05T12:48:29.641879, updateTime=2023-12-05T12:48:29.641879)
Item(id=4, itemNm=테스트 상품 4, price=10004, stockNumber=100, itemDetail=테스트 상품 상세 설명 4, itemSellStatus=SELL, regTime=2023-12-05T12:48:29.640882, updateTime=2023-12-05T12:48:29.640882)
Item(id=3, itemNm=테스트 상품 3, price=10003, stockNumber=100, itemDetail=테스트 상품 상세 설명 3, itemSellStatus=SELL, regTime=2023-12-05T12:48:29.638886, updateTime=2023-12-05T12:48:29.638886)
Item(id=2, itemNm=테스트 상품 2, price=10002, stockNumber=100, itemDetail=테스트 상품 상세 설명 2, itemSellStatus=SELL, regTime=2023-12-05T12:48:29.637915, updateTime=2023-12-05T12:48:29.637915)
Item(id=1, itemNm=테스트 상품 1, price=10001, stockNumber=100, itemDetail=테스트 상품 상세 설명 1, itemSellStatus=SELL, regTime=2023-12-05T12:48:29.566113, updateTime=2023-12-05T12:48:29.566113)
📍JPAQuery 데이터 반환 메소드
메소드 기능 ⚡ List<T> fetch()⚡조회 결과 리스트 반환 T fetchOne()조회 결과 대상이 1건인 경우 T fetchFirst()조회 대상 중 1건만 반환 Long fetchCount()조회 대상 개수 반환 QueryResult<T>fetchResults()조회한 리스트와 전체 개수 반환
📌QuerydslPredicateExecutor
쿼리문의 where 조건문을 메소드로 정의해놓은 클래스 👉
entityManager를 부르지 않는다
📍ItemRepository 인터페이스 상속 추가
public interface ItemRepository extends JpaRepository<Item, Long>,
QuerydslPredicateExecutor<Item>{
👉 Repository 에 Predicate 를 매개변수로 전달하기 위해 QuerydslPredicateExecutor 상속
📍QuerydslPredicateExecutor 인터페이스 정의 메소드
조건이 맞으면 인터페이스에서 상속을 받아 사용한다
메소드 기능 long count(Predicate)데이터의 총 개수 반환 boolean exists(Predicate)데이터 존재 여부 반환 Iterable findAll(Predicate)모든 데이터 반환 Page<T> findAll(Predicate, Pageable)조건에 맞는 페이지 데이터 반환
👉 게시판 페이지 이걸로 한다. Pageable 이 뭐지Iterable findAll(Predicate, Sort)정렬된 데이터 반환 T findOne(Predicate)조건에 맞는 데이터 1개 반환
📍QuerydslPredicateExecutor 예제 테스트
createItemList2 메소드 추가
    // createItemList2에서는
    // 상품 판매 상태가 SELL, SOLD_OUT 둘 로 나눈다
    public void createItemList2(){
        for (int i = 1; i <= 5; i++) {
            Item item = new Item();
            item.setItemNm("테스트 상품 " + i);
            item.setPrice(10000 + i);
            item.setItemDetail("테스트 상품 상세 설명 " + i);
            item.setItemSellStatus(ItemSellStatus.SELL);
            item.setStockNumber(100);
            item.setRegTime(LocalDateTime.now());
            item.setUpdateTime(LocalDateTime.now());
            itemRepository.save(item);
        }

        for (int i = 6; i <= 10; i++) {
            Item item = new Item();
            item.setItemNm("테스트 상품 " + i);
            item.setPrice(10000 + i);
            item.setItemDetail("테스트 상품 상세 설명 " + i);
            item.setItemSellStatus(ItemSellStatus.SOLD_OUT);
            item.setStockNumber(0); // SOLD_OUT
            item.setRegTime(LocalDateTime.now());
            item.setUpdateTime(LocalDateTime.now());
            itemRepository.save(item);
        }
    }
조회 테스트 2

@Test
@DisplayName("상품 Querydsl 조회 테스트 2")
public void queryDslTest2(){
this.createItemList2();
// 쿼리문 조건을 추가 하기 위한 BooleanBuilder 클래스
// 쿼리문의 where 역할을 수행하는 Predicate 를 담는 객체 booleanBuilder
BooleanBuilder booleanBuilder = new BooleanBuilder();
QItem item = QItem.item;
String itemDetail = "테스트 상품 상세 설명";
int price = 10003;
String itemSellStat = "SELL";
// 테스트 상품 상세 설명이 포함된 경우 where 조건부 설정
// itemDetail.like itemDetail에 테스트 상품 상세 설명 포함된 모든 값
booleanBuilder.and(item.itemDetail.like("%" + itemDetail + "%"));
// and price.gt가 10003 보다 더 큰 것들 모은다
booleanBuilder.and(item.price.gt(price)); // price = 10003 보다 가격이 큰 경우
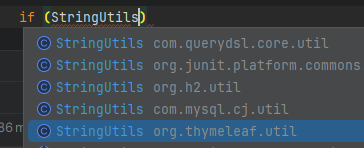
// 문자열을 비교하는데 SELL(String)과 ItemSellStatus.SELL(Enum)를 비교하므로 StringUtils 사용한 equals()
if (StringUtils.equals(itemSellStat, ItemSellStatus.SELL)){
// itemSellStatus == ItemSellStatus.SELL 인 녀석들 나와라
booleanBuilder.and(item.itemSellStatus.eq(ItemSellStatus.SELL));
}
// 페이지 당 조회할 데이터의 개수 👉 0 번째 페이지, 5개의 데이터
Pageable pageable = PageRequest.of(0, 5); // 👉 0 1 2 3 4 / PageRequest.of(1, 5); 👉 5 6 7 8 9 ...
// 조건에 맞는 데이터를 Page<Item> 타입으로 받아온다
// findAll() 메소드의 매개변수로 predicate(쿼리 조건식), pageable(page 데이터)전달
Page<Item> itemPagingResult = itemRepository.findAll(booleanBuilder, pageable);
// 총 개수가 나온다
System.out.println("total elements : " + itemPagingResult.getTotalElements());
// 반환된 페이지에서 content 부분만을 List<Item> 타입으로 추출
List<Item> resultItemList = itemPagingResult.getContent();
// 출력
for (Item resultItem : resultItemList){
System.out.println(resultItem.toString());
}
}Hibernate:
select
i1_0.item_id,
i1_0.item_detail,
i1_0.item_nm,
i1_0.item_sell_status,
i1_0.price,
i1_0.reg_time,
i1_0.stock_number,
i1_0.update_time
from
item i1_0
where
i1_0.item_detail like ? escape '!'
and i1_0.price>?
and i1_0.item_sell_status=?
offset
? rows
fetch
first ? rows only
total elements : 2
Item(id=4, itemNm=테스트 상품 4, price=10004, stockNumber=100, itemDetail=테스트 상품 상세 설명 4, itemSellStatus=SELL, regTime=2023-12-05T14:42:35.487995, updateTime=2023-12-05T14:42:35.487995)
Item(id=5, itemNm=테스트 상품 5, price=10005, stockNumber=100, itemDetail=테스트 상품 상세 설명 5, itemSellStatus=SELL, regTime=2023-12-05T14:42:35.489989, updateTime=2023-12-05T14:42:35.489989)
📖Thymeleaf
화면(view):HTML,CSS,JavaScript
👉JavaScript를 제외하면 정적이다.
우리가 원하는 동적으로 만드는 것이템플릿:JSP,Thymeleaf이다
❗ 전 처럼view끼리 화면 이동은 없다. 무조건Controller를 거쳐서 이동한다Thymeleaf 와 JSP
- 미리 정의된 템플릿을 만들고 동적으로 HTML 페이지를 만들어서 클라이언트에 전달하는 방식
- 요청이 올 때 마다 서버에서 새로운 HTML 페이지를 만들어 준다(서버 사이드랜드 방식)
서버 사이드 템플릿 엔진 :
Thymeleaf,JSP
JSP는 무조건 서버사이드 렌더링. 즉, 무조건 서버에 확인을 받는다
Thymeleaf는 서버사이드 랜더링을 하지 않아도 웹 브라우저에서 정상적인 화면이 나온다. 컨트롤러가 전달한 가공된 데이터를 이용하여 동적으로 화면을 구성하도록 지원하는 템플릿 엔진이다.
📌Thymeleaf 장점
html파일을 서버 사이드 렌더링을 하지 않고 브라우저에 띄워도 정상적으로 동작- 디자이너 또는 퍼블리셔가 자신이 작업한 내용을 바로 열어서 확인 가능
- 개발자는
html파일을 받아서html태그 안에Thymeleaf문법을 추가
📖Thymeleaf 기본 문법들
📌설정
📍xmlns:th=" "
<html lang="en" xmlns:th="http://www.thymeleaf.org">
- 타임리프의 th속성을 사용하기 위해 선언된 네임스테이스이다.
- 순수 HTML로만 이루어진 페이지인 경우 선언하지 않아도 된다.
📌기본 기능
📍th:text="${}"
<div th:text="${data}"></div>
JSP의EL표현식인${}와 마찬가지로${}표현식을 사용해서 컨트롤러에서 전달받은 데이터에 접근할 수 있다.
📍th:href="@{}"
<a th:hrf="@{/boardListPage?currentPageNum={page}}"></a>
<a>태그의href속성과 동일하다. 괄호안에 클릭시 이동하고자하는url를 입력
📍th:with="${}"
<div th:with=”userId = ${number}” th:text=”${usesrId}”>변수형태의 값을 재정의하는 속성이다. 즉,
th:with를 이용하여 새로운 변수값을 생성할 수 있다.
📍th:value="${}"
<input type="text" id="userId" th:value="${userId} + '의 이름은 ${userName}"/>
input의value에 값을 삽입할 때 사용. 여러개의 값을 넣을땐+기호를 사용
📌Layout
📍xmlns:layout="", layout:decorator=""
<html lang="ko"
      xmlns:th="http://www.thymeleaf.org"
      xmlns:layout="http://www.ultraq.net.nz/thymeleaf/layout"
      layout:decorate="~{board/layout/basic}">
타임리프의
layout기능을 사용하기 위해서는 위와 같은 의존성을 추가해줘야 한다.xmlns:layout은 타임리프의 레이아웃 기능을 사용하기 위한 선언이다. 레이아웃을 적용시킬HTML파일에 해당 선언 후 해당 페이지에th:fagment로 조각한 공통 영역을 가져와서 삽입해준다
📍th:block
<html lagn="ko"
      xmlns:th="http://www.thymeleaf.org"
      xmlns:layout="http://www.ultraq.net.nz/thymeleaf/layout">
<body>
  	//전체 레이아웃
	<th:block th:fragment="footerFragment">
 	</th:block>
</body>
</html>
block은 타임리프 표현을 어느 곳에서든 사용할 수 있도록 하는 구문이다.- 해당 기능은 동적인 처리가 필요할 때 사용된다. 주로
layout기능이나switch에 사용이 많이 된다.
📍th:fragment=""
<body>
	<footer th:fragment="footerFragment">
  		<p>안녕하세요</p>
	</footer>
</body>
웹페이지에 메뉴 탭이나 네비게이션바와 같이 공통으로 반복되는 영역이 존재한다. 이 공통의 역영들을 매 페이지마다
HTML코드를 반복해서 쓰면 굉장히 지저분 해지는데fragment가 바로 공통 영역을 정의하여 코드를 정리해준다.
특히,header와footer에 삽입하여 조각화 한다. 이렇게 만들어진 조각을 삽입하고자 하는 대상HTML파일에서th:replace"[파일경로 :: 조각 이름]"을 통해 삽입한다.
📍th:replace="~{파일경로 :: 조각이름}"
<body>
	<div th:replace="~{/common/footer :: footerFragment}"></div>
</body>
JSP의<include>태그와 유사한 속성이다.
fragment로 조각화한 공통 영역을 HTML에 삽입하는 역할을 한다.
::을 기준으로앞에는 조각이 있는 경로를뒤에는 조각의 이름을 넣어준다.
insert88과 다르게 완전하게 대체
📍 th:insert="~{파일경로 :: 조각이름}"
<body>
	<div th:insert="~{/common/footer :: footerFragment}"></div>
</body>
insert는 태그 내로 조각을 삽입하는 방법이다.replace는 완전하게 대체하기 때문에replace태그 가 입력된<div>가 사라지고fragment로 조각화한 코드가 완전히 대체된다.
하지만insert는insert가 입력된<div>안에fragment를 삽입하는 개념이기 때문에<div>안에조각화한 코드가 삽입된다.
형식은replace와 동일하다.
📌Form
일반적이 형태. 잘 알고 있다
<body>
	<form th:action="@{/join}" th:object="${joinForm}" method="post">
  		<input type="text" id="userId" th:field="*{userId}" >
    	<input type="password" id="userPw" th:field="*{userPw}" >
  	</form>
</body>
📍th:action="@{}"
<form>태그 사용시, 해당 경로로 요청을 보낼 때 사용한다.
📍th:object="${}"
<form>태그에서 데이터를 보내기 위해Submit을 할 때 데이터가th:object속성을 통해object에 지정한 객체에 값을 담아 넘긴다. 이때 값을th:field속성과 함꼐 사용하여 넘긴다.
Controller와View사이의DTO클래스 객체라고 생각하면 된다.
📍th:field="*{}"
th:object속성과 함께th:field를 이용해서HTML태그에 멤버 변수를 매핑할 수 있다.
th:field을 이용한 사용자 입력 필드는id,name,value속성 값이 자동으로 매핑된다.
th:object와th:field는Controller에서 특정 클래스의 객체를 전달 받은 경우에만 사용 가능하다.
📌조건문과 반복문
📍th:if="{}"
<span th:if="${userNum} == 1"></span>
<span th:unless="${userNum} == 2"></span>
JAVA의 조건문에 해당하는 속성이다. 각각if와else를 뜻한다.
th:unless는 일반적인 언어의else문과는 달리th:if에 들어가는 조건과 동일한 조건을 지정해야 한다.
📍 th:each="변수 : ${list}"
<body>
  	<li th:each="pageButton" : ${#numbers.sequece(paging.firstPage, paging.lastPage)}></li>
</body>
JSP의JSTL에서<c:foreach>그리고JAVA의 반복문 중for문을 뜻한다.
${list}로 값을 받아온 것을 변수로 하나씩 가져온다는 뜻으로, 변수는 이름을 마음대로 지정할 수 있다.
📍 th:switch, th:case
<th:block th:switch="${userNum}">
  	<span th:case="1">권한1</span>
  	<span th:case="2">권한2</span>
</th:block>
JAVA의switch-case문과 동일하다.
switch case문으로 제어할 태그를th:block으로 설정하고 그 안에 코드를 작성한다.
userNum라는 변수의 값이 1이거나 2일때 동작하는 예제이다.
📌그 외
📍#numbers.sequest(start, end, step)
기본적으로 타임리프에서는
#numbers라는 숫자 포맷 메소드를 지원한다.#numbers에는 다양한 메소드들이 존재하는데 가장 많이 사용하는 것이#numbers.sequece이다.
#numbers.sequece메소드는start,end,step을 이용하여 원하는 범위에 대해 시퀀스를 생성해준다.
📖Thymeleaf 사용하기
Thymeleaf는HTML파일
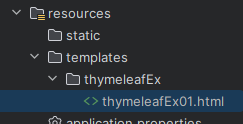
📌thymeleafEx01.html
<!DOCTYPE html>
<html xmlns:th="http://www.thymeleaf.org">
<head>
    <meta charset="UTF-8">
    <title>Title</title>
</head>
<body>
    <p th:text = "${data}">Hello Thymeleaf!!</p>
</body>
</html>
📌controller 패키지 생성
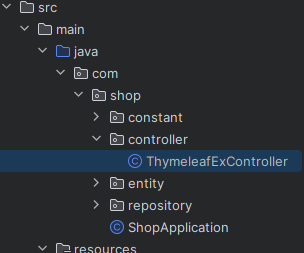
📍ThymeleafExController 클래스
package com.shop.controller;

import org.springframework.stereotype.Controller;
import org.springframework.ui.Model;
import org.springframework.web.bind.annotation.GetMapping;
import org.springframework.web.bind.annotation.RequestMapping;

@Controller
@RequestMapping(value = "/thymeleaf") // 첫 시작이 thymeleaf 인 것 들은 여기로 온다
public class ThymeleafExController {
    // Get 방식 중에 /thymeleaf/ex01 경로 이면 아래 함수 실행
    @GetMapping(value = "/ex01")
    public String thymeleafExample01(Model model){
        model.addAttribute("data", "타임리프 예제 입니다.");
        // 문자열을 리턴하면 경로에 맞는 HTML 호출, 기본
        return "thymeleafEx/thymeleafEx01";
    }
}
📌실행 결과
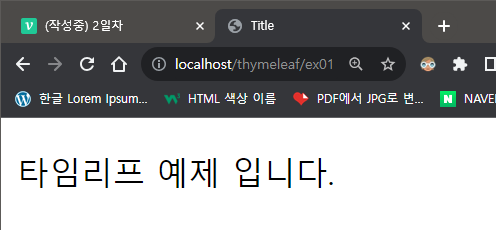
👉 Hello Thymeleaf!! 가 안나오네??
❗ th:text = "${data}" 가 Controller 에서 값을 받아오면 Hello Thymeleaf!! 은 실행하지 않고 Controller를 실행하기 때문
📖Thymeleaf 예제들
📌dto 패키지 생성
📍ItemDto 클래스 생성
Entity를 가지고 있는 Item 클래스
package com.shop.dto;

import lombok.Data;
import lombok.Getter;
import lombok.Setter;

import java.time.LocalDateTime;

@Data
public class ItemDto {
    private Long id;
    private String itemNm;
    private Integer price;
    private String itemDetail;
    private String sellStatCd;
    private LocalDateTime regTime;
    private LocalDateTime updateTime;
}
👉 원래 사용하지 않는 것들을 구분하기 위해 @Getter, @Setter 등으로 어노테이션을 하지만 귀찮으니까 앞으로 @Data 사용
📍ThymeleafExController 예제 2 추가
@GetMapping(value = "/ex02")
public String thymeleafExample02(Model model){
ItemDto itemDto = new ItemDto();
itemDto.setItemDetail("상품 상세 설명");
itemDto.setItemNm("테스트 상품 1");
itemDto.setPrice(10000);
itemDto.setRegTime(LocalDateTime.now());
model.addAttribute("itemDto", itemDto);
return "thymeleafEx/thymeleafEx02";
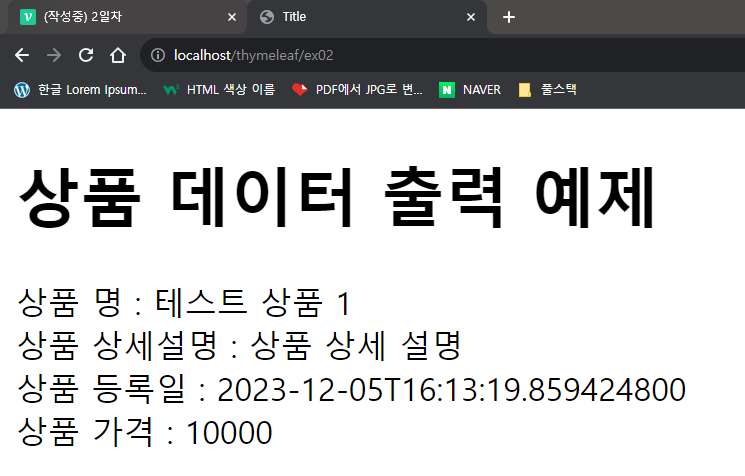
}📍thymeleafEx02.html
<!DOCTYPE html>
<html xmlns:th="http://www.thymeleaf.org" lang="ko">
<head>
    <meta charset="UTF-8">
    <title>Title</title>
</head>
<body>
    <h1>상품 데이터 출력 예제</h1>
    <div>
        상품 명 : <span th:text = "${itemDto.itemNm}"></span>
    </div>
    <div>
        상품 상세설명 : <span th:text = "${itemDto.itemDetail}"></span>
    </div>
    <div>
        상품 등록일 : <span th:text = "${itemDto.regTime}"></span>
    </div>
    <div>
        상품 가격 : <span th:text = "${itemDto.price}"></span>
    </div>
</body>
</html>
📍결과
📍⚡JSP와의 차이점⚡
<% %>을 사용 하지 않고th:을 이용하며jstl태그를 사용 하지 않고 내장된 것으로 조건문, 반복문 등을 표현 할 수 있다. 뭐가 좋고 나쁜 건 없고 편한 걸로 사용 하면 된다. 그냥 취향 차이
📌반복문 사용하기
📍ThymeleafExController 예제 3 추가
@GetMapping(value = "/ex03")
public String thymeleafExample03(Model model){
List<ItemDto> itemDtoList = new ArrayList<>();
for (int i = 1; i <= 10; i++) {
ItemDto itemDto = new ItemDto();
itemDto.setItemDetail("상품 상세 설명" + i);
itemDto.setItemNm("테스트 상품 " + i);
itemDto.setPrice(1000 * i);
itemDto.setRegTime(LocalDateTime.now());
itemDtoList.add(itemDto);
}
model.addAttribute("itemDtoList", itemDtoList);
return "thymeleafEx/thymeleafEx03";
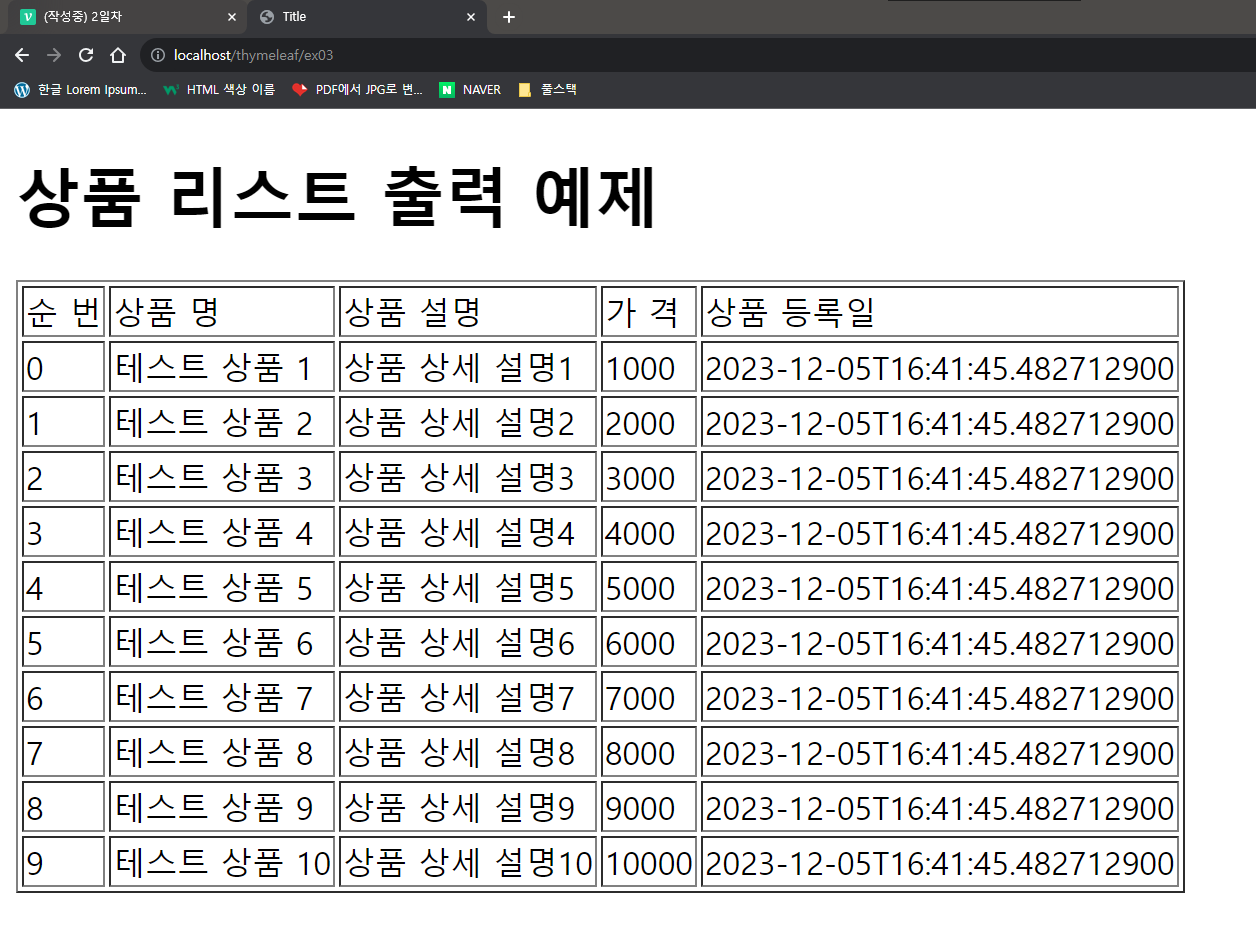
}📍thymeleafEx03.html
<!DOCTYPE html>
<html xmlns:th="http://www.thymeleaf.org" lang="ko">
<head>
    <meta charset="UTF-8">
    <title>Title</title>
</head>
<body>
    <h1>상품 리스트 출력 예제</h1>
    <table border="1">
        <thead>
            <tr>
                <td> 순 번 </td>
                <td>상품 명</td>
                <td>상품 설명</td>
                <td> 가 격 </td>
                <td>상품 등록일</td>
            </tr>
        </thead>
        <tbody>
            <tr th:each = "itemDto, status : ${itemDtoList}">
                <td th:text = "${status.index}"></td>
                <td th:text = "${itemDto.itemNm}"></td>
                <td th:text = "${itemDto.itemDetail}"></td>
                <td th:text = "${itemDto.price}"></td>
                <td th:text = "${itemDto.regTime}"></td>
            </tr>
        </tbody>
    </table>
</body>
</html>
📍결과
📌if/switch 조건문 사용하기
📍ThymeleafExController 예제 4 추가
@GetMapping(value = "/ex04")
public String thymeleafExample04(Model model){
List<ItemDto> itemDtoList = new ArrayList<>();
for (int i = 1; i <= 10; i++) {
ItemDto itemDto = new ItemDto();
itemDto.setItemDetail("상품 상세 설명" + i);
itemDto.setItemNm("테스트 상품 " + i);
itemDto.setPrice(1000 * i);
itemDto.setRegTime(LocalDateTime.now());
itemDtoList.add(itemDto);
}
model.addAttribute("itemDtoList", itemDtoList);
return "thymeleafEx/thymeleafEx04";
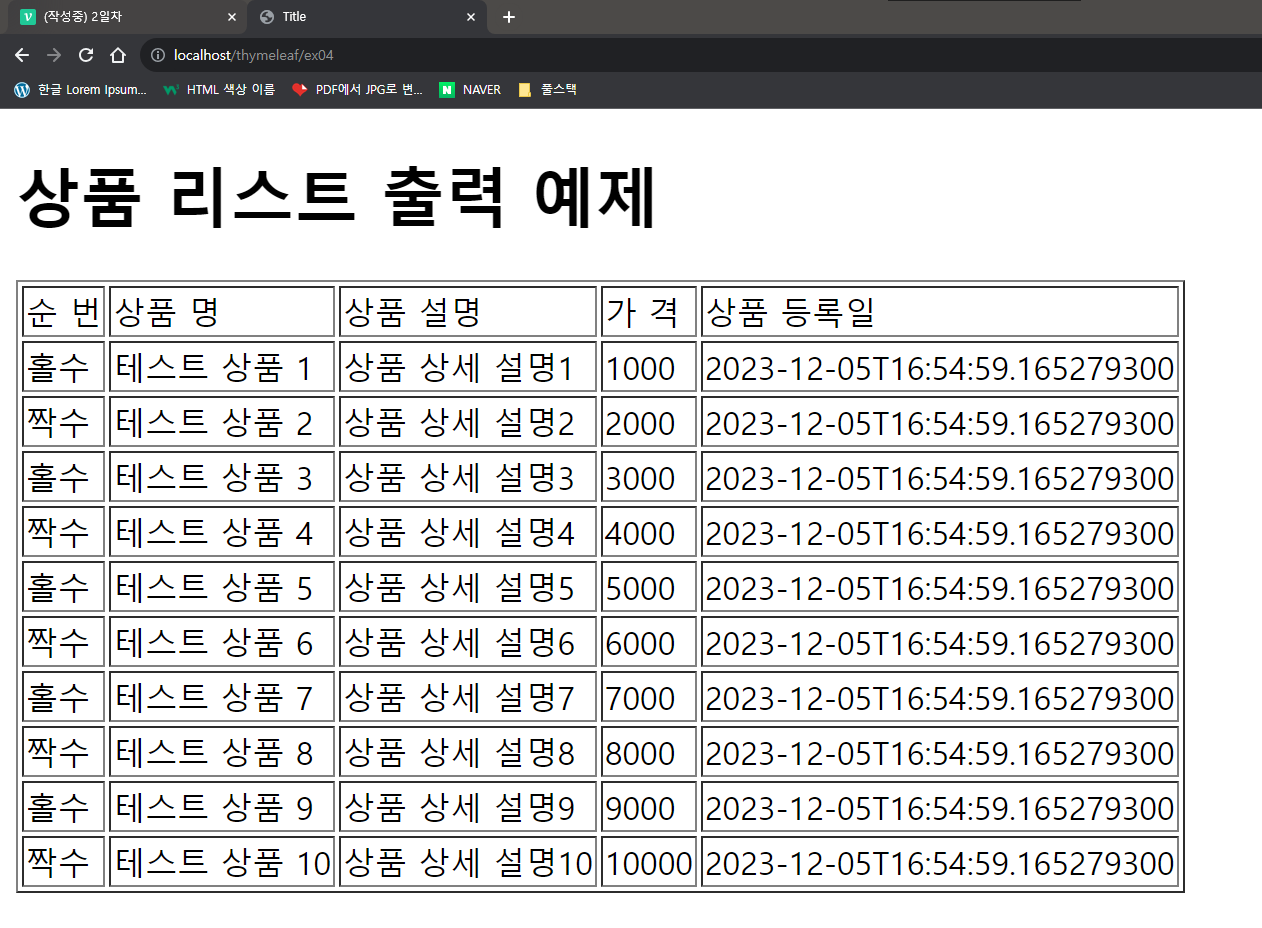
}📍thymeleafEx04.html
<!DOCTYPE html>
<html xmlns:th="http://www.thymeleaf.org" lang="ko">
<head>
    <meta charset="UTF-8">
    <title>Title</title>
</head>
<body>
<h1>상품 리스트 출력 예제</h1>
<table border="1">
    <thead>
    <tr>
        <td> 순 번 </td>
        <td>상품 명</td>
        <td>상품 설명</td>
        <td> 가 격 </td>
        <td>상품 등록일</td>
    </tr>
    </thead>
    <tbody>
    <tr th:each = "itemDto, status : ${itemDtoList}">
        <td th:if = "${status.even}" th:text="짝수"></td>
        <td th:unless = "${status.even}" th:text="홀수"></td>
        <td th:text = "${itemDto.itemNm}"></td>
        <td th:text = "${itemDto.itemDetail}"></td>
        <td th:text = "${itemDto.price}"></td>
        <td th:text = "${itemDto.regTime}"></td>
    </tr>
    </tbody>
</table>
</body>
</html>
👉 if 문
<!DOCTYPE html>
<html xmlns:th="http://www.thymeleaf.org" lang="ko">
<head>
    <meta charset="UTF-8">
    <title>Title</title>
</head>
<body>
<h1>상품 리스트 출력 예제</h1>
<table border="1">
    <thead>
    <tr>
        <td> 순 번 </td>
        <td>상품 명</td>
        <td>상품 설명</td>
        <td> 가 격 </td>
        <td>상품 등록일</td>
    </tr>
    </thead>
    <tbody>
    <tr th:each = "itemDto, status : ${itemDtoList}">
        <!-- <td th:if = "${status.even}" th:text="짝수"></td>
        <td th:unless = "${status.even}" th:text="홀수"></td> -->
        <td th:switch = "${status.even}">
            <span th:case = true>짝수</span>
            <span th:case = false>홀수</span>
        </td>
        <td th:text = "${itemDto.itemNm}"></td>
        <td th:text = "${itemDto.itemDetail}"></td>
        <td th:text = "${itemDto.price}"></td>
        <td th:text = "${itemDto.regTime}"></td>
    </tr>
    </tbody>
</table>
</body>
</html>
👉 switch 문
📍결과
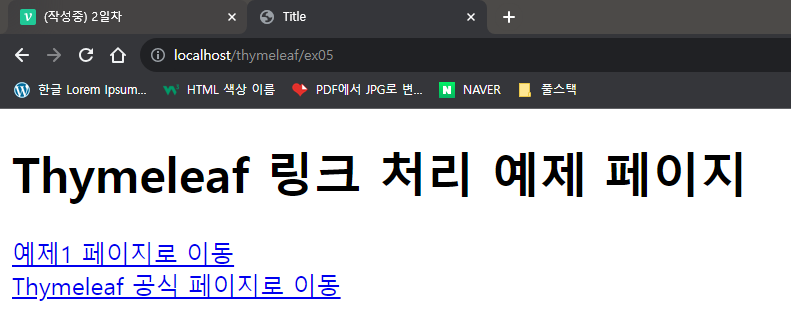
📌href 사용하기
📍ThymeleafExController 예제 5 추가
    @GetMapping(value = "/ex05")
    public String thymeleafExample05(Model model){
        return "thymeleafEx/thymeleafEx05";
    }
📍thymeleafEx05.html
<!DOCTYPE html>
<html xmlns:th="http://www.thymeleaf.org" lang="ko">
<head>
    <meta charset="UTF-8">
    <title>Title</title>
</head>
<body>
    <h1>Thymeleaf 링크 처리 예제 페이지</h1>
    <div>
        <a th:href = "@{/thymeleaf/ex01}">예제1 페이지로 이동</a>
    </div>
    <div>
        <a th:href = "@{https://www.thymeleaf.org/}">Thymeleaf 공식 페이지로 이동</a>
    </div>
</body>
</html>
📍결과

👁🗨Quiz
예제 5번에서 a태그 링크를 통해 예제 6번으로 이동을 하는데, 매개변수를 같이 전달하여 예제 6번에서 출력 되도록 해보자
    <div>
        <a th:href = "@{/thymeleaf/ex06(param1 = '홍길동', param2 = '안녕하세요.')}">
            thymeleaf 파라미터 전달
        </a>
</div> @GetMapping(value = "/ex06")
public String thymeleafExample06(Model model, HttpServletRequest request){
String name = request.getParameter("param1");
String tell = request.getParameter("param2");
model.addAttribute("name", name);
model.addAttribute("tell", tell);
return "thymeleafEx/thymeleafEx06";
} @GetMapping(value = "/ex06")
public String thymeleafExample06(Model model, @RequestParam(name = "param1") String name,
@RequestParam(name = "param2") String tell){
model.addAttribute("name", name);
model.addAttribute("tell", tell);
return "thymeleafEx/thymeleafEx06";
} @GetMapping(value = "/ex06")
// GetMapping을 통해 이미 param1, param2 값은 받아 왔다. 이름은 동일 해야한다
public String thymeleafExample06(Model model, String param1, String param2)
{
model.addAttribute("name", param1);
model.addAttribute("tell", param2);
return "thymeleafEx/thymeleafEx06";
}👉 방법은 여러가지
<!DOCTYPE html>
<html xmlns:th="http://www.thymeleaf.org" lang="ko">
<head>
    <meta charset="UTF-8">
    <title>Title</title>
</head>
<body>
    이름 : <span th:text = "${name}"></span> <br>
    전달 하는 말 : <span th:text = "${tell}"></span>
</body>
</html>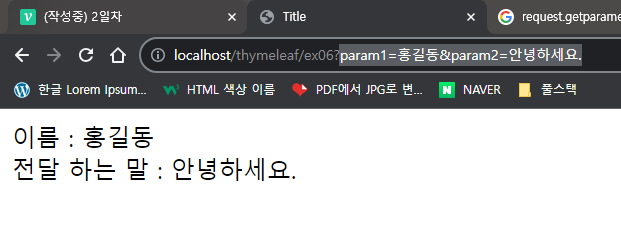
📖Thymeleaf 페이지 레이아웃
<dependency>
    <groupId>nz.net.ultraq.thymeleaf</groupId>
    <artifactId>thymeleaf-layout-dialect</artifactId>
    <version>3.3.0</version>
</dependency>
👉 의존성 추가
📌fragments 파일 생성
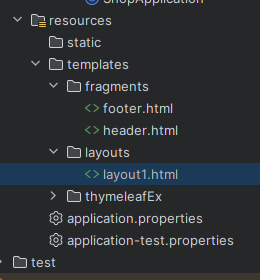
📍header.html
<!DOCTYPE html>
<html xmlns:th="http://www.thymeleaf.org" lang="ko">
<head>
    <meta charset="UTF-8">
    <title>Title</title>
</head>
<body>
    <div th:fragment = "header">
        header 영역 입니다.
    </div>
</body>
</html>
📍footer.html
<!DOCTYPE html>
<html xmlns:th="http://www.thymeleaf.org" lang="ko">
<head>
    <meta charset="UTF-8">
    <title>Title</title>
</head>
<body>
    <div th:fragment = "footer">
        footer 영역 입니다.
    </div>
</body>
</html>
📌layouts 파일 생성
📍layout1.html
<!DOCTYPE html>
<html xmlns:th="http://www.thymeleaf.org"
xmlns:layout="http://www.ultraq.net.nz/thymeleaf/layout" lang="ko">
<head>
<meta charset="UTF-8">
<title>Title</title>
<th:block layout:fragment = "script"></th:block>
<th:block layout:fragment = "css"></th:block>
</head>
<body>
<div th:replace = "~{fragments/header::header}"></div>
<div layout:fragment = "content" class = "content"></div>
<div th:replace = "~{fragments/footer::footer}"></div>
</body>
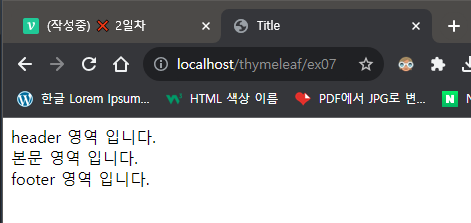
</html>👉 th:replace : 치환 해서 안 바꿀 예정 (푸터, 헤더)
layout:fragment : 계속 해서 바뀔 예정 (콘텐츠 영역, 본문)
📍thymeleafEx07.html
<!DOCTYPE html>
<html xmlns:th="http://www.thymeleaf.org"
      xmlns:layout="http://www.ultraq.net.nz/thymeleaf/layout"
      layout:decorate="~{layouts/layout1}" lang="ko">
<head>
    <meta charset="UTF-8">
    <title>Title</title>
</head>
<body>
    <div layout:fragment = "content">
        본문 영역 입니다.
    </div>
</body>
</html>
👉 layout:fragment 에 의해 content 가 "본문 영역 입니다." 로 바뀌었다. 앞으로는 이렇게 할 것
📍ThymeleafExController 예제 7 추가
    @GetMapping(value = "/ex07")
    public String thymeleafExample07(Model model){
        return "thymeleafEx/thymeleafEx07";
    }
📌결과