
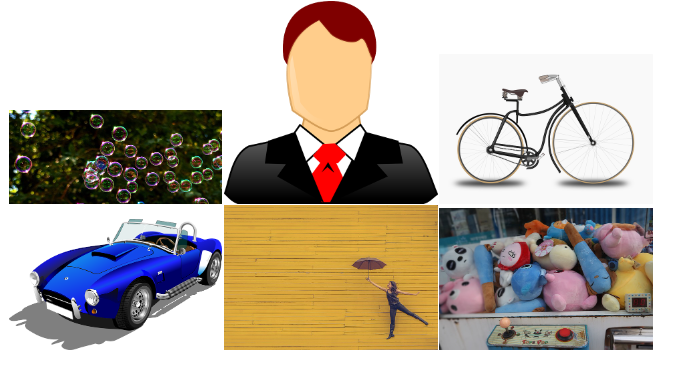
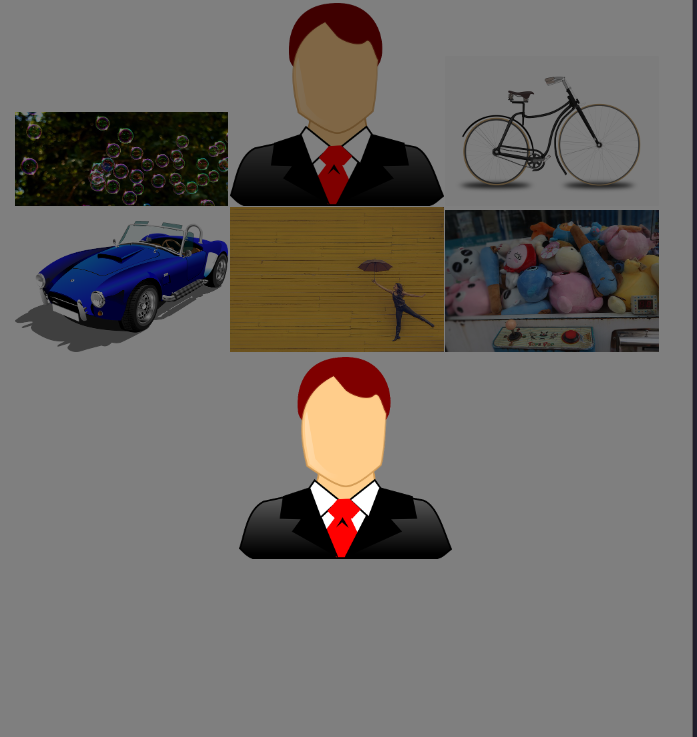
📌객체의 이동하기
$(선택자).pretendTo("target"): 선택자를target요소 자식 중 첫 번째 자식으로 이동$(선택자).appentTo("target"): 선택자를target요소 자식 중 마지막 자식으로 이동$(선택자).insertBefore("target"): 선택자를target요소 앞으로 이동$(선택자).insertAfter("target"): 선택자를target요소 뒤로 이동

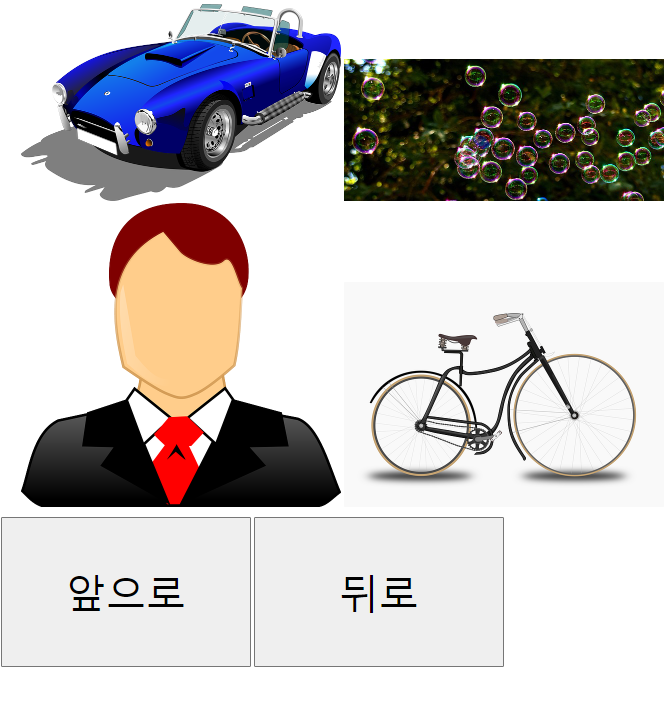
👉 앞으로 눌렀을 때
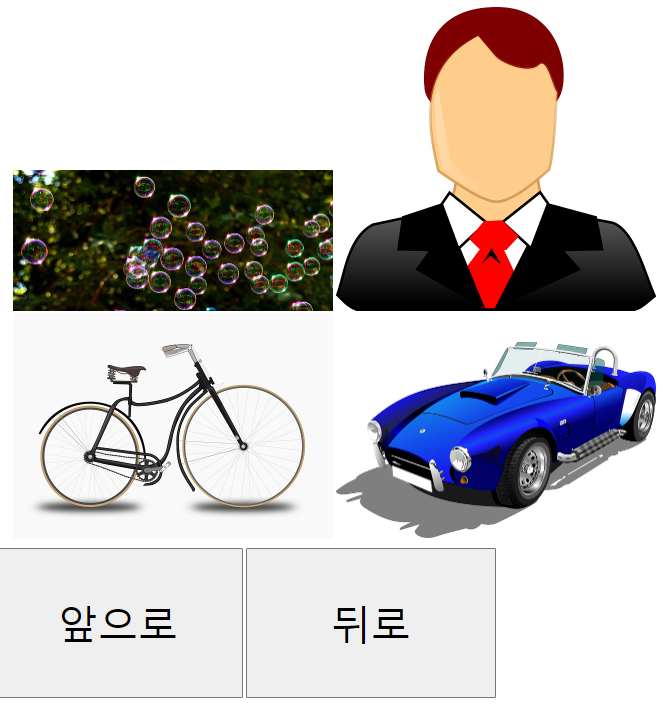
👉 뒤로 1번
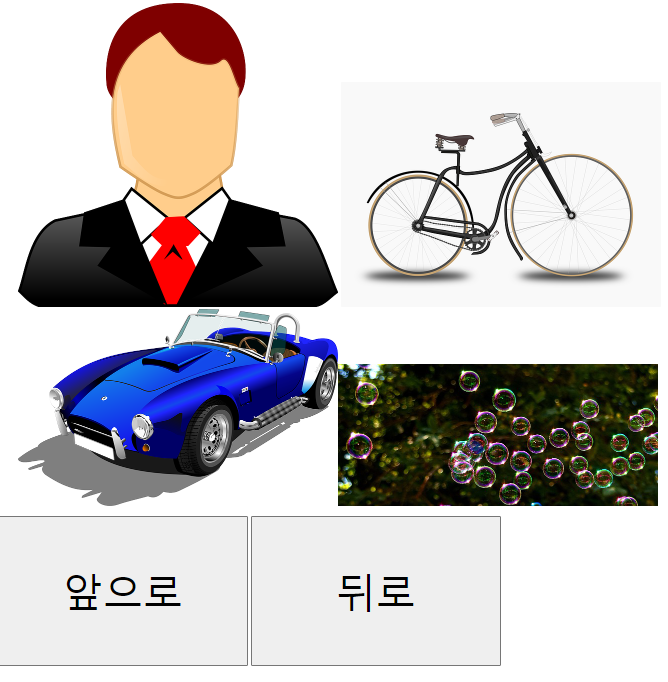
👉 뒤로 한 번 더
<!DOCTYPE html>
<html lang="ko">
<head>
    <meta charset="UTF-8">
    <meta name="viewport" content="width=device-width, initial-scale=1.0">
    <script src="https://code.jquery.com/jquery-3.4.1.min.js"></script>
    <title>Document</title>
    <style>
        ul{list-style: none;}
        ul li {
            display: inline-block;
        }
        button{
            width: 500px;
            height: 300px;
            font-size: 5em;
        }
    </style>
</head>
<body>
    <div id = "box">
        <ul>
            <li><img src="images/1.jpg" alt=""></li>
            <li><img src="images/2.png" alt=""></li>
            <li><img src="images/3.png" alt=""></li>
            <li><img src="images/4.png" alt=""></li>
        </ul>
        <p>
            <button id = "prev">앞으로</button>
            <button id = "next">뒤로</button>
        </p>
    </div>
    <script>
        $(function(){
            $('#prev').click(function(e){
                $('ul>li:eq(3)').prependTo('ul');
            });

            $('#next').click(function(e){
                $('ul>li:eq(0)').appendTo('ul');
            });

        });
    </script>
</body>
</html>
📌요소 묶기
$(선택자).wrap(<>): 선택자 각각을 요소로 감싸기$(선택자).wrapAll(<>): 선택 집합 전체를 요소로 감싸기$(선택자).wrapInner(<>): 선택자 안을 요소로 감싸기$(선택자).unwrap(<>): 감싸고 있는 태그 제거

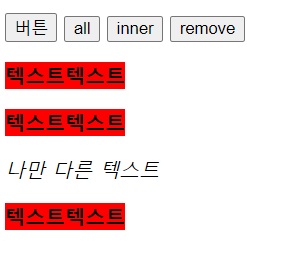


👉 하나씩 눌렀을 때
<!DOCTYPE html>
<html lang="ko">
<head>
    <meta charset="UTF-8">
    <meta name="viewport" content="width=device-width, initial-scale=1.0">
    <script src="https://code.jquery.com/jquery-3.4.1.min.js"></script>
    <title>Document</title>
</head>
<body>
    <p>
        <button id = "btn01">버튼</button>
        <button id = "btn02">all</button>
        <button id = "btn03">inner</button>
        <button id = "btn04">remove</button>
    </p>
    <div>
        <b> 텍스트텍스트</b>
        <b> 텍스트텍스트</b>
        <em>나만 다른 텍스트</em>
        <b> 텍스트텍스트</b>
    </div>
    <script>

        $(function(e){
            // wrap
            $('#btn01').click(function(e){
                $('b').wrap('<p>');
                $('b').css('background-color', 'red');
            });

            // wrapAll
            $('#btn02').click(function(e){
                $('b').wrapAll('<p>');
                $('b').css('background-color', 'yellow');
            });

            // wrapInner
            $('#btn03').click(function(e){
                $('div').wrapInner('<p>');
                $('div').css('background-color', 'orange');
            });

            // unwrap
            $('#btn04').click(function(e){
                $('b').unwrap();
                $('b').css('background-color', 'blue');
            });

        });

    </script>
</body>
</html>
📌객체의 바꾸기
- ⚡
$(선택자).replaceWith(): 선택자를 다른 요소로 변경⚡- ⚡
$(선택자).replaceAll(): 선택자로 요소를 변경⚡
👉 예제는 기타변형하기와 함께
📌기타변형하기
- ⚡
$(선택자).remove(): 선택자와 일치하는 노드 제거⚡ $(선택자).detach():remove()와 같은 형상이지만 메모리에 남아있어서 다시 사용 가능$(선택자).empty(): 선택자와 일치하는 노드 중 자식 노드들 제거$(선택자).clone(): 선택자와 똑같은 노드를 복제하여 기억
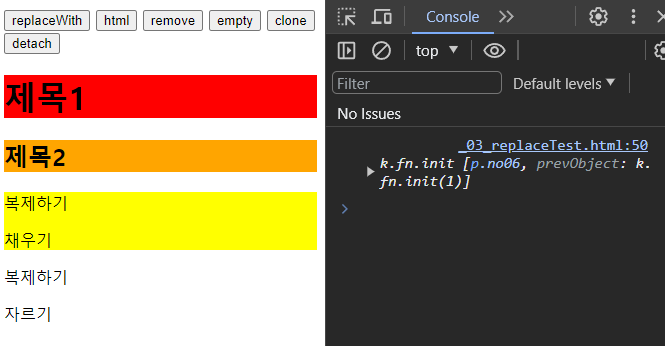
👉 clone 까지 눌렀을 때
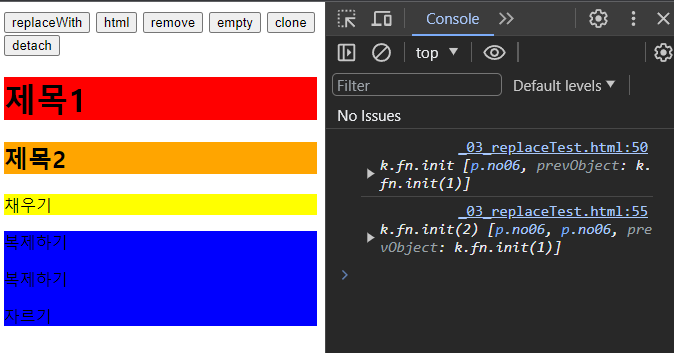
👉 detach 까지 눌렀을 때
<!DOCTYPE html>
<html lang="ko">
<head>
    <meta charset="UTF-8">
    <meta name="viewport" content="width=device-width, initial-scale=1.0">
    <script src="https://code.jquery.com/jquery-3.4.1.min.js"></script>
    <title>Document</title>
</head>
<body>
    <button id = "btn01">replaceWith</button>
    <button id = "btn02">html</button>
    <button id = "btn03">remove</button>
    <button id = "btn04">empty</button>
    <button id = "btn05">clone</button>
    <button id = "btn06">detach</button>
    <p class="no01">요소 바꾸기 바꿔 주세요</p>
    <p class="no02">콘텐츠 바꾸기 바꿔 주세요</p>
    <p class="no03">없애기</p>
    <p class="no04">비우기</p>
    <p class="no05">채우기</p>
    <p class="no06">복제하기</p>
    <p class="no07">자르기</p>

    <script>

        $(function(){

            $('#btn01').click(function(e){
                $('p.no01').replaceWith('<h1>제목1</h1>');
                $('h1').css('background-color', 'red');
            });

            $('#btn02').click(function(e){
                $('p.no02').html('<h2>제목2</h2>');
                $('h2').css('background-color', 'orange');
            });

            $('#btn03').click(function(e){
                $('p.no03').remove();
            });

            $('#btn04').click(function(e){
                $('p.no04').empty();
            });

            $('#btn05').click(function(e){
                var num01 = $('p.no06').clone();
                $('p.no05').prepend(num01);
                $('p.no05').css('background-color', 'yellow');
                console.log(num01);
            });

            $('#btn06').click(function(e){
                var num02 = $('p.no06').detach();
                console.log(num02);
                $('p.no06').css('background-color', 'green');
                $('p.no07').css('background-color', 'blue');
                $('p.no07').prepend(num02);
            });
        });

    </script>
</body>
</html>
📖⭐⭐⭐탐색이동 매소드⭐⭐⭐
한 번 선택자로 선택 후 DOM을 이동하여 원하는 요소를 선택. 예를들어 댓글 같은 것을 입력시 해당
ul의li를 찾아 이동해야하여 등록해야 하는 것을 담당. 중요한 내용
📌이동 매소드의 형식
$(선택자).이동매소드().명령어();, 선택자로 선택 후 메소드를 이용하여원하는 선택자로 이동$(선택자).이동매소드('selector').명령어();, 선택자로 선택 후 메소드를 이용하여 조건에 맞는selector를 선택
📍순번 이동 매소드
.first(): 선택한 요소 집합 중첫 번째 요소를 찾는다.last(): 선택한 요소 집합 중마지막 요소를 찾는다
👉 예제는 한꺼번에
📍⚡위치 이동 매소드⚡
댓글은 이걸로 주로 사용
.next(): 선택한 요소의바로 다음에 있는 형제 요소를 찾는다.nextall(): 선택한 요소다음에 있는 형제 요소를모두찾는다.prev(): 선택한 요소의바로 앞에 있는 형제 요소를 찾는다.prevAll(): 선택한 요소의바로 앞에 있는 형제 요소를모두찾는다
👉 예제는 한꺼번에
📍관계 이동 매소드
.children(): 선택요소의자식 요소를모두찾는다.parent(): 선택요소의부모 요소를 찾는다.parents(): 문서 트리를 거슬러 올라가면서 선택 요소의조상 요소를 모두 찾는다.parentsUntil(selector): 문서 트리를 거슬러 올라가면서selector를만날 때까지 조상 요소를모두찾는다.selector를 명시하지 않았다면html요소까지 모두 찾는다.siblings(): 선택한 요소의 형제 요소를 모두 찾는다
👉 예제는 한꺼번에
📍탐색 기타 이동 매소드
.find(selector):이미 선택한요소의자손 요소를 모두찾는다.selector를 넘겨 받아 찾은 자손 요소를 제한할 수도 있다..children()메소드와 비슷하지만 찾는 범위가 넓어 느리다..not(selector): 선택한 요소 중에서selector에 해당하는요소를 제거한다..offsetParnet(): CSS 속성top,left등의 기준이 되는 조상 요소를 찾는다. 문서 트리를 거슬러 올라가면서position속성이relative,absolute,fixed로 지정된가장 가까운 조상 요소를 찾는다.selice(start, end): 선택한 요소 중start+1번째 부터end번째까지 찾는다.end는 생략가능.each(function(){실행문}): 모든 요소각각에함수를 실행add:이미 선택한 요소에 다른 요소를추가
<!DOCTYPE html>
<html lang="ko">
<head>
<meta charset="UTF-8">
<meta name="viewport" content="width=device-width, initial-scale=1.0">
<title>Document</title>
<script src = "https://code.jquery.com/jquery-3.4.1.min.js"></script>
<style>
div{
width: 500px;
height: 300px;
display: inline-block;
margin: 50px;
}
.button{
width: 200px;
height: 100px;
background-color: darkcyan;
text-align: center;
line-height: 100px;
color: wheat;
font-size: 2em;
}
.back{
width: 400px;
height: 100px;
border: 1px solid black;
}
</style>
</head>
<body>
<div id = "box_01">
<p class = "button">click</p>
<p class= "back"></p>
<p class = "back"></p>
</div>
<div id = "box_02">
<p class = "button">click</p>
<p class = "back"></p>
<p class = "back"></p>
</div>
<div id = "box_03">
<p class = "button">click</p>
<p class = "back"></p>
<p class = "back"></p>
</div>
<script>
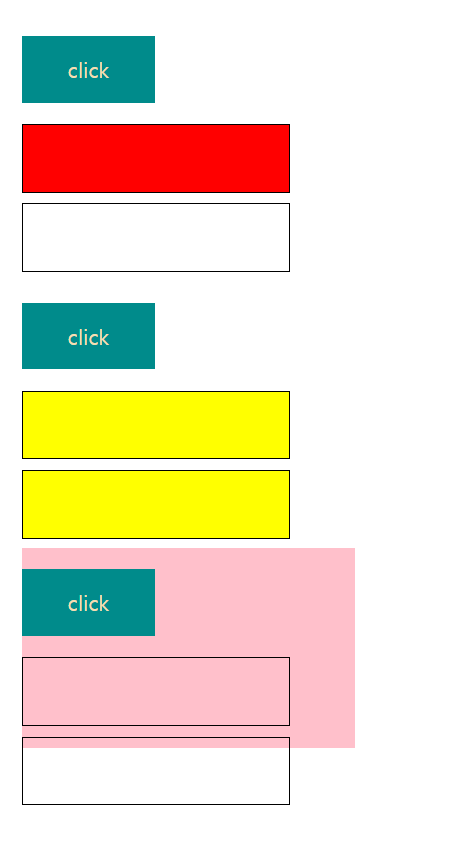
$('div#box_01>.button').click(function(e){
$(this).next('p').css('background', 'red');
});
$('div#box_02>.button').click(function(e){
$(this).siblings('p').css('background', 'yellow');
});
$('div#box_03>.button').click(function(e){
$(this).parent('div').css('background', 'pink');
});
</script>
</body>
</html>📖이벤트 등록하기
$(선택자).이벤트명령어(function(e){실행문;});, 하나의 선택자에 이벤트 하나를 등록하여 실행문을 실행$(선택자).이벤트핸들러('이벤트명', function(e){실행문;});, 하나의 선택자에 여러 이벤트를 등록하여 실행문을 실행 가능
📌이벤트 등록/삭제 매소드
- ⚡
on(): 이벤트 타입과 이벤트 핸들러를 설정 할 수 있다.⚡one(): 이벤트를 한번만 실행한다off(): 이벤트를 삭제한다
👉 예제는 아래 마우스 이벤트와 함께
📌마우스 이벤트
$(선택자).click(): 선택자에 마우스 포인터를 눌렀다 떼었을 때$(선택자).dbclick(): 선택한 요소를 연속해서 두 번 클릭했을 때 이벤트 발생$(선택자).mousedown(): 선택한 요소에서 마우스 버튼을 눌렀을 때 이벤트가 발생$(선택자).mouseup(): 선택한 요소 범위에 마우스 버튼을 눌렀다 떼었을 때 이벤트가 발$(선택자).mouseenter(): 선택한 요소 범위에 마우스 포인터를 올렸을 때 이벤트가 발생$(선택자).mouseleave(): 선택한 요소 범위에서 마우스 포인터가 벗어났을 때 이벤트가 발생$(선택자).hover(): 선택한 요소에 마우스 포인터를 올렸을 때와 벗어났을 때 각각 이벤트가 발생$(선택자).move(): 선택한 요소 범위에서 마우스 포인터를 움직였을 때 이벤트가 발생


👉 추가 및 실행이 잘 된다.
<!DOCTYPE html>
<html lang="ko">
<head>
<meta charset="UTF-8">
<meta name="viewport" content="width=device-width, initial-scale=1.0">
<title>Document</title>
<script src = "https://code.jquery.com/jquery-3.4.1.min.js"></script>
</head>
<body>
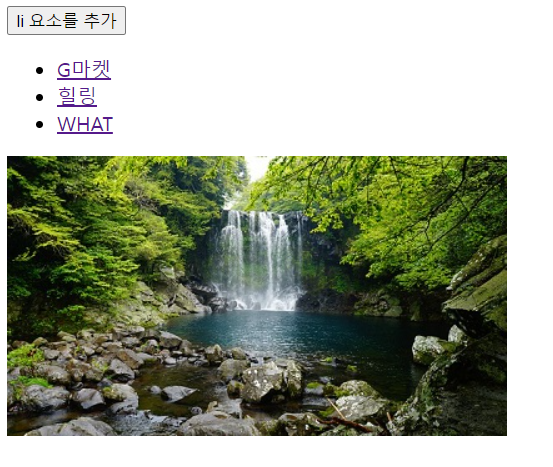
<button>li 요소를 추가</button>
<ul id = "linkBtn">
<li><a href="../Day01/images/gmarket.png">G마켓</a></li>
<li><a href="../Day01/images/healing.jpg">힐링</a></li>
</ul>
<p><img src = "../Day01/images/activity.jpg"></p>
<script>
$('li>a').on('click', function(e){
var pic = $(this).attr('href');
$('p>img').attr('src', pic);
return false;
});
$('button').on('click', function(e){
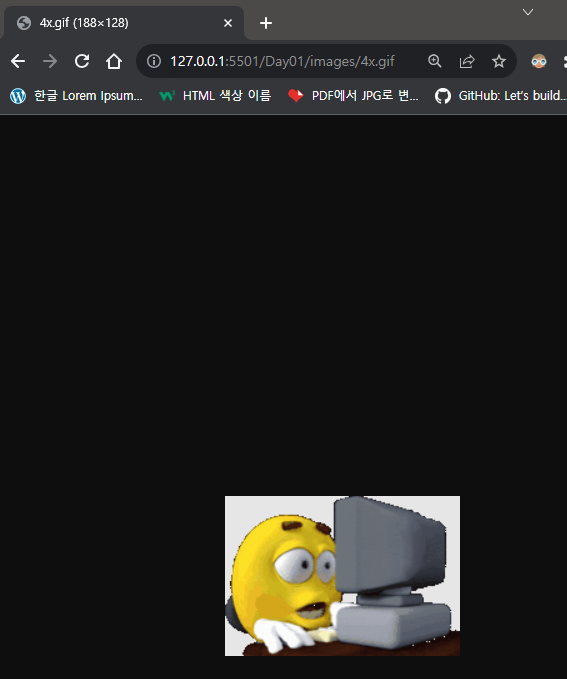
$('ul').append('<li><a href = "../Day01/images/4x.gif">WHAT</a></li>')
});
</script>
</body>
</html>📌기타 이벤트
ready()말고는 거의 쓰진 않는다.
📍키보드 이벤트
keydown(): 선택한 요소에서 키보드를 눌렀을 때 이벤트 발생keyup(): 선택한 요소에서 키보드 키가 올라갈 때 이벤트 발생keypress(): 선택한 요소에서 키보드 키가 내려갈 때 이벤트 발생
📍윈도우 이벤트
resize(): 브라우저의 가로 사이즈가 변경 될 때 이벤트 발생scroll(): 브라우저의 스크롤이 움직일 때 이벤트 발생load(): 소스가 로딩될 때 이벤트 발생- ⚡
ready(): HTML 문서가 로딩이 완료되면 이벤트 발생⚡
📖이펙트 명령어
$(선택자).이펙트명령어(1.시간, 2. 'easing', 3. 콜백함수 function(){실행문;});
📌이펙트 매소드 사용하기
- 효과가 적용되는
시간:slow,normal,fast, 밀리언 초로1000ms = 1초가속도를 설정. 생략 가능 :lenear(일정 속도로 유지),swing(조금씩 빨라졌다 느리게 끝냄)콜백함수: 이펙트가 끝난 후에 실행할 실행문을 설정. 생략 가능하며 익명의 함수로 설정해야함
📌콜백함수
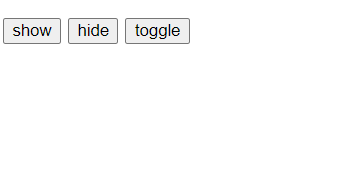
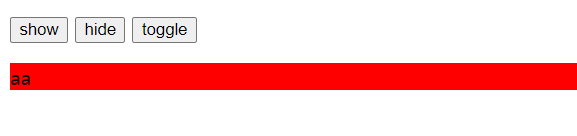
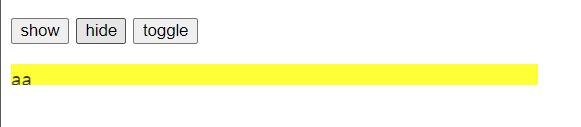
show():hide():toggle():slideDown():slideUp():slideToggle():fadeIn():fadeOut():fadeTp():fadeToggle():
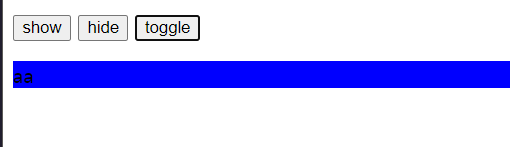
📍show(), hide(), toggle()
<!DOCTYPE html>
<html lang="ko">
<head>
<meta charset="UTF-8">
<meta name="viewport" content="width=device-width, initial-scale=1.0">
<title>Document</title>
<script src = "https://code.jquery.com/jquery-3.4.1.min.js"></script>
</head>
<body>
<div id = "effect01">
<p class="button">
<button class = "btn01">show</button>
<button class = "btn02">hide</button>
<button class = "btn03">toggle</button>
</p>
<p class="back01">aa</p>
</div>
<script>
$('p .btn01').on('click', function(){
$('p.back01').show(500);
$('p.back01').css('background-color', 'red');
});
$('p .btn02').on('click', function(){
$('p.back01').hide(500);
$('p.back01').css('background-color', 'yellow');
});
$('p .btn03').on('click', function(){
$('p.back01').toggle(500);
$('p.back01').css('background-color', 'blue');
});
</script>
</body>
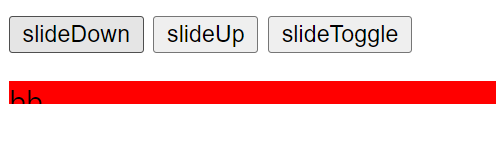
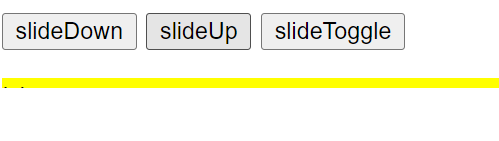
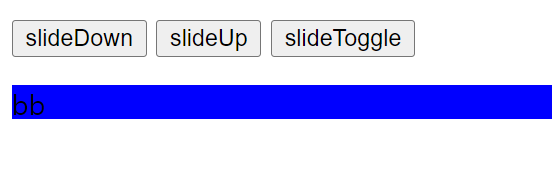
</html>📍slide
<!DOCTYPE html>
<html lang="ko">
<head>
    <meta charset="UTF-8">
    <meta name="viewport" content="width=device-width, initial-scale=1.0">
    <title>Document</title>
    <script src = "https://code.jquery.com/jquery-3.4.1.min.js"></script>
</head>
<body>
    <div id = "effect01">
        <p class="button">
            <button class = "btn01">slideDown</button>
            <button class = "btn02">slideUp</button>
            <button class = "btn03">slideToggle</button>
        </p>
        <p class="back01">bb</p>
    </div>
    <script>
        $('p .btn01').on('click', function(){
            $('p.back01').slideDown(500);
            $('p.back01').css('background-color', 'red');
        });

        $('p .btn02').on('click', function(){
            $('p.back01').slideUp(500);
            $('p.back01').css('background-color', 'yellow');
        });

        $('p .btn03').on('click', function(){
            $('p.back01').slideToggle(500);
            $('p.back01').css('background-color', 'blue');
        });
    </script>
</body>
</html>
📍fade
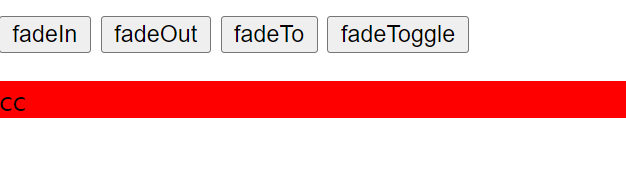
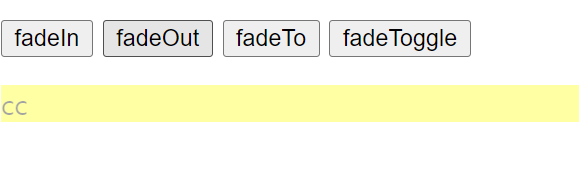
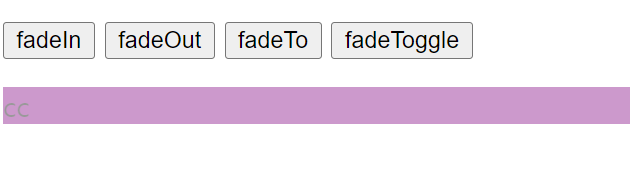
<!DOCTYPE html>
<html lang="ko">
<head>
    <meta charset="UTF-8">
    <meta name="viewport" content="width=device-width, initial-scale=1.0">
    <title>Document</title>
    <script src = "https://code.jquery.com/jquery-3.4.1.min.js"></script>
</head>
<body>
    <div id = "effect01">
        <p class="button">
            <button class = "btn01">fadeIn</button>
            <button class = "btn02">fadeOut</button>
            <button class = "btn03">fadeTo</button>
            <button class = "btn04">fadeToggle</button>
        </p>
        <p class="back01">cc</p>
    </div>
    <script>
        $('p .btn01').on('click', function(){
            $('p.back01').fadeIn(500);
            $('p.back01').css('background-color', 'red');
        });

        $('p .btn02').on('click', function(){
            $('p.back01').fadeOut(500);
            $('p.back01').css('background-color', 'yellow');
        });

        $('p .btn03').on('click', function(){
            $('p.back01').fadeTo(500, 0.4);
            $('p.back01').css('background-color', 'blue');
        });

        $('p .btn04').on('click', function(){
            $('p.back01').fadeToggle(500);
            $('p.back01').css('background-color', 'purple');
        });
    </script>
</body>
</html>
📌$(:not(:animated)) 사용하여 광클릭 문제 해결하기
이펙트 명령어를 사용할 때 광클릭과 같이 이벤트가 여러번 작동 시킬 수 있는데, 막아주는 방법중에
$(선택자:not(:animated)).이펙트명령어())
의 방법이 있다
📖animate()
$('선택자').animate({1. 속성명: '값', 속성명 : '값'}, 2. 소요시간, 3. '가속도', 4. 콜백함수)
1. 움직일 스타일 설정
2. 소요 시간
3. 가속도
4. 콜백함수
📌애니메이션 제어 명령어
animate(): 스타일 속성으로 움직이기에 해당stop(): 해당 선택자의 애니메이션 효과를 중간에 멈춤delay(): 설정된 값 만큼 지연했다가 진행queqr(): 큐에 사용자 정의 함수를 추가하거나 큐에 대기 중인 함수를 배열에 담아 반환finish(): 해당되는 선택자의 애니메이션을 강제로 완료 시점으로 보낸 후 종료


👉 heart 사진 클릭하면 오른쪽(+) 이동
👉 bear 사진 클릭하면 왼쪽(-) 이동
<!DOCTYPE html>
<html lang="ko">

<head>
    <meta charset="UTF-8">
    <meta name="viewport" content="width=device-width, initial-scale=1.0">
    <title>Document</title>
    <script src="https://code.jquery.com/jquery-3.4.1.min.js"></script>
    <style>
        div {
            width: 1000px;
            height: 500px;
            overflow: hidden;
        }

        /* 전체 기준 */
        ul {
            list-style: none;
            width: 900px;
            height: 400px;
        }

        /* 보이는 것 기준 */
        ul>li{
            float: left;
        }

        ul>li>img{
            vertical-align: top;
        }

    </style>
</head>
<body>
    <div>
        <ul>
            <li id="bear"><img src="../Day04_CSS/images/bear.jpg" alt="flower"></li>
            <li id="heart"><img src="../Day04_CSS/images/heart.jpg" alt="heart"></li>
        </ul>
    </div>
    <script>
        $(function(){
            $('#bear').on('click', function(){
                var width2 = $(this).width();
                $('div>ul').animate({marginLeft:'-='+width2},300,'swing');
            });

            $('#heart').on('click', function(){
                var width3 = $(this).width();
                $('div>ul').animate({marginLeft:'+='+width3},300,'swing');
            });
        });
    </script>
</body>

</html>
📖객체의 크기와 위치
📌객체의 크기
$('선택자').크기명령어(값)👉$('p').width(900)$('선택자').크기명령어()
📌객체의 매소드
width(): 선택자의 가로 크기를 설정 또는 추출. 데이터 자료형은number데이터height(): 선택자의 세로 크기를 설정 또는 추출innerWidth():padding값을 포함 한 가로 크기innerHeight():padding값을 포함 한 세로 크기outerWidth():border값을 포함 한 가로 크기
outerWidth(true):margin값을 포함 한 가로 크기outerHeight():border값을 포함 한 세로 크기
outerHeight(true):margin값을 포함 한 세로 크기
📌객체의 위치
offset(): 선택자의 위치 값을 설정 또는 추출 👉$('선택자').offset().top,$('선택자').offset({top:50, left:50})position(): 선택자의 위치 값을 설정 👉$('선택자').position().top
<!DOCTYPE html>
<html lang="ko">

<head>
    <meta charset="UTF-8">
    <meta name="viewport" content="width=device-width, initial-scale=1.0">
    <title>Document</title>
    <script src="https://code.jquery.com/jquery-3.4.1.min.js"></script>
    <style>
        #back {
            position: fixed;
            width: 100%;
            height: 100%;
            left: 0;
            top: 0;
            background-color: rgba(0, 0, 0, 0.5);
            display: none;
        }

        #main {
            position: fixed;
            left: 50%;
            top: 50%;
            display: none;
        }

        ul {
            list-style: none;
        }

        ul li{
            display: inline-block;
        }
    </style>
</head>

<body>
    <ul>
        <li><a href="images/1.jpg" class="modal"><img src="images/1.jpg" alt=""></a></li>
        <li><a href="images/2.png" class="modal"><img src="images/2.png" alt=""></a></li>
        <li><a href="images/3.png" class="modal"><img src="images/3.png" alt=""></a></li>
        <li><a href="images/4.png" class="modal"><img src="images/4.png" alt=""></a></li>
        <li><a href="images/5.jpg" class="modal"><img src="images/5.jpg" alt=""></a></li>
        <li><a href="images/6.jpg" class="modal"><img src="images/6.jpg" alt=""></a></li>
    </ul>

    <script>

        $(function (){
            console.log(1);
            $('body').append('<div id = "back"></div><div id = "main"></div>');
        });

        $('ul>li>a.modal').on('click', function(e){
            console.log(2);
            var pic = $(this).attr('href');
            $('#back').show();
            $('#main').show().html('<img src = "' + pic + '">');

            // 화면 중앙에 위치
            var picWidth = $('#main').width() / 2;
            var picHeight = $('#main').height() / 2;

            $('#main').css({ marginLeft: '-' + picWidth + 'px', marginTop: '-' + picHeight + 'px' });
            return false;
        });

        $('#back').on('click', function(e){
            console.log(3);
            $('#back').hide();
            $('#main').hide();
        });

    </script>
</body>

</html>
👉 다른 곳 클릭시 창 꺼짐은 안됨. 수정 해야 할 듯
📖스크롤의 위치
$(document).scrollTop(값): DOM의 스크롤 top 값을 설정$(document).scrollTop(): DOM의 스크롤 top 값을 가져옴
scrollTop():document세로 스크롤 값scrollLeft():document가로 스크롤 값
📌스크롤 애니메이션
❗ 스크롤 애니메이션은 선택자를
document가 아닌$('html, body')를 사용
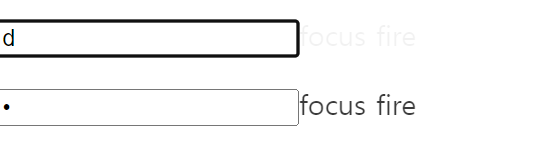
📖폼
📌폼의 선택자
$(":input"): 모든 input 요소 선택$(":text"): 모든 input 요소 중 text 타입 선택$(":password"): 모든 input 요소 중 password 타입 선택$(":radio"): 모든 input 요소 중 radio 타입 선택$(":checkbox"): 모든 input 요소 중 checkbox 타입 선택$(":submit"): 모든 input 요소 중 submit 타입 선택$(":reset"): 모든 input 요소 중 reset 타입 선택$(":button"): 모든 input 요소 중 button 타입 선택$(":image"): 모든 input 요소 중 image 타입 선택$(":file"): 모든 input 요소 중 file 타입 선택$(":enabled"): 모든 enabled input 요소 선택$(":disabled"): 모든 disabled input 요소 선택$(":selected"): 모든 selected input 요소 선택$(":checked"): 모든 checked input 요소 선택
📌폼 이벤트와 매소드
📍폼 이벤트 명령어
$(선택자).focus(함수(){명령문});$(선택자).on('focus','함수(){명령문})
focus(): 폼 컨트롤 요소에 마우스나 탭키가 선택된 상태를 감지 될 때blur():focus()와 반대개념으로 폼 컨트롤 요소에 focus가 벗어났을 때를 감지 될 때- ⚡
change(): 폼 컨트롤 요소의 값이 변경된 것을 감지하는 명령 될 때, 쇼핑몰에서구매 수량 올/내리는상황에서 사용⚡submit(): 폼 태그의 전송 버튼이 눌렸을 때 발생하는 이벤트 처리 설정
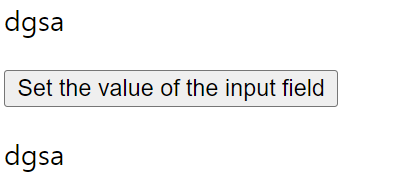
📍폼 컨트롤 요소의 값 설정 및 사용하기
$(선택자).val(값)👉 선택자의 value값 넣기$(선택자).val()👉 선택자의 value값 가져오기
<!DOCTYPE html>
<html lang="ko">

<head>
    <meta charset="UTF-8">
    <meta name="viewport" content="width=device-width, initial-scale=1.0">
    <title>Document</title>
    <script src="https://code.jquery.com/jquery-3.4.1.min.js"></script>

</head>

<body>
    <!-- <p><input type="text" name="user"></p>
    <button>Set the value of the input field</button> -->

    <p><input type="text" name="users"><span>focus fire</span></p>
    <p><input type="password" name="password"><span>focus fire</span></p>
    <p></p>

    <script>
        $(function () {
            // 1번
            // $('button').on('click', function (e) {
            //     $('input').val('welcome');
            // });

            // 2번
            // $('input').on('keyup', function () {
            //     var stl = $(this).val();
            //     console.log(stl);
            //     $('p').text(stl);
            // });

            // 3번
            // $(' p > input').on('change', function(){
            //     $('body').append('<span>값이 변경되었습니다. </span>')
            // })

            $(function(){
                $('input').on('focus', function(e){
                    $(this).next('span').css('display', 'inline').delay(800).fadeOut(1000);
                });
            });

        });
    </script>
</body>

</html>
<!DOCTYPE html>
<html lang="ko">
<head>
<meta charset="UTF-8">
<meta name="viewport" content="width=device-width, initial-scale=1.0">
<title>Document</title>
<script src="https://code.jquery.com/jquery-3.4.1.min.js"></script>
</head>
<body>
<p><input type="text" name="user"></p>
<button>Set the value of the input field</button>
<p></p>
<script>
$(function () {
// 2번
$('input').on('keyup', function () {
var stl = $(this).val();
console.log(stl);
$('p').text(stl);
});
});
</script>
</body>
</html><!DOCTYPE html>
<html lang="ko">
<head>
<meta charset="UTF-8">
<meta name="viewport" content="width=device-width, initial-scale=1.0">
<title>Document</title>
<script src="https://code.jquery.com/jquery-3.4.1.min.js"></script>
</head>
<body>
<p><input type="text" name="user"></p>
<p></p>
<script>
$(function () {
// 3번
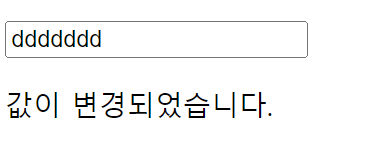
$(' p > input').on('change', function(){
$('body').append('<span>값이 변경되었습니다. </span>')
})
});
</script>
</body>
</html><!DOCTYPE html>
<html lang="ko">
<head>
<meta charset="UTF-8">
<meta name="viewport" content="width=device-width, initial-scale=1.0">
<title>Document</title>
<script src="https://code.jquery.com/jquery-3.4.1.min.js"></script>
</head>
<body>
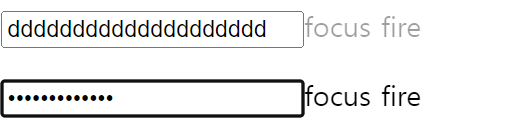
<p><input type="text" name="users"><span>focus fire</span></p>
<p><input type="password" name="password"><span>focus fire</span></p>
<script>
$(function () {
$(function(){
$('input').on('focus', function(e){
$(this).next('span').css('display', 'inline').delay(800).fadeOut(1000);
});
});
});
</script>
</body>
</html>⭐⭐⭐⭐⭐AJAX⭐⭐⭐⭐⭐
나중에 배운다