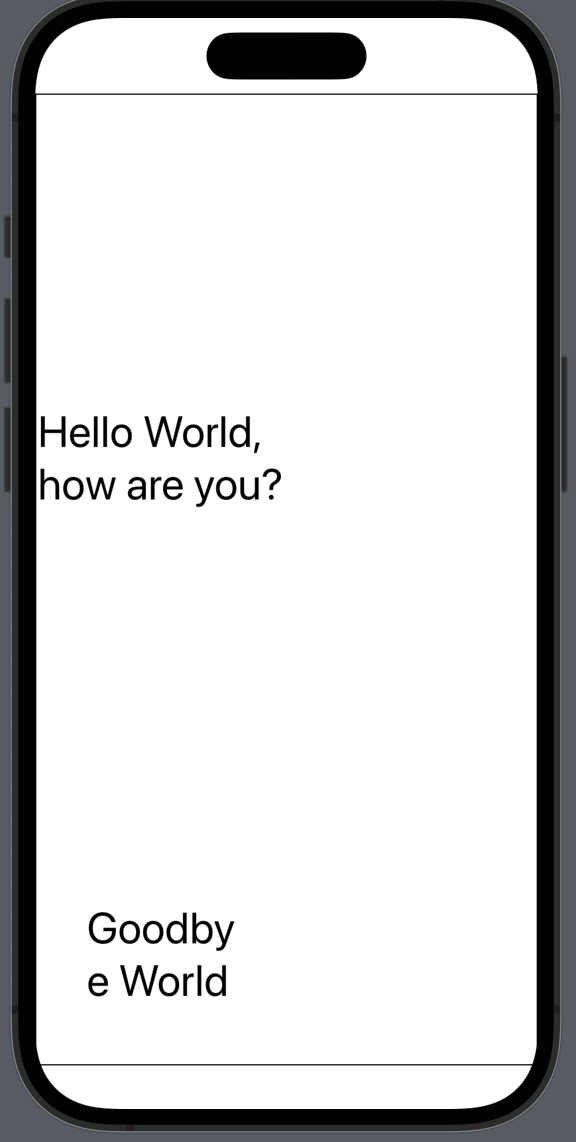
1. SwiftUI 스택
SwiftUI는 VStack(수직), HStack(수평), ZStack(중첩되게 배치하는 뷰) 형태인 3개의 스택 레이아웃 뷰를 제공한다. 스택은 SwiftUI View 파일 내에 하위 뷰들이 스택 뷰에 포함되도록 선언된다.
struct ContentView: View {
	var body: some View {
    	HStack {
        	Image(systemName: "goforward.10")
            Image(systemName: "goforward.15")
            Image(systemName: "goforward.30")
        }
    }
}
VStack{
	Image(systemName: "goforward.10")
    Image(systemName: "goforward.15")
    Image(systemName: "goforward.30")
}
기존의 컴포넌트를 스택에 포함시키려면 컴포넌트를 스택 선언부 안에 직접 넣거나 코드 에디터에 있는 컴포넌트 위에 마우스 포인터를 올리고 키보드의 Command 키를 누른 상태에서 컴포넌트를 클릭하여 할 수 있다.

다른 스택 안에 스택을 포함시켜 복잡한 레이아웃을 간단하게 설계할 수 있다.
VStack {
	Text("Financial Results")
    	.font(.title)

    HStack {
    	Text("Q1 Sales")
        	.font(.headline)

        VStack {
        	Text("January")
            Text("February")
            Text("March")
        }

        VStack {
        	Text("$1000")
            Text("$200")
            Text("$3000")
        }
    }
}
2. Spacer, alignment, padding
Spacer를 스택 안에서 사용하면 Spacer는 배치된 뷰들의 간격을 제공하기 위하여 스택의 방향에 따라 유연하게 확장/축소된다.
HStack(alignment: .top, spacing: 15) {

	Text("Q1 Sales")
    	.font(.headline)
    Spacer()
    VStack(alignment: .leading) {
    	Text("January")
        Text("February")
        Text("March")
    }
    Spacer()
.
.
.
alignment : 스택의 정렬은 스택이 선언될 때 정렬 값을 지정하면 된다.
spacing : 간격 값을 지정할 수 있다.
SwiftUI는 레이아웃, 콘텐트, 화면 크기에 대한 최적의 간격을 자동으로 사용한다.
Text("Hello World!")
	.padding()
수정자의 매개변수로 값을 전달하여 간격을 지정할 수 있다.
Text("Hello World!")
	.padding(10)
지정된 값이 있던 없던 뷰의 특정 방향에만 적용할 수 있다.
Text("Hello World!")
	.padding(.top, 10)
HStack(alignment: .center, spacing: 15) {
Text("Financial Results")
.font(.title)
HStack(alignment: .top) {
Text("Q1 Sales")
.font(.headline)
Spacer()
VStack(alignment: . leading) {
Text("January")
Text("February")
Text("March")
}
Spacer()
VStack(alignment: .leading) {
Text("$10000")
Text("$200")
Text("$3000")
}
.padding(5)
}
.padding(5)
}
.padding(5)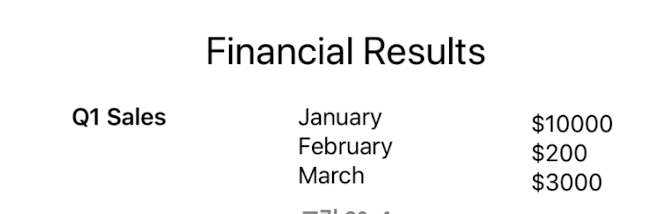
3. 컨테이너의 자식 뷰 제한
컨테이너 뷰는 직접적인 하위 뷰를 10개로 제한한다. 스택 컨테이너가 10개 이상의 자식 뷰를 담으면 오류가 발생한다.
스택에 포함된 직접적인 자식 뷰가 10개를 넘어야 한다면 Group 뷰를 사용할 수 있다.
VStack {

    Group {
    	Text("Sample text")
        Text("Sample text")
        Text("Sample text")
        Text("Sample text")
        Text("Sample text")
        Text("Sample text")
    }

    Group {
    	Text("Sample text")
        Text("Sample text")
        Text("Sample text")
        Text("Sample text")
        Text("Sample text")
        Text("Sample text")
    }
}
Group에 뷰들을 포함시키고 숨기는 명령을 주면 하나의 명령으로 모든 뷰를 숨길 수 있다.
4. 텍스트 줄 제한과 레이아웃 우선순위
디폴트로, HStack은 Text 뷰를 한 줄로 보여준다.
HStack {
	Image(systemName: "airplane")
    Text("Flight times:")
    Text("London")
}
.font(.largeTitle)
스택이 충분한 공간을 보유

스택이 충분한 공간을 가지고 있지 않은 경우

텍스트를 몇 줄로 표현할지는 lineLimit() 수정자를 사용하면 정할 수 있다.
HStack {
	Image(systemName: "airplane")
    Text("Flight times:")
    Text("London")
}
.font(.largeTitle)
.lineLimit(1)
뷰들 간에 우선순위는 layoutPriority() 수정자를 사용해서 줄 수 있다.
HStack {
	Image(systemName: "airplane")
    Text("Flight times:")
    Text("London").layoutPriority(1)
}
.font(.largeTitle)
.lineLimit(1)
5. SwiftUI 프레임
디폴트로, 뷰는 자신의 콘텐트와 자신이 속한 레이아웃에 따라 자동으로 크기가 조절된다. 뷰 자체가 특정 크기나 영역에 맞아야 할때는 frame 수정자를 사용한다.
Text("Hello World")
	.font(.largeTitle)
    .border(Color.black)
    .frame(Width: 100, height: 100, alignment: .center)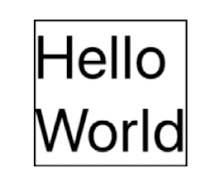
frame을 사용하여 텍스트가 길어지면 잘리는 현상을 해결할 수 있다.
Text("Hello World, how are you?")
	.font(.largeTitle)
    .border(Color.black)
    .frame(minWidth: 100, maxWidth: 300, minheight: 100,
    		maxHeight: 100, alignment: .center)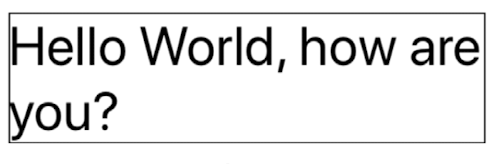
최솟값과 최댓값을 각각 0과 무한대로도 설정 가능하다.
.frame(minWidth: 0, maxWidth: .infinity, minHeight: 0, maxHeight: .infinity)디폴트로, framea은 화면을 채울 때 화면의 안전 영역을 준수한다. 안전 영역 밖에까지 확장되도록 frame을 구성하려면 edgesIgnoringSafeArea() 수정자를 사용하면 안전 영역을 무시하게 된다.
6. frame, GeometryReader
프레임은 뷰들을 담고 있는 컨테이너의 크기에 따라 조절되도록 구현할 수 있다.
GeometryReader로 뷰를 감싸고 컨테이너의 크기를 식별하기 위한 리더(reader)를 이용하여 할 수 있다. 리더는 프레임의 크기를 계산하는 데 사용된다.
GeometryReader { geometry in
	VStack {
    	Text("Hello World, how are you?")
        	.font(.largeTitle)
            .frame(width: geometry.size.width / 2,
            	height: (geometry.size.height / 4) * 3)
        Text("Goodbye World")
        	.font(.largeTitle)
            .frame(width: geometry.size.width / 3,
            	height: geometry.size.height / 4)
    }
} .border(Color.black)