🙆♂️ import 🙇♂️
docs.spring.io[Profile Annotation]
복수 이상의 WAS를 사용하는 상황에서
같은 Spring Application을 사용하지만 각 Sever에 맞게 의 Context를 설정해야 하는 경우가 있다.
예를 들자면 아래와 같은 상황이다.
1.23.45.66 Tomcat Server에서는 DB 접속을 3.33.33.33:3306에 접속해야 한다.
메인 Server에 접속하기 위한 Token은 "abcdefghgillog11" 이다.
2.44.51.77 Tomcat Server에서는 DB 접속을 4.44.44.44:3306에 접속해야 한다.
메인 Server에 접속하기 위한 Token은 "gillogggolillog124" 이다.
위와 같은 상황에서 활용될 수 있는것이 Spring.Profile이다.
먼저 Spring Profile에 대해 간략히 알아보자.
Spring Profile
profile은 세 가지 방법으로 활성화 할 수 있는 논리적 그룹이다.
ConfigurableEnvironment.setActiveProfiles(java.lang.String...)(Application Code)spring.profiles.activeProperty 지정 (JVM 시스템 속성,환경 변수)web.xml(tomcat)에서 Servlet context Parameter
@Profile 사용처
@Profile은 아래 세 가지 방법으로 활용 가능하다.
-
@Configuration포함 모든@ComponentClass Annotation과 함께 사용 -
Custom Stereo Type Annotation생성을 위한Meta Annotation으로 활용 -
@BeanAnnotation이 사용된 method와 함께 활용
profile 문자열 활용
먼저 profile 관련 표현식은 아래와 같다.
!NOT&AND|OR
profile은 아래와 같이 활용 가능하다.
// server1이나 server2에서 활성화
@Profile({"server1", "server2"})

// server1이거나 server2가 아닐 경우 활성화
@Profile({"server1", "!server2"})

// server1이고 server2가 아닌 경우 이거나 아예 server3인 경우
@Profile("(server1 & !server2) | server3")
이는 Spring Context.xml 등에서 <beans profile="p1,p2">과 같이 설정하는 것과 같다.
Profile Tomcat 활용
spring.profiles.active Property 지정 (JVM 시스템 속성,환경 변수) 방법을 통해서,
Tomcat 각 Server 별 Profile을 지정해보려한다.
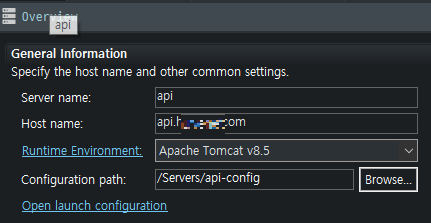
먼저 Tomcat의 launch configuration에 들어가자
이제 Arguments에 VM arguments로 구동시 변수 설정으로 ,
-Dspring.profiles.active=local 와 같이 해당 Tomcat Server에서 설정하고 싶은 Profile 명 을 설정하자.

이제 Java안에서 @Configuration이나 @Bean 관련 Annotation에서 @Profile을 통해 활용하거나,
context관련.xml 에서 아래와 같이 활용 가능하다.
<beans profile="local">
  <bean id="datasource" class="org.apache.commons.dbcp2.BasicDataSource" destroy-method="close">
    <property name="url" value="jdbc:mysql://3.33.33.33:3306/gillog">
  </bean>
  <bean id="token">
    <property name="jwt" value="abcdefghgillog11">
  </bean>
</beans>


<beans profile="devel">
  <bean id="datasource" class="org.apache.commons.dbcp2.BasicDataSource" destroy-method="close">
    <property name="url" value="jdbc:mysql://4.44.44.44:3306/gillog">
  </bean>
  <bean id="token">
    <property name="jwt" value="gillogggolillog124">
  </bean>
</beans>
이를 통해 spring.profile.active=local로 지정한 Tomcat Server와,
spring.profile.active=devel로 지정한 Tomcat Server에서,
각각 다른 Bean으로 같은 Spring Application을 구동 가능하다.