기본적인 XCode 설정
- 테스트 프로젝트 추가: Xcode Test Navigator탭 좌측 아래 + 버튼 클릭
1파일 1클래스 룰을 지킨다면 1파일 마다 1테스트 케이스라보면 될까? 테스트케이스의 기준은 내맴이긴 하지만,,
(프로젝트를 생성하면 기본적으로 unit test 파일과 ui test 파일이 기본적으로 생성되어있음) - 테스트 코드 실행:
Product>TestorCommand+U - 테스트 실행 전/후
실행 전
실행 후
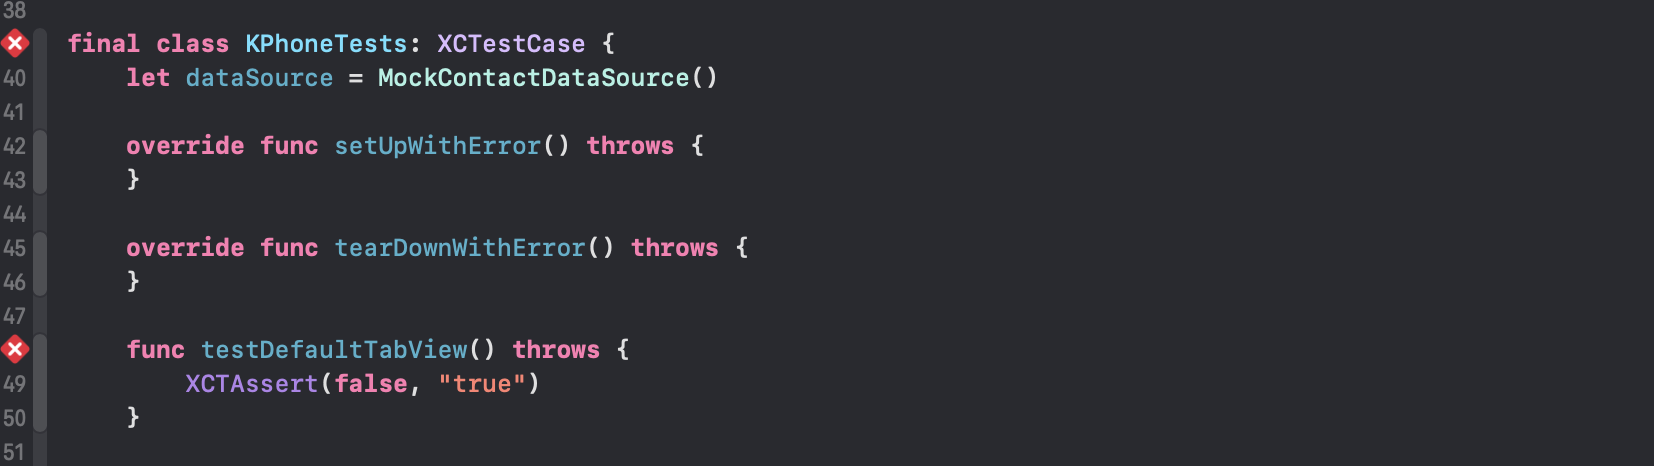
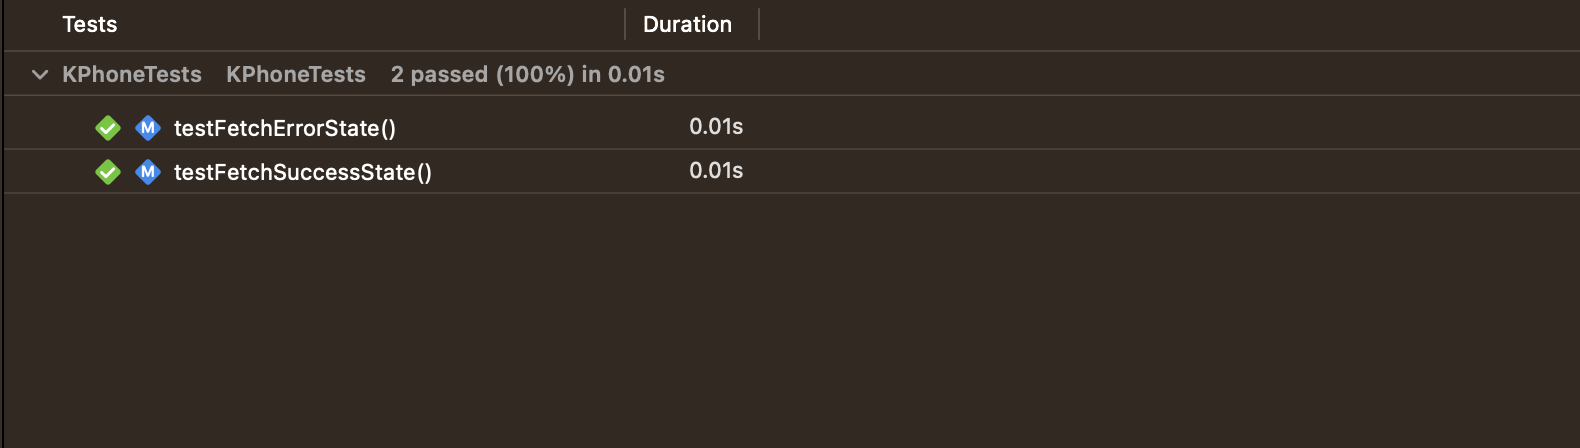
UnitTest
테스트를 위해 알아야 할 XCTest
기본적으로 XCTest를 import해야 테스트를 위한 api들을 사용할 수 있음.
unit test 성능 테스트 UI 테스트 까지도 가능함.
import XCTest
- XCTestCase
이 클래스를 상속 받아서 써야 아래 API 들을 사용할 수 있음.
이 클래스를 상속받은 클래스 하나가 하나의 테스트 케이스로보면 됨. - .setUp(), .tearDown()
setUp()에서 SUT(System Under Test) 객체를 생성, tearDown()에서 해제
모든 테스트가 깨끈한 상태로 시작하는지 확인할 수 있도록 함. - @testable
Unit Test가 타켓 프로젝트의 클래스와 클래스의 메소드에 접근할 수 있게 해줌 - XCTAssert
프로젝트에서 Mdel을 테스트하기위해 사용함. 테스트 코드에서 기대하는 기대값이 나오는지 확인함.- XCTAssertNil
- XCTAssertTrue
- XCTAssertEqual
- ...
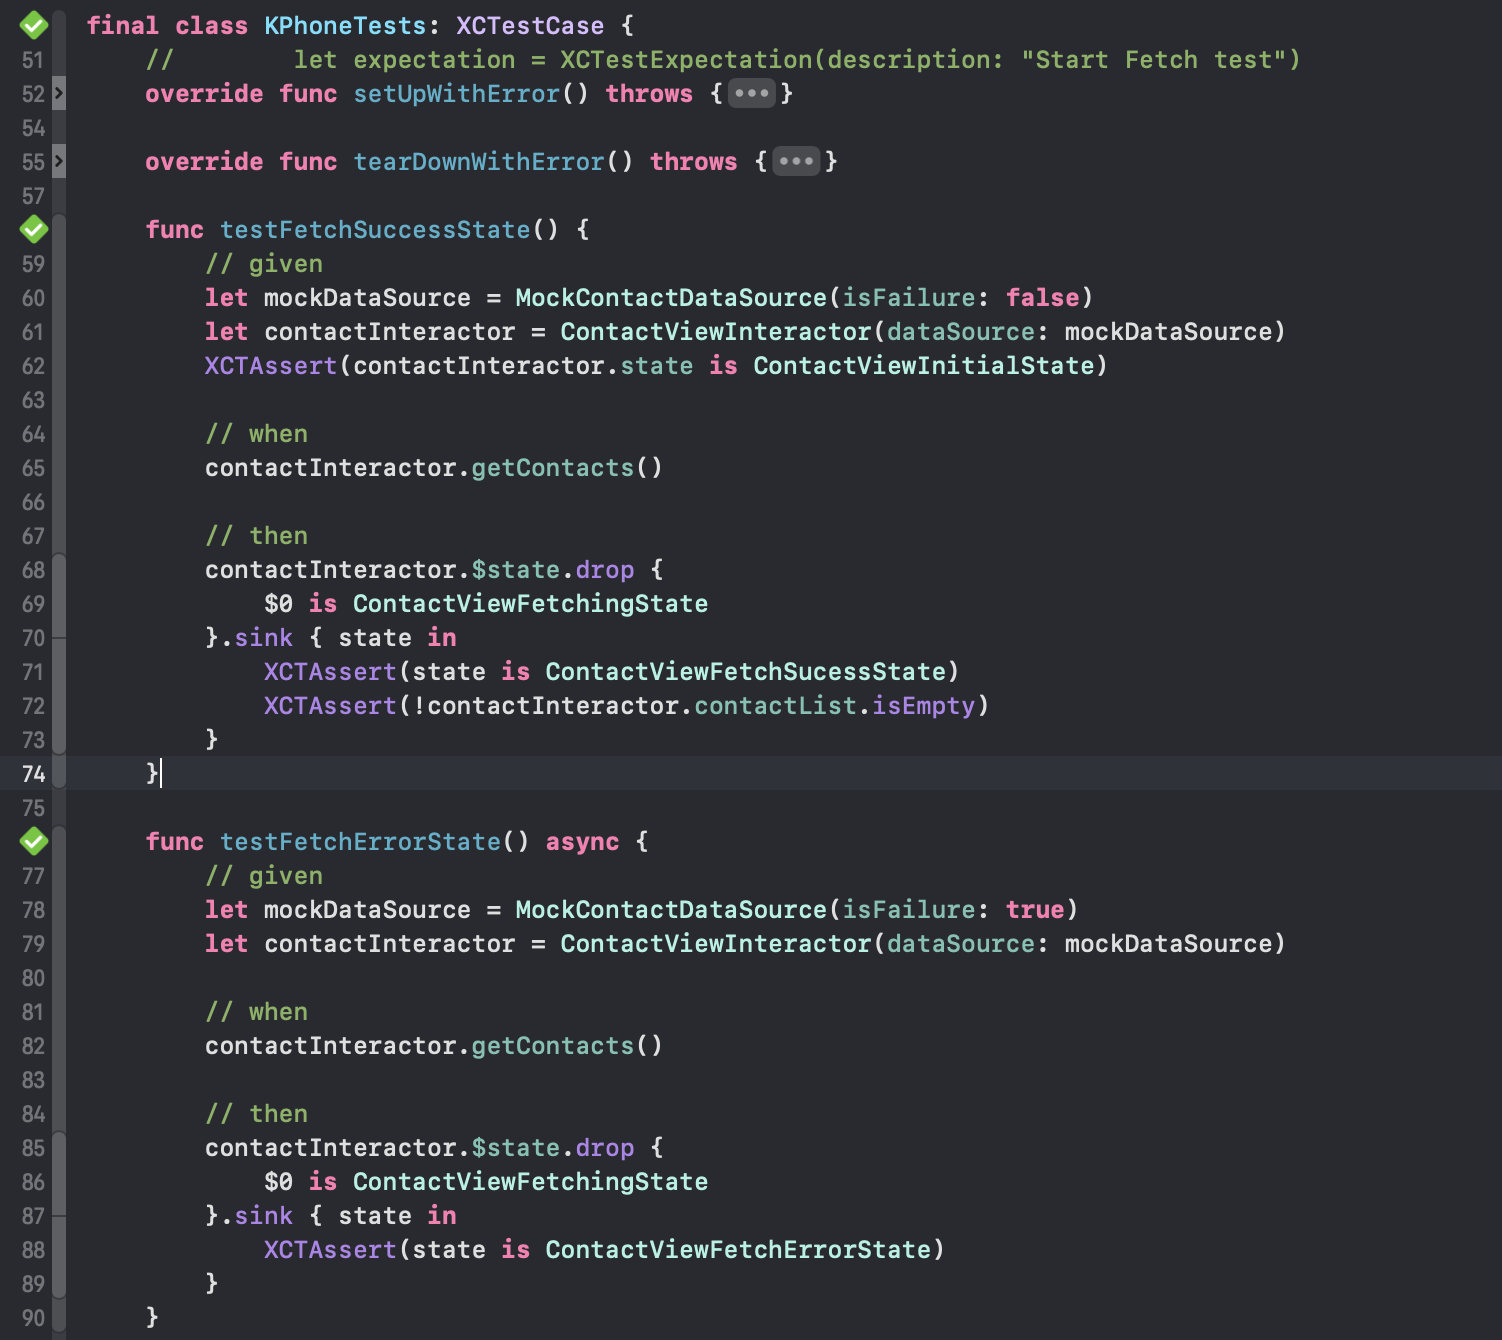
Test Code
- 테스트 메소드 이름은 test로 시작해야함
- given when then 구조를 지켜서 작성하는게 가독성에 좋음.
given섹션에서는 필요한 모든 값을 설정
calculator에서는 사용자가 입력할 숫자와 연산자들을 셋팅하면 될 것이다.when섹션에서는 테스트 중인 코드를 실행then섹션에서는 예상한 결과를 확인하며,
계산 결과가 일치하는지 확인하여 실패하는 경우에 메세지를 출력
setUp VS setUpWithError(tearDown vs tearDownWithError)
XCTest의 호출 순서
setUpWithError() -> setUp() -> tearDown -> tearDownWithError()
함수명에서 알 수 있듯이 throw로 error를 던질 수 있게됨.
error가 존재하면 이후 테스트는 자체적으로 skip되고 바로 tearDownWithError가 호출됨.
- XCTSkipIf, SCTSkipUnless: 일부만 skip하고 싶을 때 exception 처리 할 때 쓰는거
XCTestError
test에서 wait하다가 발생할 수 있는 에러를 정의
- timeourWhileWaiting
- failureWhileWaiting
AsyncTest
코드가 다른 thread나 큐에 담겨 순서대로 처리되거나, 뭐 그런경우에는 기본적으로 async 를 사용해서 함수를 실행하면 됨
ConCurrency
func testDownloadWebDataWithConcurrency() async throws {
    // Create a URL for a webpage to download.
    let url = URL(string: "https://apple.com")!

    // Use an asynchronous function to download the webpage.
    let dataAndResponse: (data: Data, response: URLResponse) = try await URLSession.shared.data(from: url, delegate: nil)

    // Assert that the actual response matches the expected response.
    let httpResponse = try XCTUnwrap(dataAndResponse.response as? HTTPURLResponse, "Expected an HTTPURLResponse.")
    XCTAssertEqual(httpResponse.statusCode, 200, "Expected a 200 OK response.")
}
Expectations
필요한경우: async를 사용할 수 없을 때나 async code가 아래의 환경에서 돌때
- Objective-C
- dispatch queue 안에
- A delegate method
- An asynchronous callback, closure, or completion block
- A Future or Promise in Swift Combine
- A situation where it needs to complete within a specific amount of time
// XCTestExpectation는 async한 동작 테스트를 위한 expectation
let expectation = XCTestExpectation(description: "Open a file asynchronously.")
// timeout 시간 내에 완료하는지 테스트 하는 경우
let fileManager = ExampleFileManager()

// 파일 가져오는 동작 ==> async
fileManager.openFileAsync(with: "exampleFilename") { file, error in
    //...
}

// 10초 동안 기다려서 완료하는지 실패하는지 봄 시간초과도 남.
wait(for: [expectation], timeout: 10.0) // => XCTWaiterDelegate가 XCTestCase 안에있어서 이렇게 사용 가능 https://developer.apple.com/documentation/xctest/xctwaiter

// fulfill로 끝났다는걸 알려줌, error든 성공한 file이든 끝날때 까지 기다림.
fileManager.openFileAsync(with: "exampleFilename") { file, error in
// 아래 Assertion들이 실제 결과값이 맞는지를 테스트 하는거고
    // 성공하면 파일이 nil이 아님.
    XCTAssertNotNil(file, "Expected to load a file.")

    // 성공하면 error가 nil임.
    XCTAssertNil(error, "Expected no errors loading a file.")

    // Fulfill the expectation.
    // 기다림 끝 다음 테스트로 넘어가도 좋다는 뜻
    expectation.fulfill()
}
// timeout 에러 떨어지기 전에 fulfill 실행 안하면 XCTest가 실패로 기록함.
비동기 task안에서 fullfill 호출하고, wait로 기다려주고, XCTAssert로 error, condition 확인
TestExpectation
TODO
Other Expectations
- XCTKVOExpectation
Observing하는 keyPath의 값이 expectedValue가 같아진 경우
등록한 Handler를 만족하면 자동으로 fulfill - XCTNSPredicateExpectation
Predicate 조건을 만족하면 자동으로 fulfill - XCTNSNotificationExpectation
특정 Notification이 post되면 자동으로 fulfill
Performance
성능 측정
measure {}
measureBlock {}
TODO 이 두개 차이가 뭐지 표준 편차가 어쨌다는거야,,,
암튼 이거 두개를 사용해서 성능을 측정하는데 여러번 재서 평균값을 내는건지 뭐 암튼 그럼
어떤걸 측정할지를 matrix 라고 하고 이 Matrix 종류는 아래와 같음
- XCTMetrix: 프로토콜
- XCTCPUMetrix: cpu
- XCTClockMetrix: 실행시간
- XCTMemoryMetrix: 도는동안 사용하는 메모리
- XCTOSSignpostMetrix: 뷰가 변경되는거 감지. navigation 이 변하거나 scroll 이 변하거나
- XCTStoageMetrix: storage에 뭔가 쓸때 성능
- XCTApplicationLaunchMetrix: 앱 켜지는데 얼마나 걸리냐
성능 측정 옵션
- default
- invocation: 호출이 자동이냐 수동이냐의 옵션
- XCTMeasureOptions.InvocationOptions: 수동 시작 혹은 수동 종료를 설정할 수 있음. - iterationCount: 그 블록의 측정 횟수
측정 결과
- XCTPerformanceMeasurement : 한번 반복으로 측정
- XCTPerformanceMeasurementTimestamp : 반복 측정의시작 혹은 종료 값을 츨정하는거
Code Coverage
Report navigator에서 최근 테스트 한것의 Coverage를 클릭하면 얼만큼을 커버하는 테스트 코드인지도 분석 결과를 볼 수 있고 각 함수들이 몇번 호출되었는지 알 수 있다.
설정하는 방법 : Product → Scheme → Edit Scheme → Options 에서 Code Coverage를 체크
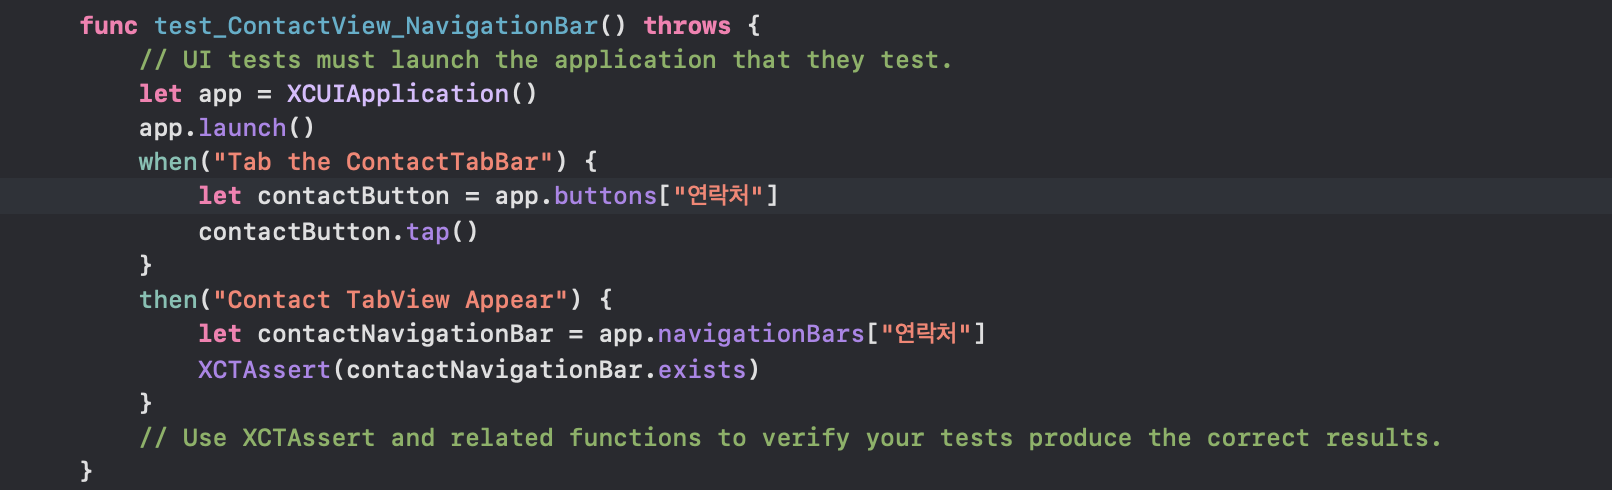
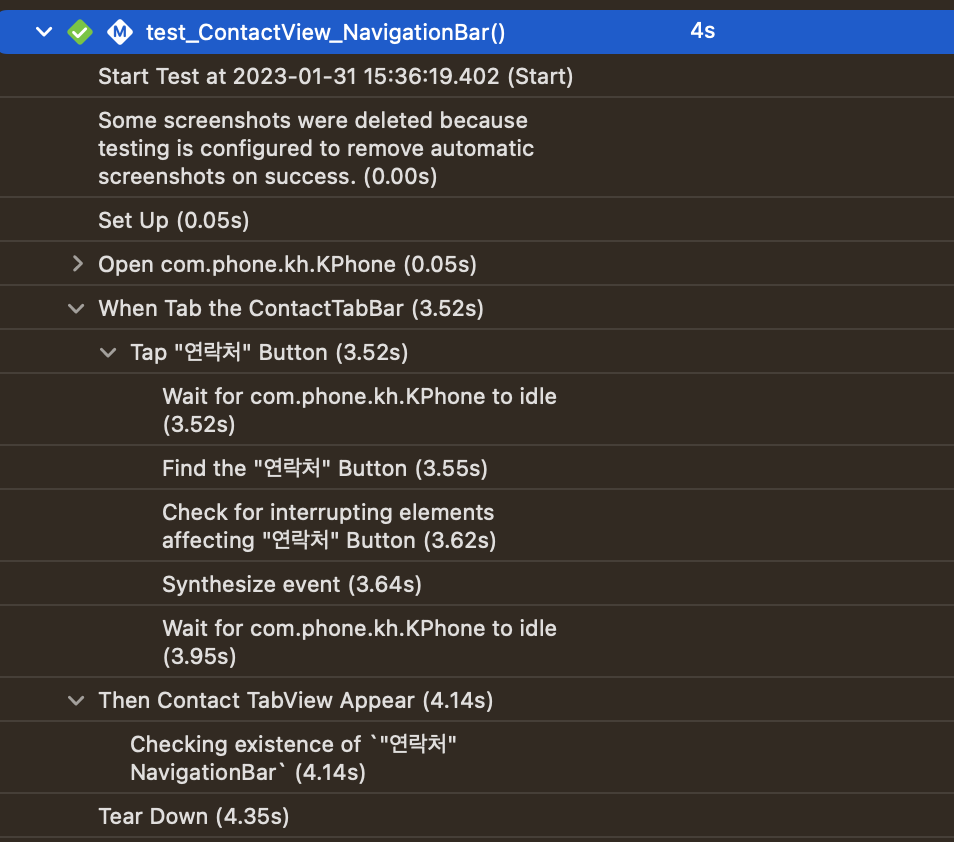
UI-Test Code(E2E)
SwiftUI- ViewInsPector
func testRecipeDefaultText() throws {
  // 1
  let controller = RecipeController.previewController()
  let recipe = controller.createRecipe()
  let view = RecipeLineView(recipe: recipe)

  // 2
  let inspectedName = try view
    .inspect()
    .find(text: AppStrings.defaultTitle)
    .string()
  XCTAssertEqual(AppStrings.defaultTitle, inspectedName)
  let inspectedDescription = try view
    .inspect()
    .find(text: AppStrings.defaultDescription)
    .string()
  XCTAssertEqual(AppStrings.defaultDescription, inspectedDescription)
}
XCUIElement
XCtest에서 제공하는거 참고
User Interface Tests
UI TestCode 작성
break point 를 찍으면 lldb(low level debugger) console이 뜨는데
po 명령어를 사용하면 객체의 상태를 검사하는 것이 가능
Report
Activities
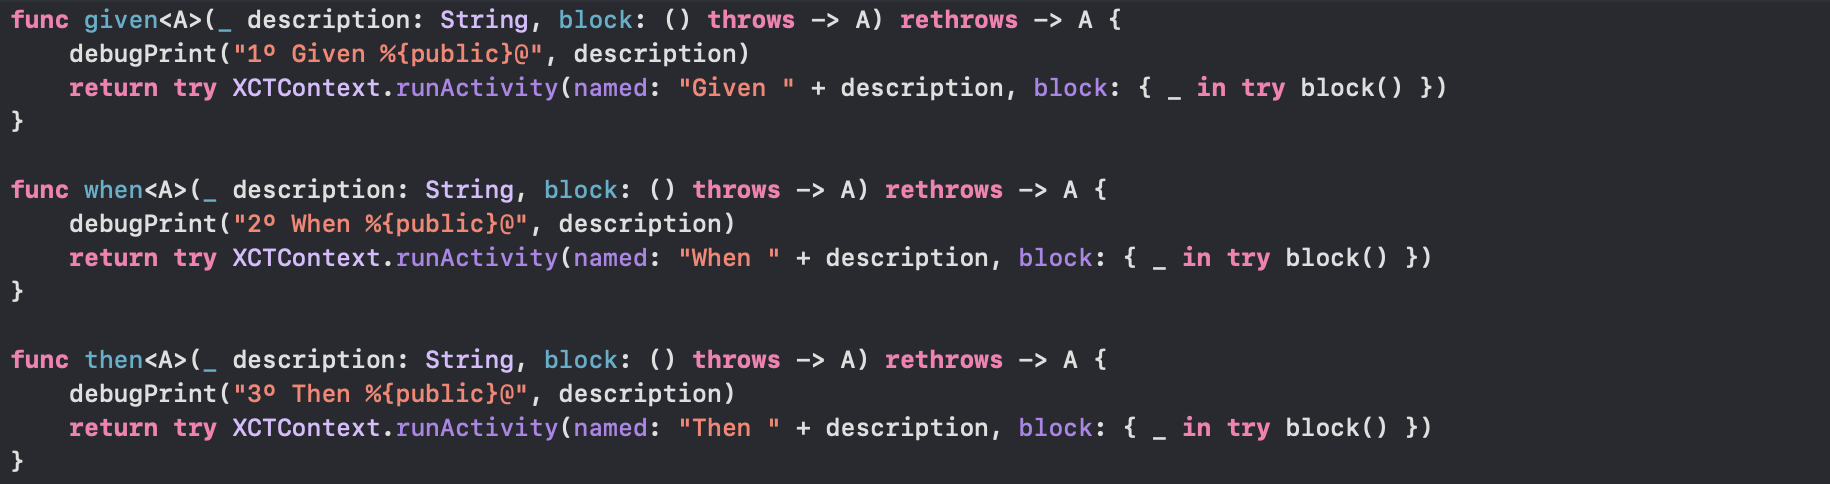
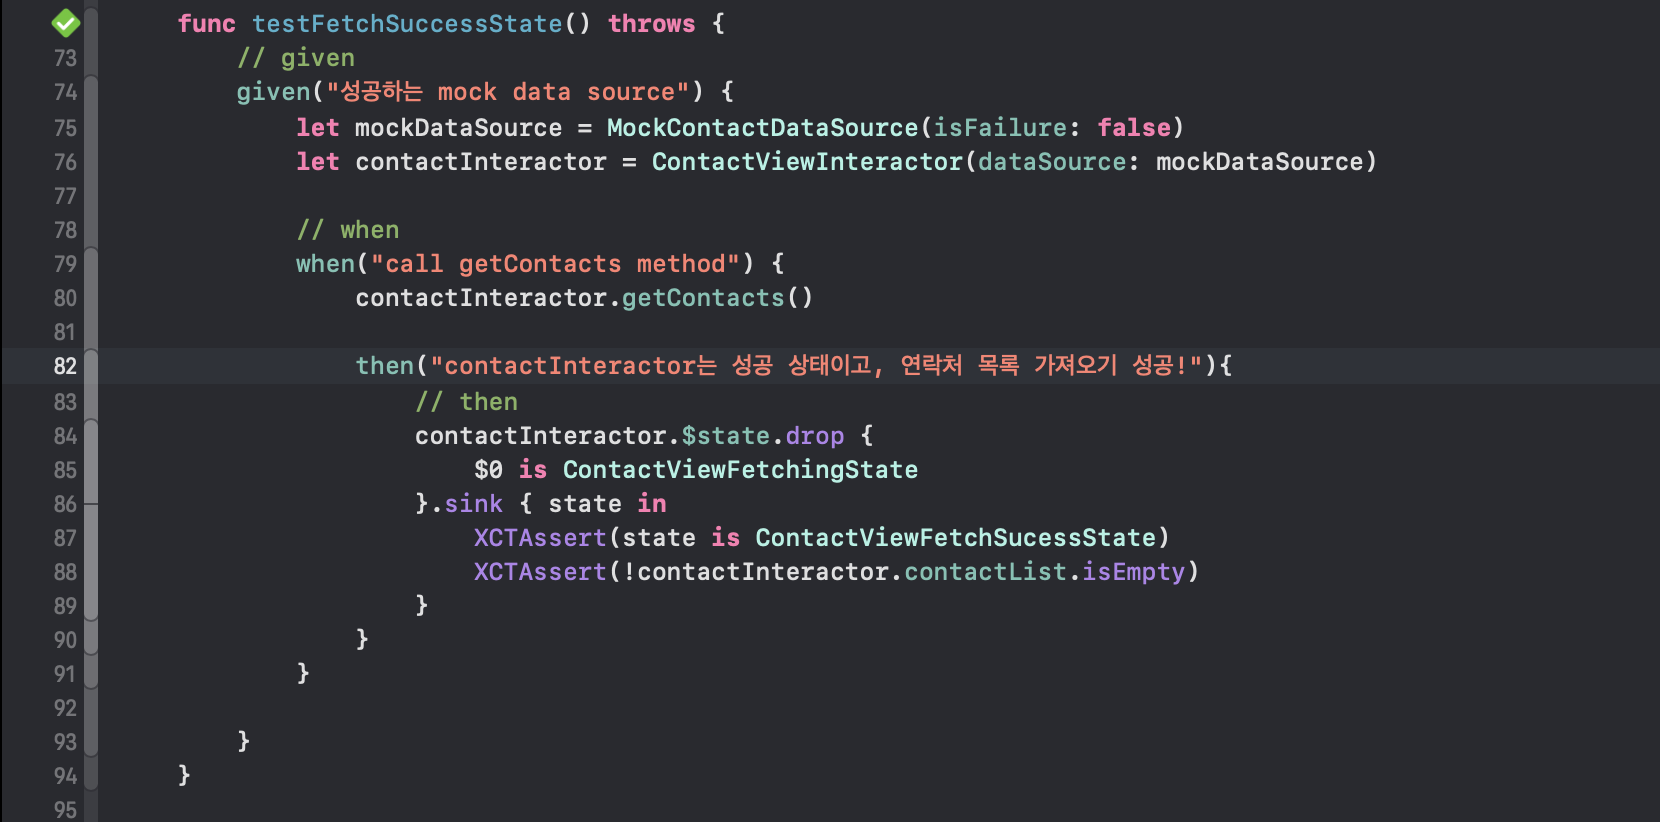
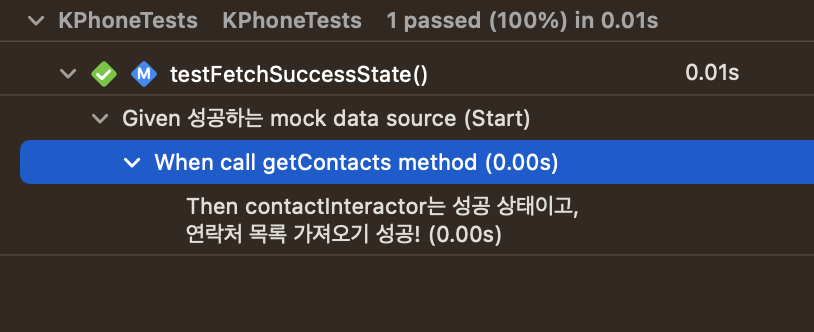
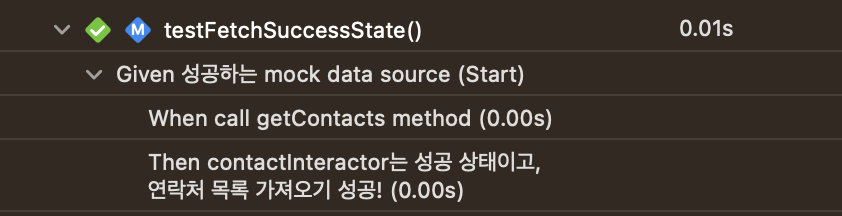
서브 스텝 구조의 액티비티들을 만들어서 간단하게 테스트를 리포트 하면 됨.
runActivity 안에 테스트 코드는 블록처럼 테스트 코드를 넘김
func testLogin() throws {
    openLoginWindow()
    enterPassword(for: .member)
    closeLoginWindow()
}

func openLoginWindow() {
    XCTContext.runActivity(named: "Open login window") { activity in
        let loginButton = app.buttons["Login"]

        XCTAssertTrue(loginButton.exists, "Login button is missing.")
        XCTAssertTrue(loginButton.isHittable, "Login button is not hittable.")
        XCTAssertFalse(app.staticTexts["Logged In"].exists, "Logged In label is visible and should not be.")

        loginButton.tap()

        let loginLabel = app.staticTexts["Login:"]
        XCTAssertTrue(loginLabel.waitForExistence(timeout: 3.0), "Login label is missing.")
    }
}

func enterPassword(for userType: TestUserType) {
    XCTContext.runActivity(named: "Enter password") { activity in
        let userNameTextField = app.textFields["user name"]
        userNameTextField.tap()
        userNameTextField.typeText(userType.userName)

        let passwordSecureTextField = app.secureTextFields["password"]
        passwordSecureTextField.tap()
        passwordSecureTextField.typeText(userType.password)

        // Dismiss keyboard.
        app.children(matching: .window).firstMatch.tap()
    }
}

func closeLoginWindow() {
    XCTContext.runActivity(named: "Close login window") { activity in
        let submitLoginButton = app.buttons["Submit"]
        XCTAssertTrue(submitLoginButton.exists, "Submit button is missing.")
        XCTAssertTrue(submitLoginButton.isHittable, "Submit button is not hittable.")
        submitLoginButton.tap()
        XCTAssertTrue(app.staticTexts["Logged In"].waitForExistence(timeout: 3.0), "Logged In label is missing.")
    }
}
기존 코드

activity 사용해서 각 sub step 정리
결과값
XCTContext
현재 testing context
XCTActivity
테스트 메소드의 서브 스텝 이름
UtilityMethod 활용
activity를 활용해서 여러 서브 스텝에서 사용 할 수 있게 만들 수 있음
아래 예에서는 login 함수가 그럼
func testAdminLoginFeatures() throws {
    let loginResult = login(for: .admin)
    try XCTAssertTrue(loginResult.get() == .admin)

    XCTAssertTrue(app.buttons["Admin Features"].exists, "Missing Admin Features button.")
    XCTAssertFalse(app.buttons["Member Features"].exists, "Member Features button is visible and should not be.")
}

func testMemberLoginFeatures() throws {
    let loginResult = login(for: .member)
    try XCTAssertTrue(loginResult.get() == .member)

    XCTAssertFalse(app.buttons["Admin Features"].exists, "Admin Features button is visible and should not be.")
    XCTAssertTrue(app.buttons["Member Features"].exists, "Missing Member Features button.")
}

func testGuestLoginFeatures() throws {
    let loginResult = login(for: .guest)

    switch loginResult {
    case .success:
        XCTAssertFalse(app.buttons["Admin Features"].exists, "Admin Features button is visible and should not be.")
        XCTAssertFalse(app.buttons["Member Features"].exists, "Member Features button is visible and should not be.")
    case .failure(let error):
        throw XCTSkip("Guest logins are still not working, skip this test. Error was: \(error)")
    }
}

func login(for userType: TestUserType) -> Result<TestUserType, Error> {
    return XCTContext.runActivity(named: "Login") { activity in
        performLoginUITests(for: userType)

        guard app.staticTexts["Logged In"].exists else {
            let screenshot = app.windows.firstMatch.screenshot()
            let attachment = XCTAttachment(screenshot: screenshot)
            attachment.lifetime = .keepAlways
            activity.add(attachment)
            return .failure(TestLoginError.invalidLogin)
        }
        return .success(userType)
    }
}
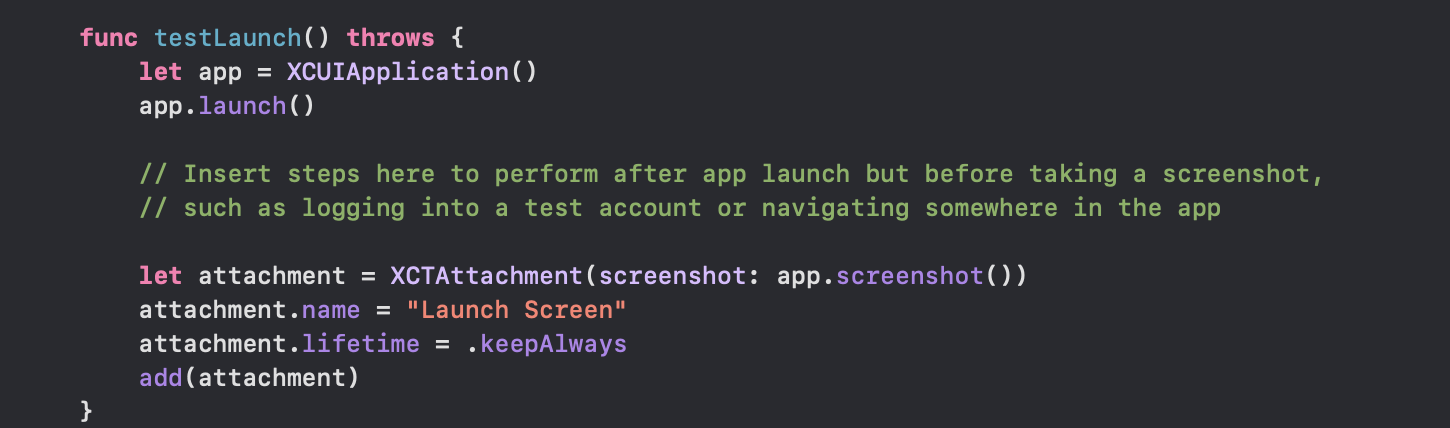
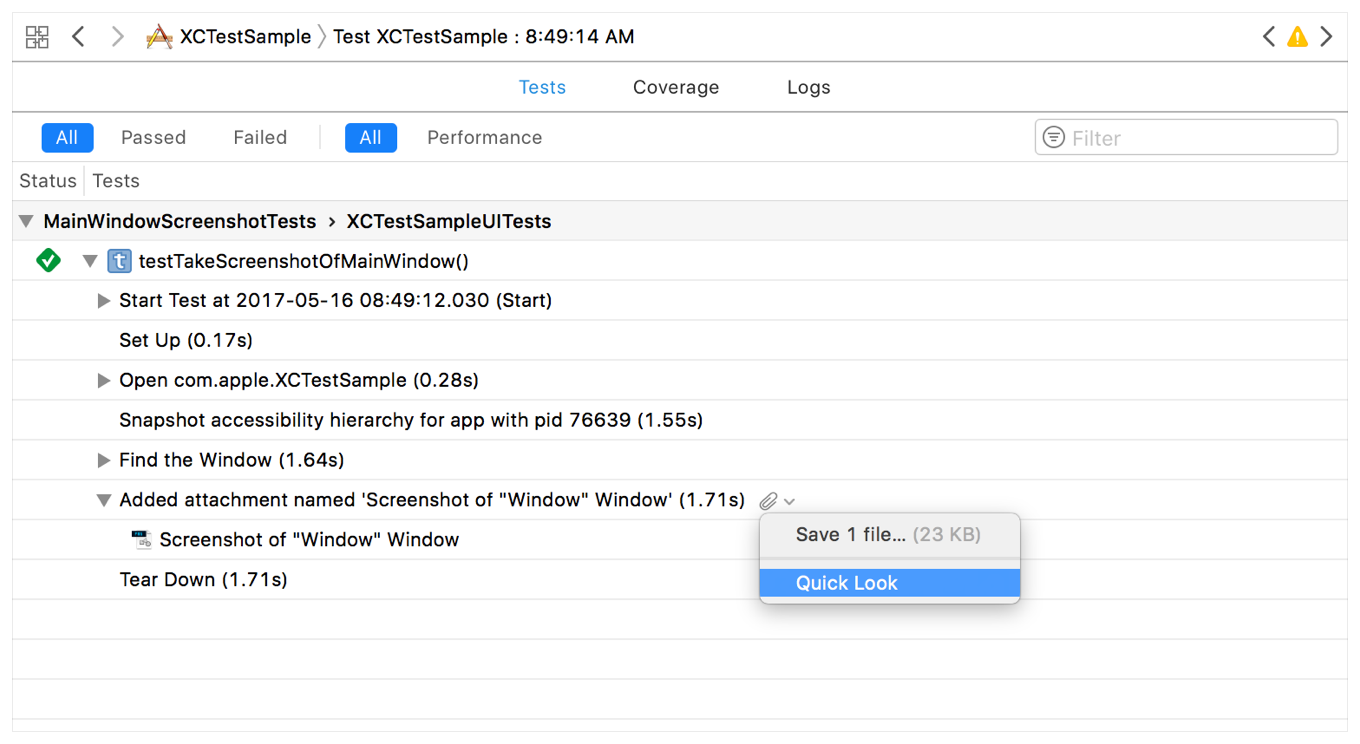
Attachments
뭐 테스트 실패 했을 때 마냥 throw를 던지는거보다 캡쳐나 해당 테스트 실패 시 파일, string, plistObject 등등을 첨부 파일로 남겨주기위해 사용
ReportNavigator 들어가서 최근 테스트 실행하면
아래 사진처럼 확인할 수 있음.
// 예시 (속성 이름에 따라 타입은 당연히 다름)
Attachments(image: "bla")
Attachments(screenshot: "bla")
Attachments(data: "bla")
Attachments(contentsOfFile: "bla")
Attachments(plistObject: "bla")
Attachments(string: "bla")
위 예시에서
let attachment = XCTAttachment(screenshot: screenshot)
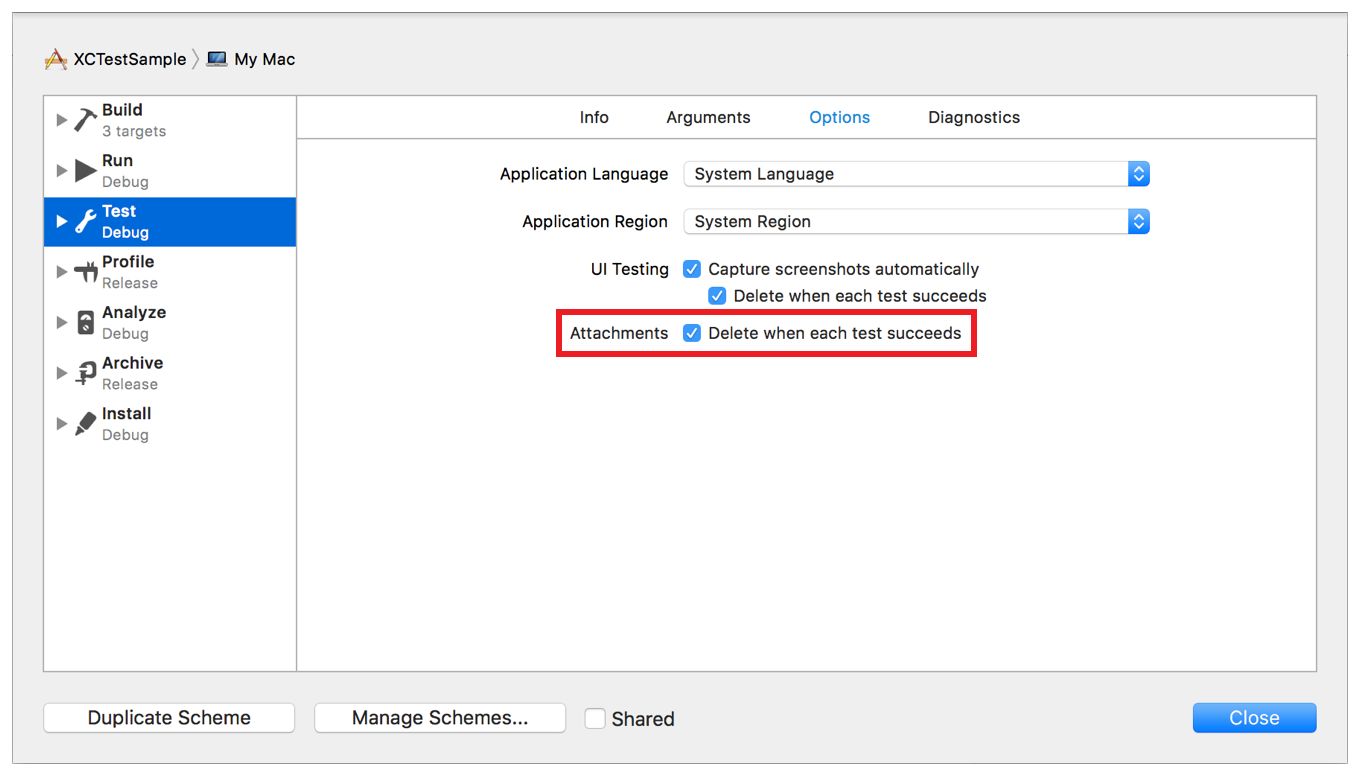
첨부 파일 남길 때 성공 해도 남기고 싶으면
lifetime을 keepAlways로 매번 설정해주는거보다 아래 체크박스 해제해도 됨.