지난 포스트에서 custom-error를 만들어 front-end와 에러에 대해 소통을 손쉽게 해주었다.
const errorHandler = (
	err: any,
	req: Request,
	res: Response,
	next: NextFunction
): void => {
  if (err instanceof BadRequestError) {
    res
      .status(err.code)
      .send({ message: err.message, code: err.errorCode, errors: err.data });
  } else if (err instanceof UnauthorizedError) {
    res
      .status(err.code)
      .send({ message: err.message, code: err.errorCode, errors: err.data });
  } else if (err instanceof ForbiddenError) {
    res
      .status(err.code)
      .send({ message: err.message, code: err.errorCode, errors: err.data });
  } else if (err instanceof InternalServerError) {
    res
      .status(err.code)
      .send({ message: err.message, code: err.errorCode, errors: err.data });
  } else if (err instanceof NotFoundError) {
    res.status(err.code).send({ message: 'NOT_FOUND' });
  } else {
	// slack으로 message보내서 확인
  }
}
하지만 이 마지막 Exception Error에 대해서는 처리하지 않았는데, 오늘 Discord로 이 에러들을 전송해주려 한다. Slack을 이용하고 싶었지만, 팀원 분들이 회사 때문에 Slack을 이용하지 못하게 되어서 나머지 중 친숙한 Discord를 골랐다.
Discord.js 공식문서
Discord와 우리 node.js 서버를 연동하기 위해 Discord.js를 사용하였다.
Discord bot 만들기
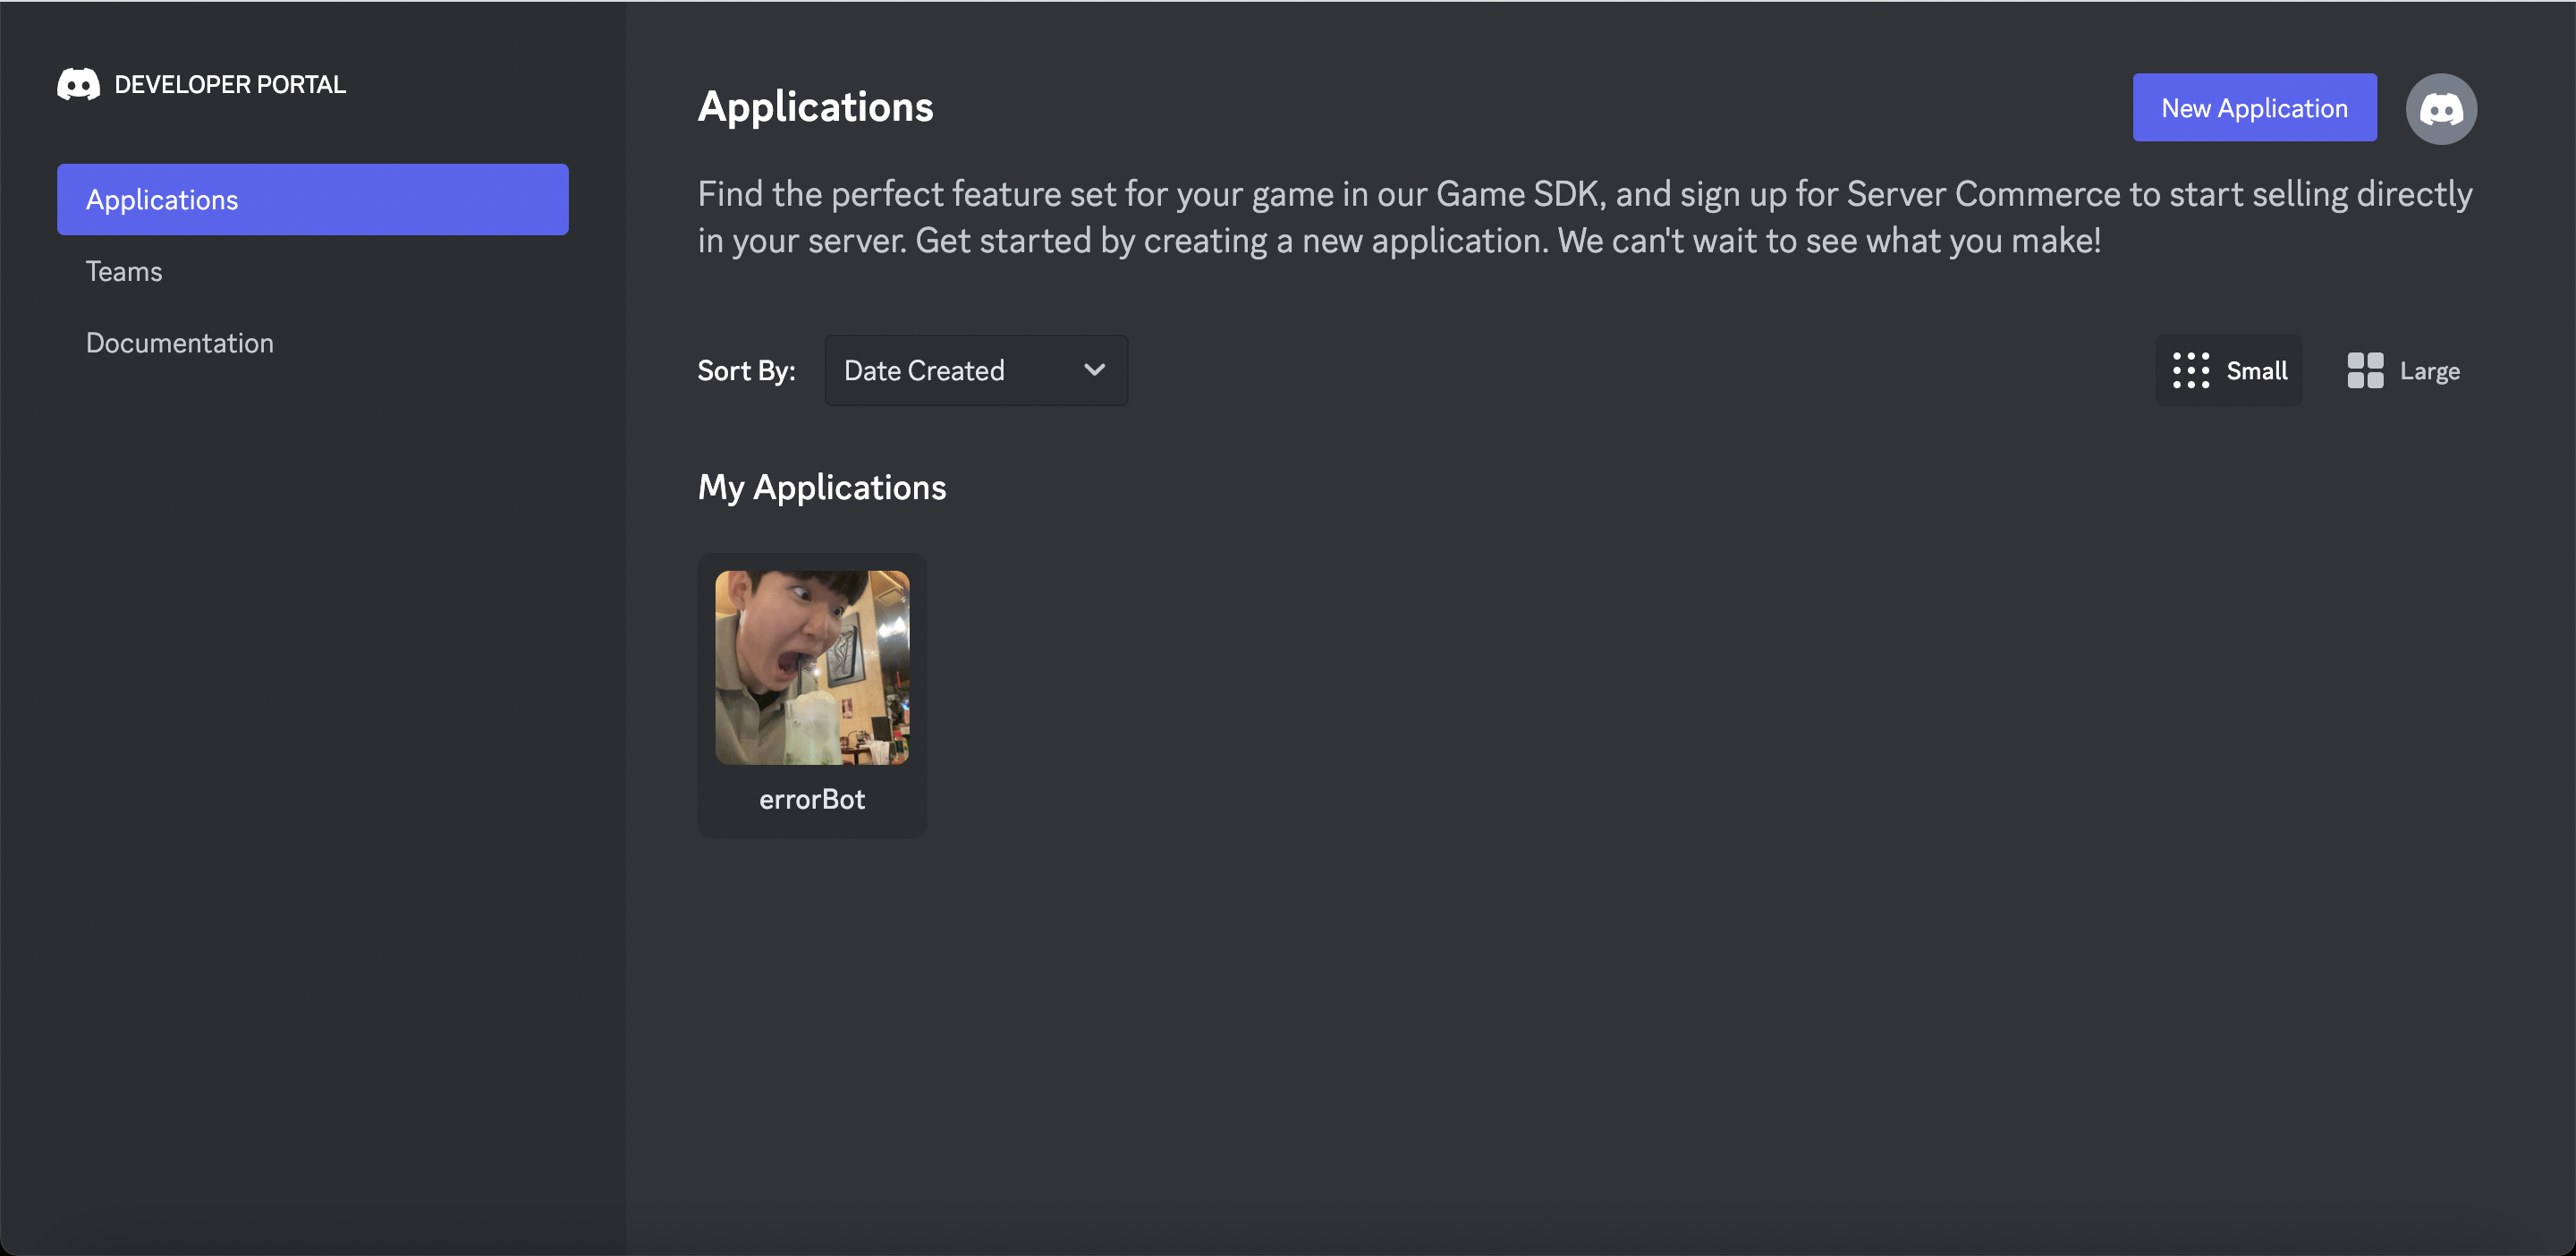 https://discord.com/developers/applications
위 페이지로 들어가서 Discord bot을 만들어보자.
https://discord.com/developers/applications
위 페이지로 들어가서 Discord bot을 만들어보자.
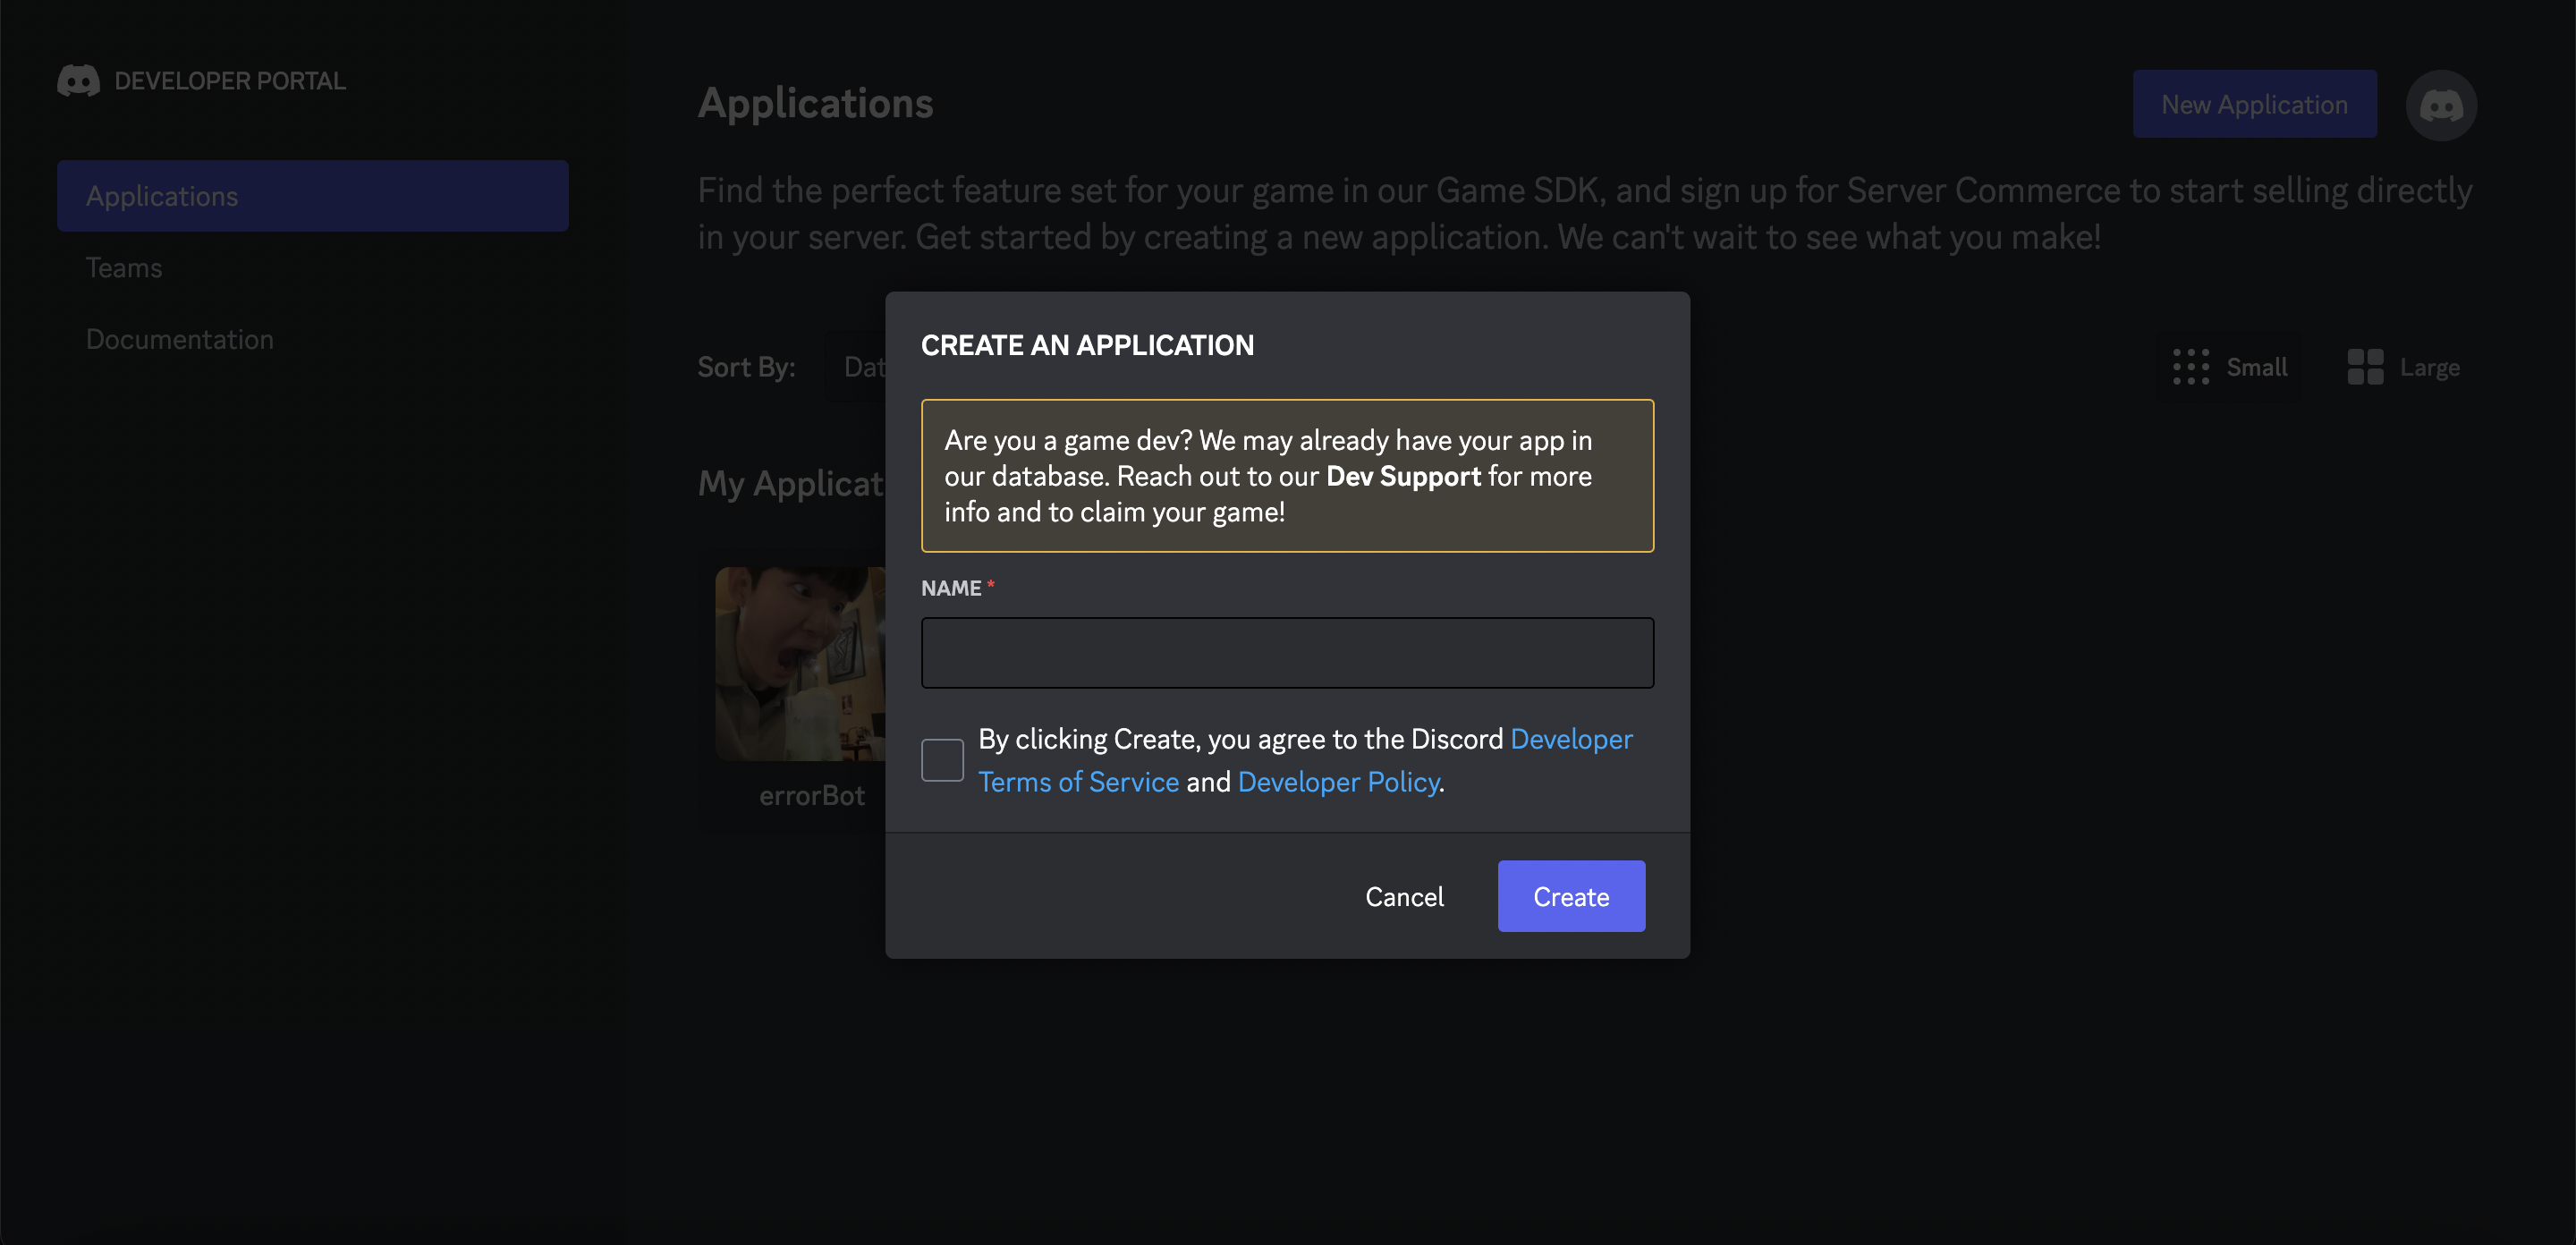
위의 New Application 버튼을 클릭하여 새로운 Discord bot을 생성한다.
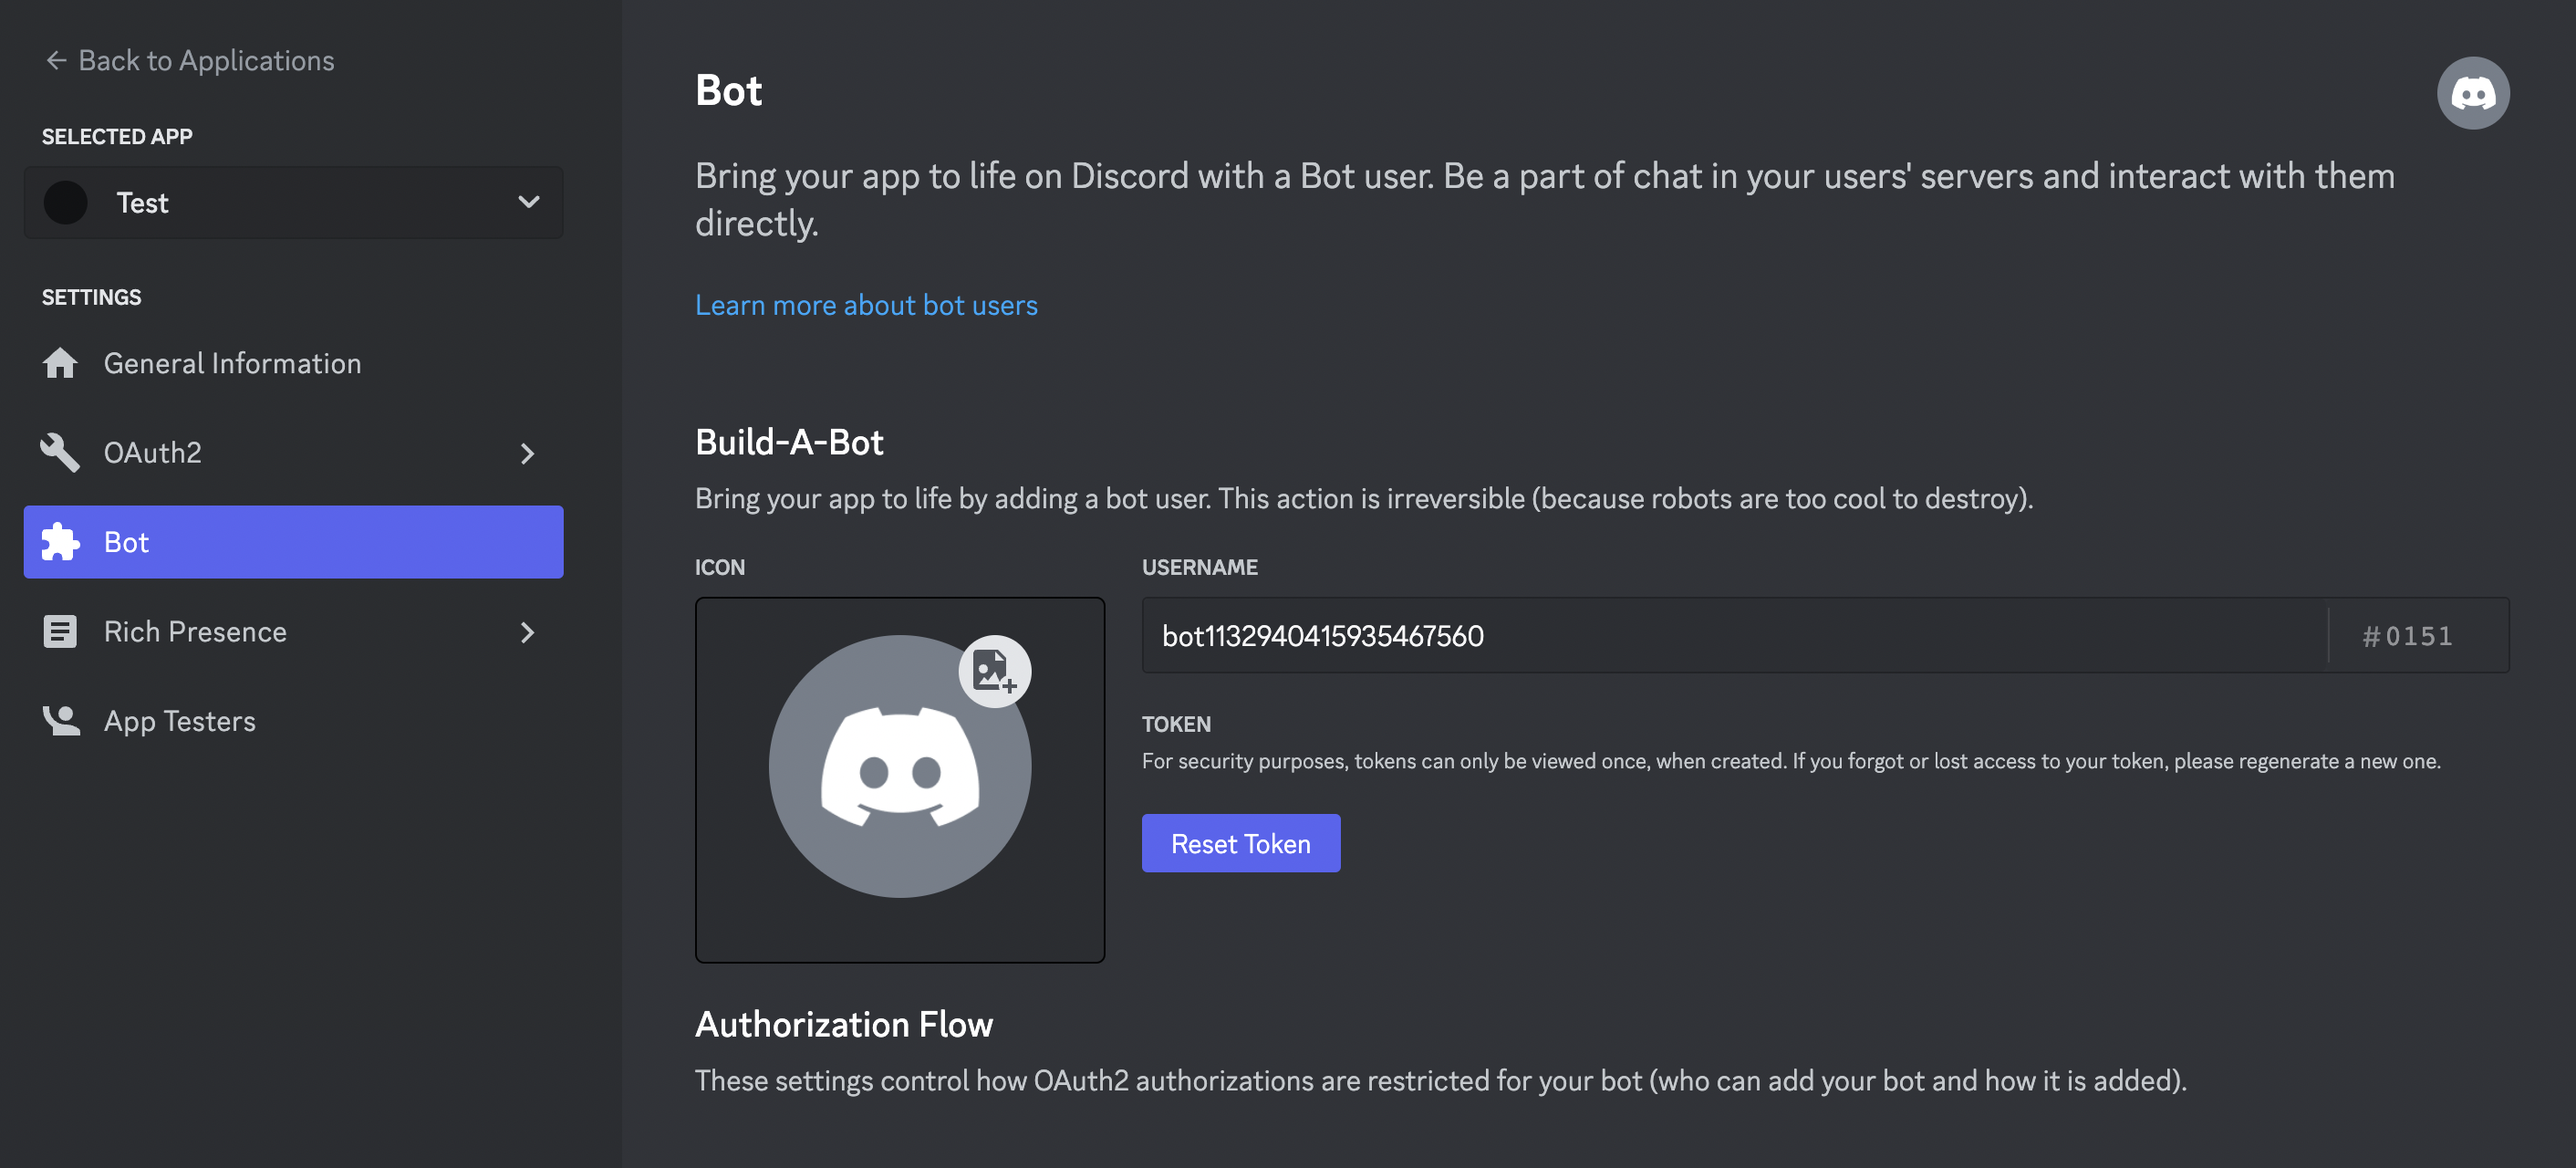
그 다음 Bot버튼을 누르면 Token을 발급할 수 있다. 이 Token을 기억해두자.
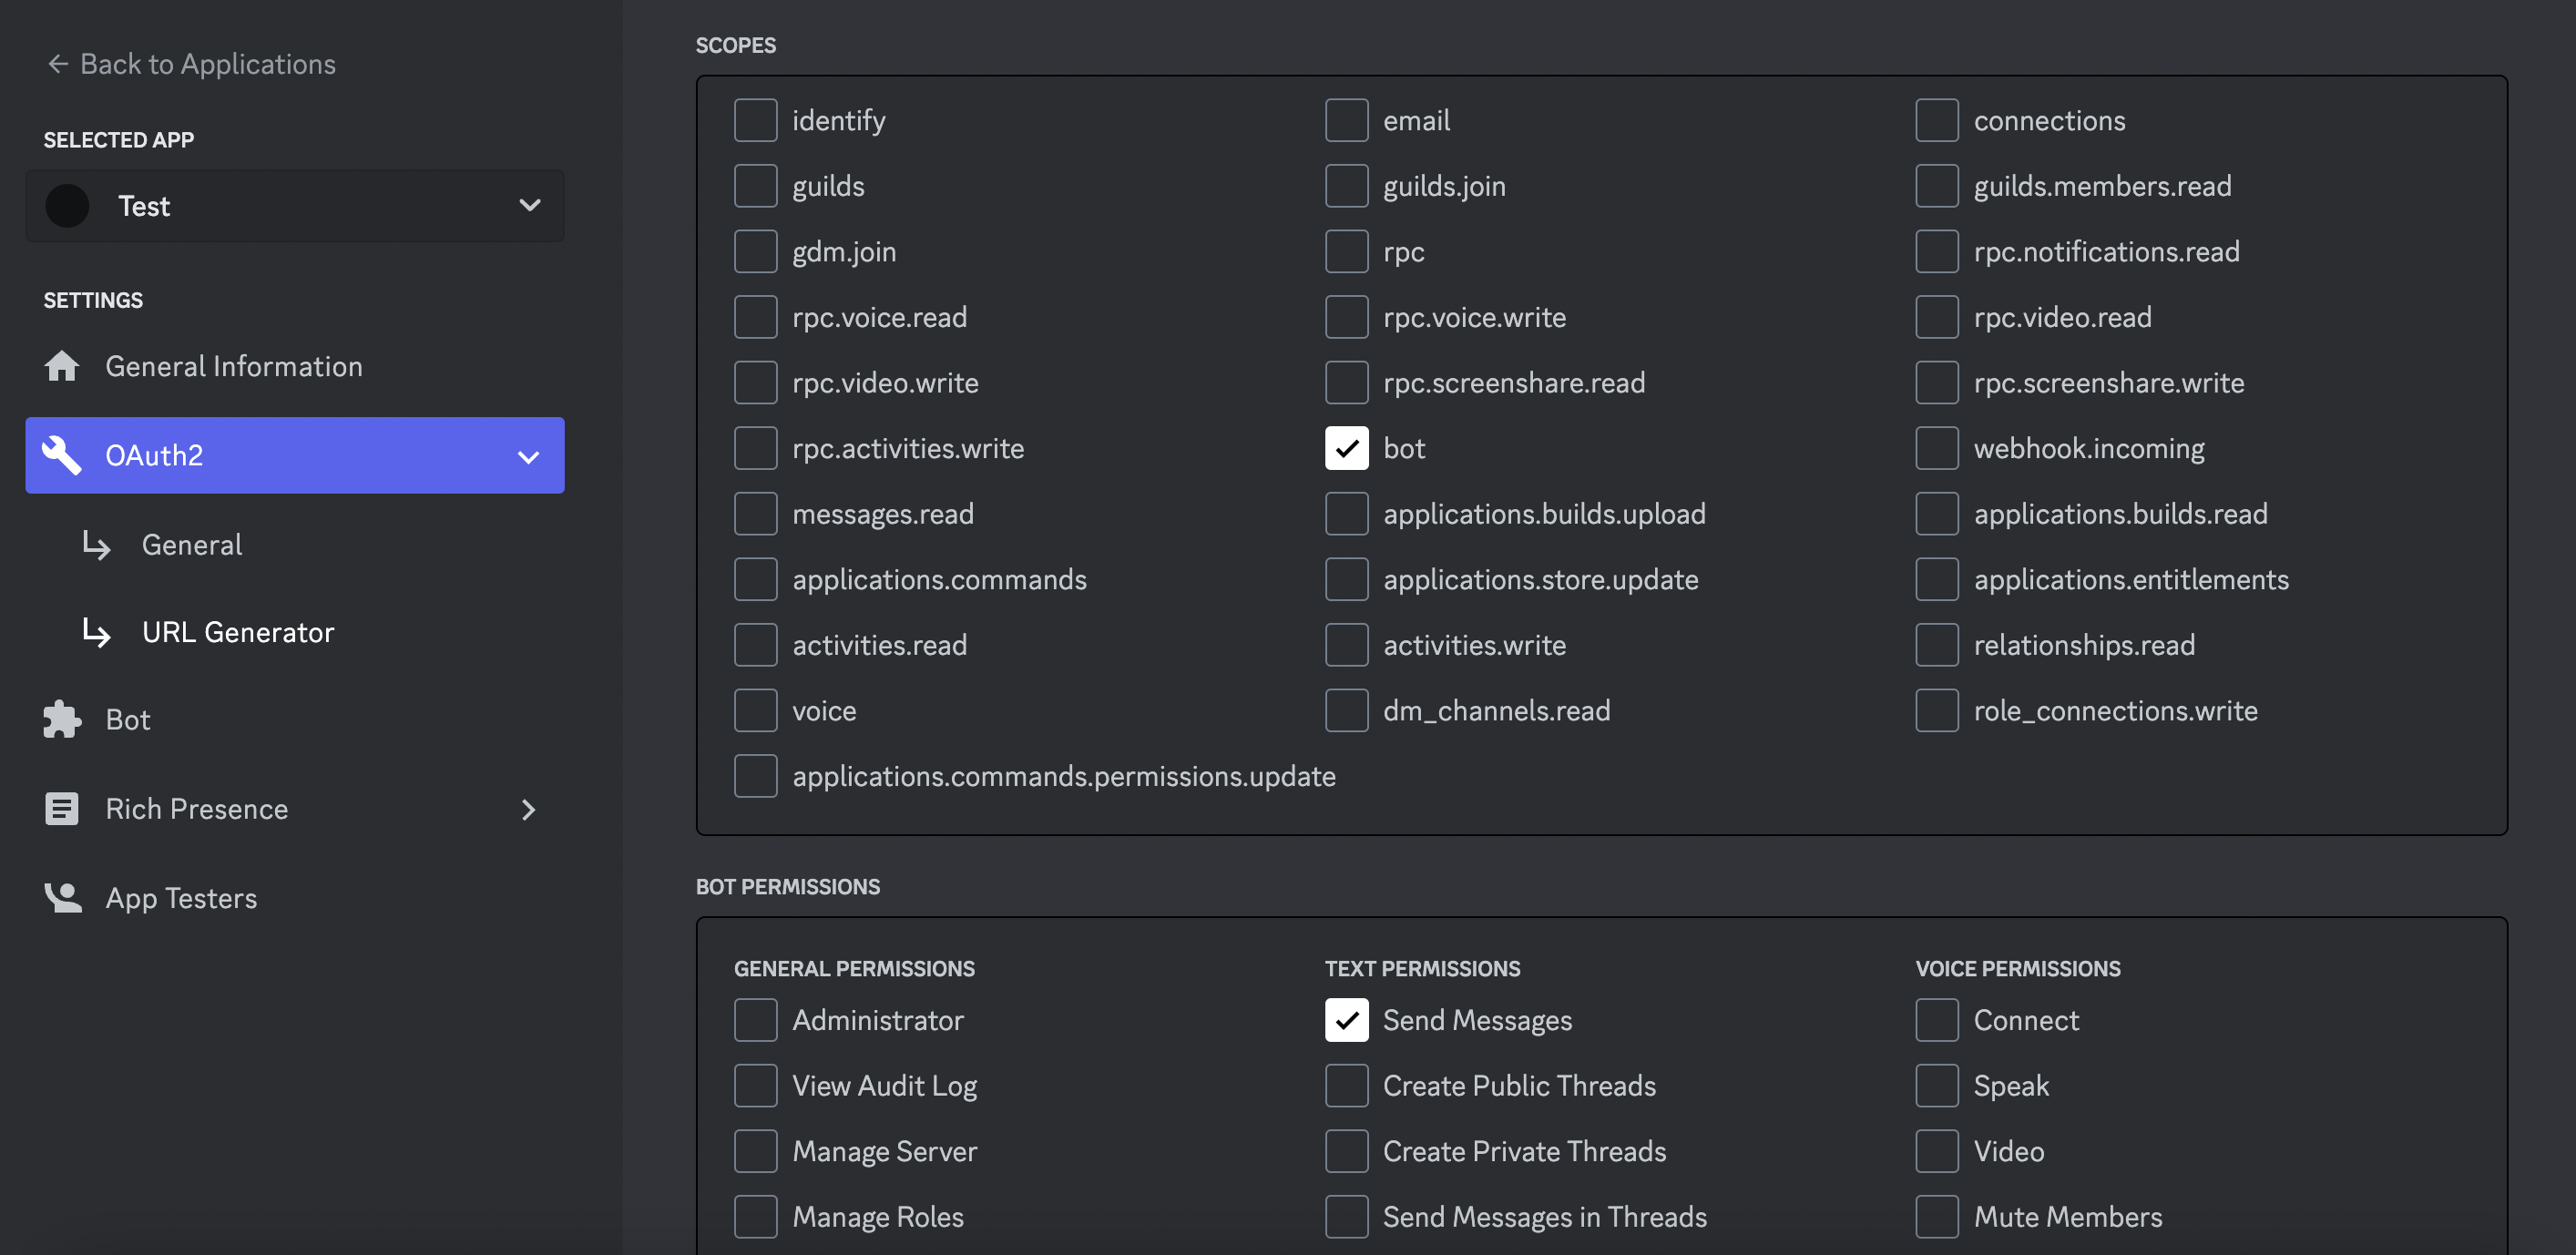
그 다음 oAuth2 버튼을 클릭하여 bot체크박스에 체크하면, Bot에게 어떤 권한을 줄 것인지 선택할 수 있다. 각 Application 목적에 맞게 권한을 부여해준다.
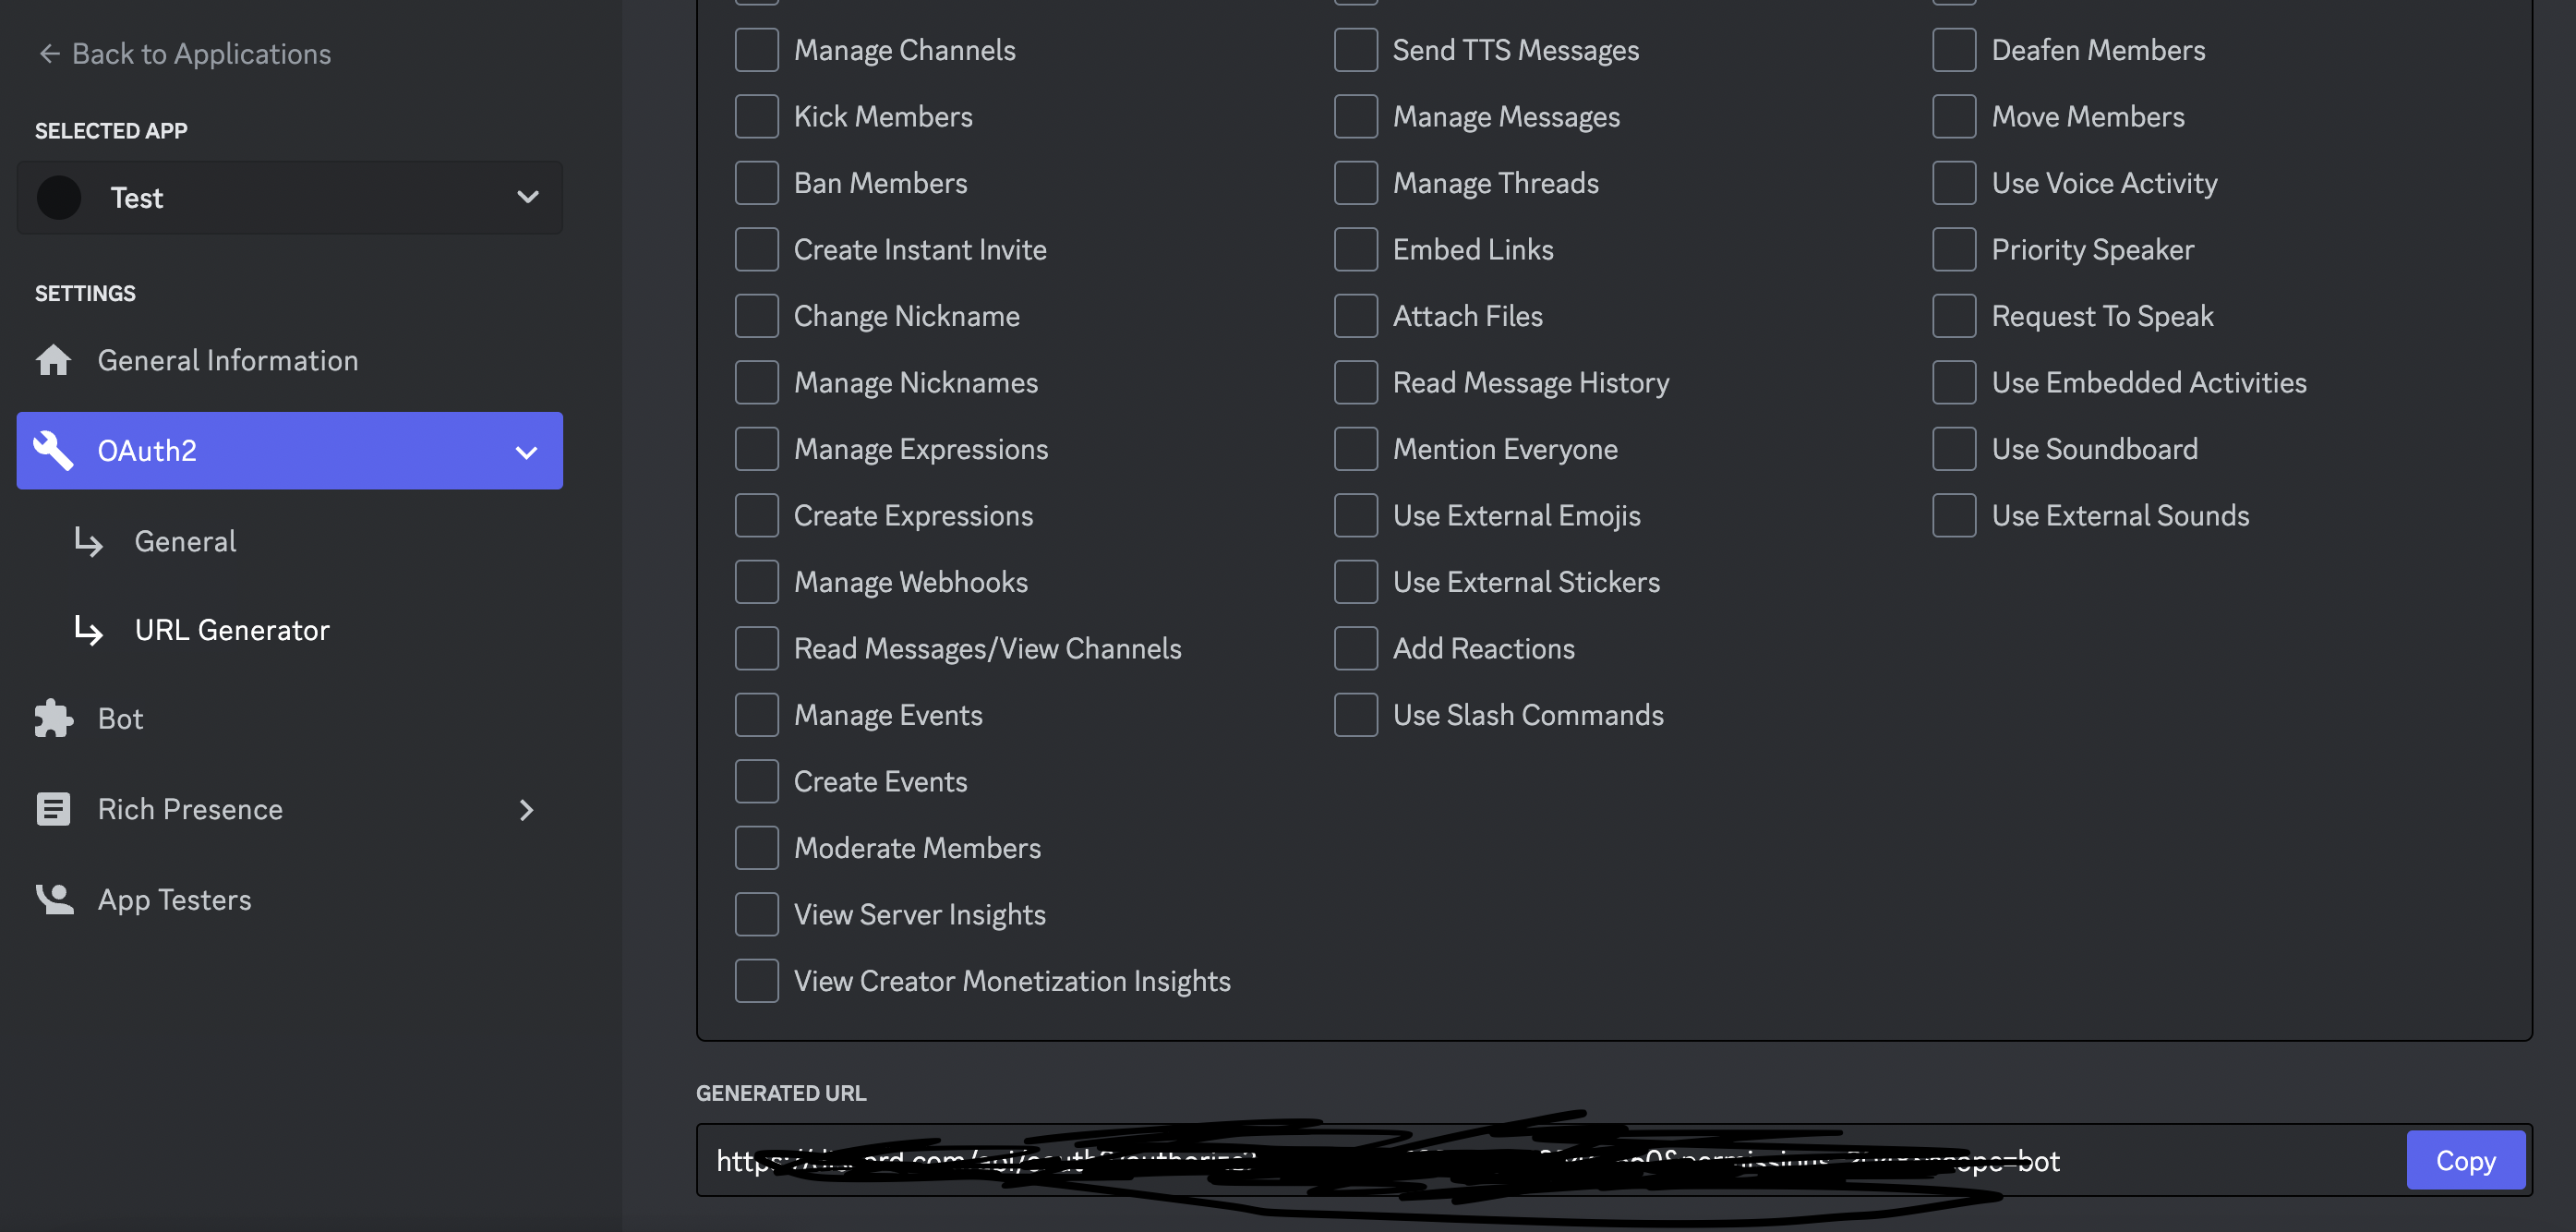
그 다음 맨 밑으로 가면 GENERATED URL이 생성되어 있다. 이걸 클릭하자!
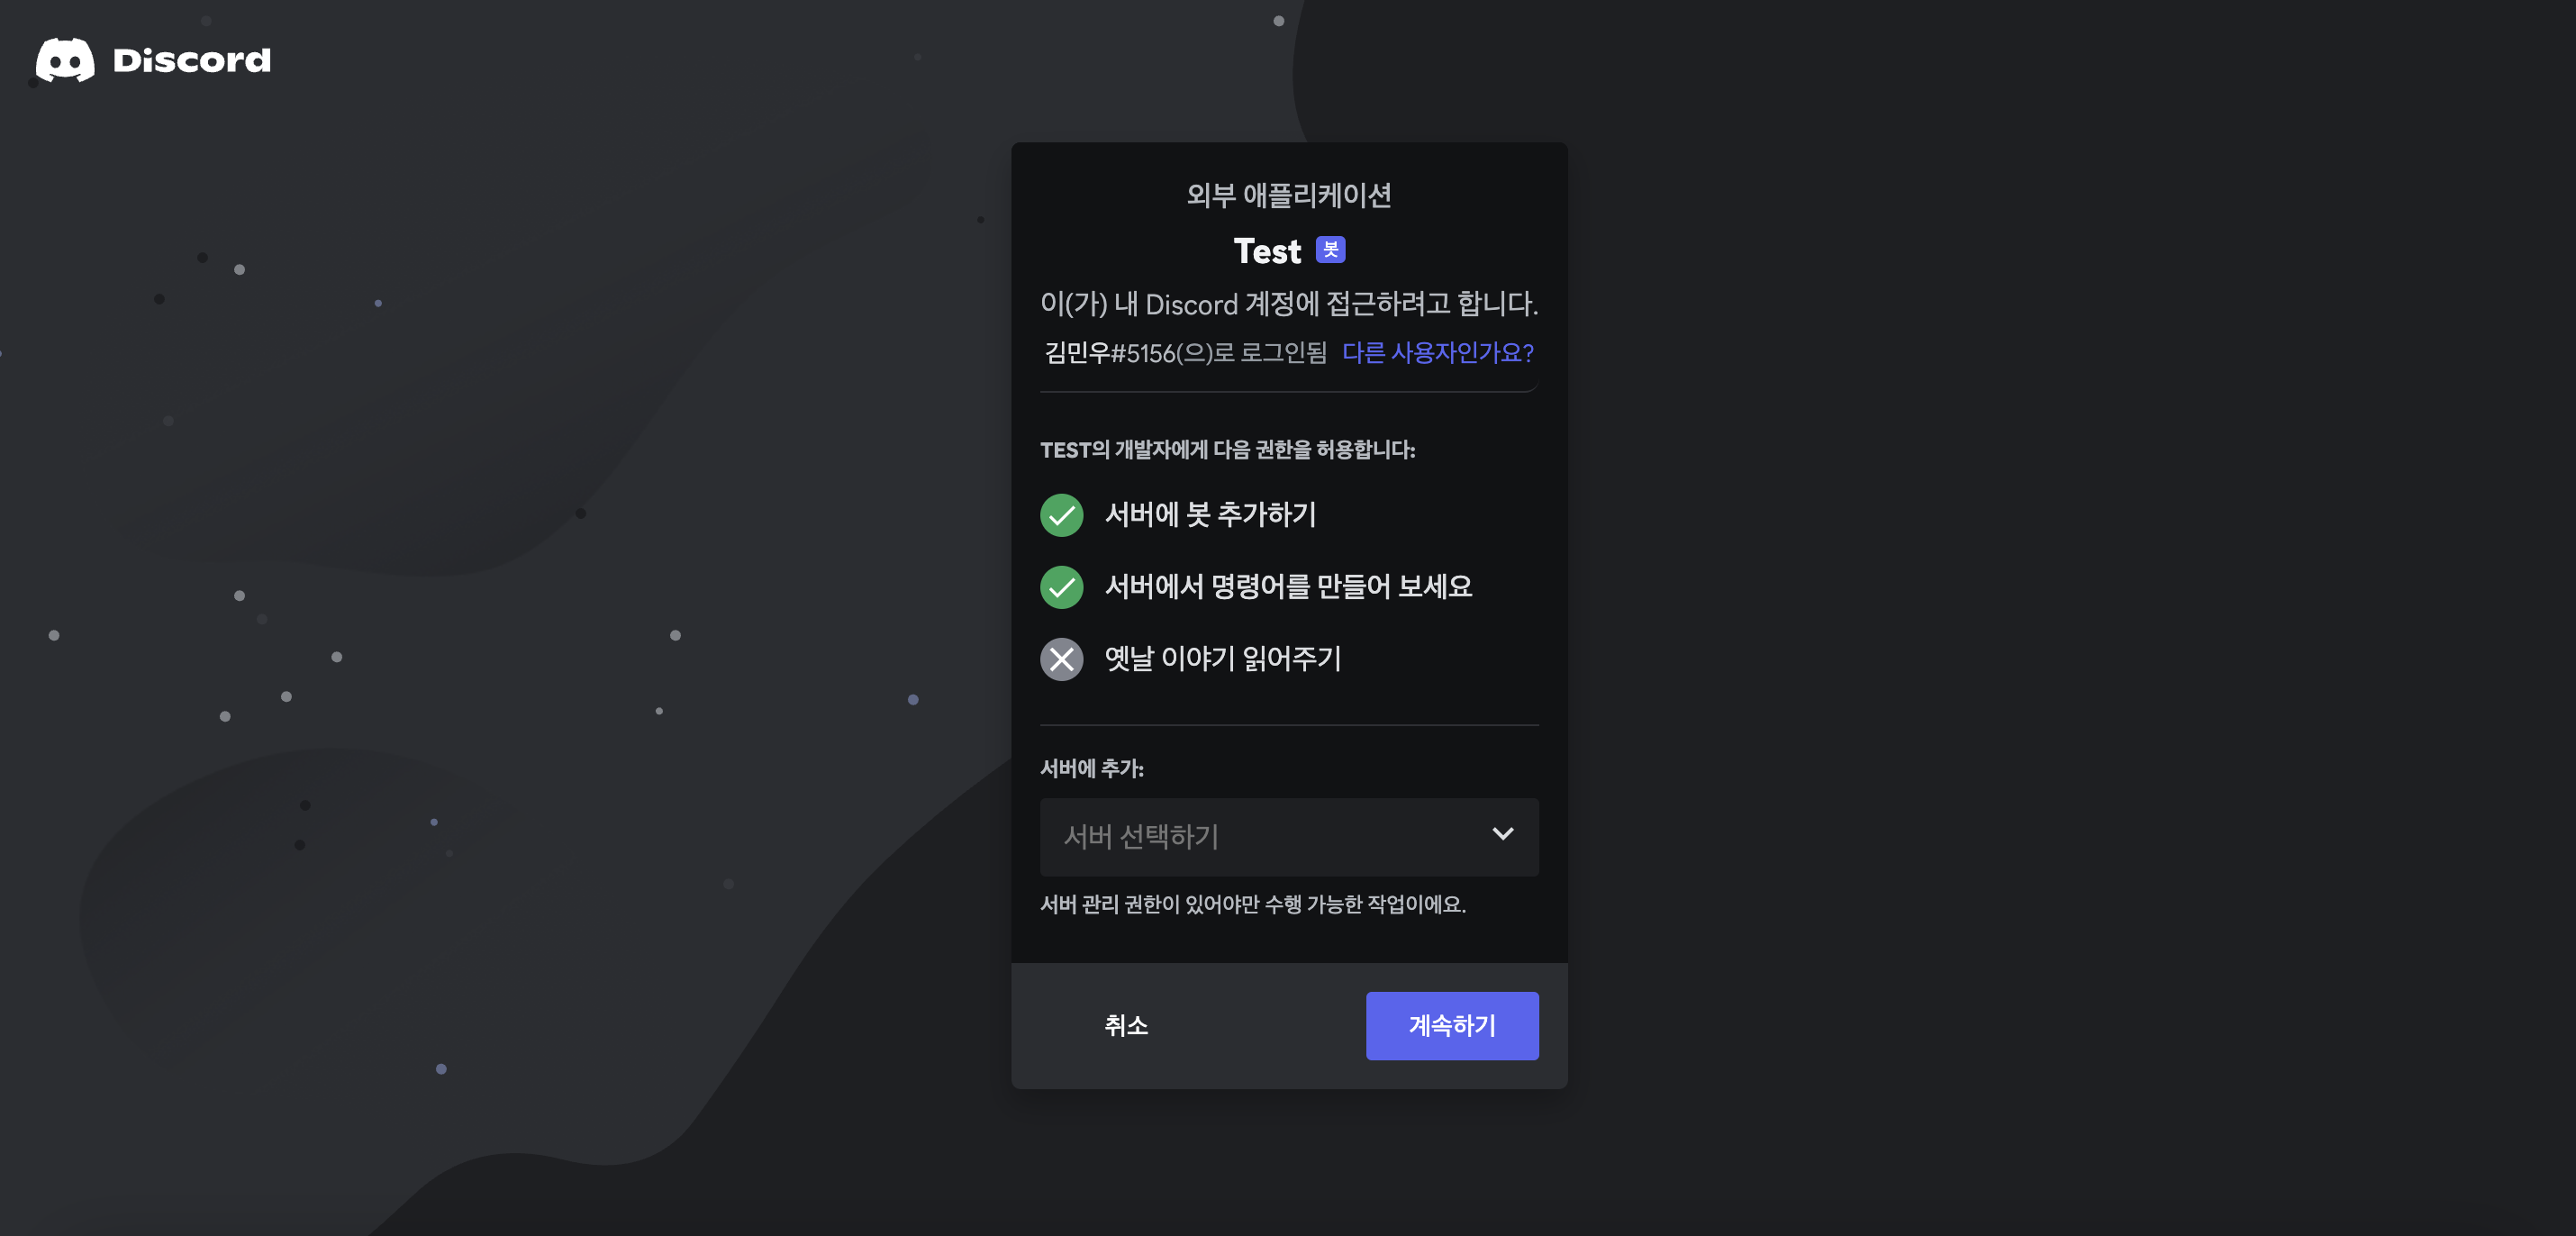
그러면 이제 어느 채널에 bot을 입장시킬지만 선택해주면 Bot이 우리의 채널에 들어온 것을 확인할 수 있다.
Discord bot과 node.js 연동하기
이제 이 bot을 node.js로 제어해 보자.
npm install discord.js먼저 discord.js를 다운받아준다.
import { Client, GatewayIntentBits } from 'discord.js';

const client = new Client({ intents: [GatewayIntentBits.Guilds] });

client.login(TOKEN);
그 다음은 문서에 나와있는대로, connect시켜주면 된다. 이 bot와 연결할때 아까 그 token이 필요하니 사용해주도록하자.
Discord bot으로 특정 시점에 메세지 보내기
먼저 메세지를 보내려면 보내려는 channel의 id를 알아야한다.
https://neony.tistory.com/3
여기 channel Id를 얻는 방법이 나와있다.
import { Client, GatewayIntentBits } from 'discord.js';

const client = new Client({ intents: [GatewayIntentBits.Guilds] });

async sendMessage() {
  client.login(TOKEN);

  channels = await client.channels.fetch(
    `${process.env.DISCORD_CHANNEL_ID}`
  );

  await channels.send("Hello world");
}
그 다음 얻어온 channeID로 원하는 message를 보내면 된다.
Message custom해서 보내기
하지만 이렇게 메세지만 보내면 살짝 멋이 없다.. 보는 맛두 없고 그래서 살짝 꾸며주자!
const exampleEmbed: Embed = {
  color: 0x0099ff,
  title: type === 'error' ? 'Error occured' : 'Api latency',
  description:
  type === 'error' ? `${message}` : `${message} ${duration}ms`,
  fields: [
        {
          name: 'Ip',
          value: `${userIp ?? 'null'}`,
          inline: true,
        },
        {
          name: 'UserId',
          value: `${userUUID ?? 'null'}`,
          inline: true,
        },
        {
          name: 'Time',
          value: `${new Date()}`,
          inline: true,
        },
      ],
};

await channels.send({ embeds: [exampleEmbed] });
그럴때는 embed 옵션을 사용하면 된다. option에 대해서는 공식문서를 참조하자.
나는 api소요시간이 2000ms 이상걸리는 것과 500 error들에 대해 Discord bot이 메세지를 보내게 해주었다.
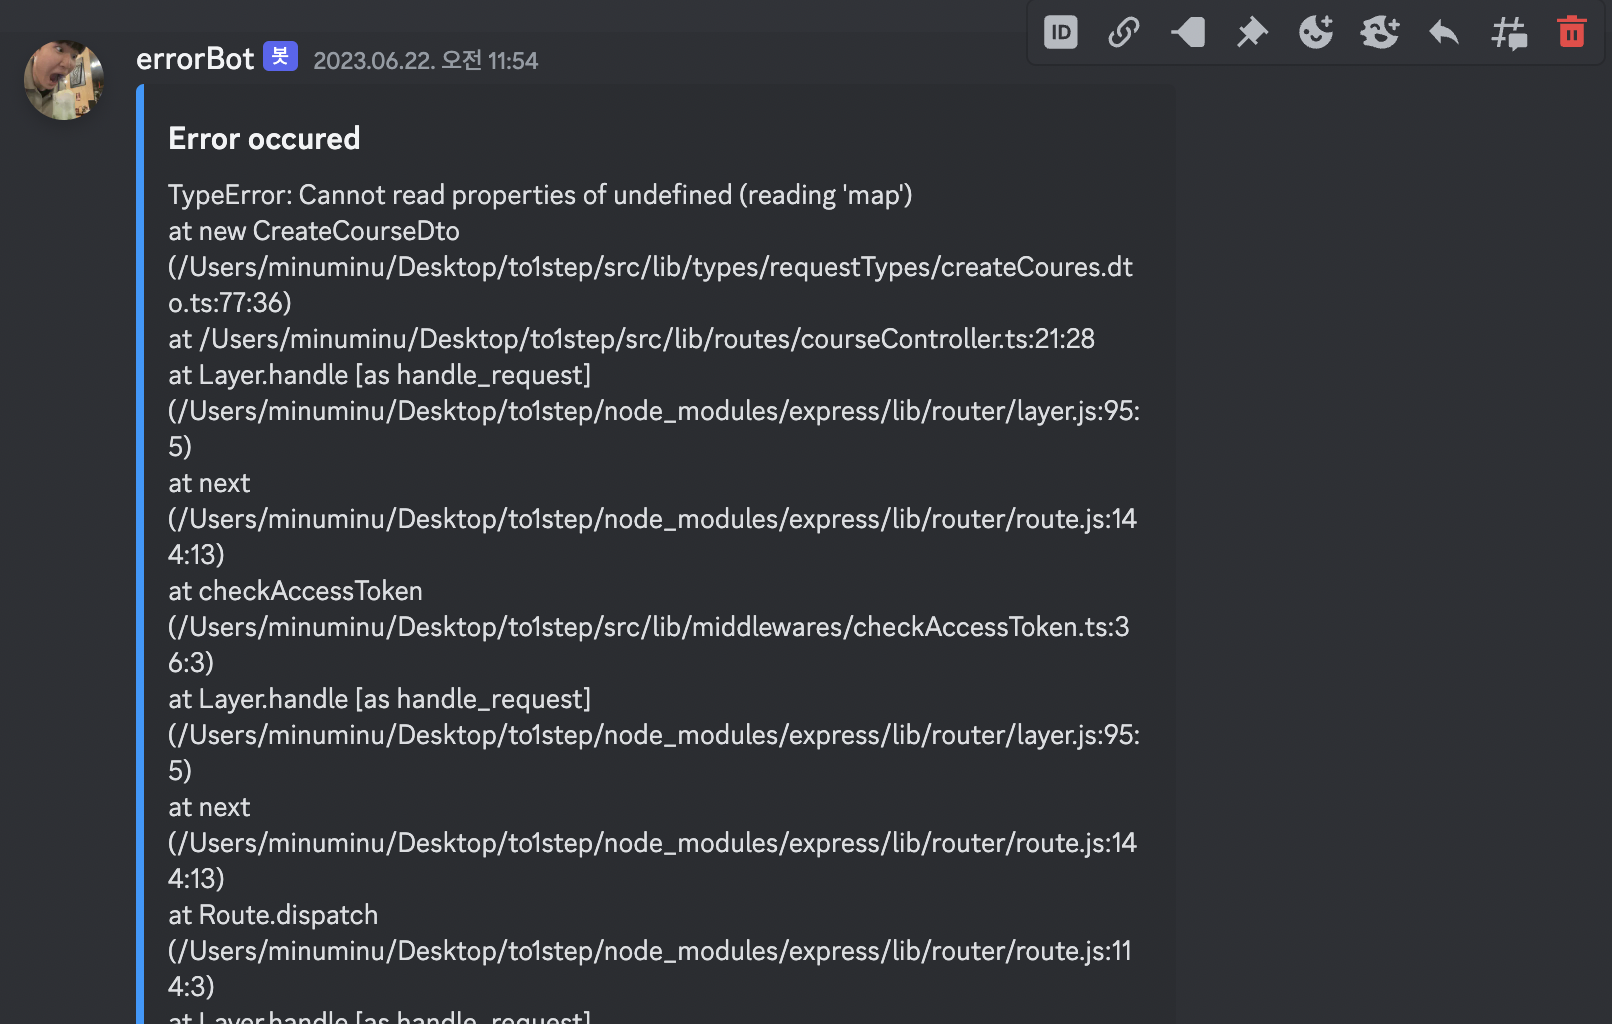
500 Error가 발생해 메세지를 보내온 사진
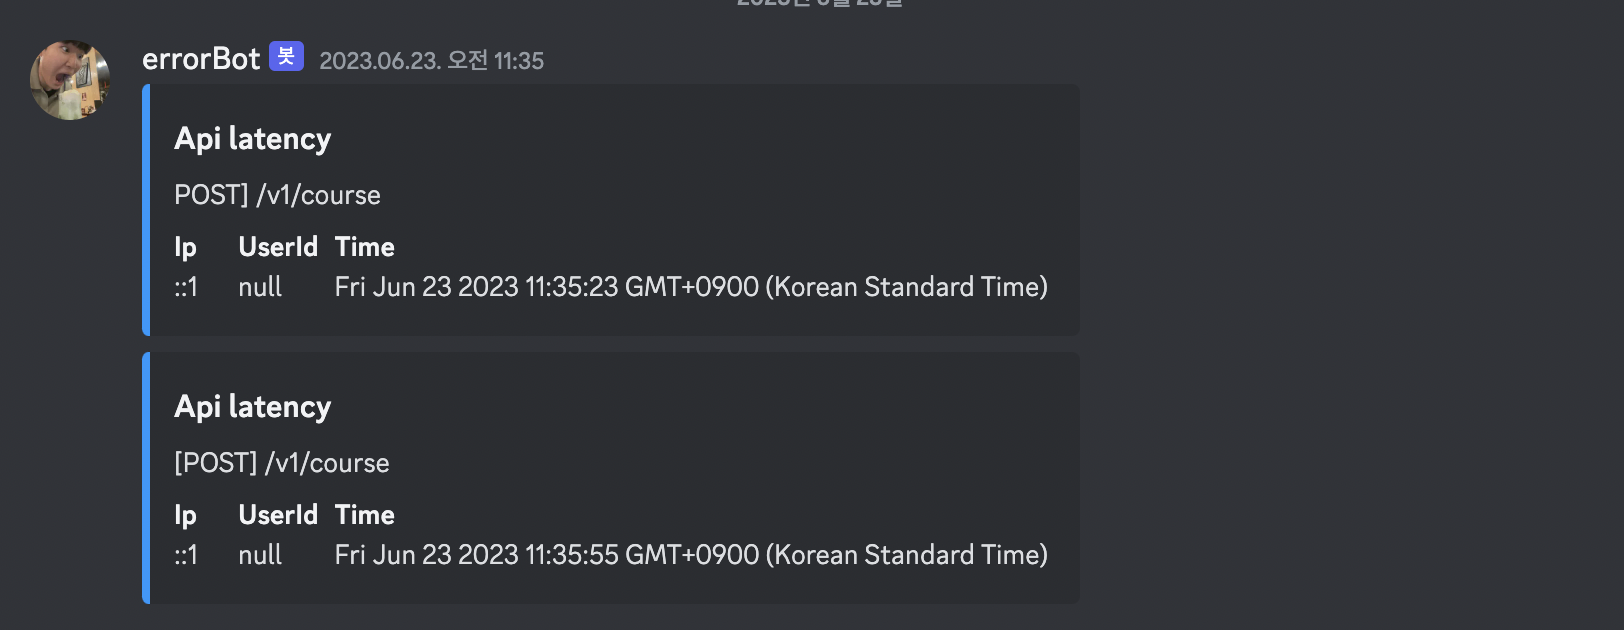
2000ms 이상 소요되는 api에 대해 메세지를 보내온 사진
