이제 Spring에서 구글 로그인 구현을 해보자!
3. Spring에서 User 관련 Class 만들기
먼저 domain 패키지에 User과 Role 도메인을 만든다.
User는 사용자 정보를 담당할 도메인이다.
User.java
import lombok.Builder;
import lombok.Getter;
import lombok.NoArgsConstructor;

import javax.persistence.*;

@Getter
@NoArgsConstructor
@Entity
public class User {

    @Id
    @GeneratedValue(strategy = GenerationType.IDENTITY)
    private Long id;

		@Column(unique = true)
    private String userId;

    @Column(nullable = false)
    private String profileName;

    private String profileImg;

		@Column(unique = true)
    private String socialId;

		@Enumerated(EnumType.STRING)
    private SocialPlatformEnum socialPlatform;

    @Enumerated(EnumType.STRING)
    @Column(nullable = true)
    private Role role;

    @Builder
    public User(String userId, SocialPlatformEnum socialPlatform, String socialId, String profileImg, String profileName, Role role){
        this.userId = userId;
				this.profileName = profileName;
				this.profileImg = profileImg;
        this.socialId = socialId;
        this.socialPlatform = socialPlatform;
        this.role = role;
    }

   public User update(String profileName, String profileImg) {
        this.profileName = profileName;
        this.profileImg = profileImg;

        return this;
    }

    public String getRoleKey(){
        return this.role.getKey();
    }

}
Column
내 프로젝트에서 User 테이블에 필요한 column들을 작성했다.
위의 정보중에서
- socialId
- profileImg
- role
이렇게 세 column은 구글 회원가입을 통해 얻은 데이터로 채울 것이다.
Builder
builder는 객체를 생성하게 도와준다.
처음에 builder가 없을때는 직접 entity에 @Setter 어노테이션을 통해 데이터를 입력해서 객체를 생성했는데 이것이 굉장히 불편하기도 하고 안정성에서도 떨어진다고 들어서 builder 어노테이션을 통해 객체를 생성한다.
- setter를 통해 객체를 생성할 때
User user = new User(); user.setName = "name"; user.setProfileImg = "ImgUrl"; - ArgConstructor를 통해 객체를 생성할 때
User user = new User("name", "ImgUrl");setter를 사용할 때 보다 편리하지만, 순서를 지켜야하기 때문에 인자가 많아지면 뭐가 뭔지 이해하기 힘들어지는 것 같다.
- Builder를 통해 객체를 생성할 때
User user = User.builder()
						.name("name")
						.profileImg("profileImg")
훨씬 명시적이고 가독성이 높다.
Role.java
import lombok.Getter;
import lombok.RequiredArgsConstructor;

@Getter
@RequiredArgsConstructor
public enum Role {
    GUEST("ROLE_GUEST", "손님"),
    USER("ROLE_USER", "일반 사용자");

    private final String key;
    private final String title;
}
스프링 시큐리티에서는 권한 코드에 항상 ROLE_이 앞에 있어야 한다. 그래서 코드별 키 값을 지정해야 한다.
UserRepository.java
마지막으로 User Repository도 작성해준다.
public interface UserRepository extends JpaRepository<User, Long> {
    Optional<User> findByEmail(String email);
}
findByEmail 을 만들어 놔야 나중에 email을 통해 이미 생성된 사용자인지 여부를 가려낼 수 있다.
4. Spring에서 세큐리티 관련 로직 구현하기
1) build.gradle
// https://mvnrepository.com/artifact/org.springframework.boot/spring-boot-starter-oauth2-client
implementation group: 'org.springframework.boot', name: 'spring-boot-starter-oauth2-client', version: '2.5.4'
build.gradle에 소셜 로그인 등 클라이언트 입장에서 소셜 기능 구현시 필요한 의존성인 Spring-boot-starter-oauth2-client 를 추가해준다.
2) config.auth 패키지 생성

뒤에 나오는 SecurityConfig, CustomOAuth2UserService 클래스 등 모든 세큐리티 관련 클래스를 이곳에 담을 예정이다.
SecurityConfig.java
@RequiredArgsConstructor
@EnableWebSecurity
public class SecurityConfig extends WebSecurityConfigurerAdapter {
    private final CustomOAuth2UserService customOAuth2UserService;

    protected void configure(HttpSecurity http) throws Exception{
        http
                .csrf().disable()
                .headers().frameOptions().disable()
                .and()
                .authorizeRequests()
                .antMatchers("/", "/css/**", "/images/**", "/js/**", "/h2-console/**").permitAll()
                .antMatchers("/api/v1/**").hasRole(Role.USER.name())
                .anyRequest().authenticated()
                .and()
                .logout()
                .logoutSuccessUrl("/")
                .and()
                .oauth2Login()
                .userInfoEndpoint()
                .userService(customOAuth2UserService);
    }
}EnableWebSecurity: spring security 설정들을 활성화 해준다.csrf().disable().headers().frameOptions().disable(): • h2-console 화면을 사용하기 위해 해당 옵션들을 disable.authorizeRequests(): URL별 권한 관리를 설정하는 옵션의 시작점이다. 이게 선언되어야만 antMatchers 옵션을 사용할 수 있다..antMatchers(): 권한 관리 대상을 지정하는 옵션이다. • URL, HTTP 메서드별로 관리 가능하고 • "/", "/h2-console/** " 등 지정된 URL은 permitAll() 옵션을 통해 전체 열람 권한 부여할 수 있다. "/api/v1/** " 주소를 가진 API는 USER 권한만 열람 권한 부여
anyRequest- antMatchers로 설정된 URL 외의 나머지 URL에 대한 설정
- authenticated() 옵션으로 인증된 사용자, 즉 로그인한 사용자들에게만 열람 권한 부여
logout()- 로그아웃 기능에 대한 설정의 시작점
- logoutSuccessUrl("/")은 로그아웃 성공시 "/" 주소로 이동을 의미
auth2Login()- OAuth2 로그인 기능에 대한 설정의 시작점
- userInfoEndpoint()은 로그인 성공 후 사용자 정보를 가져올 때의 설정을 담당
- userService()은 소셜 로그인 성공 시 후속 조치를 진행할 UserService 인터페이스의 구현체를 등록여기서는 customOAuth2UserService를 UserService 인터페이스의 구현체로 등록리소스 서버(구글, 네이버, 카카오 등)에서 사용자 정보를 가져온 상태에서 추가로 진행하고자 하는 기능 명시 가능
CustomOAuth2UserService.java
이 클래스에서는 구글 로그인, 회원가입 이후 가져온 사용자의 정보들을 기반으로 가입 및 정보수정, 세션 저장 등의 기능을 지원한다.
@RequiredArgsConstructor
@Service
public class CustomOAuth2UserService implements OAuth2UserService<OAuth2UserRequest, OAuth2User> {

    private final UserRepository userRepository;
    private final HttpSession httpSession;

    @Override
    public OAuth2User loadUser(OAuth2UserRequest userRequest) throws OAuth2AuthenticationException {
        OAuth2UserService<OAuth2UserRequest,OAuth2User> delegate = new DefaultOAuth2UserService();
        OAuth2User oauth2User = delegate.loadUser(userRequest);

        String registrationId = userRequest.getClientRegistration().getRegistrationId();
        String userNameAttributeName = userRequest.getClientRegistration().getProviderDetails().getUserInfoEndpoint().getUserNameAttributeName();

        OAuthAttributes attributes = OAuthAttributes.of(registrationId, userNameAttributeName, oauth2User.getAttributes());

        User user = saveOrUpdate(attributes);
        httpSession.setAttribute("user", new SessionUser(user));

        return new DefaultOAuth2User(Collections.singleton(new SimpleGrantedAuthority(user.getRoleKey())), attributes.getAttributes(), attributes.getNameAttributeKey());
    }

    private User saveOrUpdate(OAuthAttributes attributes){
        User user = userRepository.findBySocialId(attributes.getEmail())
                .map(entity->entity.update(attributes.getName(), attributes.getPicture()))
                .orElse(attributes.toEntity());

        return userRepository.save(user);
    }
}**registrationId**- 현재 로그인 진행 중인 서비스를 구분해준다. ex)구글, 네이버 등
- 구글의 소셜로그인만 구현할 때는 필요 없지만, 이후 다른 플랫폼의 로그인을 연동할 때는 구글 로그인인지 네이버 로그인인지 구분하기 위해 사용해야 한다.
- 구글 로그인인 지금은 “google”라는 값을 가진다.
userNameAttributeName- OAuth2 로그인 진행 시 키가 되는 필드값으로 Primary Key와 같은 의미이다.
- 구글은 "sub"이라는 기본 코드를 제공하지만, 네이버와 카카오는 기본 지원하지 않는다.
- 네이버 로그인과 구글 로그인을 동시 지원할 때 사용된다.
OAuthAttributes- OAuth2UserService를 통해 가져온 OAuth2User의 attribute를 담을 클래스이다.
**SessionUser**- 세션에 사용자 정보를 저장하기 위한 Dto 클래스이다.
**saveOrUpdate()**- 이메일을 통해 사용자 데이터가 DB에 있는지 확인한다.
- DB에 데이터가 이미 있고 + 구글 사용자 정보가 업데이트 된 경우 유저의 정보를 업데이트한다.
- 유저 정보가 없다면 유저 정보를 새로 저장한다.
OAuthAttributes.java
OAuth2UserService를 통해 가져온 OAuth2User의 속성을 담는 클래스이다.
@Getter
public class OAuthAttributes {
    private Map<String,Object> attributes;
    private String nameAttributeKey;
    private String name;
    private String email;
    private String picture;
    private SocialPlatformEnum socialPlatform;
    private String userId;

    @Builder
    public OAuthAttributes(Map<String,Object> attributes, String nameAttributeKey, String name, String email, String picture, SocialPlatformEnum socialPlaform, String userId){
        this.attributes = attributes;
        this.nameAttributeKey = nameAttributeKey;
        this.name = name;
        this.email = email;
        this.picture = picture;
        this.socialPlatform = socialPlaform;
        this.userId = userId;
    }

    public static OAuthAttributes of(String registrationId,
                                     String userNameAttributeName,
                                     Map<String, Object> attributes) {
        return ofGoogle(registrationId, userNameAttributeName, attributes);
    }

		private static OAuthAttributes ofGoogle(String userNameAttributeName,
                                            Map<String, Object> attributes) {
        // 1. social platform 추가
        SocialPlatformEnum socialPlatform = SocialPlatformEnum.GOOGLE;
        // 2. user ID 랜덤 생성 추가
        String userId = createDefaultUserIdWithEmail((String) attributes.get("email"));

        return OAuthAttributes.builder()
                .name((String) attributes.get("name"))
                .email((String) attributes.get("email"))
                .picture((String) attributes.get("picture"))
                .socialPlaform(socialPlatform)
                .userId(userId)
                .attributes(attributes)
                .nameAttributeKey(userNameAttributeName)
                .build();
    }

    public User toEntity(){
        return User.builder()
                .socialId(email)
                .profileName(name)
                .profileImg(picture)
                .socialPlatform(socialPlatform)
                .userId(name)
                .role(Role.USER)
                .build();
    }

    public static String createDefaultUserIdWithEmail(String email){
        String[] split1_ = email.split("@");
        String[] split2_ = split1_[1].split("\\.");
        String id = split1_[0];
        String platform = split2_[0];

        return id + "_" + platform;
}- of()
- OAuth2User에서 반환하는 사용자 정보는 Map이기 때문에 값 하나하나를 변환해야 한다.
- 지금은 google login 하나뿐이라서 바로 ofGoogle을 반환해주지만, 이후에 다른 플랫폼도 추가되면 registrationId에 따라 함수를 만들어줘야 할 것 같다.
- ofGoogle()
- 구글 로그인인 경우 이 함수를 통해 User를 만들어낸다.
- 프로덕트 상에서 userId가 unique 해야한다는 제약사항이 있어서, unique한 값을 만들어내는 함수를 따로 만들었다.
- toEntity()
- User Entity를 생성한다.
- OAuthAttributes에서 엔티티를 생성하는 시점은 처음 가입 시점이다.
- 가입 시 기본 권한을 USER로 주기 위해 role 빌더 값에 Role.USER 값 입력
프로덕트 User 모델에 맞추기 위해 이 클래스의 코드를 책의 코드에서 많이 수정했다.
SessionUser.java
Session User는 인증된 사용자 정보만이 필요하다. 그렇기에 name, email, picture만 필드로 선언한다.
@Getter
public class SessionUser implements Serializable {
    private String name;
    private String email;
    private String picture;

    public SessionUser(User user) {
        this.name = user.getProfileName();
        this.email = user.getSocialId();
        this.picture = user.getProfileImg();
    }
}
이렇게 모든 서버 세큐리티 설정을 끝냈다.
회원가입/로그인 테스트를 해보자
5. 회원가입/로그인 테스트하기
Application을 실행시키고 주소창에 위에 설정했던 주소를 넣는다.
http://localhost:8080/oauth2/authorization/google회원가입 테스트
주소를 넣으면 구글 로그인 화면이 잘 나오고
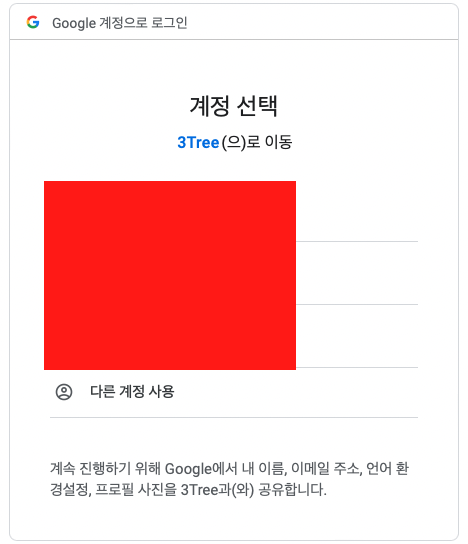
계정을 선택하면 회원가입이 완료된다.
DB에도 원했던 대로 정보가 잘 입력된것을 확인할 수 있다.

(console창에 뜬 sql 문)
회원가입과 로그인 모두 잘 된다.
REFERENCE.