이전에는...
단순히 캐시를 이용해서 값을 저장하고 불러오는 코드만 작성하였습니다. 이제 이를 이용하여 값을 랜덤으로 생성하고 인증하는 코드를 만들어봅시다!
어느 플랫폼을 사용할 것인가?
smtp를 지원하는 것은 어느것을 사용해도 좋아요! 주로 아래의 메일사를 사용합니다. 링크는 smtp 설정 방법이에요!
- 네이버 메일
- gmail - 공식 문서를 가져오고 싶었으나, 공식 문서가 없어서 다른 글을 가져왔습니다.
- 다음 메일 - 공식 문서를 가져오고 싶었으나, 메일을 만들지 않으면 볼 수 없다고 하여 다른 글을 가져왔습니다.
- 아웃룩
개인으로 쓰기 편한 것은 네이버입니다. 어느 것을 쓰나 auth와 host부분만 달라지니 이에 맞게 수정만 해주시면 돼요.
이 포스트에서는 네이버를 기준으로 작성하겠습니다.
MailerModule 설치
npm-@nestjs-modules/mailer를 바탕으로 설치를 해주시면 됩니다.
docs도 잘 정리되어있으니 따라하시면 됩니다.
메일 서비스 구현
이하 모든 내용은 @nestjs/config가 설치되어있다 가정하고 진행하겠습니다!
MailingModule
import { Module } from '@nestjs/common';
import { CacheServiceModule } from 'src/redis-cache/redis-cache.module';
import { MailingService } from './mailing.service';
import { MailerModule } from '@nestjs-modules/mailer';
import { MailingController } from './mailing.controller';
import { ConfigModule, ConfigService } from '@nestjs/config';

@Module({
  imports: [
    CacheServiceModule,
    MailerModule.forRootAsync({
      // ConfigModule을 이용하여 env를 불러온다.
      // 이 경우 process.env.key 로 불러오지 못하는 경우도 가능!
      useFactory: async (config: ConfigService) => {
        return {
          imports: [ConfigModule],
          transport: {
            host: config.get<string>('mailing.host'),
            port: 587,
            auth: {
              user: config.get<string>('mailing.user'),
              pass: config.get<string>('mailing.pass'),
            },
          },
        };
      },
      inject: [ConfigService],
    }),
  ],
  controllers: [MailingController],
  providers: [MailingService],
  exports: [MailingService],
})
export class MailingModule {}
MailingService
Service는 간단하게 작성하였습니다. 현재는 값 생성 및 Redis에 저장/값 검증만 지원하면 되니 매우 간단한 서비스를 작성했어요.
import { MailerService } from '@nestjs-modules/mailer';
import { ConflictException, Injectable } from '@nestjs/common';
import { ConfigService } from '@nestjs/config';
import { RedisCacheService } from 'src/redis-cache/redis-cache.service';
interface EmailOptions {
from: string; // 보내는 사람
to: string; // 받는 사람
subject: string; // 제목
html: string; // 내용. 특이하게 html으로 작성된다.
}
@Injectable()
export class MailingService {
constructor(
private readonly cacheService: RedisCacheService,
private readonly mailerService: MailerService,
private readonly configService: ConfigService,
) {}
private TTL: number = 300;
async generateCode(email: string) {
const rand = Math.floor(Math.random() * 10000) + 10000;
try {
await this.cacheService.set(email, rand, this.TTL);
return rand;
} catch (err) {
return -1;
}
}
// 메일을 보내는 코드
async sendMail(email: string, code: number) {
const emailOptions: EmailOptions = {
from: this.configService.get<string>('mailing.host_user'),
to: email,
subject: '가입 인증 메일',
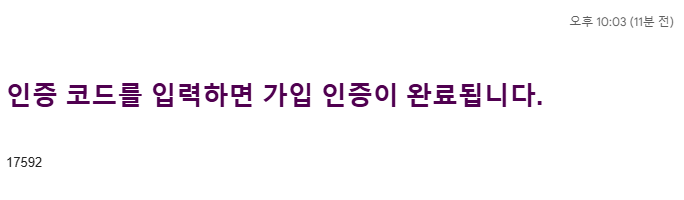
html: `<h1> 인증 코드를 입력하면 가입 인증이 완료됩니다.</h1><br/>${code}`,
};
this.mailerService
.sendMail(emailOptions)
.then((result) => console.log(result))
.catch((err) => new ConflictException(err));
}
async verifyCode(email: string, value: number) {
const cacheValue = await this.cacheService.get(email);
if (value === cacheValue) {
return 200;
} else {
return 400;
}
}
}참고 - ISendMailOptions
export interface ISendMailOptions extends SendMailOptions {
    to?: string | Address | Array<string | Address>; // 수신 이메일 목록
    cc?: string | Address | Array<string | Address>; // 참조 이메일 목록
    bcc?: string | Address | Array<string | Address>; // 숨은 참조 이메일 목록
    replyTo?: string | Address | Array<string | Address>; // 답장 받을 이메일 주소
    inReplyTo?: string | Address; // 이전 메시지 참조
    from?: string | Address; // 발신자 이메일 주소
    subject?: string; // 이메일 제목
    text?: string | Buffer | AttachmentLikeObject; // 텍스트 형식 이메일 내용
    html?: string | Buffer; // HTML 형식 이메일 내용
    sender?: string | Address; // 발신자 이름
    raw?: string | Buffer; // 원시 이메일 데이터
    textEncoding?: TextEncoding; // 텍스트 인코딩 방식
    references?: string | string[]; // 이메일 참조
    encoding?: string; // 인코딩 방식
    date?: Date | string; // 이메일 전송 날짜
    headers?: Headers; // 이메일 헤더 정보
    context?: {
        [name: string]: any;
    };
    transporterName?: string; // 전송자 이름
    template?: string; // 이메일 템플릿
    attachments?: Attachment[]; // 첨부 파일
    dkim?: DKIM.Options; // 도메인키 식별 메일
}
DKIM의 자세한 내용은 Cloudflare의 설명을 확인해주세요!
context는 아래와 같이 사용 가능합니다.
const context = {
    userName: "John Doe",
    company: "ABC Inc.",
    products: ["Product A", "Product B", "Product C"]
};

const emailOptions = {
    to: "recipient@example.com",
    subject: "Welcome to our platform!",
    text: "Hi {{userName}}, welcome to {{company}}. Here are some of our products: {{products.join(', ')}}",
    context: context
};
실제 데이터를 넣어서 보낼 수 있다고 하네요!
MailingController
controller도 간단히 작성했습니다. 코드 생성부 / 코드 검증부 2가지만 만들었어요.
import { Body, Controller, Post, Res } from '@nestjs/common';
import { MailingService } from './mailing.service';
import { Response } from 'express';
import { GenerateCodeDto } from './dto/generate-code.dto';
import { VerifyCodeDto } from './dto/verify-code.dto';

@Controller('mail')
export class MailingController {
  constructor(private mailingService: MailingService) {}

  @Post('code/verify')
  async verifyCode(@Body() dto: VerifyCodeDto, @Res() res: Response) {
    try {
      const { email, code } = dto;
      const result = await this.mailingService.verifyCode(email, +code);
      res.status(result).send();
    } catch (err) {
      res.status(500).send(err);
    }
  }

  @Post('code/generate')
  async generateCode(@Body() dto: GenerateCodeDto) {
    const email: string = dto.email;
    const code = await this.mailingService.generateCode(email);
    await this.mailingService.sendMail(email, code);
  }
}
DTO
GenerateCodeDto
export interface GenerateCodeDto {
  email: string;
}
VerifyCodeDto
import { GenerateCodeDto } from './generate-code.dto';

export interface VerifyCodeDto extends GenerateCodeDto {
  code: number;
}
메일 보내기
/mail/code/generate로 Post 요청을 보내면 인증 코드가 발급되고 메일이 발송됩니다.
정상적인 인증코드를 입력한 경우 Response<200>을, 틀린 인증코드를 입력한 경우 Response<400>을 반환하게 했어요!
이로서 메일 서비스까지 완료했습니다!
캐시 + 메일 인증 구현이 재밌었네요

저는 말하는 싹 난 감자입니다