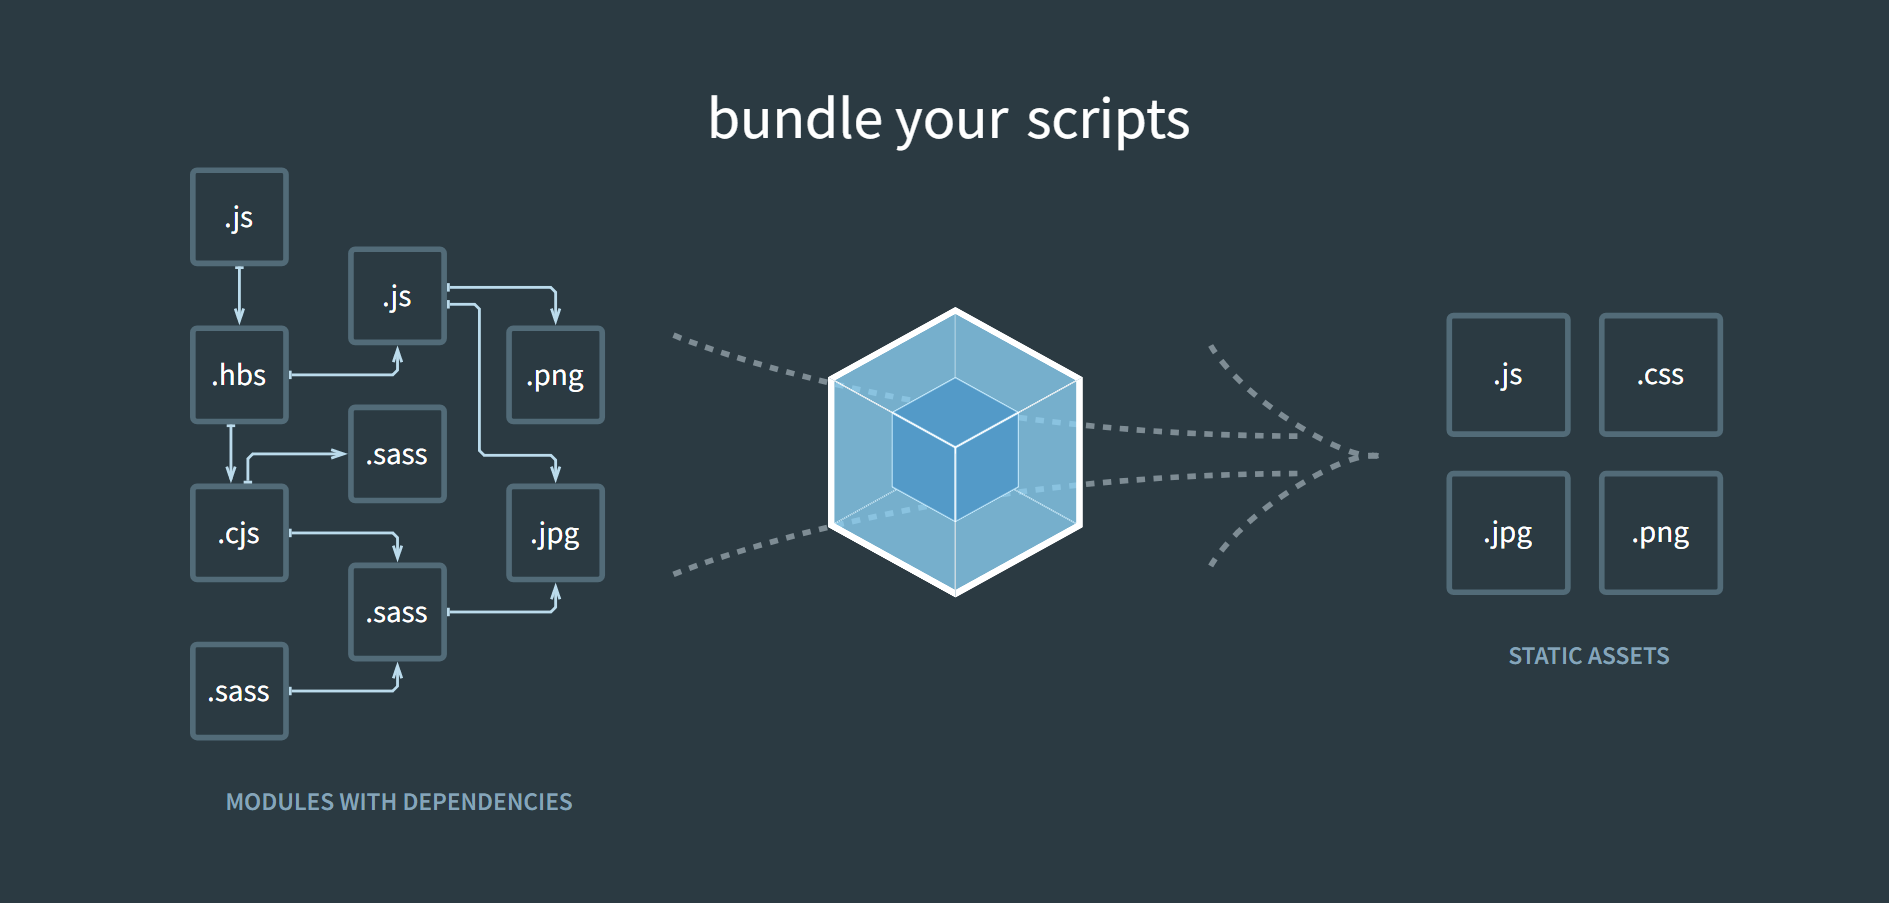
1. 웹팩을 왜 쓰는가?
개발이 완료되고 나면 이를 배포하는 과정이 필요한데 만일 코드의 양이 늘어나게 되면 파일의 크기가 무거워지게 되는데, 웹 페이지의 로딩속도와 성능에 상당한 문제가 생기고 이는 유저 이탈로 바로 직결된다.
그래서 이러한 파일들을 번들링해주는 웹팩이 필요하다.
2. css-minimizer-webpack-plugin vs mini-css-extract-plugin
css-minimizer-webpack-plugin은 min-css-extract-plugin에 의해 생성된 css 파일을 압축하는 데 사용된다고 한다.
3. 세팅
npm init -y
npm install -D webpack webpack-cli : 번들링하기 위해서 우선 webpack을 사용한다.
webpack.config.js 작성
// webpack.config.js
const path = require('path');

module.exports = {
  entry: './src/index.js', //시작점
  output: { //출구
    path: path.resolve(__dirname, 'dist'),
    filename: 'app.bundle.js',
  },
};
주의할 점은 entry 그리고 output에 path를 경로에 맞춰서 잘 작성하면 된다.
npx webpack : 번들링하기
npm i -D css-loader style-loader
추가적으로 html,css 파일을 작성했을 때, 이를 build 시키면
Unexpected token "*" 라는 에러가 나오면서 빌드가 안된다.
이 때 필요한게 위에서 적은 css-loader와 style-loader이다.
// webpack.config.js
const path = require("path");

module.exports = {
  entry: "./src/index.js",
  output: {
    path: path.resolve(__dirname, "dist"),
    filename: "app.bundle.js",
  },
  module: {
    rules: [
      {

        test: /\.css$/,
        // 파일명이 .css로 끝나는 모든 파일에 적용
		// 배열 마지막 요소부터 오른쪽에서 왼쪽 순으로 적용
		// 먼저 css-loader가 적용되고, styled-loader가 적용되어야 한다.
		// 순서 주의!
        use: ["style-loader", "css-loader"],
		// loader가 node_modules 안의 있는 내용도 처리하기 때문에
		// node_modules는 제외해야 한다.
        exclude: /node_modules/,
      },
    ],
  },
};test와 use는 필수적으로 들어가야 한다.
node_modules 같은 경우에는 보통 react 프로젝트를 진행할 때 용량 이슈로 잘 올리지도 않기도 하고 웹팩에서도 마찬가지다.
npm i -D html-webpack-plugin
또한 html도 번들링 작업이 필요하기 때문에 html-webpack-plugin라는 플러그인도 설치해준다.
const path = require("path");
const HtmlWebpackPlugin = require('html-webpack-plugin')

module.exports = {
  entry: "./src/index.js",
  output: {
    path: path.resolve(__dirname, "dist"),
    filename: "app.bundle.js",
  },
  module: {
    rules: [
      {
        test: /\.css$/,
        use: ["style-loader", "css-loader"],
        exclude: /node_modules/,
      },
    ],
  },
  plugins: [new HtmlWebpackPlugin({
    template: path.resolve(__dirname, "src", "index.html")
  })]
};
일반 브라우저에서는 import,export 같은 최신 문법이 적용되지 않기 때문에 require를 통해서 직접 모듈을 불러와야 한다.
이렇게 다 설정을 해주고 나서 다시 build를 하면
WARNING in configuration
The 'mode' option has not been set, webpack will fallback to 'production' for this value.
Set 'mode' option to 'development' or 'production' to enable defaults for each environment.
You can also set it to 'none' to disable any default behavior. Learn more: https://webpack.js.org/configuration/mode/
이런 게 뜨는데,
경고 메시지 그대로다. mode를 설정 안해줘서 그렇다. 웬만하면 development로 설정을 하는데 이거까지 작성하면
asset app.bundle.js 5.87 KiB [emitted] (name: main)
asset index.html 1.78 KiB [emitted]
./src/script.js 4.46 KiB [built] [code generated]
webpack 5.74.0 compiled successfully in 455 ms
아무런 에러나 경고도 없이 잘됐다.
느낀점
프론트엔드 개발자로서 Webpack 같은 번들링 도구를 잘 알아야 된다고는 어렴풋이 들었는데 솔직히 리액트로 앱 설치하면 거기 안에 webpack이 다 들어있어서 솔직히 이걸 굳이 공부를 해야하나 싶었다.
하지만 적어도 공식문서를 보면서 최소한 어떻게 돌아가고(?) 있구나라는 거는 알아야 할 거 같다.