이전에는 기본 스타일로 음원재생목록의 UI를 구현해보았는데, 디테일한 구현에는 한계가 있었다. 그래서 이번에는 음원재생목록보다 좀더 디테일한 설정이 필요한 음원순위목록을 CustomTableViewCell을 이용하여 만들어 볼 것이다.
CustomTableViewCell
Cell의 UI를 구현할 때 기본 UITableViewCell이 제공하는 스타일로는 충분치 않을 경우가 많다. 이럴 때 CustomTableViewCell을 만들어 사용하게 된다.
CustomTableViewCell을 사용하면 기본 셀에 없는 이미지, 버튼, 스위치 등의 UI를 추가하거나, 배치를 자유롭게 커스텀할 수 있다.
목표
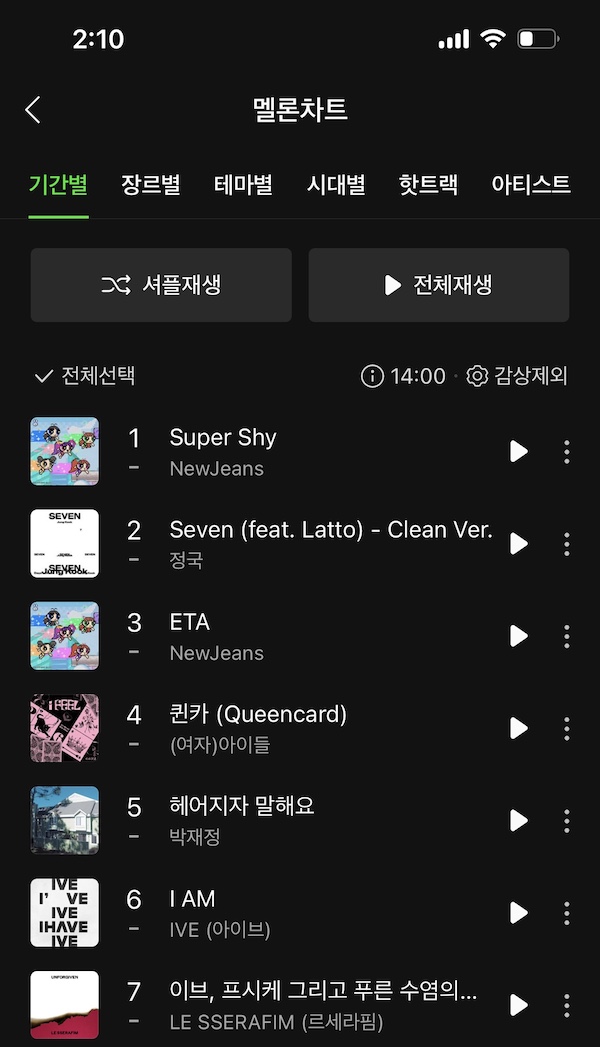
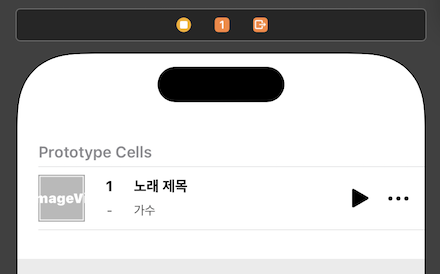
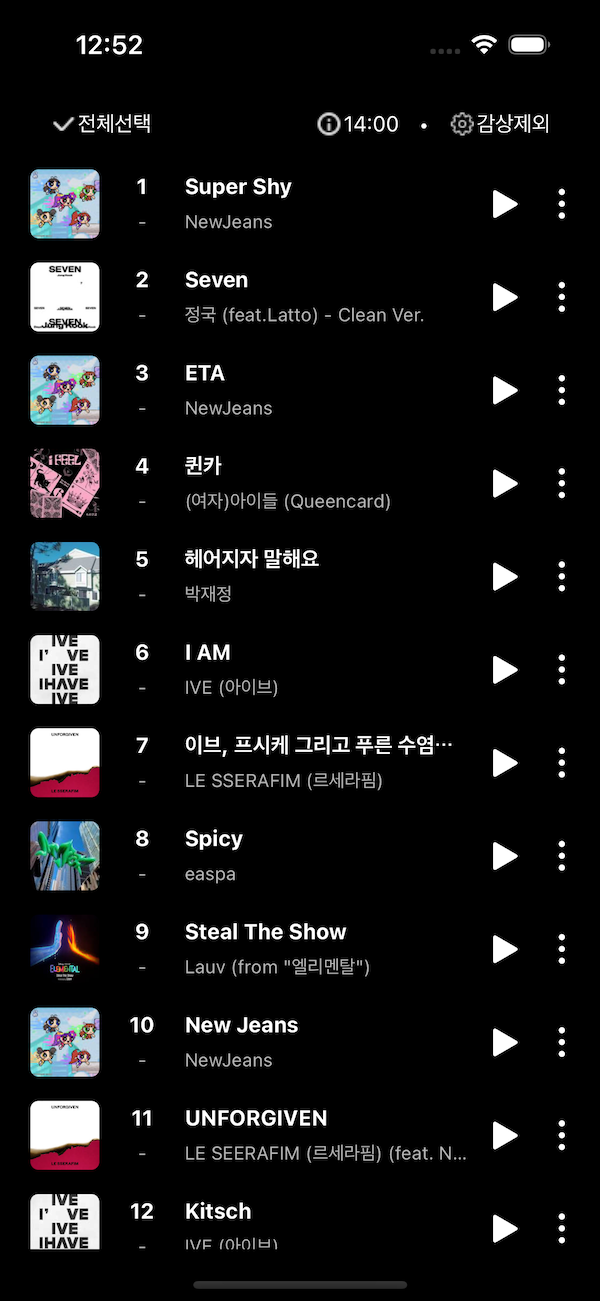
재생목록과 비교했을 때 추가된 요소들이 보인다.
이번에도 테이블뷰와 관련된 UI만 만들어 보도록 하겠다.
만들기
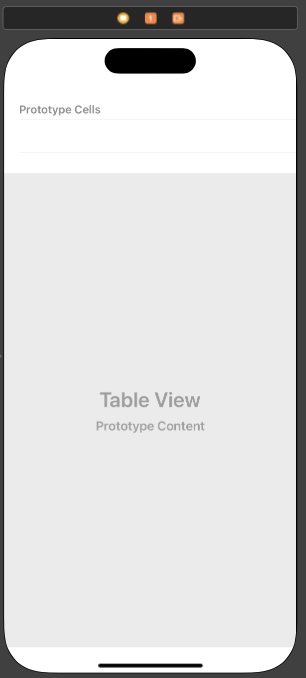
스토리보드에 UITableView, UITableViewCell 추가
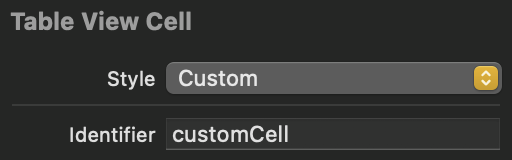
기존 ViewController에 UITableView와 UITableViewCell을 추가하고 Table View Cell Style을 Custom으로 Identifier을 "customCell"로 설정한다.
Custom Cell의 오토레이아웃 설정하기
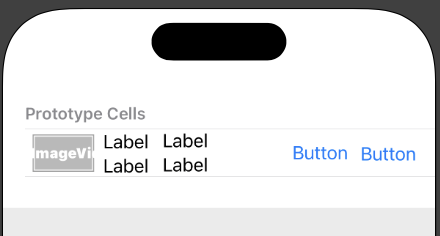
사실 이 작업 쉽지 않았다. 아직 오토레이아웃을 확실하게 다루지 못하나보다 자주 사용해야겠다.
한 가지 문제가 있었다. 가장 우측의 버튼 이미지는 멜론 앱에서는 세로 방향으로 표시되었지만, iOS에서 제공하는 이미지는 가로 방향만 있었다. 그래서 프로그래밍방식으로 버튼을 90도 돌려줄 예정
데이터모델 생성
이전에 만들었던 Track에 추가된 ranck 변수를 추가하였다.
struct Track {
    let rank: Int
    let albumImageName: String
    let titleText: String
    let author: String
    let description: String?

    var albumImage: UIImage? {
        return UIImage(named: albumImageName)
    }

    var subText: String {
        return [author, description].compactMap { $0 }.joined(separator: " ")
    }
}
추가된 변수를 반영하여 더미데이터를 수정해준다.
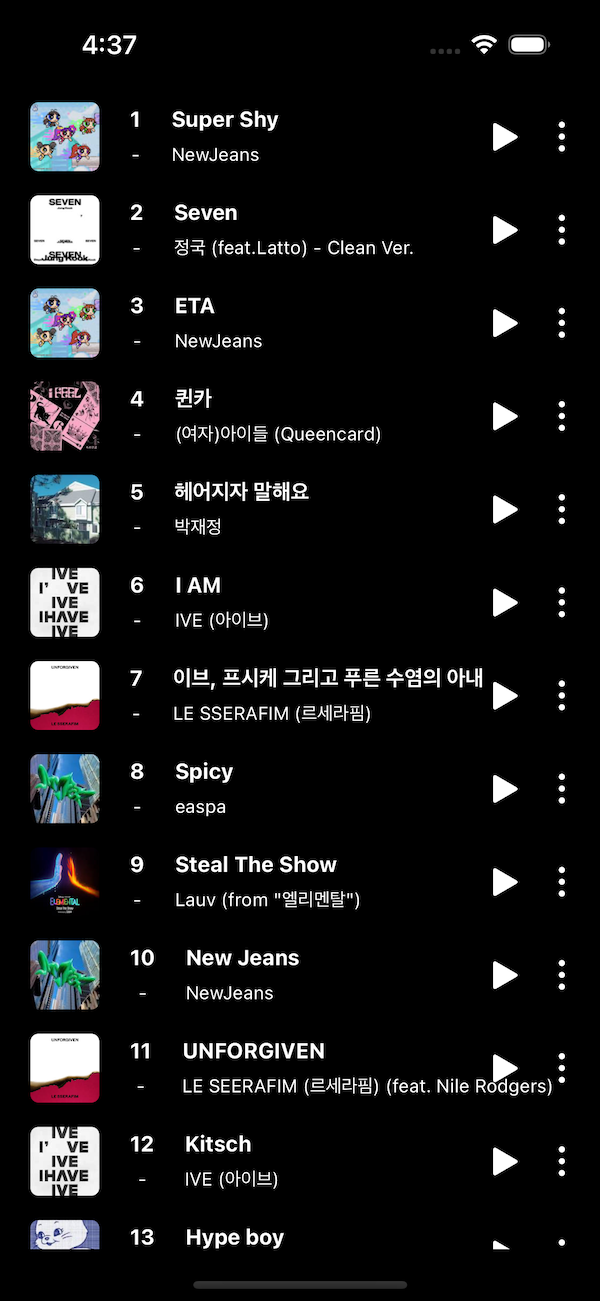
이미 음원 순위 순으로 잘 정렬되어 있었지만 굳이 무작위 순으로 섞어주었다 (순위는 수시로 변하는 값이기 때문에 직접 정렬해서 사용 해보기 위함)
extension Track {
    static let tracks: [Track] = [
        Track(rank: 5,
              albumImageName: "1집 Alone",
              titleText: "헤어지자 말해요",
              author: "박재정",
              description: nil),

        Track(rank: 1,
              albumImageName: "NewJeans 2nd EP 'Get Up'",
              titleText: "Super Shy",
              author: "NewJeans",
              description: nil),

        Track(rank: 9,
              albumImageName: "Steal The Show (From \"엘리멘탈\")",
              titleText: "Steal The Show",
              author: "Lauv",
              description: "(from \"엘리멘탈\")"),

        Track(rank: 6,
              albumImageName: "I've IVE",
              titleText: "I AM",
              author: "IVE (아이브)",
              description: nil),

        Track(rank: 2,
              albumImageName: "Seven(feat.Latto)- Clean Ver.",
              titleText: "Seven",
              author: "정국",
              description: "(feat.Latto) - Clean Ver."),

        Track(rank: 8,
              albumImageName: "MY WORLD - The 3rd Mini Album",
              titleText: "Spicy",
              author: "easpa",
              description: nil),

        Track(rank: 4,
              albumImageName: "I feel",
              titleText: "퀸카",
              author: "(여자)아이들",
              description: "(Queencard)"),

        Track(rank: 11,
              albumImageName: "UNFORGIVEN",
              titleText: "UNFORGIVEN",
              author: "LE SEERAFIM (르세라핌)",
              description: "(feat. Nile Rodgers)"),

        Track(rank: 10,
              albumImageName: "NewJeans 2nd EP 'Get Up'",
              titleText: "New Jeans",
              author: "NewJeans",
              description: nil),

        Track(rank: 7,
              albumImageName: "UNFORGIVEN",
              titleText: "이브, 프시케 그리고 푸른 수염의 아내",
              author: "LE SSERAFIM (르세라핌)",
              description: nil),

        Track(rank: 13,
              albumImageName: "NewJeans 1st Ep \"New Jeans\"",
              titleText: "Hype boy",
              author: "NewJeans",
              description: nil),

        Track(rank: 3,
              albumImageName: "NewJeans 2nd EP 'Get Up'",
              titleText: "ETA",
              author: "NewJeans",
              description: nil),

        Track(rank: 12,
              albumImageName: "I've IVE",
              titleText: "Kitsch",
              author: "IVE (아이브)",
              description: nil)
    ]
}
@IBOutlet변수 생성과 그외 기본 작업
이번엔 랭킹이 추가되었기 때문에 더미파일의 배열을 순서를 굳이 섞어놨었다.
sorted를 통해 랭킹 순으로 정렬 해준다.
class ViewController: UIViewController {

    @IBOutlet weak var musicTableView: UITableView!
    let tracks: [Track] = Track.tracks.sorted { $0.rank < $1.rank }
    let cellIdentifier: String = "customCell"


    override func viewDidLoad() {
        super.viewDidLoad()

        setupTableViewStyle()
        setupDelegate()
    }

    private func setupTableViewStyle() {
        musicTableView.separatorStyle = .none
    }

    private func setupDelegate() {
        musicTableView.delegate = self
        musicTableView.dataSource = self
    }
}
CustomCell 클래스 만들기
MusicTableViewCell 클래스를 만들어 CustomCell과 연결해준다.
setupUI 메서드를 만들어서 위에서 문제가 있었던 버튼을 90도 회전시켜주고 다른 초기 설정들을 해준다.
class MusicTableViewCell: UITableViewCell {

    @IBOutlet weak var albumImage: UIImageView!
    @IBOutlet weak var rankLabel: UILabel!
    @IBOutlet weak var titleLabel: UILabel!
    @IBOutlet weak var outhorLabel: UILabel!
    @IBOutlet weak var menuButton: UIButton!
    @IBOutlet weak var dashLabel: UILabel!

    override func awakeFromNib() {
        super.awakeFromNib()
        setupUI()
    }

    private func setupUI() {
            menuButton.transform = CGAffineTransform(rotationAngle: .pi/2)
            albumImage.layer.cornerRadius = 5
            dashLabel.textColor = UIColor.label.withAlphaComponent(0.7)
            outhorLabel.textColor = UIColor.label.withAlphaComponent(0.7)
        }

    override func setSelected(_ selected: Bool, animated: Bool) {
        super.setSelected(selected, animated: animated)

        // Configure the view for the selected state
    }
}
Delegate와 DataSource 프로토콜 구현
cellForRowAt 메서드에서 dequeueReusavleCell로 Cell인스스턴스를 만들고 tracks에서 필요한 값들을 적용하고 return 해준다.
extension ViewController: UITableViewDataSource {
    func tableView(_ tableView: UITableView, numberOfRowsInSection section: Int) -> Int {
        return tracks.count
    }

    func tableView(_ tableView: UITableView, cellForRowAt indexPath: IndexPath) -> UITableViewCell {
        guard let cell = tableView.dequeueReusableCell(withIdentifier: cellIdentifier, for: indexPath) as? MusicTableViewCell else {
            fatalError()
        }

        let currentTrack = tracks[indexPath.row]
        cell.albumImage.image = currentTrack.albumImage
        cell.rankLabel.text = String(currentTrack.rank)
        cell.titleLabel.text = currentTrack.titleText
        cell.outhorLabel.text = currentTrack.subText
        return cell
    }
}
확인
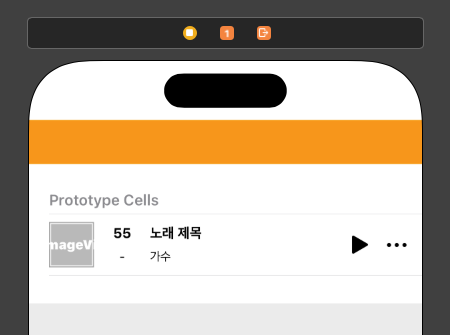
자세히 보니 라벨이 버튼의 영역을 먹고 들어가서 오토레이아웃을 손봐준다.
그리고 이번엔 테이블뷰 상단의 뷰도 추가해보겠다.
추가작업
상단 뷰 추가하기

원래 테이블뷰 헤더로 작업할 계획이었지만, 섹션이 하나밖에 없는 경우에는 헤더가 아닌 UIView로 작업하는 경우가 많다고 해서 일반 UIView로 작업했다.
버튼에 사용할 이미지가 멜론에서 사용한 이미지와 iOS에서 제공하는 이미지가 미묘하게 다르고 사이즈도 다르다.
그래서 직접 이미지를 생성하여 사용하였다.

완성
마치면서
이번에는 Custom Cell을 이용하여 이전에 만들었던 기본 Cell 로는 구현하지 못했던 요소들을 추가하여 음원순위 리스트를 만들어 보았다. Custom Cell의 사용법이 기본 셀과 비교했을 때 더 복잡하다고 느껴지지 않았다. 오히려 제약 사항이 없어 원하는 대로 설정할 수 있어 편리했다. 그러나 직접 커스텀 작업을 해야 하므로 추가 작업이 많이 필요했고, 이로 인해 예상했던 시간보다 더 많은 시간이 소요되었다.
그래도 직접 만들어 보면서 Custom Cell을 활용하는 방법에 대해 이해하게 되었고, 다른 부가 작업들을 해보면서 자잘하게 배운것들이 많았다.