ListView란 무엇인가
UI를 구성할 때 많이 사용되는 컴포넌트 중 하나
사용자가 정의한 데이터 리스트를 화면에 출력
앱 미리보기
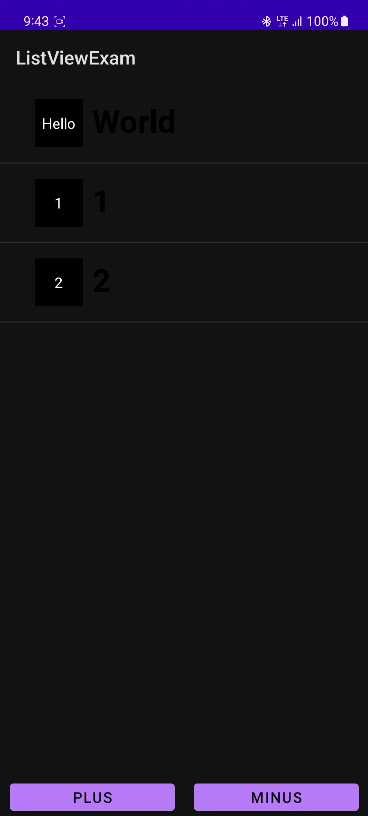
PLUS 버튼을 누르면 item이 추가되고
MINUS 버튼을 누르면 itme이 삭제된다
XML 작성
activity_main.xml
<?xml version="1.0" encoding="utf-8"?>
<androidx.constraintlayout.widget.ConstraintLayout xmlns:android="http://schemas.android.com/apk/res/android"
    xmlns:app="http://schemas.android.com/apk/res-auto"
    xmlns:tools="http://schemas.android.com/tools"
    android:layout_width="match_parent"
    android:layout_height="match_parent"
    tools:context=".MainActivity">

    <ListView
        android:id="@+id/list_view"
        android:layout_width="match_parent"
        android:layout_height="match_parent"
        app:layout_constraintBottom_toBottomOf="parent"
        app:layout_constraintLeft_toLeftOf="parent"
        app:layout_constraintRight_toRightOf="parent"
        app:layout_constraintTop_toTopOf="parent"
        android:layout_marginBottom="50dp"/>

    <Button
        android:id="@+id/plus_btn"
        android:layout_width="0dp"
        android:layout_height="40dp"
        app:layout_constraintStart_toStartOf="parent"
        app:layout_constraintEnd_toStartOf="@id/minus_btn"
        app:layout_constraintBottom_toBottomOf="parent"
        android:layout_marginStart="10dp"
        android:layout_marginEnd="10dp"
        android:text="PLUS"/>

    <Button
        android:id="@+id/minus_btn"
        android:layout_width="0dp"
        android:layout_height="40dp"
        app:layout_constraintStart_toEndOf="@id/plus_btn"
        app:layout_constraintEnd_toEndOf="parent"
        app:layout_constraintBottom_toBottomOf="parent"
        android:layout_marginStart="10dp"
        android:layout_marginEnd="10dp"
        android:text="MINUS"/>


</androidx.constraintlayout.widget.ConstraintLayout><ListView>로 ListView를 생성
Plus 버튼과 Minus 버튼 추가
item_view.xml
<?xml version="1.0" encoding="utf-8"?>
<LinearLayout xmlns:android="http://schemas.android.com/apk/res/android"
    xmlns:app="http://schemas.android.com/apk/res-auto"
    android:padding="16dp"
    android:orientation="horizontal"
    android:layout_width="match_parent"
    android:layout_height="wrap_content">
    <TextView
        android:id="@+id/title"
        android:layout_width="50dp"
        android:layout_height="50dp"
        android:background="@color/black"
        app:layout_constraintStart_toStartOf="parent"
        app:layout_constraintTop_toTopOf="parent"
        app:layout_constraintBottom_toBottomOf="parent"
        android:layout_marginStart="20dp"
        android:text="title"
        android:textColor="@color/white"
        android:gravity="center"/>

    <LinearLayout
        android:layout_width="match_parent"
        android:layout_height="wrap_content"
        android:layout_marginStart="10dp"
        android:orientation="vertical">

        <TextView
            android:id="@+id/content"
            android:layout_width="wrap_content"
            android:layout_height="wrap_content"
            android:text="content"
            android:textSize="30sp"
            android:textStyle="bold"
            android:textColor="@android:color/black"/>
    </LinearLayout>
</LinearLayout>
ListView에 들어갈 View를 작성
MainActivity
class MainActivity : AppCompatActivity() {

    var count: Int = 0

    private val binding by lazy { ActivityMainBinding.inflate(layoutInflater) }
    // Adapter 생성
    private val itemAdapter by lazy { ListViewAdapter(this, itemList) }

	// itemList의 초기값 설정
    private var itemList = mutableListOf(
        ListViewItem("Hello", "World")
    )

    override fun onCreate(savedInstanceState: Bundle?) {
        super.onCreate(savedInstanceState)
        setContentView(binding.root)

        // 뷰 바인딩으로 묶어주고 어댑터를 달아줌
        binding.listView.adapter = itemAdapter

        binding.plusBtn.setOnClickListener {
            addList()
        }

        binding.minusBtn.setOnClickListener {
            removeList()
        }
    }

	// PLUS 버튼을 눌렀을 때
    private fun addList() {
        count++
        itemList.add(ListViewItem("$count", "$count"))
        itemAdapter.notifyDataSetChanged()
    }

	// MINUS 버튼을 눌렀을 때
    private fun removeList() {
    	// count가 0인지 검사해서 0이 아닐때만 아이템을 삭제
        if (count != 0) {
            itemList.removeAt(count--)
            itemAdapter.notifyDataSetChanged()
        }

    }
}
notifyDataSetChanged()는 Adapter에서 제공하는 함수
itemList에 변경사항이 발생했을 시 notifyDataSetChanged()를 호출해야 ListView에 반영됨
ListViewAdapter
class ListViewAdapter(val context: Context, var itemList: MutableList<ListViewItem>) : BaseAdapter() {

    //ListView에 속한 item의 전체 수를 반환한다.
    override fun getCount(): Int {
        return itemList.size
    }
    /*
    해당 위치의 item을 반환하는 메소드이다. Int 형식으로 된 position을 파라미터로 갖는다.
    예를 들어 1번째 Dog item을 선택하고 싶으면 코드에서 getItem(0)과 같이 쓸 수 있을 것이다.
    */
    override fun getItem(p0: Int): Any {
        return itemList[p0]
    }
    /*
    해당 위치의 item id를 반환하는 메소드이다.
     */
    override fun getItemId(p0: Int): Long {
        return 0
    }

    // xml 파일의 View와 데이터를 연결하는 핵심 역할을 하는 메소드이다.
    override fun getView(position: Int, convertView: View?, parent: ViewGroup?): View {

        val view: View = LayoutInflater.from(context).inflate(R.layout.item_view, null)

        val title = view.findViewById<TextView>(R.id.title)
        val content = view.findViewById<TextView>(R.id.content)

        val list = itemList[position]
        title.text = list.title
        content.text = list.content

        return view
    }
}
Adapter란 뷰와 데이터를 연결해주는 다리 역할을 함
BaseAdapter를 상속해서 사용
ListViewItem
data class ListViewItem(
    var title: String?,
    var content: String?
)
itemList의 값을 쉽게 다루기 위해 data class를 만듬

Android, Flutter