임시저장했던 포스팅을 업로드하는 것을 잊었었다.
공유를 위해 업로드하고자 한다.
0. Intro
보통 우리는 개발을 시작할 때 Create-React-App을 사용하여 프로젝트를 개설한다.
npx create-react-app my-app --template typescript
webpack, babel 등을 자동으로 설치해주고 index.tsx, app.tsx, index.html 등의 기본적인 파일을 자동으로 생성해주기 때문에 상당히 편한 방법이다.
Q. 그런데 왜 굳이 직접 하려고 하는거지?
하지만 불필요한 설정이 추가되거나 하여 빌드 시간이 길어질 수도 있고, 특히 tsconfig과 같은 설정을 수정하려면 eject를 사용해야 한다는 불편함이 있다. (절대 되돌릴 수 없음, 하지만 꼭 한번은 해봐야 한다. 다음 기회에 해보는 걸로 하자.)
따라서 CRA 없이 프로젝트를 시작하는 방법을 알아둘 필요성이 있다고 생각된다.
잘 만들어 두면 앞으로 새 프로젝트를 시작할 때 계속 사용할 수 있다는 장점도 있다!
Webpack을 사용하는 방법은 자료가 충분히 많기 때문에, 이번에는 번들러로Vite를 사용한다.
Q. 왜 Vite 인가?
Vite는 Go언어로 제작된 번들러로, 훨씬 빠른 빌드 속도가 큰 장점이다.
또, 자료가 많이 없기 때문에 직접 문제를 해결하며 공부할 수 있는 것들이 많을 것으로 생각된다.
패키지 매니저는
yarn을 사용한다.
Q. 왜 yarn 인가?
1. 패키지 설치 프로세스 : npm 순차적 설치, yarn 모두 가져와서 동시에 설치
2. 보안 : npm 패키지 내의 다른 패키지 코드 실행, yarn package.json 내의 파일만 설치
=> 물론 최근 업데이트로 npm도 보안성이 많이 좋아졌다고 함. 이 부분은 나중에 정리하자.
1. 프로젝트 생성하기
1. 프로젝트 초기화
yarn init으로 프로젝트를 시작한다.
적당히 입력해주면 다음과 같은 package.json 파일이 생성된다.
  "name": "gomao",
  "version": "1.0.0",
  "description": "Gomao's Custom Project Starter",
  "main": "index.js",
  "author": "Gomao",
  "license": "MIT",
2. 의존성 설치
yarn add -D vite typescript @types/react @types/react-dom
yarn add react react-dom
제대로 입력했다면 다음과 같이 될 것이다.
{
"name": "gomao",
"version": "1.0.0",
"description": "Gomao's Custom Project Starter",
"main": "index.js",
"author": "Gomao",
"license": "MIT",
"devDependencies": {
"@types/react": "^18.2.25",
"@types/react-dom": "^18.2.10",
"typescript": "^5.2.2",
"vite": "^4.4.11"
},
"dependencies": {
"react": "^18.2.0",
"react-dom": "^18.2.0"
}
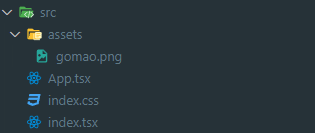
}3. 프로젝트 구조 설정
App.tsx,index.tsx,index.html,index.css등 기본 파일을 생성한다.
- 폴더 구조 생성 및 기본 아이콘 추가
App.tsx
import React from "react";
export default function App() {
  return <div>my project</div>;
}
index.tsx
import React from "react";
import App from "./App";
import { createRoot } from "react-dom/client";
import "./index.css";

const container = document.getElementById("root");
const root = createRoot(container!);

root.render(<App />);
index.html
<!DOCTYPE html>
<html lang="ko">
  <head>
    <meta charset="UTF-8" />
    <meta name="viewport" content="width=device-width, initial-scale=1.0" />
    <link rel="icon" type="image/svg+xml" href="./src/assets/gomao.png" />
    <title>Gomao's React Vite App</title>
  </head>
  <body>
    <div id="root"></div>
    <script type="module" src="/src/index.tsx"></script>
  </body>
</html>
4. Vite 설정
먼저 추가로 필요한 패키지들을 설치해준다.
yarn add --dev @types/node @vitejs/plugin-react @vitejs/plugin-react-swc
그 다음 Vite 설정 파일을 생성한다
vite.config.ts
import { defineConfig } from "vite";
import path from "path";
import react from "@vitejs/plugin-react-swc";

// https://vitejs.dev/config/
export default defineConfig({
  plugins: [react()],
  resolve: {
    alias: {
      "@assets": path.resolve(__dirname, "./src/assets"),
    },
  },
});
5. TypeScript 설정
설치한다.
tsc --init
그러면 즉시 다음과 같은 오류가 발생한다.

tsconfig.json파일을 설정해주지 않아서 그렇다.
해당 파일은 수많은 설정이 가능하기 때문에, 필요한 기능을 잘 선정하여 세팅해야 한다.
필요한 경우 tsconfig.node.json 파일을 활용해야 할 수도 있다.
=> 파일이 매우 방대하기 때문에, 이 부분은 추후에 Github 링크로 대신하도록 하겠다.
https://github.com/gboycdw/Create-My-App/blob/main/tsconfig.json
https://github.com/gboycdw/Create-My-App/blob/main/tsconfig.node.json
아까 전에는 import React from "react" 없이 인식하지 못하던 파일을 이제 인식할 수 있다.
6. 프로젝트 시작
yarn vite
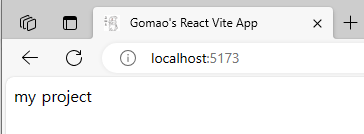
좋다 여기까지 왔으면 이제 기본적인 프로젝트 셋업이 된 것이라 볼 수 있겠다.
7. 명령어 설정
우리는 늘
npm start로 프로젝트를 시작했었는데...?
CRA는 package.json의 "scripts" 설정까지 해주고 있었던 것이다.
이제 우리가 수동으로 입력해줘야 한다.
package.json
  "scripts": {
    "test": "echo \"Error: no test specified\" && exit 1",
    "start": "vite"
  },
이제부터는 우리에게 익숙한 yarn start로 프로젝트를 시작할 수 있다.
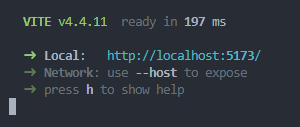
8. 역시 Vite!
여기서 또 Vite의 한 가지 장점을 발견할 수 있다.
터미널을 새로 열어서 yarn start를 한번 더 해보자.
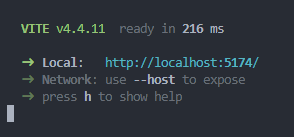
자동으로 다른 포트를 찾아서 프로젝트를 열어준다!
npm으로 할 경우, 포트가 충돌이 나기 때문에 다음과 같이 설정을 해줘야 한다.
  "scripts": {
    "start": "PORT=3001 react-scripts start",
    "build": "react-scripts build",
    "test": "react-scripts test",
    "eject": "react-scripts eject"
  },
게다가 해당 명령어는 Linux 환경에서만 동작하는 명령어기 때문에, Window 환경에서 사용하려면 또다시 다음과 같이 수정해야 한다
  "scripts": {
    "start": "set PORT=3001 && react-scripts start",
    "build": "react-scripts build",
    "test": "react-scripts test",
    "eject": "react-scripts eject"
  },
하지만 Vite는 그럴 필요가 없다.
2. 프로젝트에 필요한 후속 설정
1. CSS 선택
프로젝트에 사용할
CSS스택을 정해야 한다.
이번에는 tailwindcss를 사용해볼 예정이다.
yarn add tailwindcss
그리고 tailwindcss를 적용할 수 있도록 설정을 해줘야 한다.
vite.config.ts
export default defineConfig({
	plugins: [react()],
	resolve: {
  	alias: {
	      "@assets": path.resolve(__dirname, "./src/assets"),
  	},
	},
	// 아래 설정을 추가한다.
	css: {
	    preprocessorOptions: {
	      scss: {
	        additionalData: `@import "./tailwind.css";`,
	      },
	    },
	},
});
또, package.json 에 필요한 패키지를 설치해준다
  "devDependencies": {
  	...
    ...
    "postcss": "^8.4.30",
    "tailwindcss": "^3.3.3",
    "autoprefixer": "^10.4.15"
  }
=> yarn install
그리고 루트 폴더에 postcss.config.js 파일을 생성하고 다음과 같이 설정해준다.
module.exports = {
  plugins: {
    tailwindcss: {},
    autoprefixer: {},
  },
};
나중에 사용할 스타일 폴더와 tailwind customise 파일을 생성한다.
src/styles/tailwindStyle.ts
const colors = {
  gomao: "#0224b3",
};

export const tailwindStyle = {
  colors,
};
루트 폴더에 tailwind.config.js 파일을 생성하고 다음과 같이 설정해준다.
/** @type {import('tailwindcss').Config} */
import { tailwindStyle } from "./src/styles/tailwindStyle";

module.exports = {
  content: ["./index.html", "./src/**/*.{js,ts,jsx,tsx}"],
  theme: {
    extend: { ...tailwindStyle },
  },
  plugins: [],
};
됐다. 이제 스타일을 적용해보자.
App.tsx
export default function App() {
  return (
    <div className="text-gomao bg-green-50" style={{ padding: 15 }}>
      my project
    </div>
  );
}
위와 같이 tailwind 스타일을 적용해 준다.
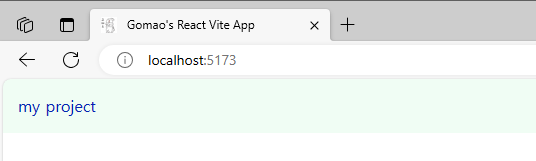
잘 적용되는 모습이다!
2. ESLint, Prettier 설정
개발 편의성을 위한 도구들
https://github.com/gboycdw/Create-My-App/blob/main/.eslintrc.cjs
https://github.com/gboycdw/Create-My-App/blob/main/.prettierrc
3. React Router DOM 설정
React를 쓸 거라면 당연히 React Router를 사용해야겠지?
...이 기능에 대해서는 다음 Posting에서 다루도록 하겠음.