JavaScript (JS)
-
front에서 기본적으로 사용하는 언어.
요즘은 JS 자체가 많이 발전해서 jQuery 쓰지 않고 JS를 사용한다. -
ajax 통신을 위해 Fetch API를 사용한다.
https://developer.mozilla.org/ko/docs/Web/API/Fetch_API/Using_Fetch
jQuery
-
초기 JS를 보완하기 위한 목적
기능적으로는 같은데 좀 더 쓰기 편하게 만든 것.
https://jquery.com -
$ 표시가 있는 게 jQuery다.
// jQuery

var hiddenBox = $( "#banner-message" );
$( "#button-container button" ).on( "click", function( event ) {
  hiddenBox.show();
});


// Ajax

$.ajax({
  url: "/api/getWeather", // 보내는 url
  data: {
    zipcode: 97201 // 데이터
  },
  // 성공했을 때 쓸 함수 (callback함수)
  success: function( result ) {
    $( "#weather-temp" ).html( "<strong>" + result + "</strong> degrees" );
  }
});
front→back 보낼 때 쓰는 패키지
-
jQuery는 API통신을 할 때
$.ajax -
JS에서는 자체적으로 갖고 있는 Fetch (바닐라JS)
-
(React서 많이 쓰는 건 Axios라는 라이브러리)
자바스크립트 불러오기
- index.html 만들기
!+Ent - index.js 만들기
console.log() - html에 게시글 불러오는 로직을 작성하면 띄울 수 있다.
<script src="index.js"></script>
<!DOCTYPE html>
<html lang="en">
<head>
    <meta charset="UTF-8">
    <meta http-equiv="X-UA-Compatible" content="IE=edge">
    <meta name="viewport" content="width=device-width, initial-scale=1.0">
    <title>프론트엔드</title>
    <!-- JS 게시글 불러오는 로직 -->
    <script src="index.js"></script>
</head>
<body>
    <h1>프론트엔드</h1>
    수정사항
</body>
</html>
JS로 데이터 불러오기
index.js
console.log("JS 불러옴")


// 로딩 되자마자 실행한다. 브라우저 로딩 됐는지 확인할 수 있다.
// 비동기함수 async : ~ 하는 동안 언제 요청이 올지 모르니 다른 거 먼저 실행, await 사용
window.onload = async function loadArticles() {


    // 요청 보내고 돌아오는 것을 저장할 변수. 변경되지 않을 변수 만들 때 const
    const response = await fetch('http://127.0.0.1:8000/articles/', {method:'GET'})
    // await : 이 요청 보내고 기다릴 것. 돌아오면 response에 저장.
    // 더 자세하게 {header부분}. default는 'GET'이지만 적어준다.
    // 이 주소로, 'GET' 방식으로 보내고, 돌아오는 값을 response에 저장한다.


    // 시리얼라이즈 상태로 받아온 것을 -> js object 형태로 쓰기 위해
    response_json = await response.json()
    console.log(response_json)
}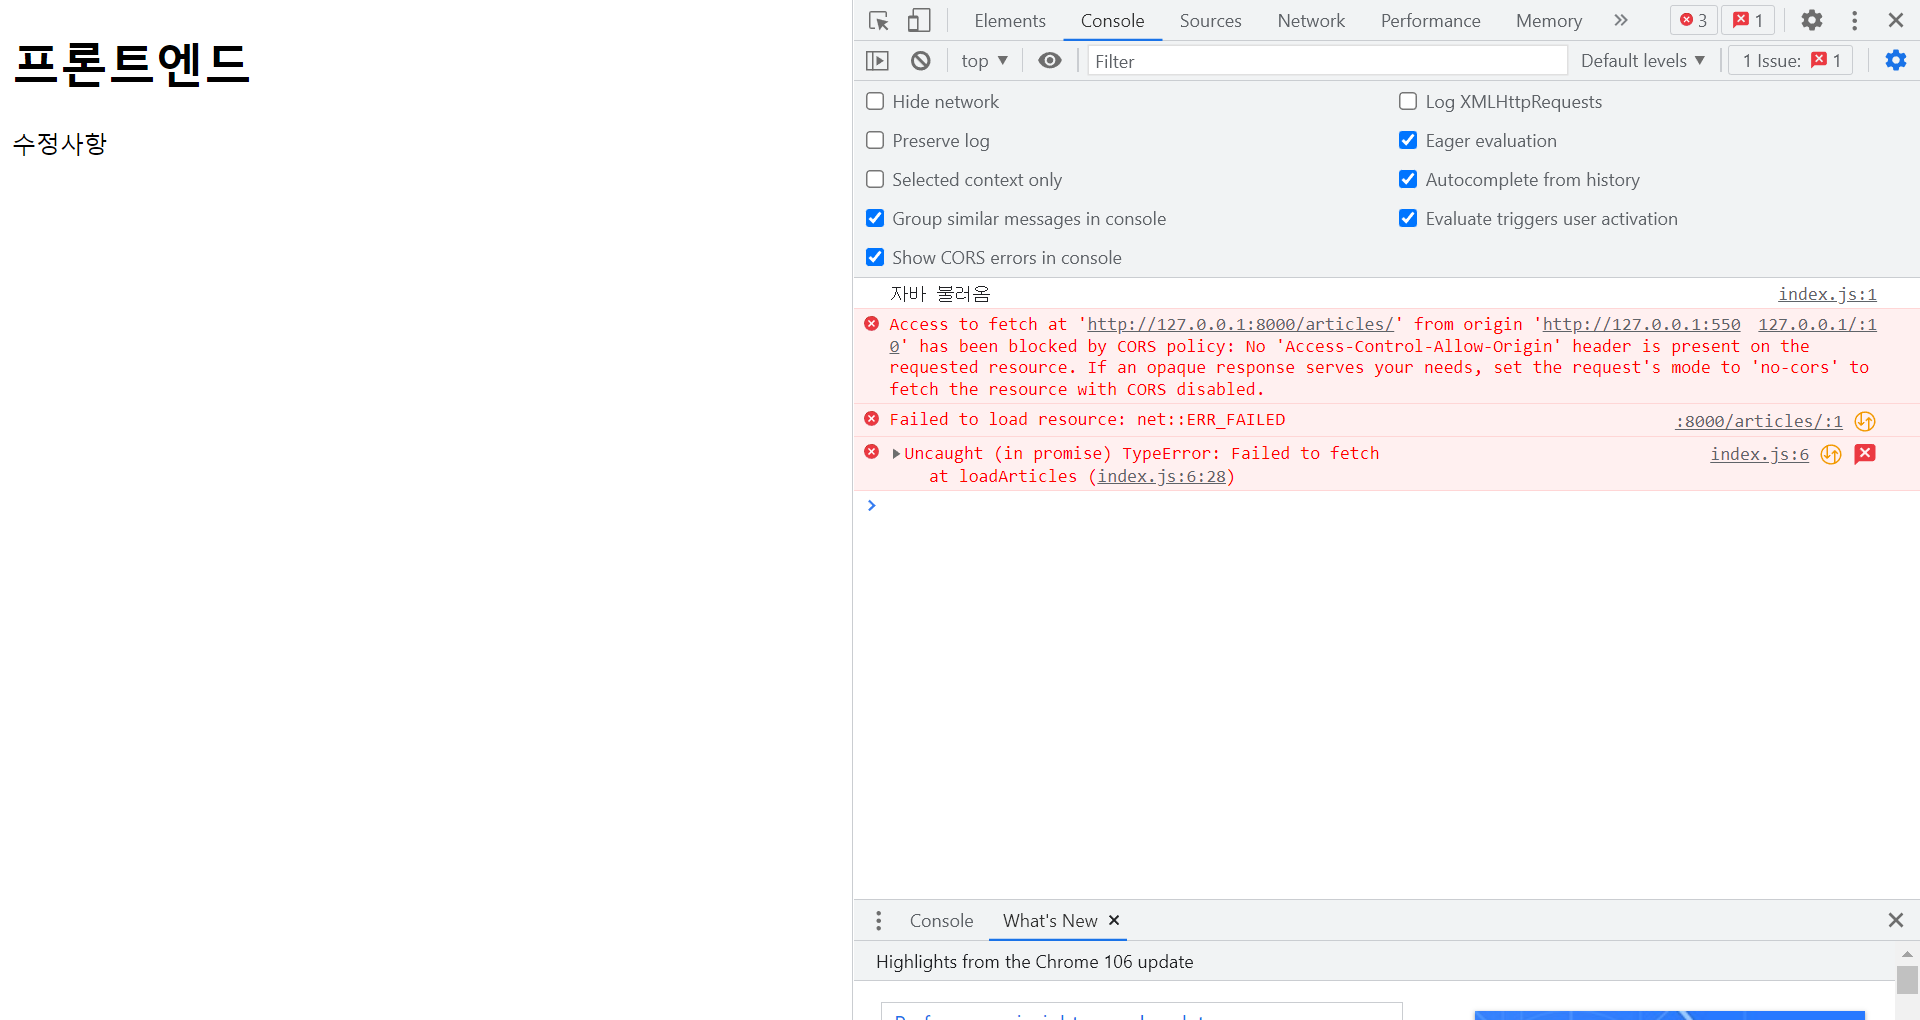
CORS (면접 질문 多)
같은 도메인에서 요청을 보낼 때는 허용되지만
다른 도메인; origin(주소:port)이 다른 곳에서 요청을 보내면
보안상 문제로 별도의 허용이 필요하다.
다른 사이트가 이 사이트인 척 하고 요청하는 것을 막기 위해.
django의 경우 별도로 허용을 해줘야 한다.
django cors 검색
https://pypi.org/project/django-cors-headers/
backend로 가서
pip install django-cors-headers
freeze
settings.py
from pathlib import Path
import os

# Build paths inside the project like this: BASE_DIR / 'subdir'.
BASE_DIR = Path(__file__).resolve().parent.parent


# Quick-start development settings - unsuitable for production
# See https://docs.djangoproject.com/en/4.1/howto/deployment/checklist/

# SECURITY WARNING: keep the secret key used in production secret!
SECRET_KEY = os.environ.get("SECRET_KEY")

# SECURITY WARNING: don't run with debug turned on in production!
DEBUG = True

ALLOWED_HOSTS = []


# Application definition

INSTALLED_APPS = [
    'django.contrib.admin',
    'django.contrib.auth',
    'django.contrib.contenttypes',
    'django.contrib.sessions',
    'django.contrib.messages',
    'django.contrib.staticfiles',
    'rest_framework',
    'articles',
    'morning_quiz',
    'drf_yasg',
    "corsheaders", # 추가
]

MIDDLEWARE = [
    'django.middleware.security.SecurityMiddleware',
    'django.contrib.sessions.middleware.SessionMiddleware',
    "corsheaders.middleware.CorsMiddleware", # 추가, 위치 중요
    'django.middleware.common.CommonMiddleware',
    'django.middleware.csrf.CsrfViewMiddleware',
    'django.contrib.auth.middleware.AuthenticationMiddleware',
    'django.contrib.messages.middleware.MessageMiddleware',
    'django.middleware.clickjacking.XFrameOptionsMiddleware',
]

ROOT_URLCONF = 'morning_quiz.urls'

TEMPLATES = [
    {
        'BACKEND': 'django.template.backends.django.DjangoTemplates',
        'DIRS': [],
        'APP_DIRS': True,
        'OPTIONS': {
            'context_processors': [
                'django.template.context_processors.debug',
                'django.template.context_processors.request',
                'django.contrib.auth.context_processors.auth',
                'django.contrib.messages.context_processors.messages',
            ],
        },
    },
]

WSGI_APPLICATION = 'morning_quiz.wsgi.application'


# Database
# https://docs.djangoproject.com/en/4.1/ref/settings/#databases

DATABASES = {
    'default': {
        'ENGINE': 'django.db.backends.sqlite3',
        'NAME': BASE_DIR / 'db.sqlite3',
    }
}


# Password validation
# https://docs.djangoproject.com/en/4.1/ref/settings/#auth-password-validators

AUTH_PASSWORD_VALIDATORS = [
    {
        'NAME': 'django.contrib.auth.password_validation.UserAttributeSimilarityValidator',
    },
    {
        'NAME': 'django.contrib.auth.password_validation.MinimumLengthValidator',
    },
    {
        'NAME': 'django.contrib.auth.password_validation.CommonPasswordValidator',
    },
    {
        'NAME': 'django.contrib.auth.password_validation.NumericPasswordValidator',
    },
]


# Internationalization
# https://docs.djangoproject.com/en/4.1/topics/i18n/

LANGUAGE_CODE = 'en-us'

TIME_ZONE = 'UTC'

USE_I18N = True

USE_TZ = True


# Static files (CSS, JavaScript, Images)
# https://docs.djangoproject.com/en/4.1/howto/static-files/

STATIC_URL = 'static/'

# Default primary key field type
# https://docs.djangoproject.com/en/4.1/ref/settings/#default-auto-field

DEFAULT_AUTO_FIELD = 'django.db.models.BigAutoField'

CORS_ALLOW_ALL_ORIGINS : bool # 추가
위 설정을 하고 frontend > F12 > console에 가보면 오류가 뜨지 않고 DB가 (JS로) 들어오는 걸 확인할 수 있다.
받아온 것을 JS로 추가하기
- 새로 받아온 리스트 저장할 div 만들기
index.html
<!DOCTYPE html>
<html lang="en">
<head>
    <meta charset="UTF-8">
    <meta http-equiv="X-UA-Compatible" content="IE=edge">
    <meta name="viewport" content="width=device-width, initial-scale=1.0">
    <title>프론트엔드</title>
    <!-- JS 게시글 불러오는 로직 -->
    <script src="index.js"></script>
</head>
<body>
    <h1>프론트엔드</h1>
    수정사항
    <!-- 새로 받아온 DB를 저장할 <div> 만들기 div#articles -->
    <div id="articles">


    </div>
</body>
</html>- 위에서 만든 리스트를 선택하기
index.js
console.log("JS 불러옴")


window.onload = async function loadArticles() {
    const response = await fetch('http://127.0.0.1:8000/articles/', {method:'GET'})

    response_json = await response.json()
    console.log(response_json)

  	// document : html, 여기서 id가 articles인 Element를 가져올 것
    const articles = document.getElementById("articles")

    // 가져온 데이터인 response_json에서 forEach 사용; for문 썼다고 생각
    // for문을 써서 response_json에 있는 것을 차례대로 하나씩 리턴한다.
    response_json.forEach(element => {
        console.log(element.title) // 제목만 나온다.
        const newArticle = document.createElement("div")
        // 새Article이 document에 createElement("태그이름") 설정하면 하나의 div를 만들 수 있다.
        newArticle.innerText = element.title
        // div 안의 글을 설정해줄 수 있다. 하나씩 돌며 하나하나 새로운 div 만들고 그 안에 텍스트는 .title
      	// 현재 메모리상에 만들어져 있다. 이것을 실제 html에 추가해야.
      	articles.appendChild(newArticle)
        // articles에 넣을 거다. 자식newArticle를 반영해라.
    });
}
console.log()는 코드 작성 후 지워도 된다.
front에 가보면 게시글의 제목들이 나와 있다. (DB의 데이터를 불러온 것)
클릭시 뜨는 것은 상세글API로 할 수 있고
수정 삭제 게시글작성 등도 만들 수 있다.
심화 내용은 구글 검색해보기 : Fetch API를 통해서 작성하는 방법.
backend를 공부하는 과정이므로 우선 front는 배제하고 기능적으로 어떻게 작동하는지 파악하는 데 초점을 둔다.