
object
객체
복합적이 데이터들이 묶여서 하나의 단위
프로퍼티
key : 데이터에 접근할 수 있는 아이디.
value :아이디에 매핑되어있는 값
속성(property)과 속성 사이는 콤마로 구분
프로퍼티 접근
const cat = {
    name : "momo",
    age : 5,
    family : "russian blue",
    sayMeow : function(){
        console.log("야옹"+this👈.name+'입니다')
    }//object 안에 함수
}
console.log(cat.name)👈
console.log(cat['family'])👈
cat.sayMeow();
cat.gender = 'male';👈
점 표기법 : cat.name
대괄호 표기법 : cat['family'] 대괄호 프로퍼티 접은 연산자 내부에 지정하는 프로퍼티 키는 반드시 따옴표로 감싼 문자열이어야 한다.
속성 추가 : cat.gender = 'male'; (cat[gender] = 'male';)
**object 안에서 this : 자기 자신 object를 가리킴
생성자함수(constructor)
똑같은 object를 찍어내기 위한 함수.
일반함수. 함수 선언문 함수 표현식만 constructor 만들 수 있음. 화살표함수는 생성자 함수 만들 수 없음.
이름을 대문자로 해줘야함.
new 연산자와 함께 호출해야 함.
똑같은 key 값에 각기 다른 value
instance(부모로부터 파생)
function Cat(name, age){
    this.name = name; //this : instance를 가리킴
    this.age = age;
    this.family = 'russian blue'
} //부모
const Cat1 = new Cat('cucu', 1)
const Cat2 = new Cat('bamkong', 3)
console.log(Cat1)
console.log(Cat2)

📌평균 계산기
세명의 이름, 국어, 영어, 수학 점수 정보를 받아서 국영수의 평균을 구하기.
이름 : kim lee park
function Score(name, ko, en, ma){
    this.name = name;
    this.ko = ko;
    this.en = en;
    this.ma = ma;
    this.getAverage = function(){
        return `${this.name} ${(this.ko + this.en + this.ma)/3}`
    }
}
const score1 = new Score('kim', 90, 95, 50);
const score2 = new Score('lee', 80, 75, 100);
const score3 = new Score('park', 50, 60, 70);
console.log(score1.getAverage());
console.log(score2.getAverage());
console.log(score3.getAverage());
prototype(상속)
자바스크립트의 모든 객체는 최소한 하나 이상의 다른 객체로부터 상속을 받으며, 이때 상속되는 정보를 제공하는 객체를 프로토타입(prototype)이라고 함.
부모의 부모
모든 오브젝트는 prototype을 가지고있음.
메모리가 적어질 수 있음.
효율적으로 작업하기 위해 반복되는 것을 프로토타입에 상속받게 함.
function Student(a,b){
     this.name=a;
     this.age=b;
}
Student.prototype.address='Korea'
var student1=new Student('Lee',20);
var student2=new Student('Kim',30);
- 내가 address 값을 가지고 있는지
- 부모(Student)의 원형ptototype을검사
- 부모(Student)의 부모의 원형prototype을 검사
function Cart(item, price){
    this.itemName = item;
    this.price = price;
}
Cart.prototype.getDiscount = function(){
    return (this.price*0.4)
}
const cart1 = new Cart('book', 15000);
const cart2 = new Cart('game', 25000);
const cart3 = new Cart('cd', 2000);
console.log(cart1.getDiscount());
console.log(cart2.getDiscount());
console.log(cart3.getDiscount());
인스턴스 오브젝트가 값을 직접 소유하게 만들고 싶으면 constructor에 만든다.
prototype만 가지고 있고 참조해서 쓰고 싶으면 prototype에 만들어서 상속시킴
인스턴스는 prototype을 가지고있지 않음. 생성자 함수만 prototype 가짐.
const parent = {name : 'kim'}
const child = {}
child.__proto__=parent;
console.log(child.name)
1. 부모 생성자의 프로토타입을 확인하는 속성 : __proto__ 2. 오브젝트끼리 상속할 수 있게 구현해줌.
const parent = {name : 'kim', age : 50}
const child = Object.create(parent);
console.log(child)
console.log(child.name)
console.log(child.age)
- 생성자(constructor) 함수로 만든다.
- (오브젝트를 찍어주는 생성자함수 object) Object.create()
=>부모요소의 prototype을 끌어 쓰고 있는 것. object는 비어있음.
Class
class People{
    constructor(name){
        this.name = name;
    }
    hello(){
        console.log(`${this.name}님 반갑습니다.`)
    }
    welcome(){
        console.log(`${this.name}님 방문해주셔서 감사합니다.`)
    }
}
const people1 = new People('새싹')
console.log(people1.hello())
console.log(people1.welcome())
console.log(people1)
console.log(Object.getPrototypeOf(people1))//👈people1__proto__ => Object.getPrototypeOf(people1)
생성자 함수를 사용해서 여러개이 오브젝트를 만들어서 사용
prototype을 이용해서 상속을 받아서 값을 참조
=> ES6 Class
Grid
자식 요소에 들어가는 속성
align-self
start | end | center | self
자식요소의 너비와 높이를 꽉 채울 때
align-self: stretch;
justify-self: stretch;
justify-self
grid-column-start/end
어디서부터 어디까지 합쳐줄지(늘어날지)
container div.item{
background-color: red;
grid-column-start: 1;👈
grid-column-end: 3;👈
grid-column: 1 / span 2; 👈
}
- 1번째 column에서 시작해서
- 3번째 column 까지 합치기
- column 기준으로 1번째 column에서 2개만큼 확장
grid-row-start/end
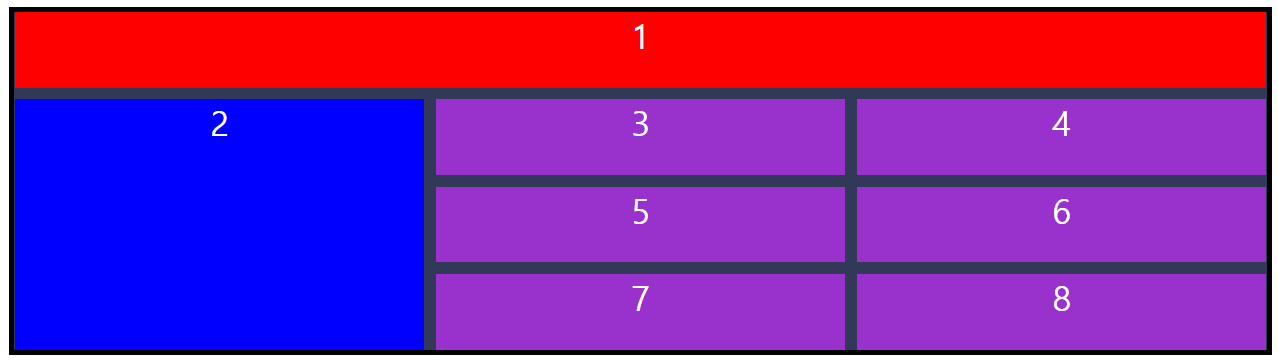
.container div:nth-child(2){
background-color: blue;
grid-row: 2 / span 3;
}
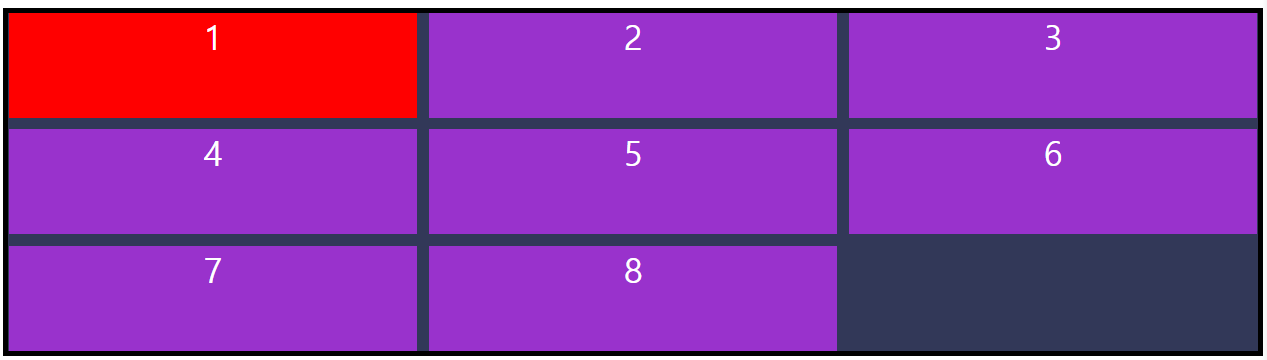
.work div{
color: #fff; text-align: center;
font-size: 30px; background-color: darkorchid;
}
.work div:nth-child(1){
grid-column: 1/ span 2;
}
.work div:nth-child(2){
grid-column-start: 3;👈
grid-row: 1/ span 2;
}
.work div:nth-child(5){
grid-row-start: 3;👈
grid-column: 1/ span 3;
}
- column을 지정 안하면 1에서 시작함
gird-area
grid-area : 시작가로/시작세로 / 종료가로/종료세로
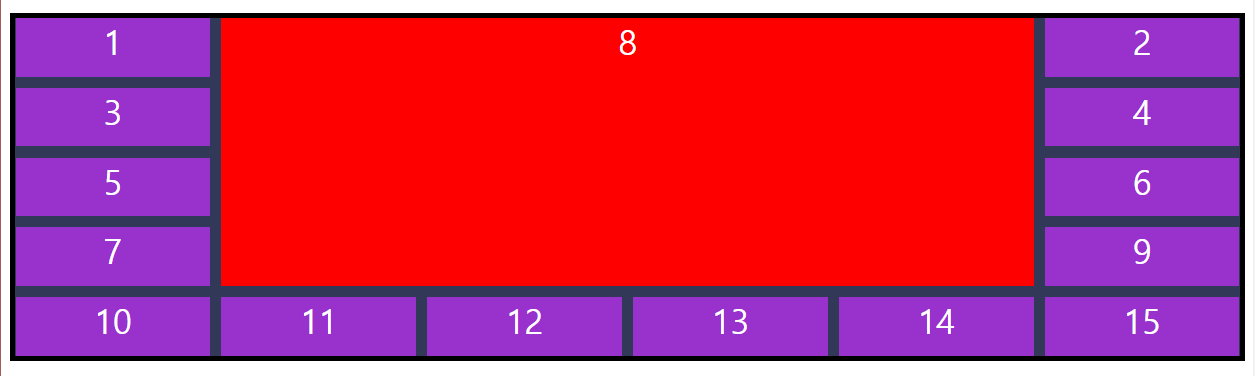
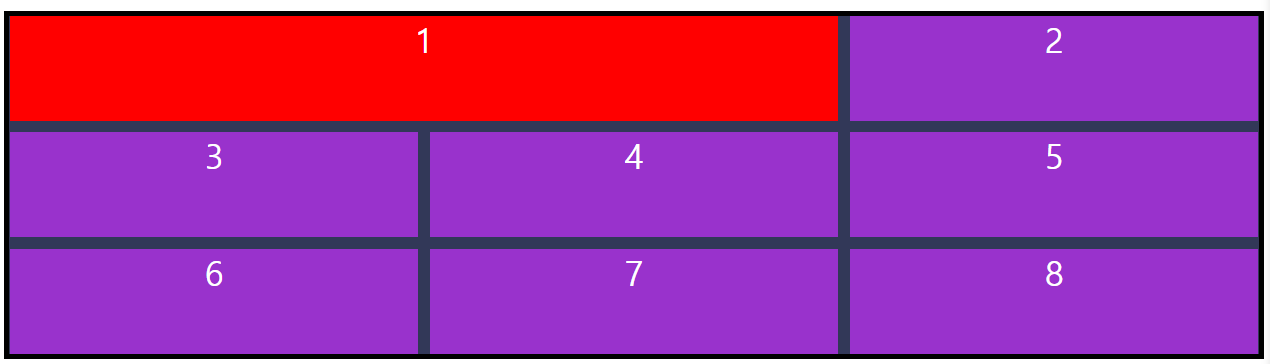
.work2 div:nth-child(8){
background-color: red;
grid-column: 2 / span 4;👈
grid-row: 1 / span 4;
grid-area: 1/2 / 5/6 ;👈
}
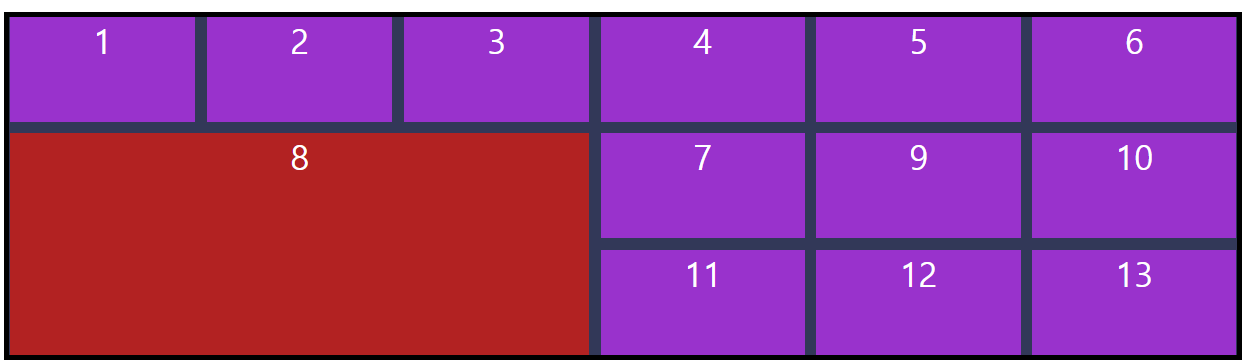
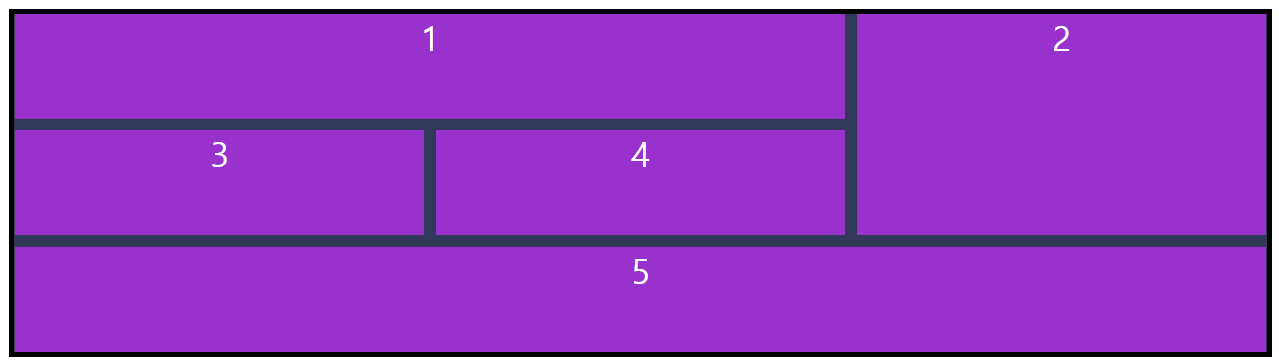
.work3 div:nth-child(8){
background-color: firebrick;
grid-area: 2/1 / span 2/span 3;👈
}
시작가로/시작세로 / span /span
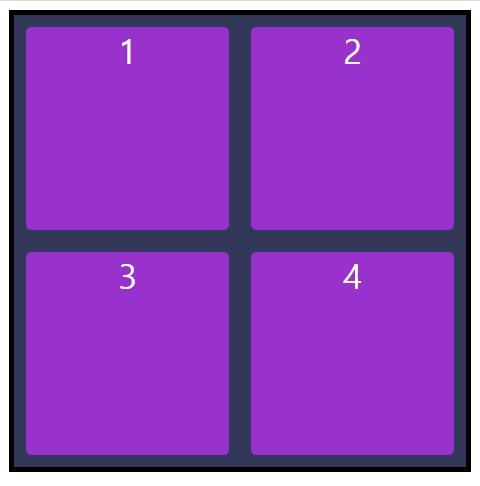
.work4 div:nth-child(1){
grid-area: 1/1/2/2;
}
.work4 div:nth-child(2){
grid-area: 1/2/2/3;
}
.work4 div:nth-child(3){
grid-area: 2/1/3/2;
}
.work4 div:nth-child(4){
grid-area: 2/2/3/3;
}
z-index
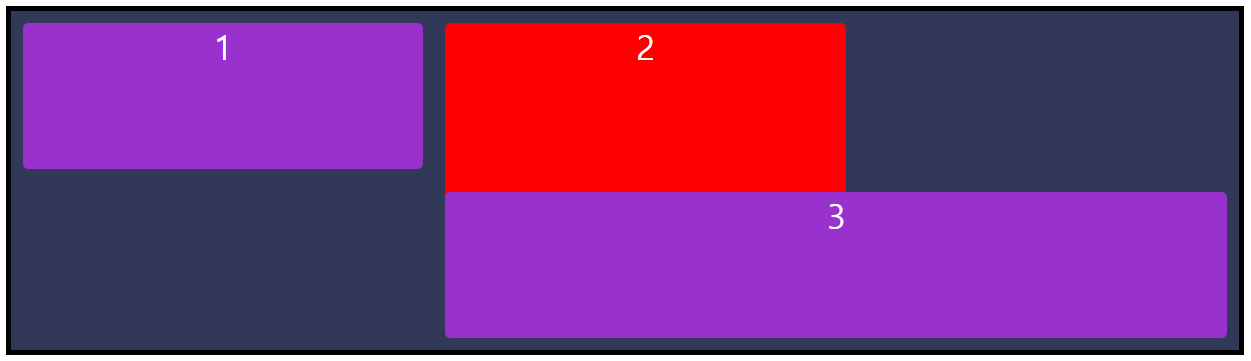
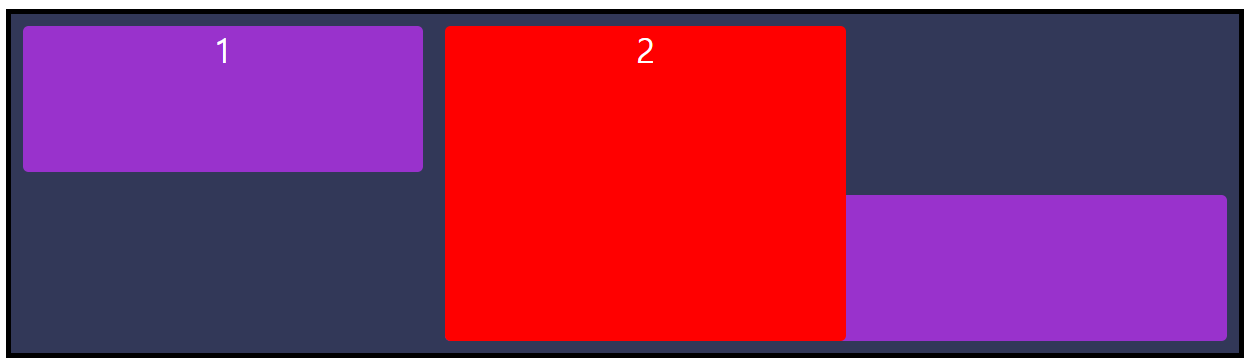
.work5 div:nth-child(1){grid-area: 1/1/2/2;}
.work5 div:nth-child(2){grid-area: 1/2/3/3; z-index: 1; background-color: red;}👈
.work5 div:nth-child(3){grid-area: 2/2/3/4;}
z-index를 적용하여 그리드를 구성할 수 있다.
grid-row
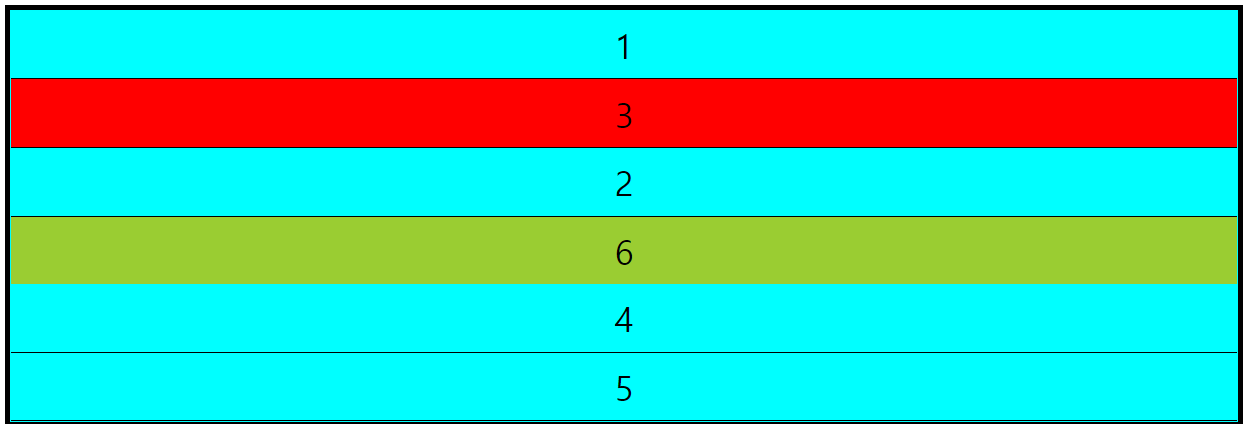
.item1{grid-row:2; background-color: red;}
.item2{grid-row: 4; background-color: yellowgreen;}
row의 순서를 바꿀 때.
order

.box2>div:nth-child(1){order:6}
.box2>div:nth-child(2){order:5}
.box2>div:nth-child(3){order:4}
.box2>div:nth-child(4){order:3}
.box2>div:nth-child(5){order:2}
.box2>div:nth-child(6){order:1}
한 셀 한 셀 바꿔줄 때.