[Spring] View 환경 설정
유튜브 강의 03 View환경설정를 보면서 정리한 내용.
본인은 이미 hello-spring이라는 프로젝트를 spring initializer를 통해서 만들었다.
김영한님의 강의 프로젝트 생성를 참고해서 만들면 된다.
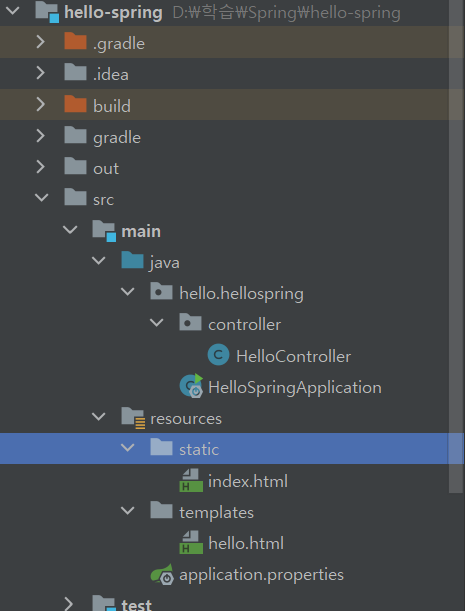
이 글을 그대로 따라하면서 View에 대한 간단한 환경 설정을 마치면 다음과 같은 프로젝트 구조가 만들어질 것이다.
index.html로 Welcome page 만들기
먼저 src/main/resources/static에 index.html를 아래와 같이 만든다.
<!DOCTYPE html>
<html lang="en">
<head>
    <meta http-equiv="Content-Type" content="text/html" charset="UTF-8">
    <title>Welcome Page</title>
</head>
<body>
<p>Hello, This is welcome page</p>

<a href="/hello">hello</a>
</body>
</html>
꼭 위와 같이 코드를 칠 필요는 없다.
다만
<a href="/hello">hello</a>부분은 나중을 위해서 쳐두도록 하자.
Welcome Page를 반영하기 위해 Spring Boot는 처음에 'static' 폴더 안에서 index.html이 있는지 먼저 확인한다. 있다면 이를 Welcome Page로 선정한다.
만약 'static' 폴더 안에 없다면 'templates' 폴더 안에서 index.html이 있는지 살펴보고 있다면 이를 Welcome Page로 선정한다.
'templates' 폴더 안에도 없다면 Spring Boot의 기본 페이지를 Welcome Page로 정한다.
자세한 건 Spring 공식 사이트의 document에서 확인해보도록 하자.
Controller 만들기
그 다음으로는 Controller를 만들 것이다.
우선 src/main/java/hello/hellospring에 controller라는 package를 만든다. 그 package안에 HelloController.java를 만든다.
그리고 아래와 같이 코드를 작성한다.
package hello.hellospring.controller;

import org.springframework.stereotype.Controller;
import org.springframework.ui.Model;
import org.springframework.web.bind.annotation.GetMapping;

@Controller
public class HelloController {

    @GetMapping("hello") // web application에서 /hello는 이 method를 호출한다. (http://localhost:8080/hello)
    public String hello(Model model){
        model.addAttribute("data", "hello!!~.~");
        return "hello"; // resources/templates/hello.html로 매칭!
    }
}
@Controller와 @GetMapping("hello") annotation를 작성하면 자동으로 import할 class들을 추천해준다.
@GetMapping("hello")에서 "hello"는 url에
~/hello 라고 입력되면 이 메소드를 호출하라는 의미이다.
그리고 hello 함수의 String 반환 값인 "hello"는 templates 폴더의 'hello.html'를 띄우겠다는 의미이다. 위 코드에서는 url상의 입력값(hello)과 실제 html 파일의 이름(hello)이 같지만 꼭 같을 필요는 없다는 의미이다.
또한 이 메소드의 model를 통해서 지정된 hello.html에 데이터를 전달할 수 있다.
위 코드에서는 여기서는 "data"란 곳에 "hello!!~.~"란 value를 담아서 전달한다.
hello.html 작성하기
src/main/resources/templates에 hello.html이라는 파일을 만든 후 코드를 아래와 같이 작성한다.
<!DOCTYPE html>
<html xmlns:th="http://www.thymeleaf.org">
<head>

    <title>hello.html</title>
    <meta http-equiv="Content-Type" content="text/html; charset=UTF-8">
</head>
<body>
<p th:text="'안녕하세요. ' + ${data}">안녕하세요 손님</p>
</body>
</html>
여기서 p 태그의 th는 위에 선언한
<html xmlns:th="http://www.thymeleaf.org">를 통해 thymeleaf의 문법을 쓸 수 있게 하기 위해서 사용한다.
p 태그의 text에 ${data}라는 것이 있는데 이는 아까 Controller를 통해서 전달한 'data'를 의미한다.
Web Application 실행하기
이렇게 작성한 후 Run한 후 localhost:8080를 쳐보면
index.html이 Welcome Page로 나타난다.

여기서 강조되어 있는 'hello'를 클릭하면
로 이동하는데,
HelloController가 이 url를 확인하면 hello 메소드를 실행해서 데이터를 넘긴 뒤 hello.html이 나타난다.

'data'를 통해 전달한 "hello!!~.~"이 잘 나타난 모습이다.
