7. RPG Attributes/Attribute Menu
목차
- Attributes 추가
- Attribute Based Modifier
- Derived Attributes 추가
- Custom Calculation
- Attribute Menu 생성
- Attribute Menu 데이터 설정
7.1 Attribute 추가
RPG게임에서 사용되는 Attirbute 는 HP, MP 뿐만이 아니라 다양한 것들이 존재한다.
필요한 몇몇을 추가한다.
- AuraAttributeSet.h
// AuraAttributeSet.h

/**
* 추가할 Attribute: Strength, Intelligence, Resilience, Vigor
*/

public:
	...

	/*
    * Primary Attributes
    */
    UPROPERTY(BlueprintReadOnly, ReplicatedUsing = OnRep_Strength, Category = "Primary Attributes")
    FGameplayAttributeData Strength;
    ATTRIBUTE_ACCESSORS(UAuraAttributeSet, Strength);

    UPROPERTY(BlueprintReadOnly, ReplicatedUsing = OnRep_Intelligence, Category = "Primary Attributes")
    FGameplayAttributeData Intelligence;
    ATTRIBUTE_ACCESSORS(UAuraAttributeSet, Intelligence);

    UPROPERTY(BlueprintReadOnly, ReplicatedUsing = OnRep_Resilience, Category = "Primary Attributes")
    FGameplayAttributeData Resilience;
    ATTRIBUTE_ACCESSORS(UAuraAttributeSet, Resilience);

    UPROPERTY(BlueprintReadOnly, ReplicatedUsing = OnRep_Vigor, Category = "Primary Attributes")
    FGameplayAttributeData Vigor;
    ATTRIBUTE_ACCESSORS(UAuraAttributeSet, Vigor);

	/*
    * Vital Attributes
    */
   	...

    UFUNCTION()
    void OnRep_Strength(const FGameplayAttributeData& OldStrength) const;

    UFUNCTION()
    void OnRep_Intelligence(const FGameplayAttributeData& OldIntelligence) const;

    UFUNCTION()
    void OnRep_Resilience(const FGameplayAttributeData& OldResilience) const;

    UFUNCTION()
    void OnRep_Vigor(const FGameplayAttributeData& OldVigor) const;
- AuraAttributeSet.cpp
// AuraAttributeSet.cpp

...

void UAuraAttributeSet::GetLifetimeReplicatedProips(TArray<FLifetimeProperty>& OutLifetimeProps) const
{
	Super::GetLifetimeReplicatedProps(OutLifetimeProps);

    /** Primary Attributes */
    DOREPLIFETIME_CONDITION_NOTIFY(UAuraAttributeSet, Strength, COND_None, REPNOTIFY_Always);
    DOREPLIFETIME_CONDITION_NOTIFY(UAuraAttributeSet, Intelligence, COND_None, REPNOTIFY_Always);
    DOREPLIFETIME_CONDITION_NOTIFY(UAuraAttributeSet, Resilience, COND_None, REPNOTIFY_Always);
    DOREPLIFETIME_CONDITION_NOTIFY(UAuraAttributeSet, Vigor, COND_None, REPNOTIFY_Always);

    /** Vital Attributes */
    ...


...

void UAuraAttributeSet::OnRep_Strength(const FGameplayAttributeData& OldStrength) const
{
	GAMEPLAYATTRIBUTE_REPNOTIFY(UAuraAttributeSet, Strength, OldStrength);
}

void UAuraAttributeSet::OnRep_Intelligence(const FGameplayAttributeData& OldIntelligence) const
{
	GAMEPLAYATTRIBUTE_REPNOTIFY(UAuraAttributeSet, Intelligence, OldIntelligence);
}

void UAuraAttributeSet::OnRep_Resilience(const FGameplayAttributeData& OldResilience) const
{
	GAMEPLAYATTRIBUTE_REPNOTIFY(UAuraAttributeSet, Resilience, OldResilience);
}

void UAuraAttributeSet::OnRep_Vigor(const FGameplayAttributeData& OldVigor) const
{
	GAMEPLAYATTRIBUTE_REPNOTIFY(UAuraAttributeSet, Vigor, OldVigor);
}
이제 데이터테이블에서 값을 초기화하기 위해 ASC를 에디터에서 볼 수 있도록 코드를 수정한다.
- AuraPlayerState.h
// AuraPlayerState.h

...
protected:
	/** 코드 수정 : VisibleAnywhere 추가 */
	UPROPERTY(VisibleAnywhere)
    TObjectPtr<UAbilitySystemComponent> AbilitySystemCompnent;
    /** 코드 수정 */

    ...
7.1.1 데이터테이블을 이용한 Attribute 초기화
이제 값을 초기화해주어야 한다.
기존의 HP와 MP의 경우 생성자에서 직접 초기화하였지만
데이터테이블을 통해 초기화하는 방법도 있다.
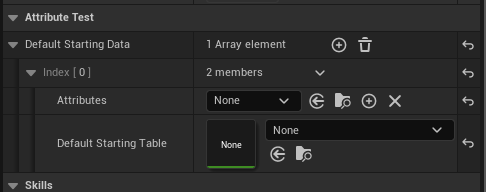
컴파일 후 에디터에서 BP_AuraPlayerState 에 있는 AbilitySystemComponent 를 확인해보면Default Starting Data 에 데이터 테이블을 추가할 수 있다.
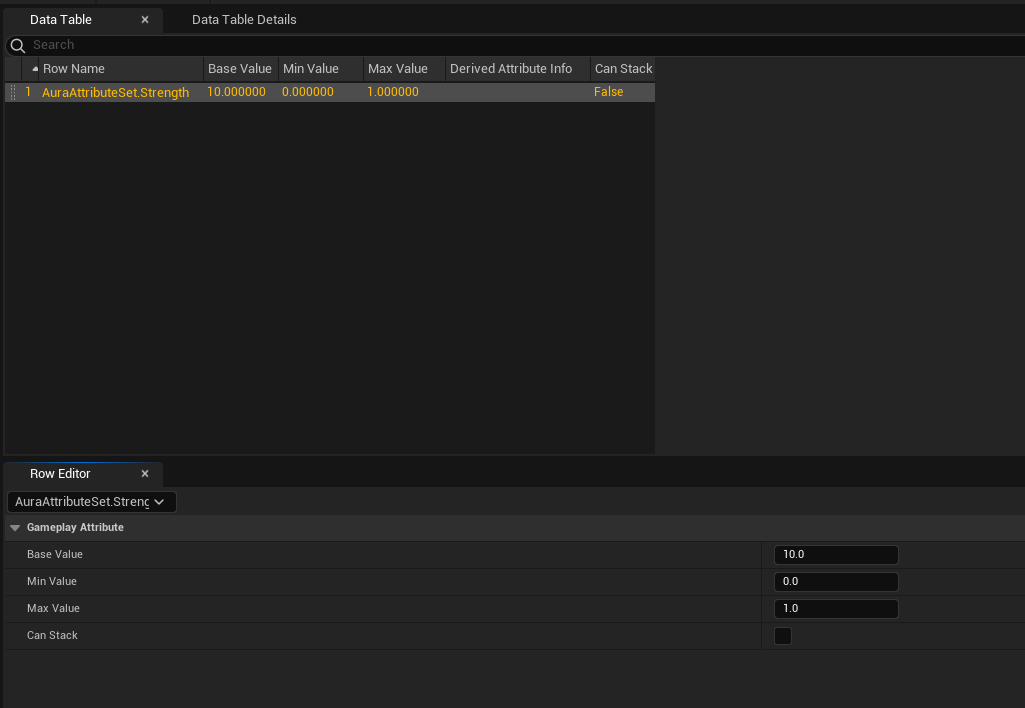
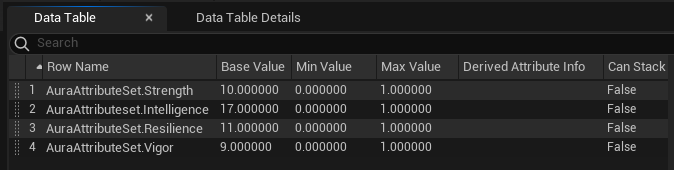
추가할 데이터 테이블 DT_InitializePrimaryValues 를 생성하고
간단하게 데이터를 추가한다음(Row Name 변경, Base Value : 10)
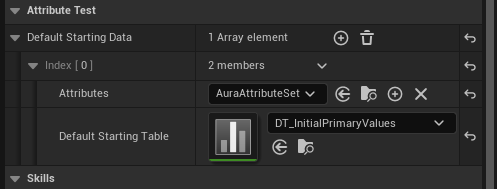
다시 BP_AuraPlayerState 로 돌아와서 데이터 테이블을 추가해준다.
(Attributes : AuraAttributeSet, Default Starting Table : DT_InitialPrimaryValue)
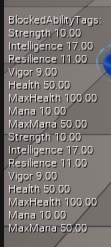
컴파일 후 실행하여 콘솔창에 showdebug abilitysystemcomponent 를 입력하면 Strength 가 10으로 초기화된 것을 확인할 수 있다.
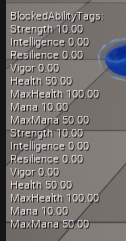
나머지 3개의 Attribute 도 추가해준다.
동일하게 저장후 실행하면 아래와 같이 값드링 초기화된 것을 확인할 수 있다.
7.1.2 GameplayEffect를 통한 Attribute 초기화
더이상 데이터 테이블을 사용하지 않을 것이므로 BP_AuraPlayerState 의 AbilitySystemComponent 에 추가해둔 Default Starting Data 를 삭제한다.
GameplayEffect를 통한 Attribute 초기화를 위한 코드를 작성한다.

- AuraCharacterBase.h
// AuraCharacterBase.h

...
class UGameplayEffect;
...

protected:
	...

    UPROPERTY(BlueprintReadOnly, EditAnywhere, Category = "Attributes")
    TSubclassOf<UGameplayEffect> DefaultPrimaryAttributes;

void InitializePrimaryAttributes() const;- AuraChracterBase.cpp
// AuraCharacterBase.cpp

...
#include "AbilitySystemComponent.h"
...

...

void AAuraCharacterBase::InializePrimaryAttributes() const
{
	check(IsValid(GetAbilitySystemComponent()));
    check(DefaultPrimaryAttributes);
	const FGameplayEffectContextHandle ContextHandle = GetAbilitySystemComponent()->MakeEffectContext();
	const FGameplayEffectSpecHandle SpecHandle = GetAbilitySystemComponent()->MakeOutgoingSpec(DefaultPrimaryAttributes, 1.f, ContextHandle);
	GetAbilitySystemComponent()->ApplyGameplayEffectSpecToTarget(*SpecHandle.Data.Get(), GetAbilitySystemComponent());
}- AuraCharacter.cpp
// AuraCharacter.cpp
void AAuraCharacter::InitAbilityActorInfo()
{
...
InitializePrimaryAttributes();
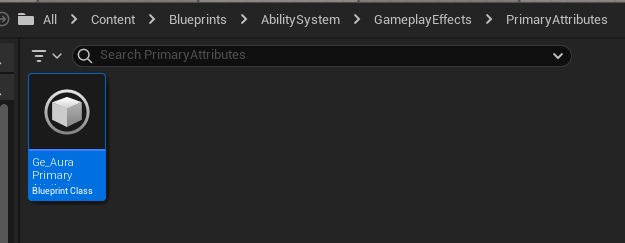
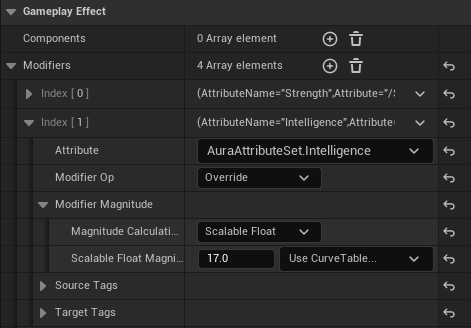
}컴파일후 에디터로 돌아와서 GameplayEffect 기반 블루프린트 GE_AuraPrimaryAttributes 를 하나 생성하고

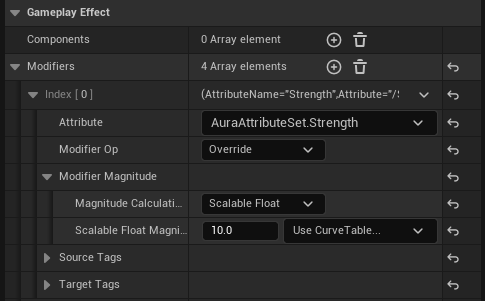
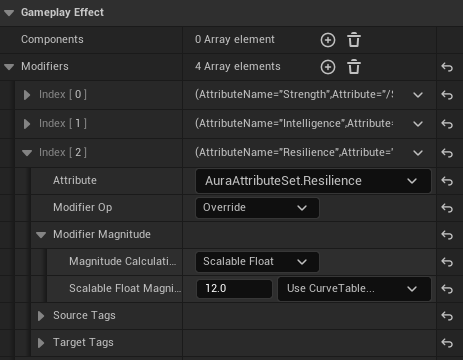
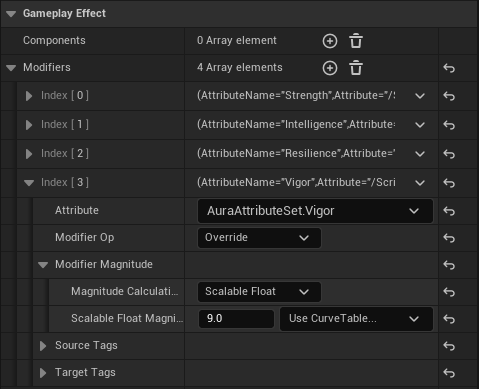
Gameplay Effect -> Modifiers 를 추가한 다음, Attribute : AuraAttributeSet.Strength , Modifier Op : Override , Scalable Float Magnitude : 10 으로 변경한다.
(Add 가 아닌 Override 인 이유는 초기화이기 때문)
나머지 3개의 Attribute 도 동일하게 초기화를 진행한다.
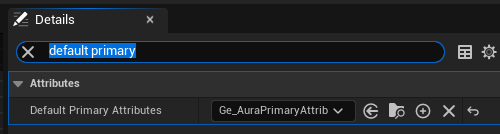
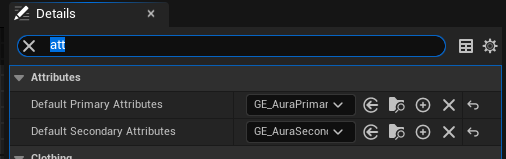
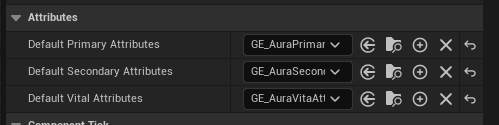
마지막으로 BP_AuraCharacter 를 열고, DefaultPrimaryAttributes 에 생성한 GE_AuraPrimaryAttributes 를 추가해준 다음 실행하면 값이 초기화된 것을 확인할 수 있다.
7.2 Attribute Based Modifier
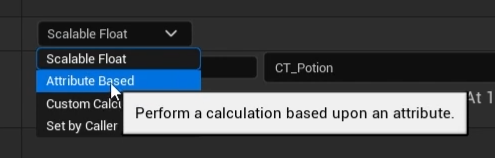
기존의 GameplayEffect 적용 방법은 Scalable Float 를 이용한 float 값에 따른 수정이었다.
하지만 다른 GameplayEffect의 값을 통한 수정이 가능한데 바로 Attribute Based 옵션이다.
기능 확인을 위해 임시로 AuraEffectActor 기반의 BP_TestAcctor 를 생성하고

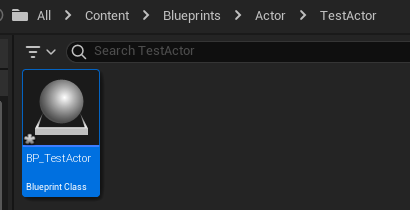
Box Collision 을 생성한 다음 노드를 구성한다.
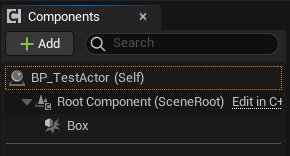
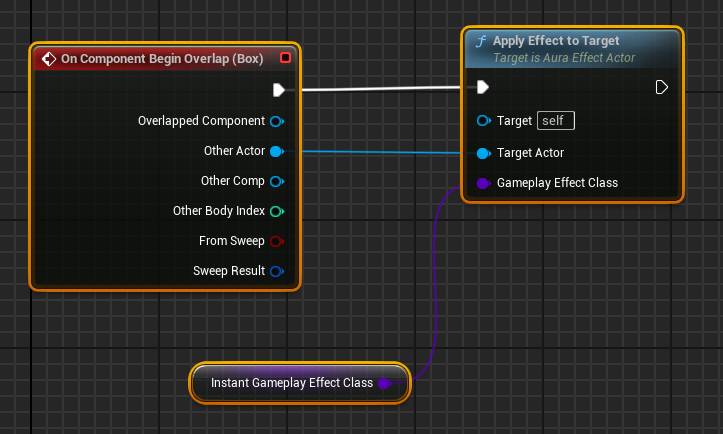
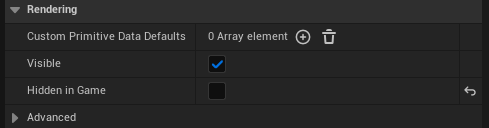
선의 두께를 5로 변경하고, Hidden in Game 을 비활성화하여 인게임에서 Box Collision 을 볼 수 있도록 한다.

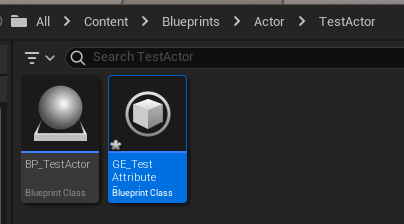
이어서 적용할 기능을 만들기 위해 GameplayEffect 기반 GE_TestAttributeBased 를 생성한다.

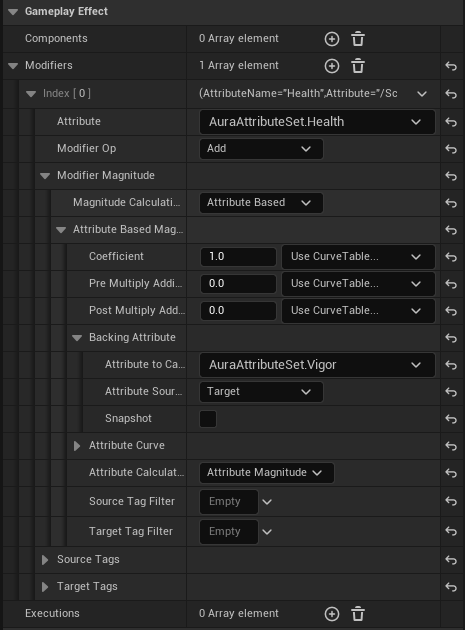
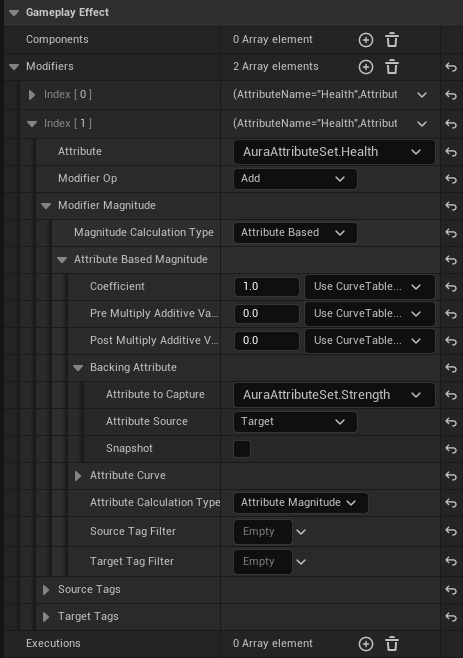
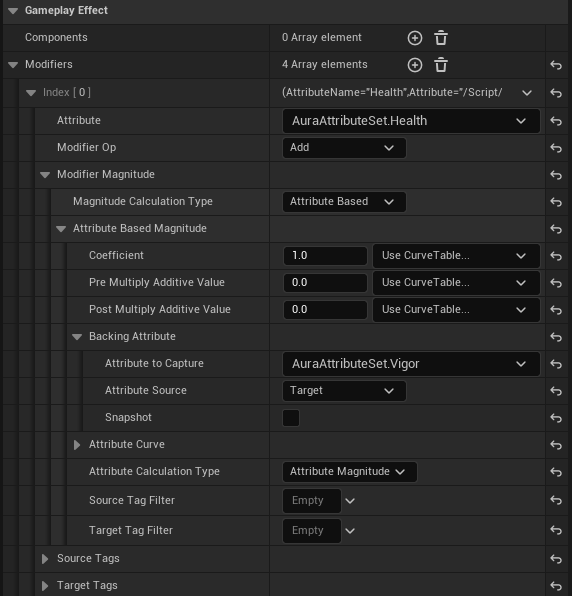
GE_TestAttributeBased 를 열고 Attribute : AuraAttributeSet.Health , Modifier Op : Add , Magitude Calcuation Type : Attribute Based , Backing Attribute -> Attribute to Capture : AuraAttributeSet.Vigor ,Attribute Source : Target 으로 설정해준다.
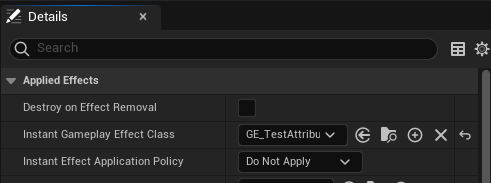
마지막으로 BP_TestActor 에서 Instant Gameplay Effect Class : GE_TestAttributeBased 로 설정해준다.
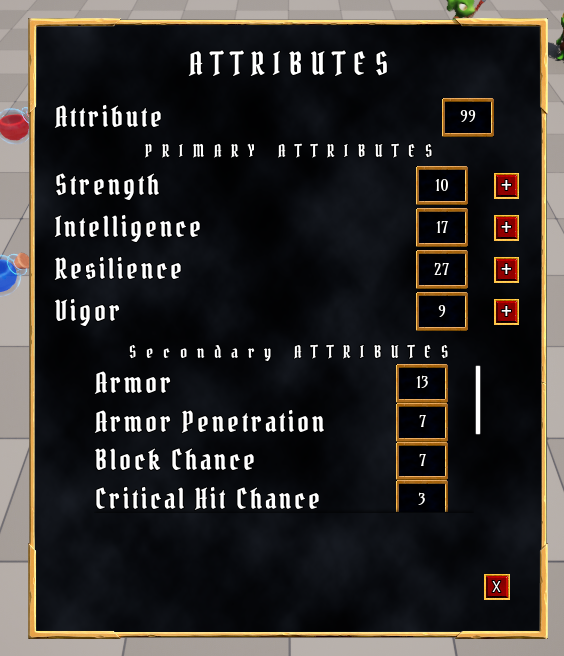
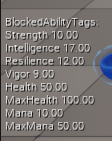
실행하면 Vigor 의 수치인 9만큼 체력이 회복되는 것을 확인할 수 있다.
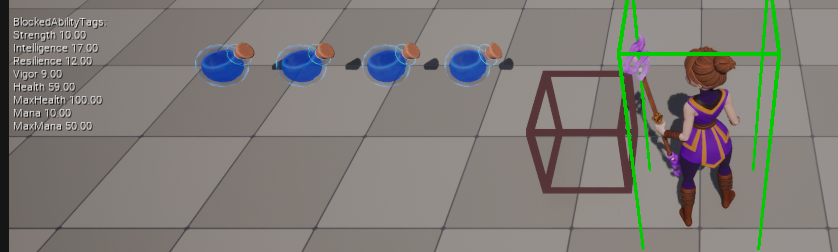
여러개의 Attribute 값 적용도 가능하다.
Modifiers 를 하나 더 추가하고, 이번에는 AuraAttributeSet.Strength 의 값을 더하도록 설정한다.
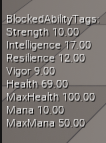
컴파일 후 실행하면 Vigor 값의 9와 Strength 값의 10이 합쳐진 19만큼 체력이 회복되는 것을 확인할 수 있다.
7.2.1 적용 순서
Modifer 의 적용 순서는 순서대로 적용된다.
확인해보기 위해 먼저 현재 체력을 낮추고, Clamp 부분을 코멘트화하여 제한을 해제한다
- AuraAttributeSet.cpp
// AuraAttributeSet.cpp
...
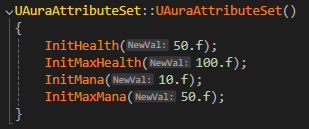
UAuraAttributeSet::UAuraAttributeSet()
{
/** 코드 수정 : 50f->10.f */
InitHealth(10.f);
/** 코드 수정 */
InitMaxHealth(100.f);
InitMana(10.f);
InitMaxMana(50.f);
}
...
void UAuraAttributeSet::PreAttributeChange(const FGameplayAttribute& Attribute, float& NewValue)
{
Super::PreAttributeChange(Attribute, NewValue);
if (Attribute == GetHealthAttribute())
{
//NewValue = FMath::Clamp(NewValue, 0.f, GetMaxHealth());
}
if (Attribute == GetManaAttribute())
{
//NewValue = FMath::Clamp(NewValue, 0.f, GetMaxMana());
}
}
void UAuraAttributeSet::PostGameplayEffectExecute(const FGameplayEffectModCallbackData& Data)
{
Super::PostGameplayEffectExecute(Data);
FEffectProperties Props;
SetEffectProperties(Data, Props);
if (Data.EvaluatedData.Attribute == GetHealthAttribute())
{
//SetHealth(FMath::ClampAngle(GetHealth(), 0.f, GetMaxHealth()));
}
if (Data.EvaluatedData.Attribute == GetManaAttribute())
{
//SetMana(FMath::ClampAngle(GetMana(), 0.f, GetMaxMana()));
}
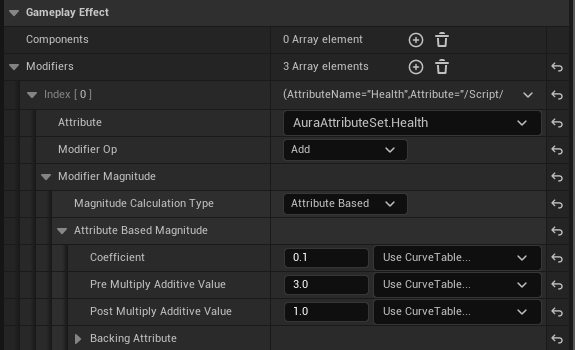
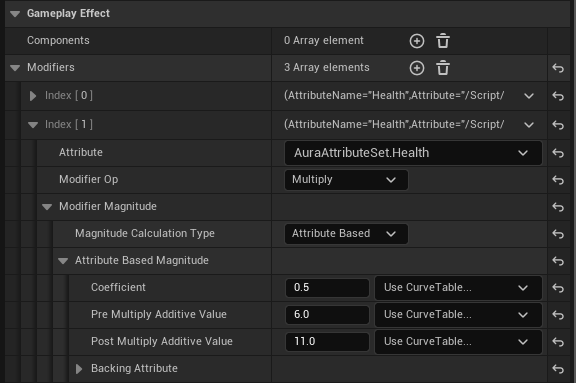
}예를 들어 아래와 같이 BP_TestAttributeBased 의 Modifier 를 설정한다.
현재 체력에 Vigor 수치만큼 더하고
현재 체력에 Strength 수치만큼 곱한 다음

현재 체력에 Resilience 수치만큼 나누고
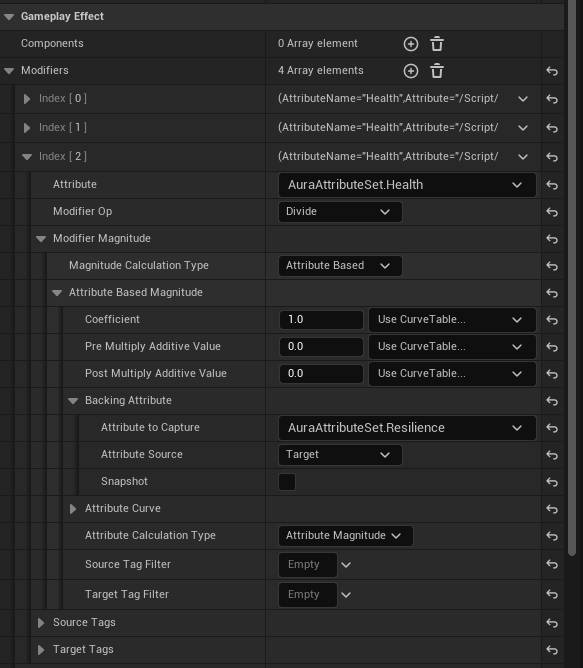
현재 체력에 MaxHealth 수치만큼 더해줄 경우
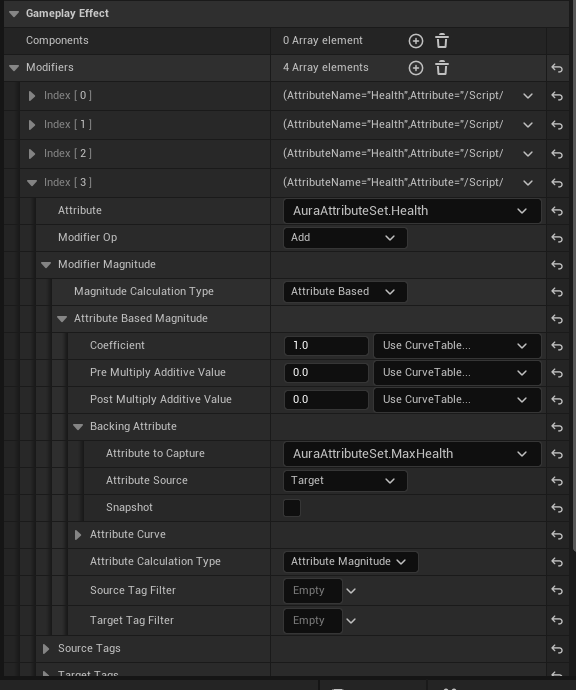
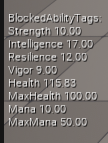
예상되는 수식은 10 + 9 * 10 / 12 + 100 = 117.5 또는 (10 + 9) * 10 / 12 + 100 = 115.83 이다.
실제로 실행해보면 115.83인 후자가 적용되는 것을 확인할 수 있다.
7.2.2 Coefficient
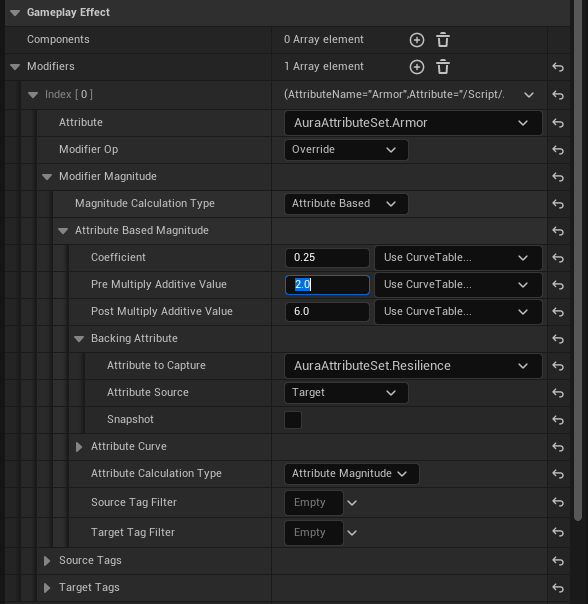
Modifier 를 살펴보면 Coefficient , Pre Multiply Additive Val , Post Multiply Additive Value 가 있는 것을 확인할 수 있다.
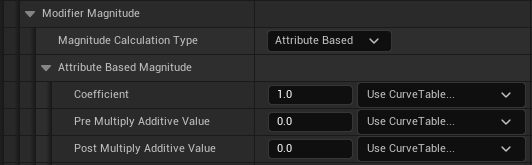
해당 부분은 계수와 전/후 추가값을 의미한다.
Vigor 값인 9를 기준으로 계산식은 아래와 같다
(C * (9 + Pre)) + Post
즉, Coefficient : 0.1, Pre : 2, Post : 5 인 경우 6.1이 나옴
확인을 위해 설정을 변경한다.
Index[3] : MaxHealth 삭제
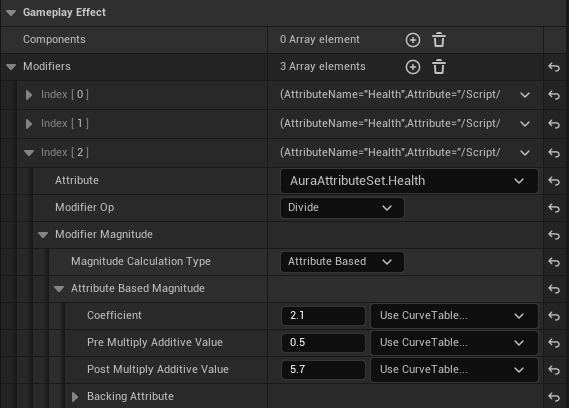
예상되는 값은 위의 계산방법과 같은 방법으로 계산시 7.26이다.
실제로 실행시 실제로 7.26이 나오는 것을 확인할 수 있다.
7.3 Derived Attributes 추가
지금 추가한 DefaultPrimaryAttributes 의 경우 총 4가지로 Strength , Intelligence , Resilience , Vigor 이다.
하지만 이외에도 여러 필요한 Attribute들이 있다.
| Attribute명 | 소속위치 | 내용 |
|---|---|---|
| Armor | Resilience | 받는 데미지 감소, 막기 확률 증가 |
| Armor Penetration | Resilience | 방어율 일정퍼센트 무시, 크리티컬 확률 증가 |
| Block Chance | Armor | 데미지 받는 비율 반으로 받을 확률 |
| Critical Hit Change | Armor Penetration | 크리티컬 힛 확률 |
| Critical Hit Damage | Armor Penetration | 크리티컬 힛 데미지 보너스 |
| Critical Hit Resistance | Armor | 적 크리티컬 공격 저항 |
| Health Regeneration | Vigor | 1초당 체력 회복량 |
| Mana Regeneration | Intelligence | 1초당 마나 회복량 |
| MaxHealth | Vigor | 최대 증가 체력 수치 |
| MaxMana | Intelligence | 최대 증가 마나 수치 |
먼저 해당 Attribute 들을 코드에 추가한다.
- AuraAttributeSet.h
// AuraAttributeSet.h

...
public:
	...

    /*
    * Primary Attributes
    */
    ...

    /*
    * Secondary Attributes
    */
    UPROPERTY(BlueprintReadOnly, ReplicatedUsing = OnRep_Armor, Category = "Secondary Attributes")
    FGameplayAttributeData Armor;
    ATTRIBUTE_ACCESSORS(UAuraAttributeSet, Armor);

    UPROPERTY(BlueprintReadOnly, ReplicatedUsing = OnRep_ArmorPenetration, Category = "Secondary Attributes")
    FGameplayAttributeData ArmorPenetration;
    ATTRIBUTE_ACCESSORS(UAuraAttributeSet, ArmorPenetration);

    UPROPERTY(BlueprintReadOnly, ReplicatedUsing = OnRep_BlockChance, Category = "Secondary Attributes")
    FGameplayAttributeData BlockChance;
    ATTRIBUTE_ACCESSORS(UAuraAttributeSet, BlockChance);

    UPROPERTY(BlueprintReadOnly, ReplicatedUsing = OnRep_CriticalHitChance, Category = "Secondary Attributes")
    FGameplayAttributeData CriticalHitChance;
    ATTRIBUTE_ACCESSORS(UAuraAttributeSet, CriticalHitChance);

    UPROPERTY(BlueprintReadOnly, ReplicatedUsing = OnRep_CriticalHitDamage, Category = "Secondary Attributes")
    FGameplayAttributeData CriticalHitDamage;
    ATTRIBUTE_ACCESSORS(UAuraAttributeSet, CriticalHitDamage);

    UPROPERTY(BlueprintReadOnly, ReplicatedUsing = OnRep_CriticalHitResistance, Category = "Secondary Attributes")
    FGameplayAttributeData CriticalHitResistance;
    ATTRIBUTE_ACCESSORS(UAuraAttributeSet, CriticalHitResistance);

    UPROPERTY(BlueprintReadOnly, ReplicatedUsing = OnRep_HealthRegeneration, Category = "Secondary Attributes")
    FGameplayAttributeData HealthRegeneration;
    ATTRIBUTE_ACCESSORS(UAuraAttributeSet, HealthRegeneration);

    UPROPERTY(BlueprintReadOnly, ReplicatedUsing = OnRep_ManaRegeneration, Category = "Secondary Attributes")
    FGameplayAttributeData ManaRegeneration;
    ATTRIBUTE_ACCESSORS(UAuraAttributeSet, ManaRegeneration);

    // 기존의 Vital Attributes에서 이동
    UPROPERTY(BlueprintReadOnly, ReplicatedUsing = OnRep_MaxHealth, Category = "Secondary Attributes")
    FGameplayAttributeData MaxHealth;
    ATTRIBUTE_ACCESSORS(UAuraAttributeSet, MaxHealth);

    // 기존의 Vital Attributes에서 이동
    UPROPERTY(BlueprintReadOnly, ReplicatedUsing = OnRep_MaxMana, Category = "Secondary Attributes")
    FGameplayAttributeData MaxMana;
    ATTRIBUTE_ACCESSORS(UAuraAttributeSet, MaxMana);

    /*
    * Vital Attributes
    */
    ...

    UFUNCTION()
    void OnRep_Armor(const FGameplayAttributeData& OldArmor) const;

    UFUNCTION()
    void OnRep_ArmorPenetration(const FGameplayAttributeData& OldArmorPenetration) const;

    UFUNCTION()
    void OnRep_BlockChance(const FGameplayAttributeData& OldBlockChance) const;

    UFUNCTION()
    void OnRep_CriticalHitChance(const FGameplayAttributeData& OldCriticalHitChance) const;

    UFUNCTION()
    void OnRep_CriticalHitDamage(const FGameplayAttributeData& OldCriticalHitDamage) const;

    UFUNCTION()
    void OnRep_CriticalHitResistance(const FGameplayAttributeData& OldCriticalHitResistance) const;

    UFUNCTION()
    void OnRep_HealthRegeneration(const FGameplayAttributeData& OldHealthRegeneration) const;

    UFUNCTION()
    void OnRep_ManaRegeneration(const FGameplayAttributeData& OldManaRegeneration) const;

    // 위에 있던 코드 아래로 이동
    UFUNCTION()
    void OnRep_MaxHealth(const FGameplayAttributeData& OldMaxHealth) const;

    // 위에 있던 코드 아래로 이동
    UFUNCTION()
    void OnRep_MaxMana(const FGameplayAttributeData& OldMaxMana) const;

...- AuraAttributeSet.cpp
// AuraAttributeSet.cpp

...

void UAuraAttributeSet::GetLifetimeReplicatedProps(TArray<FLifetimeProperty>& OutLifetimeProps) const
{
	Super::GetLifetimeReplicatedProps(OutLifetimeProps);

    /** Primary Attributes */
    ...

    /** Secondary Attributes */
    DOREPLIFETIME_CONDITION_NOTIFY(UAuraAttributeSet, Armor, COND_None, REPNOTIFY_Always);
    DOREPLIFETIME_CONDITION_NOTIFY(UAuraAttributeSet, ArmorPenetration, COND_None, REPNOTIFY_Always);
    DOREPLIFETIME_CONDITION_NOTIFY(UAuraAttributeSet, BlockChance, COND_None, REPNOTIFY_Always);
    DOREPLIFETIME_CONDITION_NOTIFY(UAuraAttributeSet, CriticalHitChance, COND_None, REPNOTIFY_Always);
    DOREPLIFETIME_CONDITION_NOTIFY(UAuraAttributeSet, CriticalHitDamage, COND_None, REPNOTIFY_Always);
    DOREPLIFETIME_CONDITION_NOTIFY(UAuraAttributeSet, CriticalHitResistance, COND_None, REPNOTIFY_Always);
    DOREPLIFETIME_CONDITION_NOTIFY(UAuraAttributeSet, HealthRegeneration, COND_None, REPNOTIFY_Always);
    DOREPLIFETIME_CONDITION_NOTIFY(UAuraAttributeSet, ManaRegeneration, COND_None, REPNOTIFY_Always);
    // 아래 코드 위로 이동
    DOREPLIFETIME_CONDITION_NOTIFY(UAuraAttributeSet, MaxHealth, COND_None, REPNOTIFY_Always);
    // 아래 코드 위로 이동
    DOREPLIFETIME_CONDITION_NOTIFY(UAuraAttributeSet, MaxMana, COND_None, REPNOTIFY_Always);

    /** Vital Attributes */
    ...
}

...

void UAuraAttributeSet::OnRep_Armor(const FGameplayAttributeData& OldArmor) const
{
	GAMEPLAYATTRIBUTE_REPNOTIFY(UAuraAttributeSet, Armor, OldArmor);
}

void UAuraAttributeSet::OnRep_ArmorPenetration(const FGameplayAttributeData& OldArmorPenetration) const
{
	GAMEPLAYATTRIBUTE_REPNOTIFY(UAuraAttributeSet, ArmorPenetration, OldArmorPenetration);
}

void UAuraAttributeSet::OnRep_BlockChance(const FGameplayAttributeData& OldBlockChance) const
{
	GAMEPLAYATTRIBUTE_REPNOTIFY(UAuraAttributeSet, BlockChance, OldBlockChance);
}

void UAuraAttributeSet::OnRep_CriticalHitChance(const FGameplayAttributeData& OldCriticalHitChance) const
{
	GAMEPLAYATTRIBUTE_REPNOTIFY(UAuraAttributeSet, CriticalHitChance, OldCriticalHitChance);
}

void UAuraAttributeSet::OnRep_CriticalHitDamage(const FGameplayAttributeData& OldCriticalHitDamage) const
{
	GAMEPLAYATTRIBUTE_REPNOTIFY(UAuraAttributeSet, CriticalHitDamage, OldCriticalHitDamage);
}

void UAuraAttributeSet::OnRep_CriticalHitResistance(const FGameplayAttributeData& OldCriticalHitResistance) const
{
	GAMEPLAYATTRIBUTE_REPNOTIFY(UAuraAttributeSet, CriticalHitResistance, OldCriticalHitResistance);
}

void UAuraAttributeSet::OnRep_HealthRegeneration(const FGameplayAttributeData& OldHealthRegeneration) const
{
	GAMEPLAYATTRIBUTE_REPNOTIFY(UAuraAttributeSet, HealthRegeneration, OldHealthRegeneration);
}

void UAuraAttributeSet::OnRep_ManaRegeneration(const FGameplayAttributeData& OldManaRegeneration) const
{
	GAMEPLAYATTRIBUTE_REPNOTIFY(UAuraAttributeSet, ManaRegeneration, OldManaRegeneration);
}

// 위에 있던 코드 아래로 이동
void UAuraAttributeSet::OnRep_MaxHealth(const FGameplayAttributeData& OldMaxHealth) const
{
	GAMEPLAYATTRIBUTE_REPNOTIFY(UAuraAttributeSet, MaxHealth, OldMaxHealth);
}

// 위에 있던 코드 아래로 이동
void UAuraAttributeSet::OnRep_MaxMana(const FGameplayAttributeData& OldMaxMana) const
{
	GAMEPLAYATTRIBUTE_REPNOTIFY(UAuraAttributeSet, MaxMana, OldMaxMana);
}
GameplayEffect 를 통한 값 초기화를 위해 AuraCharacterBase.h 에 동일하게 DefaultSecondaryAttributes 를 생성한다.
- AuraCharacterBase.h
// AuraCharacterBase.h

...
protected:
	...

    UPROPERTY(BlueprintReadOnly, EditAnywhere, Category = "Attributes")
    TSubclassOf<UGameplayEffect> DefaultSecondaryAttributes;

    ...
void InitializeSecondaryAttributes() const;- AuraCharacterBase.cpp
// AuraCharactgerBase.cpp

void AAuraCharacterBase::InitializeSecondaryAttributes() const
{
	check(IsValid(GetAbilitySystemComponent()));
    check(DefaultSecondaryAttributes);
    const FGameplayEffectContextHandle ContextHandle = GetAbilitySystemComponent()->MakeEffectContext();
    const FGameplayEffectSpecHandle SpecHandle = GetAbilitySystemComponent()->MakeOutgoingSpec(DefaultSecondaryAttributes, 1.f, ContextHandle);
    GetAbilitySystemComponent()->ApplyGameplayEffectSpecToTarget(*SpecHandle.Data.Get(), GetAbilitySystemComponent());
}
MaxHealth 와 MaxMana 의 경우 GameplayEffect 를 통해 초기화할 예정이므로 생성자에서 초기화부분을 제거하고 위에서 코멘트화한 clamping 부분을 다시 복구한다.
- AuraAttributeSet.cpp
// AuraAttributeSet.cpp

UAuraAttributeSet::UAuraAttributeSet()
{
	InitHealth(10.f);
    InitMana(10.f);
}

...

void UAuraAttributeSet::PreAttributeChange(const FGameplayAttribute& Attribute, float& NewValue)
{
	Super::PreAttributeChange(Attribute, NewValue);

	if (Attribute == GetHealthAttribute())
	{
		NewValue = FMath::Clamp(NewValue, 0.f, GetMaxHealth());
	}

	if (Attribute == GetManaAttribute())
	{
		NewValue = FMath::Clamp(NewValue, 0.f, GetMaxMana());
	}
}

void UAuraAttributeSet::PostGameplayEffectExecute(const FGameplayEffectModCallbackData& Data)
{
	Super::PostGameplayEffectExecute(Data);

	FEffectProperties Props;
	SetEffectProperties(Data, Props);

	if (Data.EvaluatedData.Attribute == GetHealthAttribute())
	{
		SetHealth(FMath::Clamp(GetHealth(), 0.f, GetMaxHealth()));
	}

	if (Data.EvaluatedData.Attribute == GetManaAttribute())
	{
		SetMana(FMath::Clamp(GetMana(), 0.f, GetMaxMana()));
	}
}
동일한 기능을 하는 함수가 두개이므로 리팩토링을 진행한다.
- AuraCharacterBase.h
// AuraCharacterBase.h

...
protected:
	...

    void ApplyEffectToSelf(TSubclassOf<UGameplayEffect> GameplayEffectClass, float Level) const;
    void InitializeDefaultAttributes() const;

    /* 코드 삭제 + cpp 정의 삭제
    void InitializePrimaryAttribute() const;
    void InitializeSecondaryAttribute() const;
*/- AuraCharacterBase.cpp
// AuraCharacterBase.cpp

...

void AAuraCharacterBase::ApplyEffectToSelf(TSubclassOf<UGameplayEffect> GameplayEffectClass, float Level) const
{
	check(IsValid(GetAbilitySystemComponent()));
    check(GameplayEffectClass);
    const FGameplayEffectContextHandle ContextHandle = GetAbilitySystemComponent()->MakeEffectContext();
    const FGameplayEffectSpecHandle SpecHandle = GetAbilitySystemComponent()->MakeOutgoingSpec(GameplayEffectClass, Level, ContextHandle);
    GetAbilitySystemComponent()->ApplyGameplayEffectSpecToTarget(*SpecHandle.Data.Get(), GetAbilitySystemComponent());
}

void AAuraCharacterBase::InitializeDefaultAttributes() const
{
	ApplyEffectToSelf(DefaultPrimaryAttributes, 1.f);
    ApplyEffectToSelf(DefaultSecondaryAttributes, 1.f);
}- AuraCharacter.cpp
// AuraCharacter.cpp
void AAuraCharacter::InitAbilityInfo()
{
...
/* 코드 삭제
InitializePrimaryAttributes();
*/
InitializeDefaultAttributes();
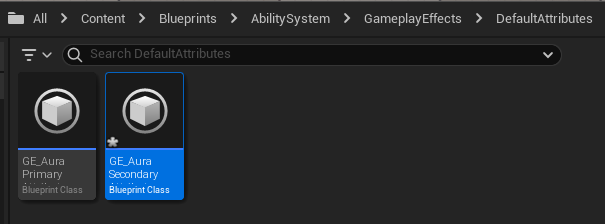
}GameplayEffect 블루프린트 클래스를 만들기 위해 기존에 만들어두었던 PrimaryAttributes 폴더명을 DefaultAttributes 로 바꾸고 GE_SecondaryAttributes 를 생성한다.
우선 캐릭터가 SecondaryAttributes 를 사용할 수 있도록 BP_AuraCharacter 에서 설정해준다.
GE_AuraSecondaryAttributes 에서 힘, 체력회복량 등은 지속적으로 적용되어야 하는 Attribute 이므로 Duration Policy : Infinite 로 설정한다.

이제 Attribute 를 초기화 해야한다.
- Armor
Attribute명 소속위치 내용 Armor Resilience 받는 데미지 감소, 막기 확률 증가
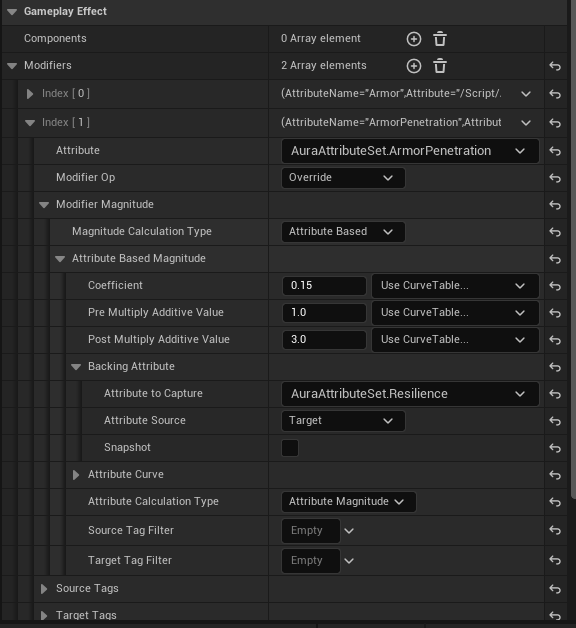
Armor의 경우Resilience값에 따라 수치가 정해지게 된다.
그림과 같이 초기화이므로Modifier Op : Override, 값을 지정하는 계산식,Attribute to Capture : AuraAttributeSet.Resilience,Attribute Source : Target으로 설정한다.
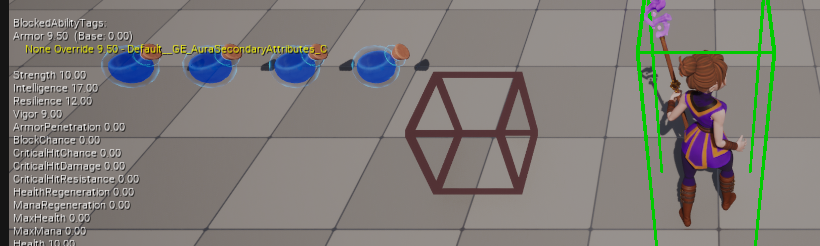
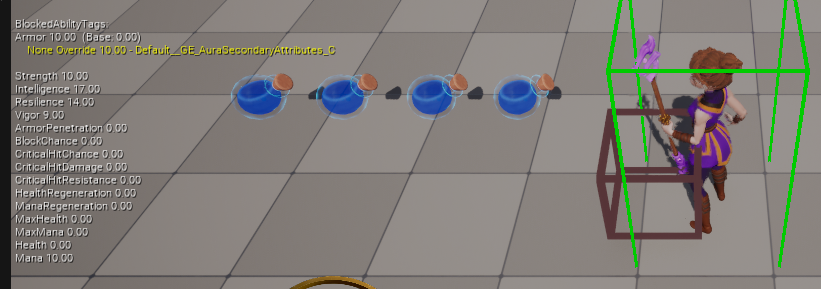
적용이 되는지 확인하기 위해GE_TestAttributeBased파일을 열고 액터에 접근시Resilience가 2만큼 증가하도록 수정한다.
접근 전Armor : 9.5,Resilience : 12
접근 후Armor : 10,Resilience : 14로 정상적으로 동작하는 것을 확인할 수 있다.
- Armor Penetration
Attribute명 소속위치 내용 Armor Penetration Resilience 방어율 일정퍼센트 무시, 크리티컬 확률 증가
Armor Penetration의 경우Resilience값에 따라 수치가 정해지게 된다.
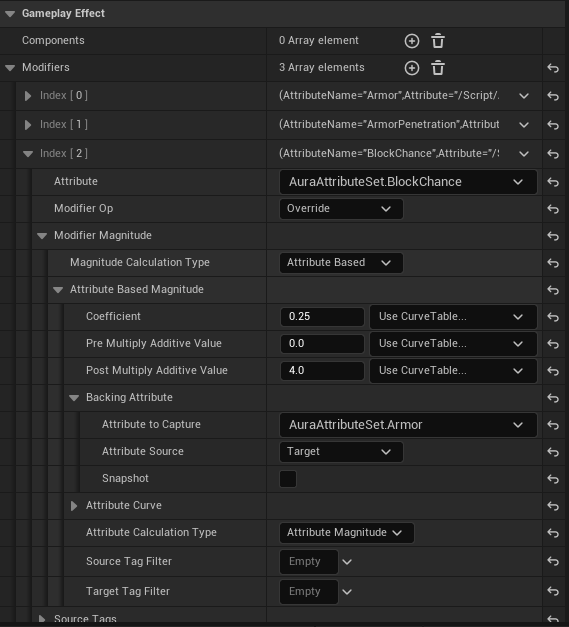
- Block Chance
Attribute명 소속위치 내용 Block Chance Armor 데미지 받는 비율 반으로 받을 확률
Block Chance의 경우Armor값에 따라 수치가 정해지게 된다.
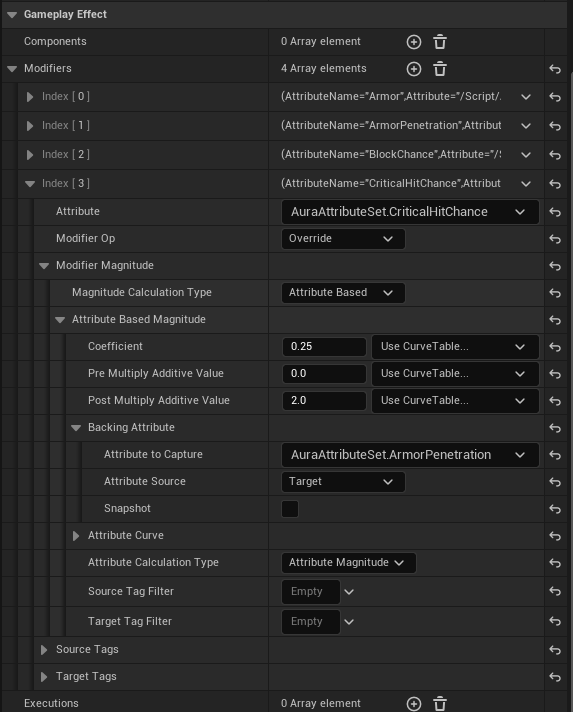
- Critical Hit Chance
Attribute명 소속위치 내용 Critical Hit Chance Armor Penetration 크리티컬 힛 확률
Critical Hit Chance의 경우Armor Penetration값에 따라 수치가 정해지게 된다.
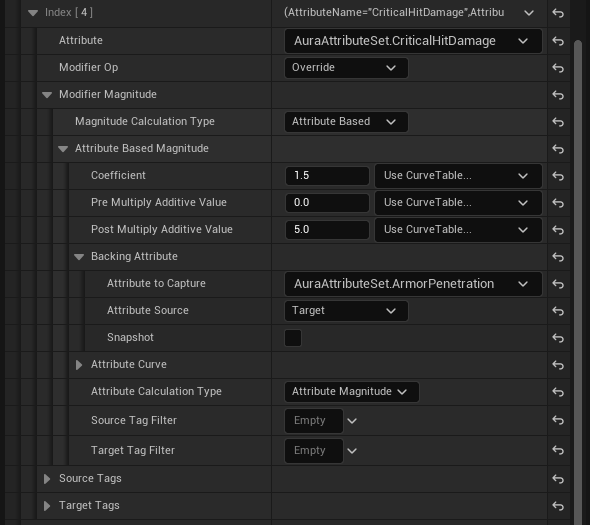
- Critical Hit Damage
Attribute명 소속위치 내용 Critical Hit Damage Armor Penetration 크리티컬 힛 데미지 보너스
Critical Hit Damage의 경우Armor Penetration값에 따라 수치가 정해지게 된다.
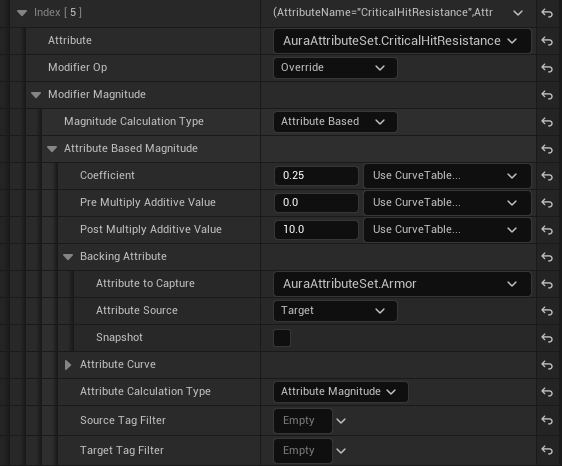
- Critical Hit Resistance
Attribute명 소속위치 내용 Critical Hit Resistance Armor 적 크리티컬 공격 저항
Critical Hit Resistance의 경우Armor값에 따라 수치가 정해지게 된다.
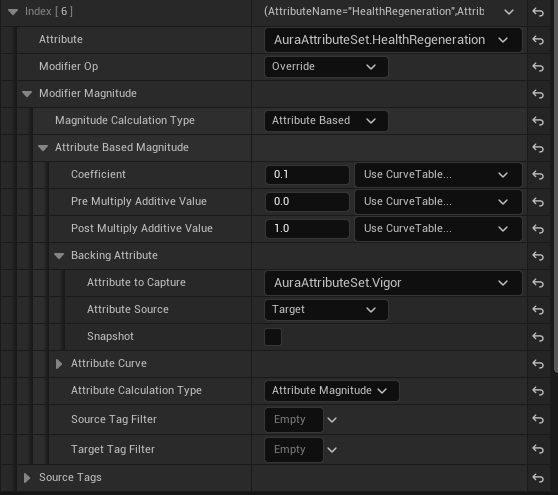
- Health Regeneration
Attribute명 소속위치 내용 Health Regeneration Vigor 1초당 체력 회복량
Health Regeneration의 경우Vigor값에 따라 수치가 정해지게 된다.
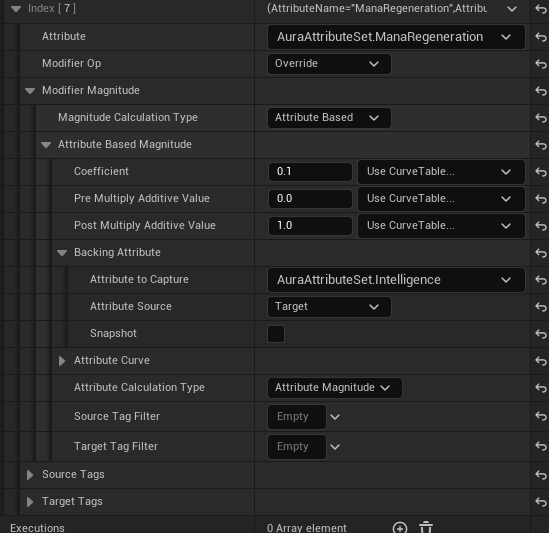
- Mana Regeneration
Attribute명 소속위치 내용 Mana Regeneration Intelligence 1초당 마나 회복량
Mana Regeneration의 경우Intelligence값에 따라 수치가 정해지게 된다.
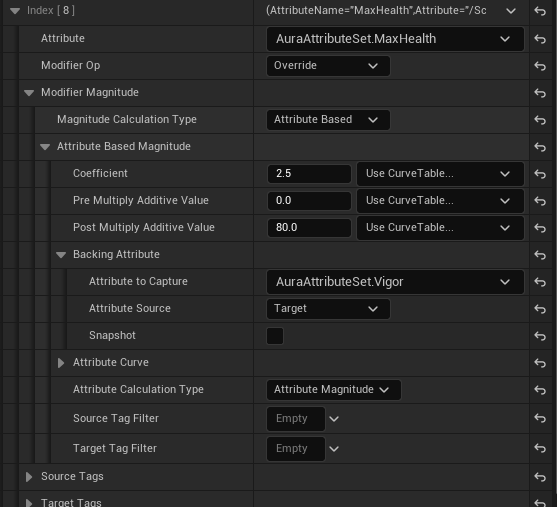
- MaxHealth
Attribute명 소속위치 내용 MaxHealth Vigor 최대 증가 체력 수치
Max Health의 경우Vigor값에 따라 수치가 정해지게 된다.
- MaxMana
Attribute명 소속위치 내용 MaxMana Intelligence 최대 증가 마나 수치
Max Mana의 경우Intelligence값에 따라 수치가 정해지게 된다.
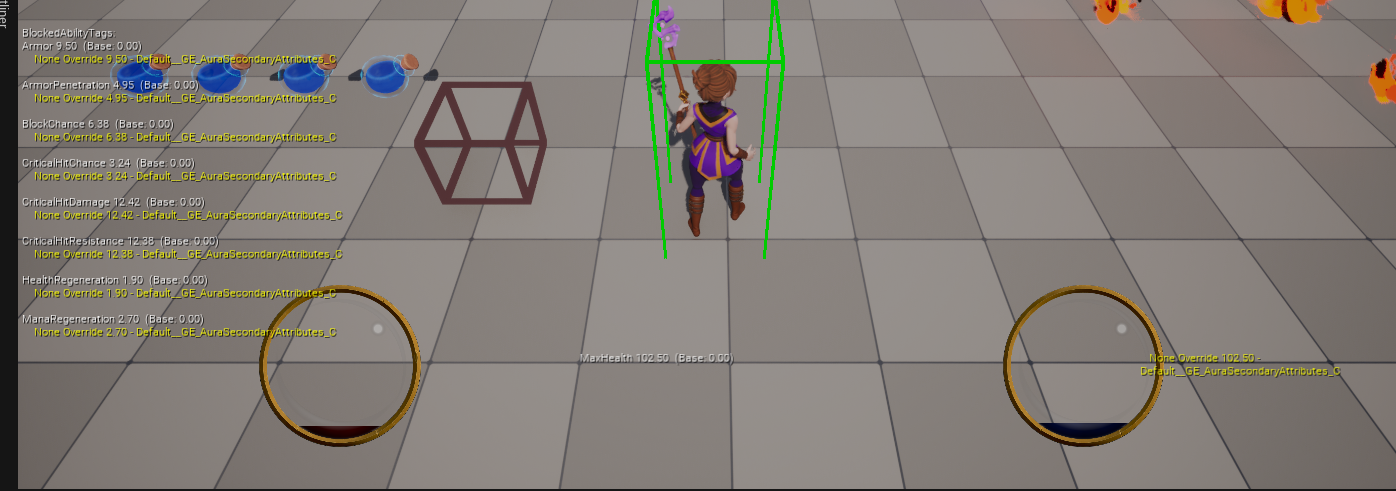
컴파일 후 실행하면 아래와 같이 수치들이 정상적으로 적용되는 것을 확인할 수 있다.
7.4 Custom Calculation
지금까지는 계수와 Pre Multiply Additive Value , Post Multiply Additive Value 3가지를 통해 값의 수정을 했다.
하지만 실제 인게임에서 이뿐만이 아닌 추가적으로 계산이 필요한 경우도 생길 것이다.
자체 수식을 통한 수치에 캐릭터의 레벨에 따라 추가적으로 상승하도록 하는 계산식과 같은 경우가 이에 해당한다.
Ex) 체력 = 계수 (상속값 + Pre)) + (Post 캐릭터레벨)
먼저 레벨 추가 관련된 작업을 해주어야 한다.
- AuraPlayerState.h
// AuraPlayerState.h

...
public:
	AAuraPlayerState();
    /** 코드 추가 */
    virtual void GetLifetimeReplicatedProps(TArray<FLifetimeProperty>& OutLifetimeProps) const override;
    /** 코드 추가 */
    ...

private:
	UPROPERTY(VisibleAnywhere, ReplicatedUsing = OnRep_Level)
	int32 Level = 1;

    UFUNCTION()
void OnRep_Level(int32 OldLevel);- AuraPlayerState.cpp
...
#include "Net/UnrealNetwork.h"
...

void AAuraPlayerState::GetLifetimeReplicatedProps(TArray<FLifetimeProperty>& OutLifetimeProps) const
{
	Super::GetLifetimeReplicatedProps(OutLifetimeProps);

	DOREPLIFETIME(AAuraPlayerState, Level);
}

...

void AAuraPlayerState::OnRep_Lelvel(inte2 OldLevel)
{

}- AuraEnemy.h
// AuraEnemy.h

...
protected:
	...

	UPROPERTY(EditAnywhere, BlueprintReadOnly, Category = "Character Class Defaults")
    int32 Level = 1;
이어서 레벨을 검색하는 기능을 수행할 인터페이스 클래스를 생성한다.
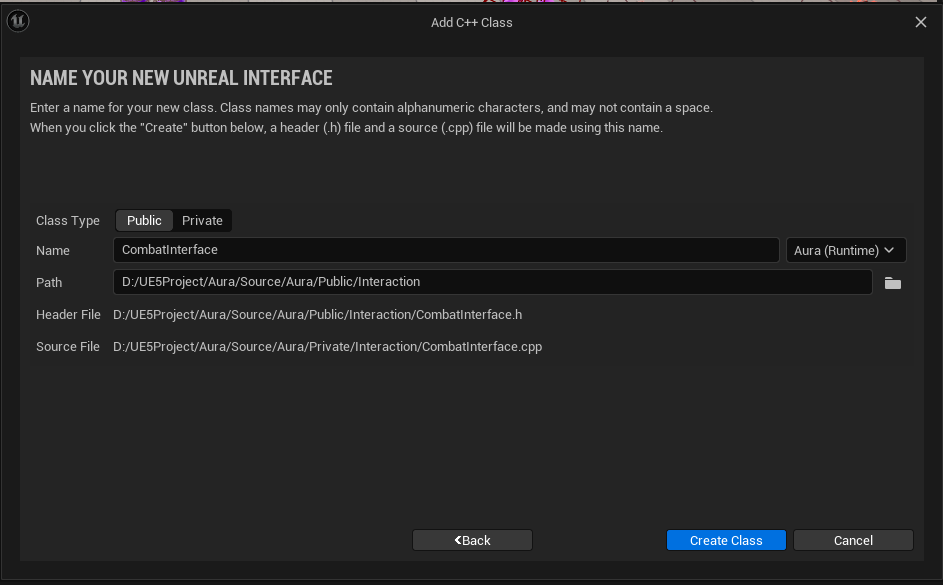
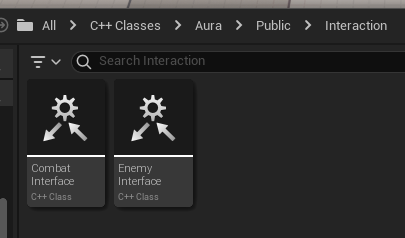
- CombatInterface.h
// CombatInterface.h

...

class AURA_API ICombatInterface
{
	GENERATED_BODY()

public:
	virtual int32 GetPlayerLevel();
};- CombatInterface.cpp
// CombatInterface.cpp

int32 ICombatInterface::GetPlayerLevel()
{
	return 0;
}
AuraCharacterBase 클래스로 돌아와 생성한 인터페이스를 상속받도록 코드를 수정하고 구현부를 작성한다.
- AuraCharacterBase.h
// AuraCharacterBase.h

...
#include "Interaction/CombatInterface.h"
...

UCLASS(Abstract)
class AURA_API AAuraCharacterBase : public ACharacter, public IAbilitySystemInterface, public ICombatInterface
{
	GENERATED_BODY()

    ...
};
AuraEnemy 클래스에서 상속받은 클래스의 함수를 override해서 호출하도록 코드를 수정한다.
- AuraEnemy.h
// AuraEmeny.h

...
public:
	...

    /** Enemy Interface */
	virtual void HighlightActor() override;
	virtual void UnHighlightActor() override;
	/** Enemy Interface */

    /** Combat Interface */
    virtual int32 GetPlayerLevel() override;
    /** Enemy Interface */

...- AuraEnemy.cpp
// AuraEnemy.cpp

...

void AAuraEnemy::UnHighlightActor()
{
	...
}

int32 GetPlayerLevel(){
{
	return Level;
}

...
AuraCharacter 클래스는 PlayerState 에 있는 Level을 반환하도록 코드를 수정한다.
- AuraPlayerState.h
// AuraPlayerState.h

...
public:
	...

FORCEINLINE int32 GetPlayerLevel() const { return Level; }- AuraCharacter.h
// AuraCharacter.h

public:
	...

    /** Combat Interface */
    virtual int32 GetPlayerLevel() override;
    /** Combat Interface */

...- AuraCharacter.cpp
// Auracharcter.cpp
...
void AAuraCharacter::OnRep_PlayerState()
{
...
}
int32 AAuraCharacter::GetPlayerLevel()
{
const AAuraPlayerState* AuraPlayerState = GetPlayerState<AAuraPlayerState>();
check(AuraPlayerState);
return AuraPlayerState->GetPlayerLevel();
}
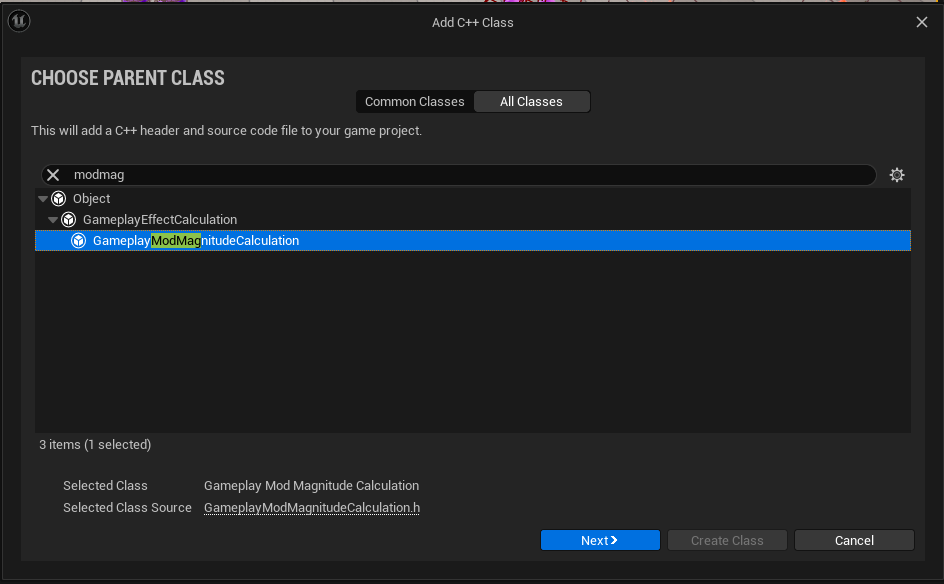
...레벨을 추가하였으니 이제 Custom Calculation 클래스를 생성해야 한다.
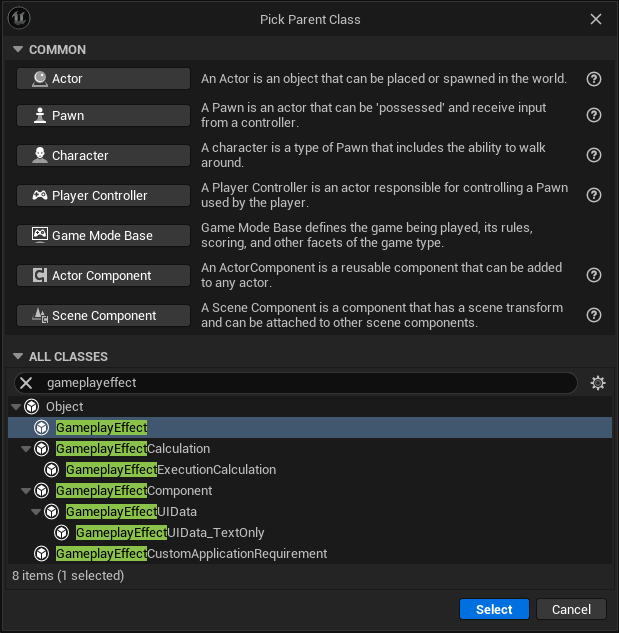
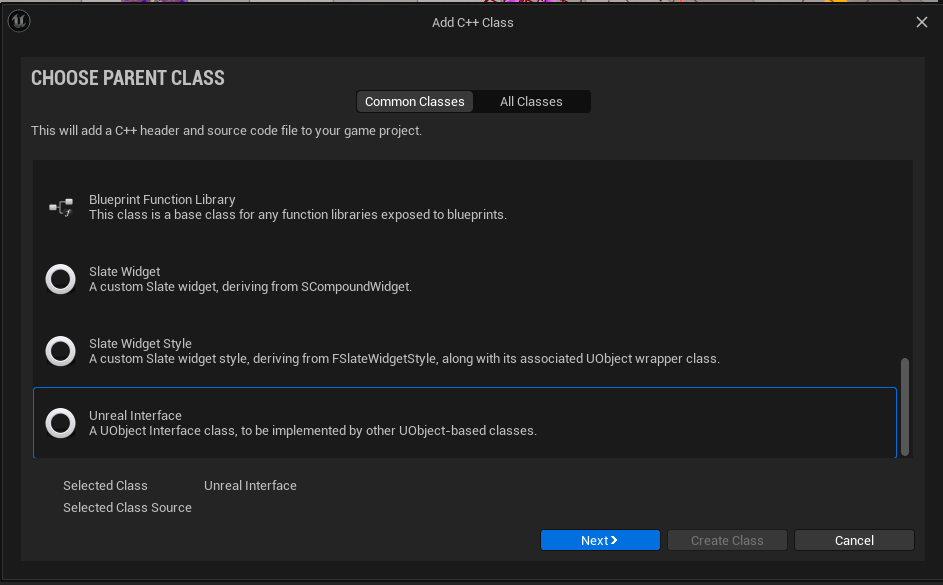
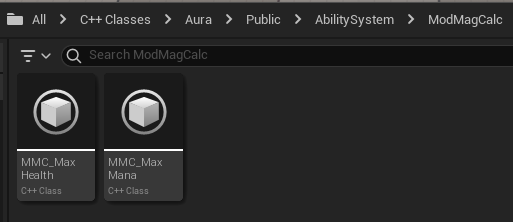
GameplayModMagnitudeCalculation 기반 클래스를 생성한다.
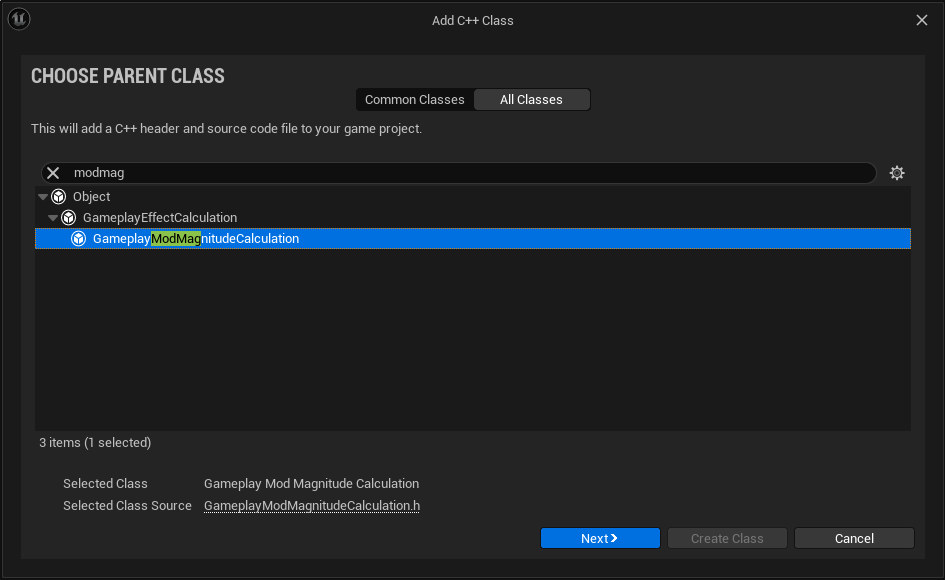
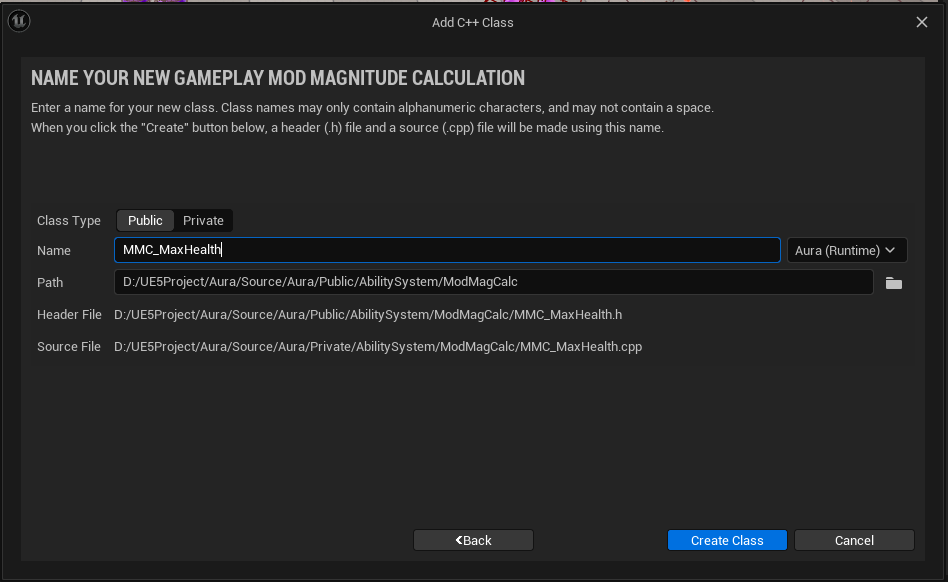
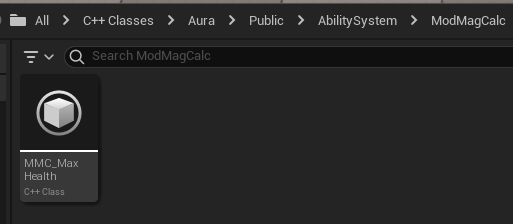
클래스를 생성하였다면 코드를 추가한다.
- MMC_MaxHealth.h
// MMC_MaxHealth.h

public:
	UMMC_MaxHealth();

    // Custom Calculation 을 수행하는 함수
	virtual float CalculateBaseMagnitude_Implementation(const FGameplayEffectSpec& Spec) const override;

private:
	// 캡쳐할 Attribute를 할당할 변수
FGameplayEffectAttributeCaptureDefinition VigorDef;- MMC_MaxHealth.cpp
// MMC_MaxHealth.cpp

...
#include "AbilitySystem/AuraAttributeSet.h"
#include "Interaction/CombatInterface.h"
...

UMMC_MaxHealth::UMMC_MaxHealth()
{
	// Attribute에 있는 Vigor 값을 캡쳐하기 위한 코드
	VigorDef.AttributeToCapture = UAuraAttributeSet::GetVigorAttribute();
    // 적용 대상 관련 설정
    VigorDef.AttributeSource = EGameplayEffectAttributeCaptureSource::Target;
    // SnapShot 관련 설정, 추후 설명
    VigorDef.bSnapshot = false;

    // Modifier Magnicute Calcultaion에 필요한 변수인 RelevantAttributesToCapture 배열에 VigorDef 추가
    RelevantAttributesToCapture.Add(VigorDef);
}

float UMMC_MaxHealth::CalculateBaseMagnitude_Implementation(const FGameplayEffectSpec& Spec) const
{
	// source와 Target에서 태그수집
    const FGameplayTagContainer* SourceTags = Spec.CapturedSourceTags.GetAggregatedTags();
    const FGameplayTagContainer* TargetTags = Spec.CapturedTargetTags.GetAggregatedTags();

    // FAggregatorEvaluateParameters : GameplayEffet 계산 과정에서 Attribute값의 평가를 제어하기 위한 다양한 파라미터 소유
    // 해당 코드에서는 수집한 태그 할당
    FAggregatorEvaluateParameters EvaluationParameters;
    EvaluationParameters.SourceTags = SourceTags;
    EvaluationParameters.TargetTags = TargetTags;

    // 임시로 Vigor값 할당
    float Vigor = 0.f;
    // 특정 Attribute 크기를 평가하여 반환, 해당 코드에서는 Vigor 크기 반환
    GetCapturedAttributeMagnitude(VigorDef, Spec, EvaluationParameters, Vigor);
    Vigor = FMath::Max<float>(Vigor, 0.f);

    // ICombatInterface의 GetPlayerLevel() 호출을 위한 코드
    ICombatInterface* CombatInterface = Cast<ICombatInterface>(Spec.GetContext().GetSourceObject());
    const int32 PlayerLevel = CombatInterface->GetPlayerLevel();

    return 80.f + 2.5f * Vigor + 10.f * PlayerLevel;
}
SourceObject에 대한 설정을 하지 않았으므로 AuraCharacterBase 클래스에서 코드를 수정한다.
해당부분에서 오류 발생
ICombatInterface* CombatInterface = Cast<ICombatInterface>(Spec.GetContext().GetSourceObject());
- AuraCharacterBase.cpp
// AuraCharacterBase.cpp
...
void AAuraCharacterBase::ApplyEffectToSelf(TSubclassOf<UGameplayEffect> GameplayEffectClass, float Level) const
{
check(IsValid(GetAbilitySystemComponent)));
check(GamepalyEffectClass);
/** 코드 수정 */
// const 삭제
FGameplayEffectContextHandle ContextHandle = GetAbilitySystemComponent()->MakeEffectContext();
// 코드 추가
ContextHandle.AddSourceObject(this);
/** 코드 수정 */
...
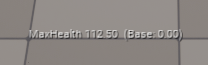
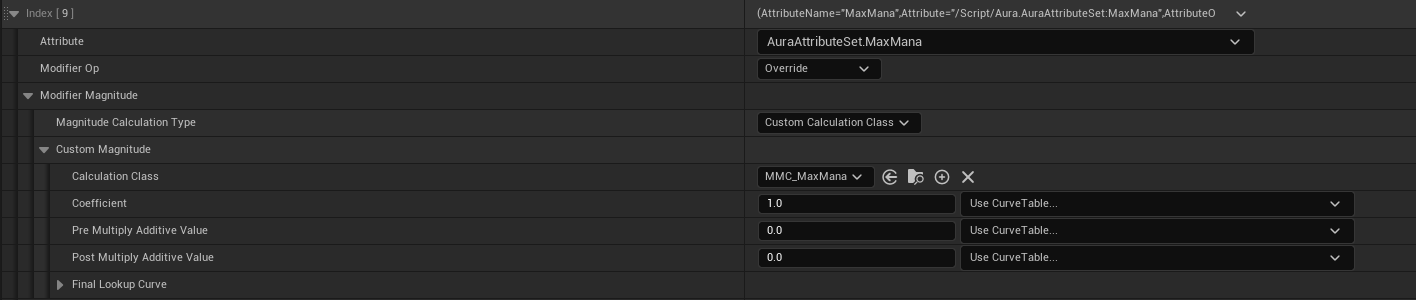
}컴파일 후 에디터로 돌아와 GE_AuraSecondaryAttributes 파일에서 Magnitude Calcuation Type : Custom Calculation Class 로 바꾸고, Calculation Class : MMC_MaxHealth 로 설정한다.
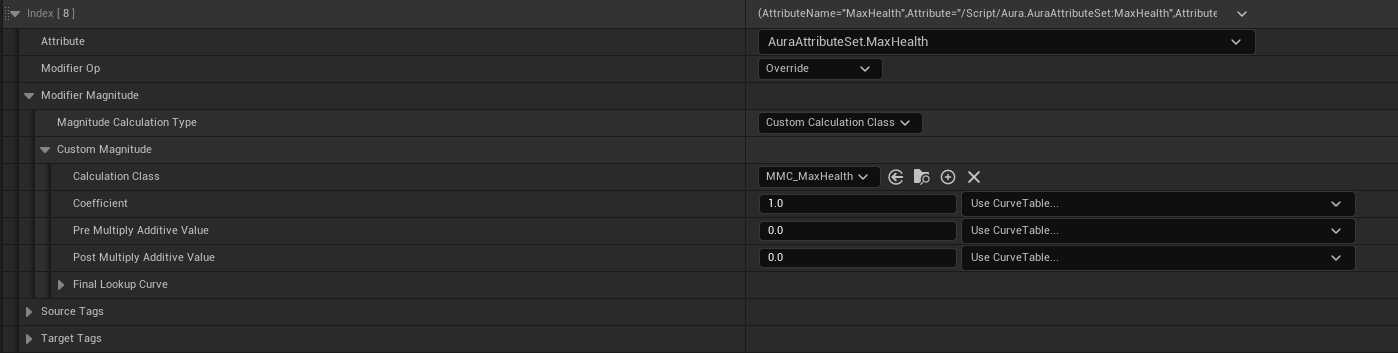
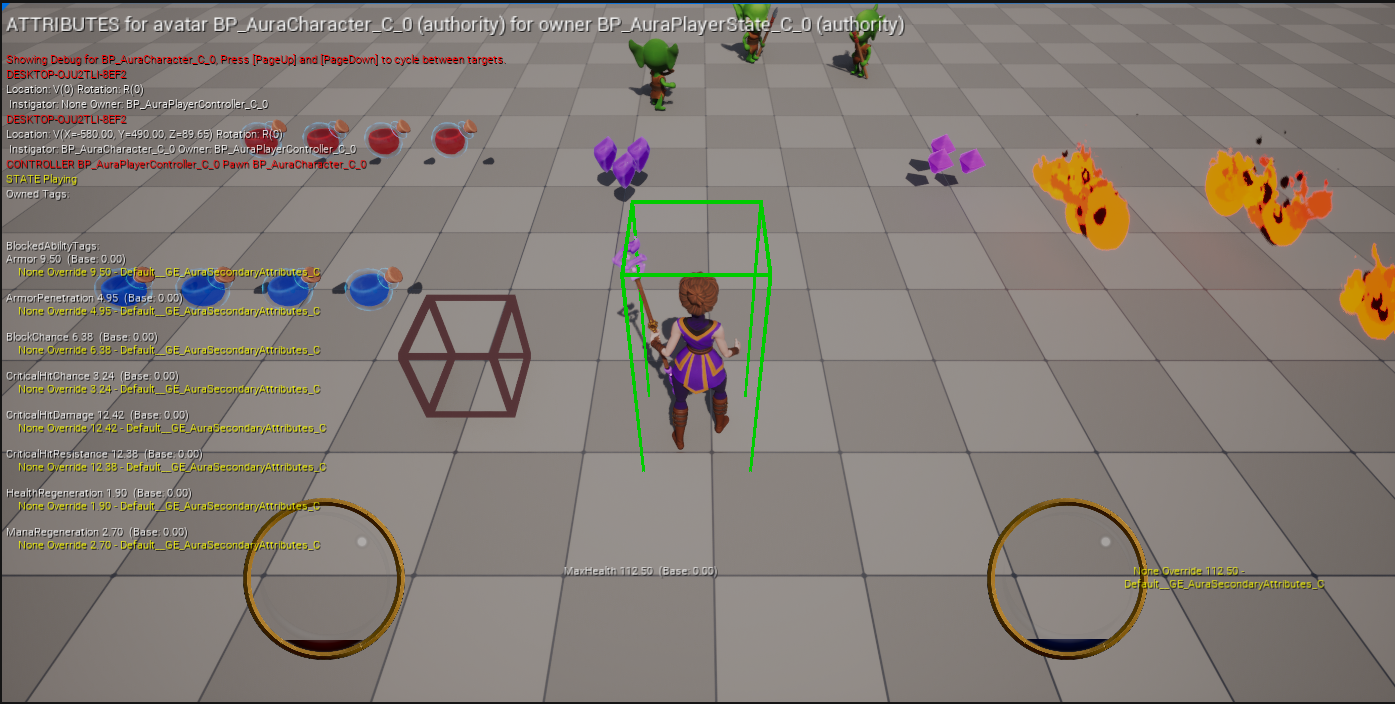
실행시 80 + (2.5 * 9) + (10 * 1) 값인 112.5가 최대 체력으로 적용된 것을 확인할 수 있다.
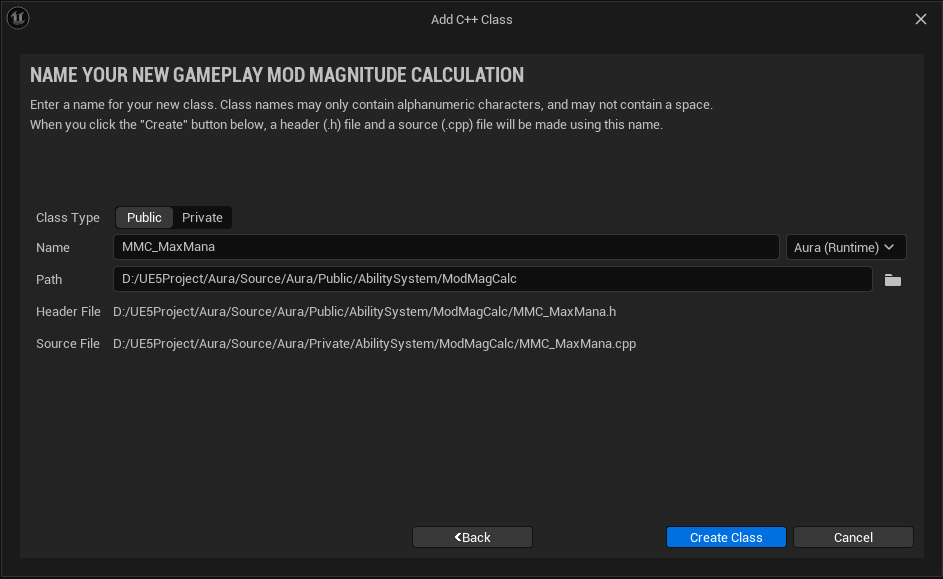
7.4.1최대 마나관련 Custom Calucation
MMC_MaxMana클래스 생성
- 코드 추가
- MMC_MaxMana.h
// MMC_MaxMana.h

...
public:
	UMMC_MaxMana();

    // Custom Calculation을 수행하는 함수
    virtual float CalculateBaseMagnitude_Implementation(const FGameplayEffectSpec& Spec) const override;

private:
	// 캡쳐할 Attribute를 할당할 함수
	FGameplayEffectAttributeCaptureDefinition IntDef;
- MMC_MaxMana.cpp
// MMC_MaxMana.cpp

...
#include "AbilitySystem/AuraAttributeSet.h"
#include "Interaction/CombatInterface.h"
...

UMMC_MaxMana::UMMC_MaxMana()
{
	// Attribute에 있는 Intelligence 값을 캡쳐하기 위한 코드
	IntDef.AttributeToCapture = UAuraAttributeSet::GetIntelligenceAttribute();
    // 적용 대상 관련 설정
    IntDef.AttributeSource = EGameplayEffectAttributeCaptureSource::Target;
	// Snapshot 사용 여부
    IntDef.bSnapshot = false;

    // Modifier Magnitude Calcuation에 필요한 변수인 RelevantAttributesToCapture 배열에 IntellegenceDef 추가
    RelevantAttributesToCapture.Add(IntDef);
}

float UMMC_MaxMana::CalculateBaseMagnitude_Implementation(const FGameplayEffectSpec& Spec) const
{
	// Source와 Target에서 태그 수집
	const FGameplayTagContainer* SourceTags = Spec.CapturedSourceTags.GetAggregatedTags();
    const FGameplayTagContainer* TargetTags = Spec.CapturedTargetTags.GetAggregatedTags();

    // FAggregatorEvaluateParameters : GameplayEffect 계산 과정에서 Attribute값의 평가를 제어하기 위한 다양한 파라미터 소유
    // 해당 코드에서는 수집한 태그 할당
    FAggregatorEvaluateParameters EvaluationParameters;
    EvaluationParameters.SourceTags = SourceTags;
    EvaluationParameters.TargetTags = TargetTags;

    // 임시로 Intelligence값 할당
    float Int = 0.f;
    // 특정 Attribute 크기를 평가하여 반환, 해당 코드에서는 Intelligence 크기 반환
    GetCapturedAttributeMagnitude(IntDef, Spec, EvaluationParameters, Int);
    Int = FMath::Max<float>(Int, 0.f);

    // ICombatInterface의 GetPlayerLevel() 호출을 위한 코드
    ICombatInterface* CombatInterface = Cast<ICombatInterface>(Spec.GetContext().GetSourceObject());
    const int32 PlayerLevel = CombatInterface->GetPlayerLevel();

    return 50.f + 2.5f * Int + 15.f * PlayerLevel;
}GE_AuraSecondaryAttributes수정
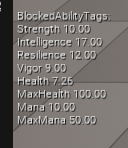
실행후 콘솔명령어로 체크하려고 해도 Attribute 수가 많아 확인이 불가능하다.
먼저GE_AuraPrimaryAttributes파일에서Intelligence값을 확인하고
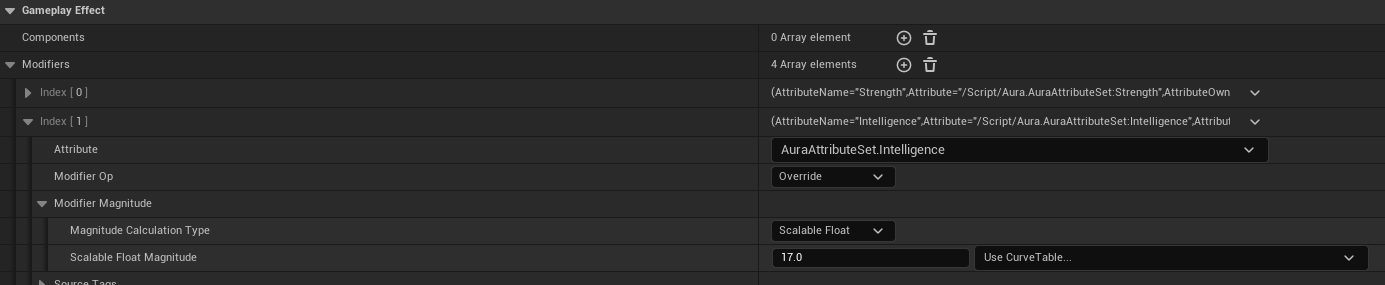
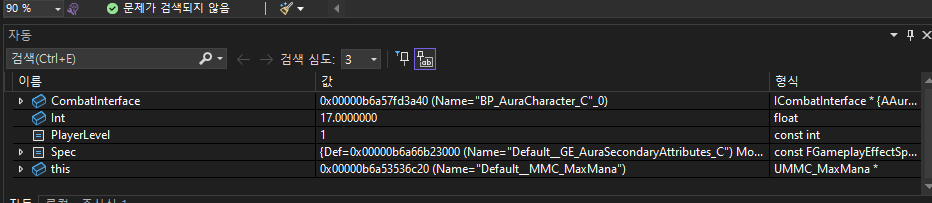
디버그모드로 실행하면 정상적으로 17이란 값과 1을 가져오는 것을 확인할 수 있다.
7.4.2 현재 Health와 Mana 생성자 하드코딩에서 GameplayEffet를 통한 초기화로 변경
현재 체력은 MaxHealth와 MaxMana가 초기화된 다음에 설정되어야 한다.
- AuraAttributeSet.cpp
#include "..."

UAuraAttributeSet::UAuraAttributeSet()
{
	// 체력, 마나 초기화 관련 코드 전부 삭제
}

...- AuraCharacterBase.h
// AuraCharacterBase.h

...
protected:
	...

    UPROPERTY(BlueprintReadOnly, EditAnywhere, Category = "Attributes")
    TSubclassOf<UGameplayEffect> DefaultVitalAttributes;

...- AuraCharacterBase.cpp
// AuraCharacterBase.cpp
...
void AAuraCharacterBae::InitializeDefaultAttribute() const
{
...
ApplyEffectToSelf(DefaultSecondaryAttributes, 1.f);
// MaxHealth와 MaxMana 초기화 후에 Health와 Mana 초기화가 진행되어야 하므로 뒤에 코드 작성
ApplyEffectToSelf(DefaultVitalAttributes, 1.f);
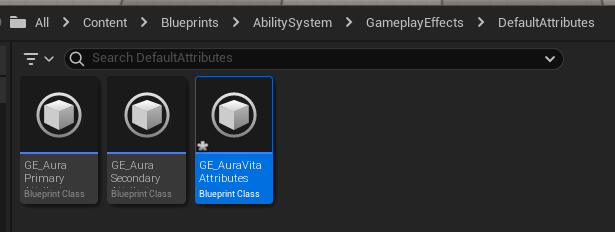
}에디터로 돌아와 GameplayEffect 기반 블루프린트 클래스인 GE_AuraVitalAttributes 를 생성하고

즉시 적용되도록 Duration Policy : Instant 로 설정한다

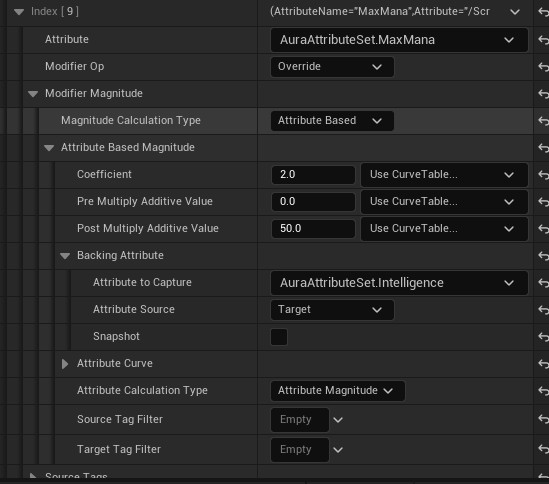
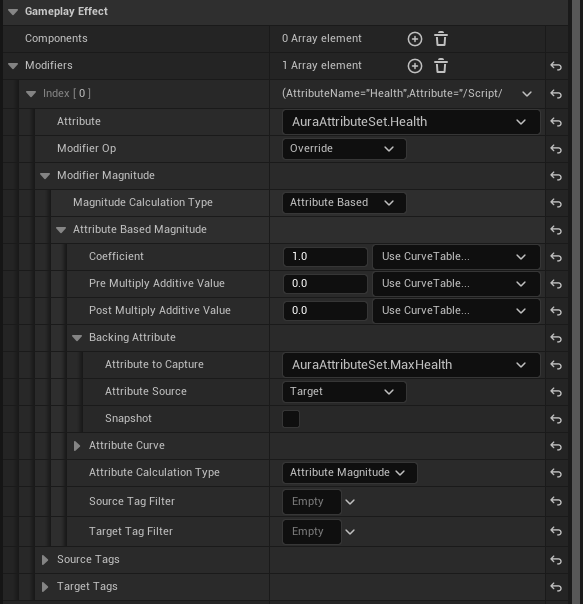
MaxHealth의 값을 받도록 하기 위해 Modifire Op : Override , Magnitude Calcuation Type : Attribute Based , Attribute to Capture : AuraAttributeSet.MaxHealth , Attribute Source : Target 으로 지정해준다.
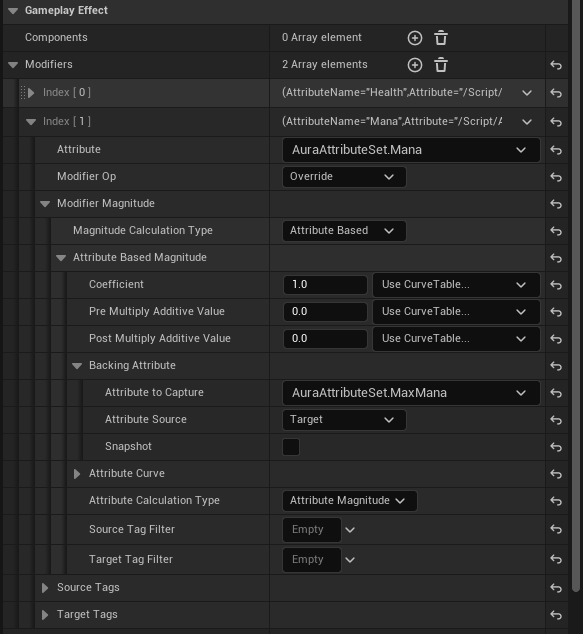
동일한 과정을 Mana에도 진행한다.
BP_Aurachacter 파일을 열고, 생성한 GE_AuraVitalAttributes 가 적용되도록 추가한다.
실행시 MaxHealth와 MaxMana값에 따라 최대로 HP와 MP가 차있는 것을 확인할 수 있다.

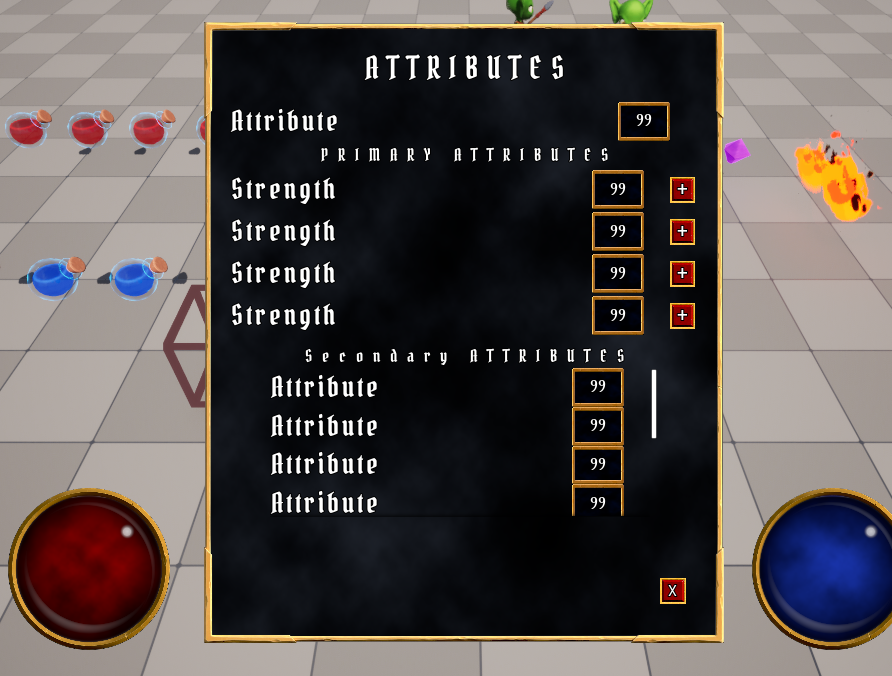
7.5 Attribute Menu 생성
7.5.1 수치를 표현할 Widget Blueprint 생성
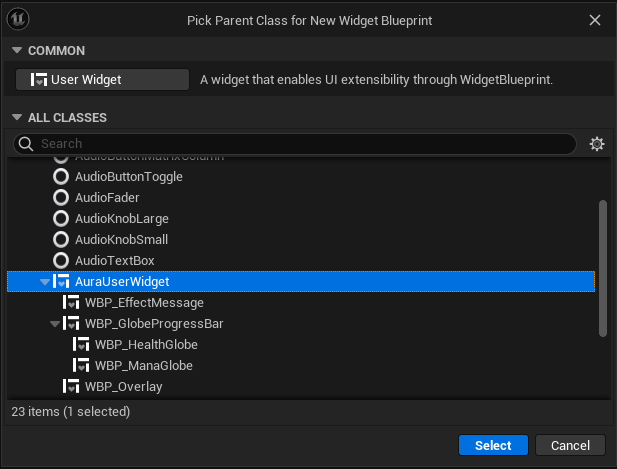
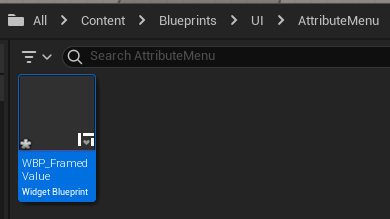
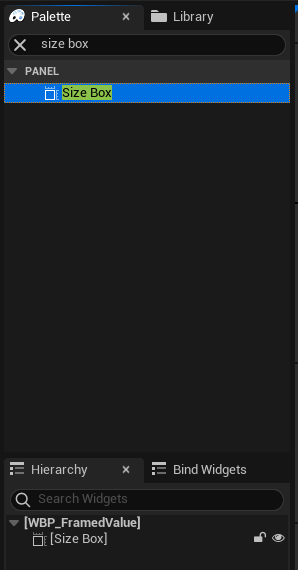
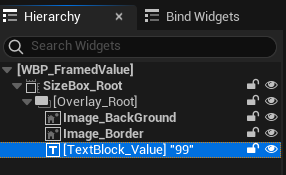
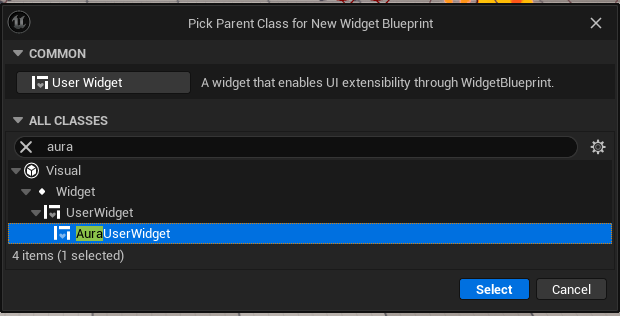
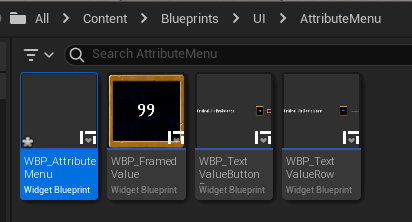
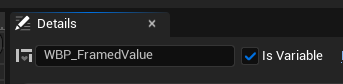
먼저 AuraUserWidget 기반의 블루프린트 WBP_FramedValue 를 생성한다.
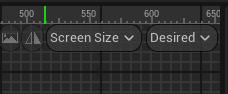
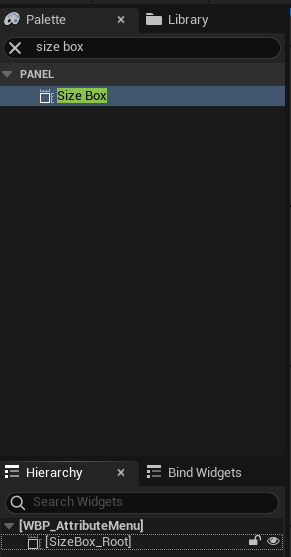
Size Box 를 하나 추가해주고
Fill Screen -> Desired 로 변경해준 뒤
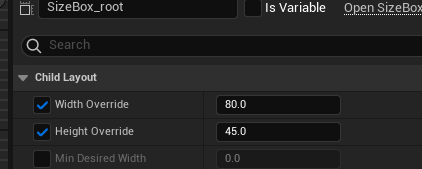
크기를 설정해준 다음
이름을 변경한다.
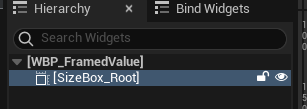
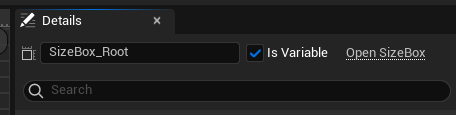
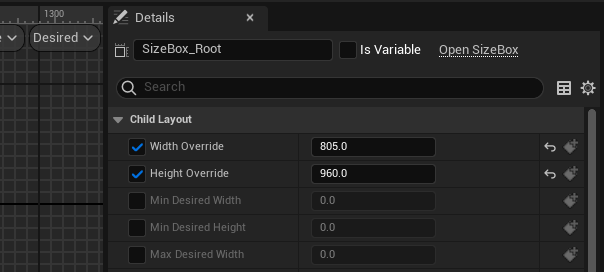
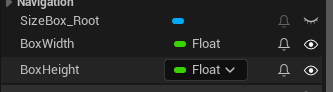
해당 박스의 가로와 세로 길이를 생성과 동시에 초기화하기 위해 SizeBox_Value 의 IsVariable 를 활성화시키고
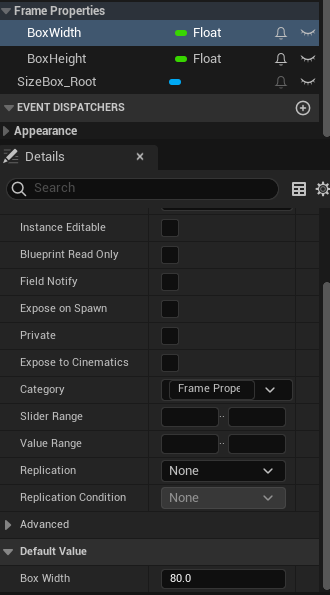
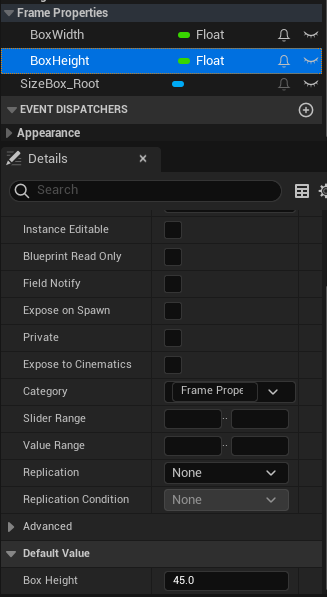
Graph 탭에서 변수 2개를 추가한다. 이때 Frame Properties 카테고리를 생성하여 두 변수가 속하도록 한다.
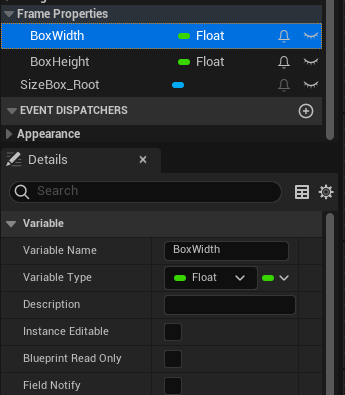
Box Width 의 값을 80.f, Box Height 값을 45.f 로 초기화하고
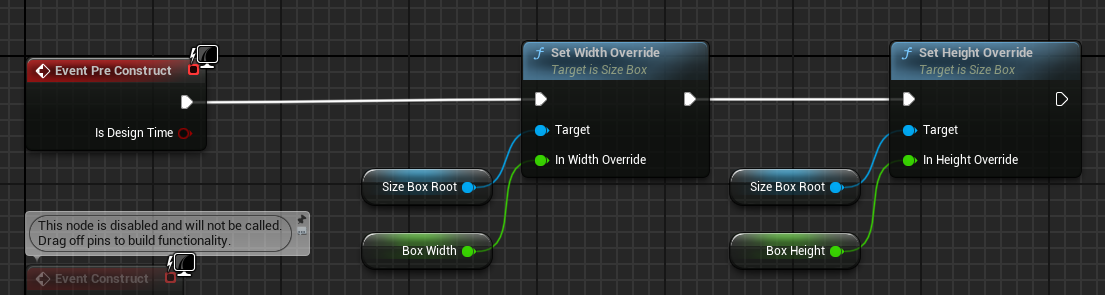
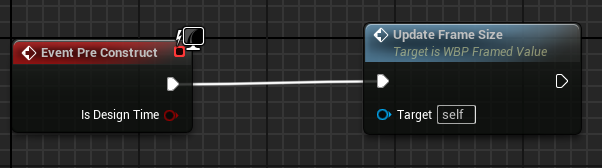
Event Pre Construct 이벤트 노드와 연결하여 초기값을 설정한다.
노드들을 드래그하여 우클릭후 Collapse to Function 을 클릭하여 함수로 리팩토링을 진행한다.
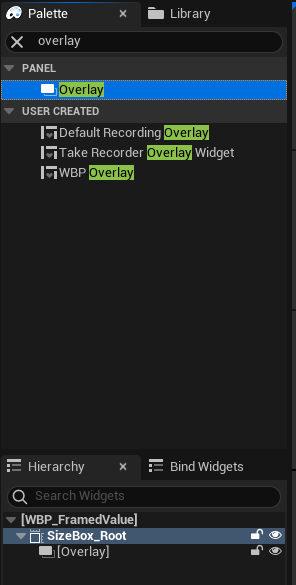
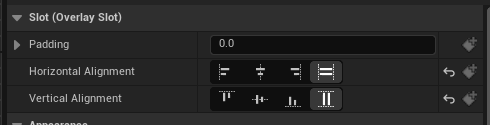
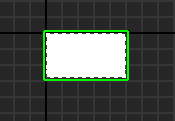
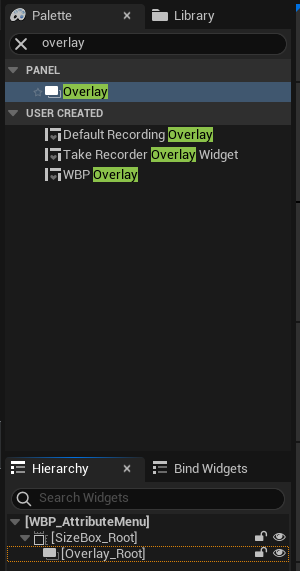
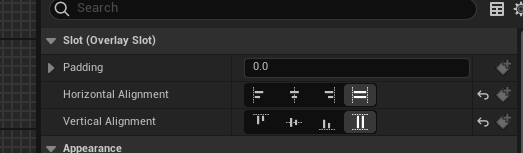
이제 Overlay 를 추가하고
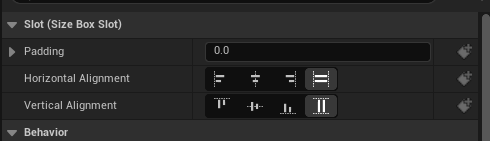
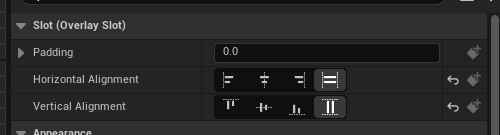
가로, 세로 가득 차도록 수정한 뒤
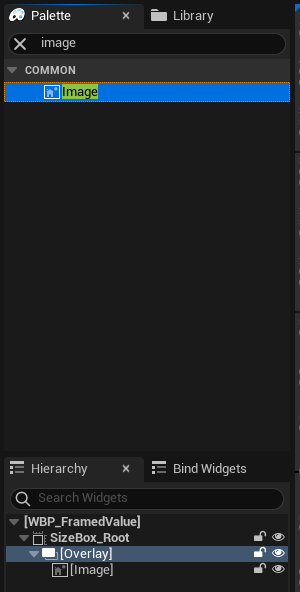
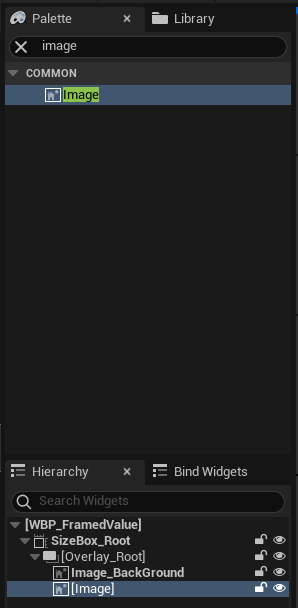
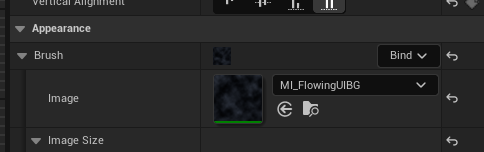
백그라운드를 위한 Image 를 추가하고 동일하게 가로, 세로 가득 차도록 수정한다.
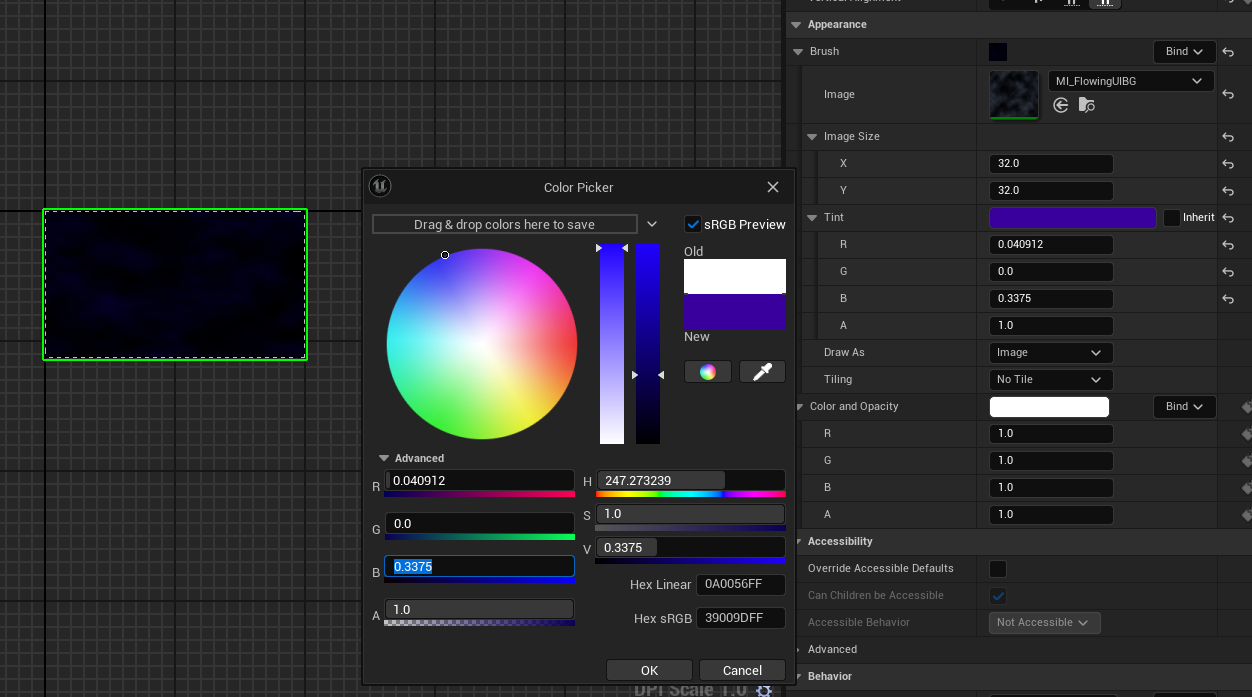
이미지를 추가해주고( MI_FlowingUIBG )
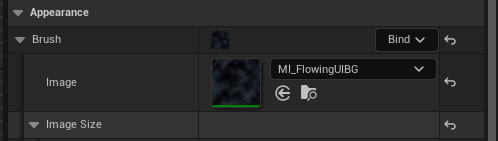
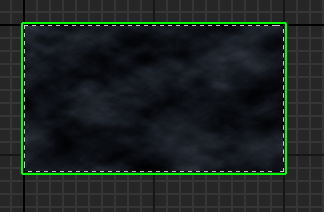
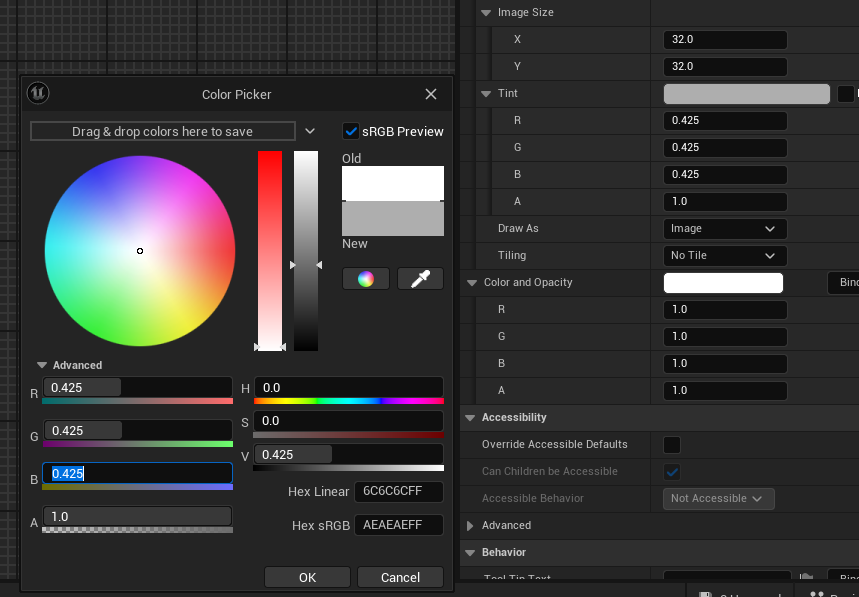
틴트값을 수정하여 색을 적절히 변경한다.
Overlay 와 Image 의 이름을 변경하고
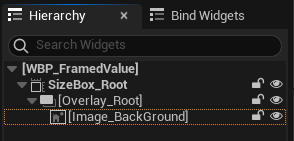
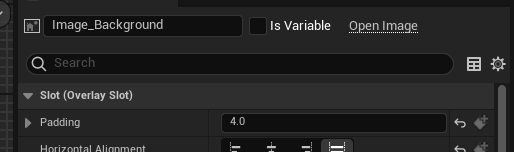
Image_Background 의 IsVariable 를 활성화한 다음

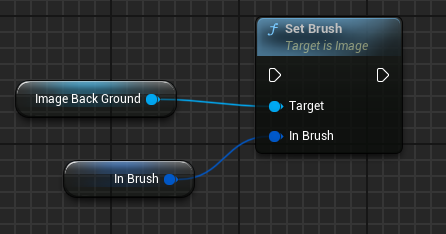
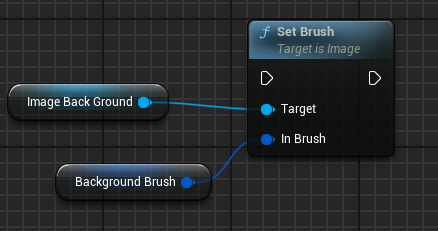
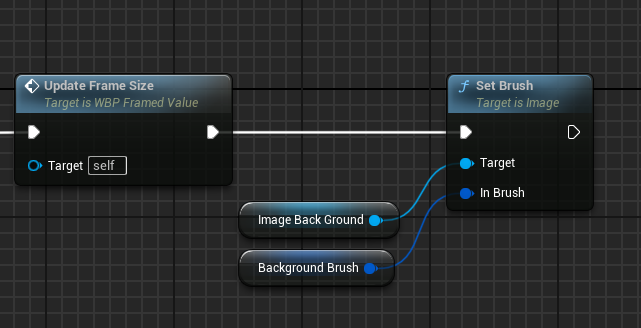
Graph 탭으로 돌아와서 Image를 설정할 수 있도록 노드를 추가한 다음, In Brush 를 변수로 승격하여 BackgroundBrush 로 변경한 뒤,Category : Frame Properties 로 설정한다.
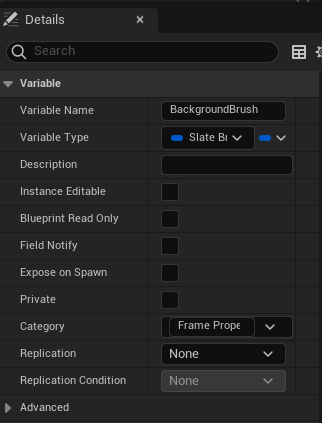
컴파일을 진행하면 Background Brush 의 이미지를 초기화할 수 있는데 동일하게 MI_FlowingUIBG 이미지를 추가하고 틴트값을 변경하여 초기화해준다.

노드를 Event Pre Construct 이벤트 노드에 연결하고
Collapse to Function 을 통해 함수로 리팩토링을 진행한다.

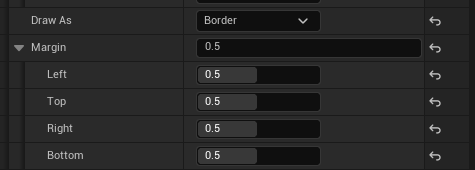
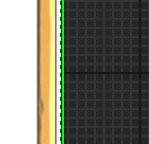
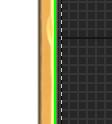
이제 외곽을 위한 Image 를 추가해준 다음 백그라운드를 생성할 때와 동일한 과정을 진행한다.(Border_1)

추가로 Draw As : Border 로 설정을 변경한 다음 각각 0.5씩 값을 준다.
SizeBox 크기의 변경이 생겨도 추가로 따로 외곽 이미지를 수정할 필요가 없어진다.
이름 변경도 해주고
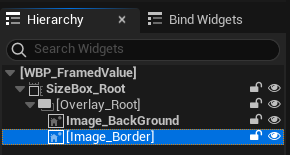
값을 나타낼 Text 를 추가한 후 중앙 정렬하고 아무 값을 출력하도록 한다.

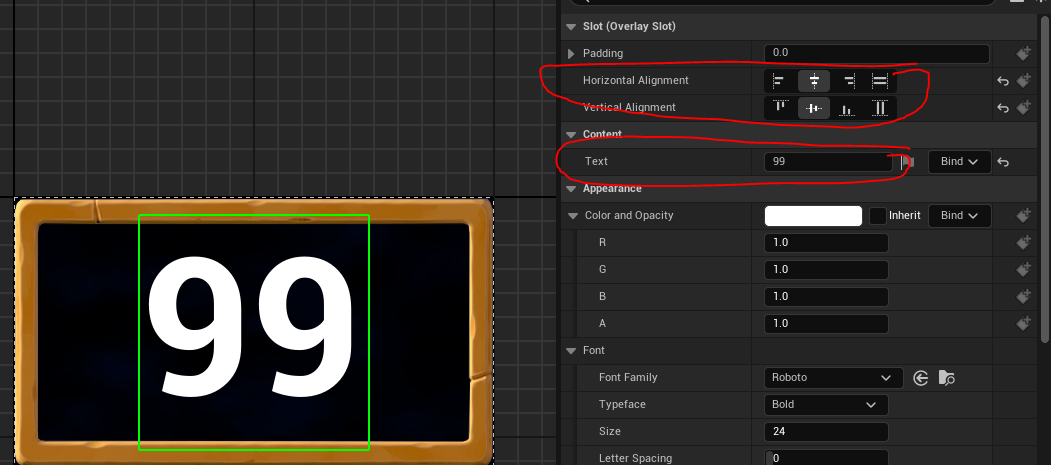
Justification 또한 중앙정렬로 수정한다.

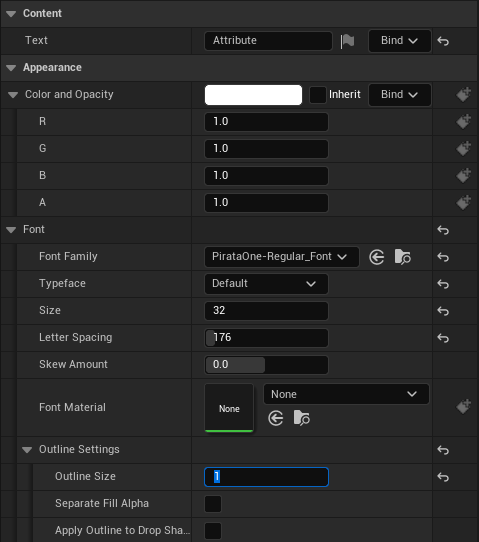
폰트를 추가하고, 글자 크기를 조절한다음, 아웃라인을 추가하여 좀 더 리얼리티있게 설정한다.
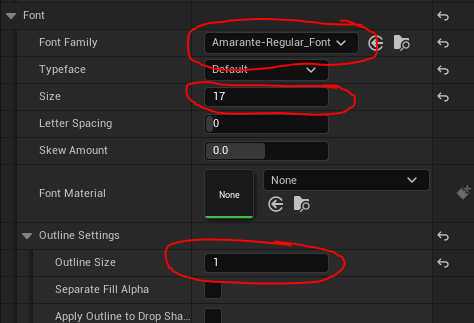
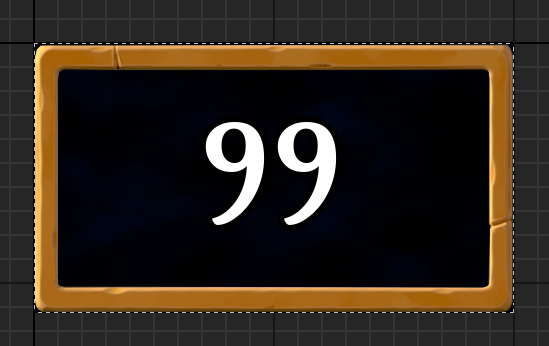
마지막으로 Text 의 이름을 TextBox_Value 로 변경한다.
7.5.2 Attribute를 나타낼 Widget Blueprint 생성
단순히 수치만 나타내면 이게 어느 Attribute의 값인지 확인할 수 없으므로 이를 나타낼 Widget Bluprint가 필요하다.
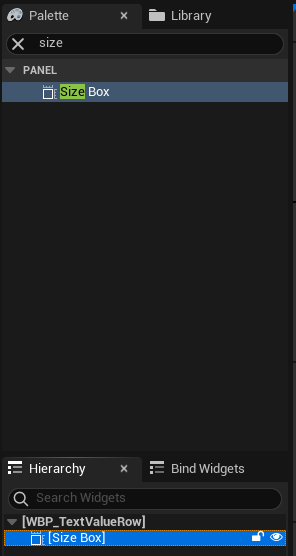
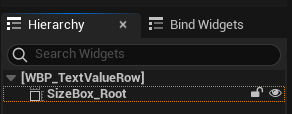
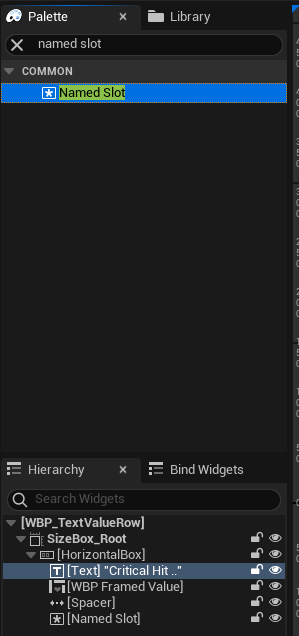
동일하게 AuraUserWidget 기반 블루프린트 WBP_TextValueRow 를 생성한다.

Size Box 를 추가해주고
Fill Screen -> Desired 로 변경, Width Override 와 Height Override 활성화를 한다.
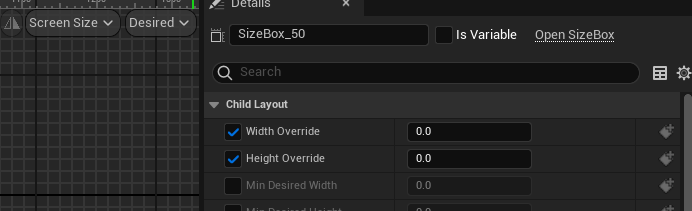
IsVariable 도 활성화해준 다음

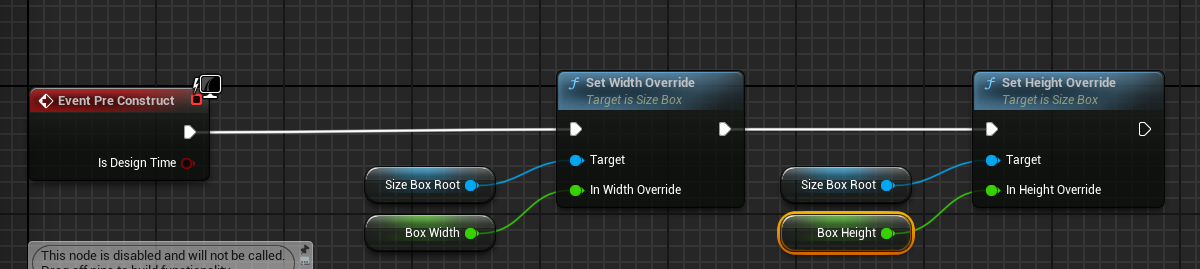
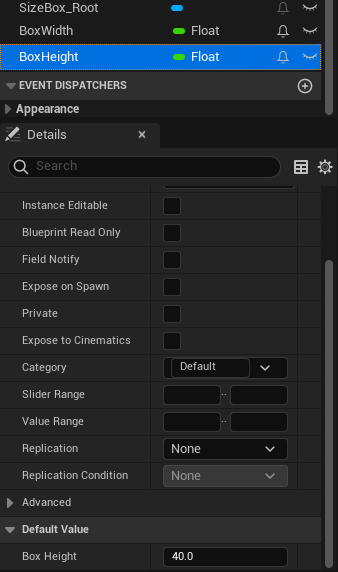
Graph 탭에서 BoxWidth 와 BoxHeight 를 추가해주고 노드를 추가하여 가로 세로 길이를 초기화시켜준다.(가로450, 세로 60)
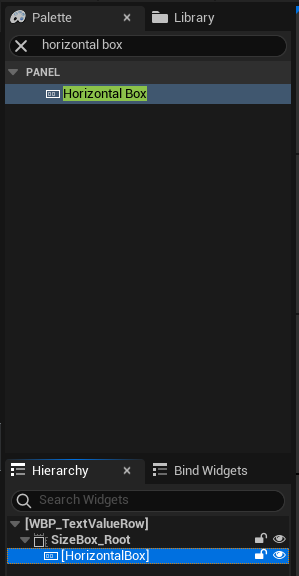
이어서 Horizontal Box 를 추가해주고
Text 도 추가해준다.
좌측 중앙정렬로 설정해주고

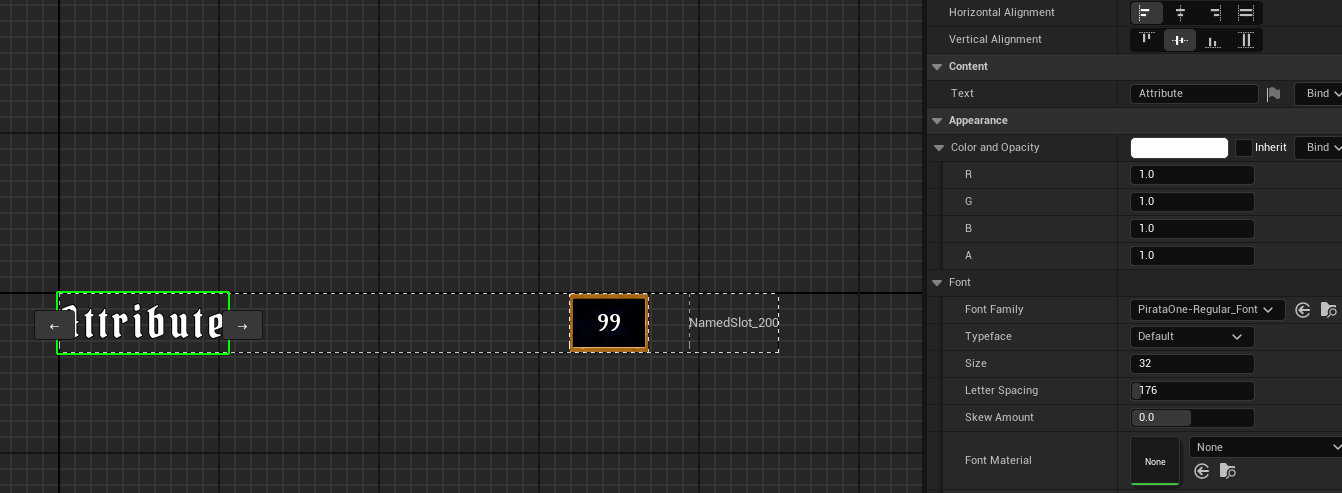
Text : Attribute , Font Family : PirataOne-Regular_Font , Size : 32 , Letter Spacing : 176 , Outline Size : 1 로 수정한다.
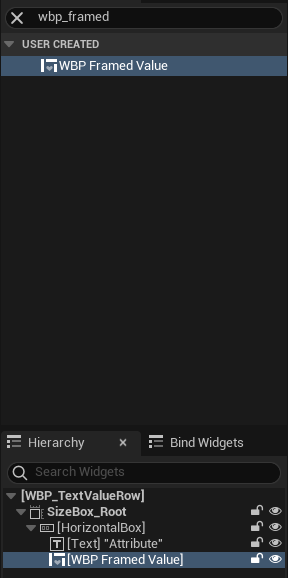
이전에 생성해둔 WBP_FramedValue 를 배치하고
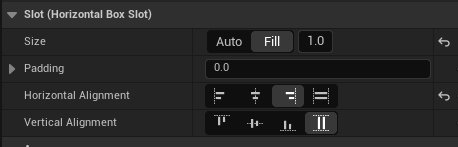
좌측 전체에 배치되도록 수정한 다음 Fill 로 변경한다.
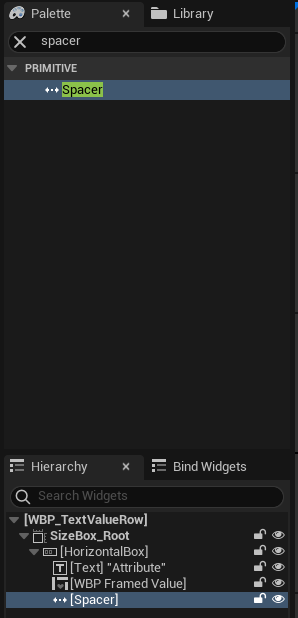
Spacer 를 추가하여 우측에 약간의 공백을 준다.

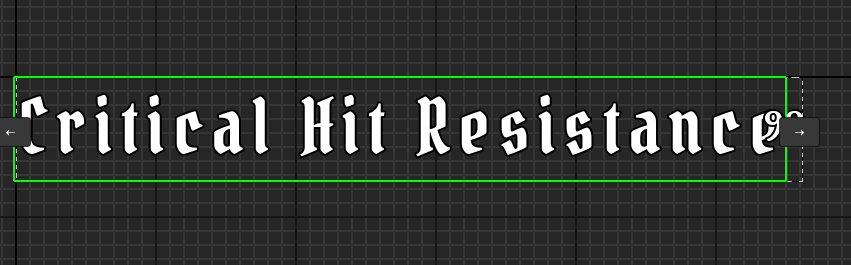
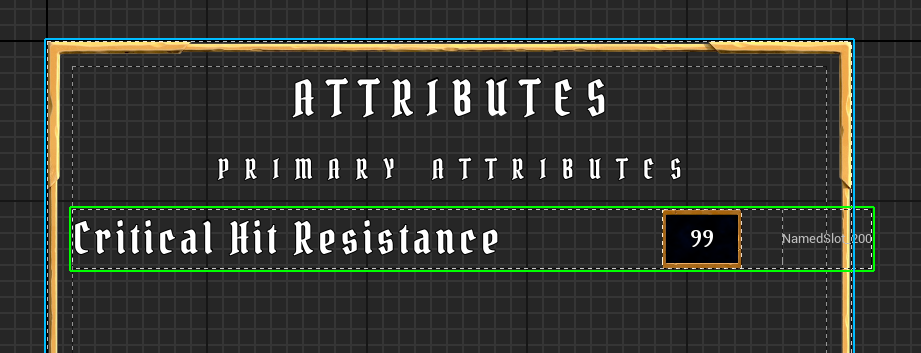
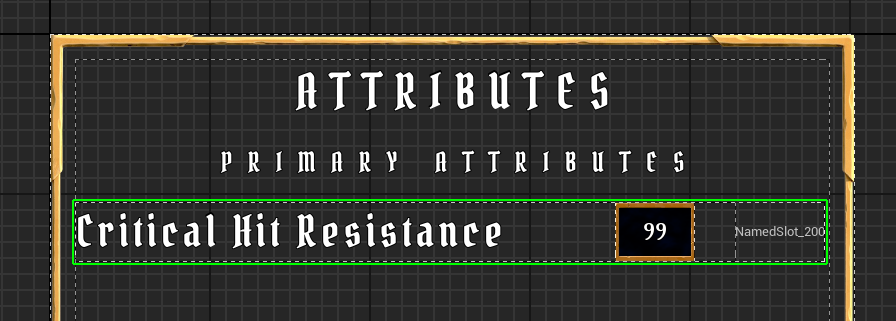
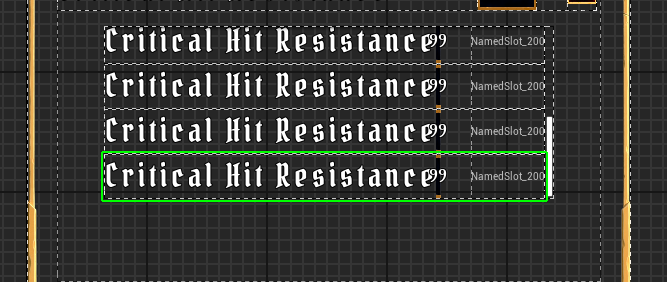
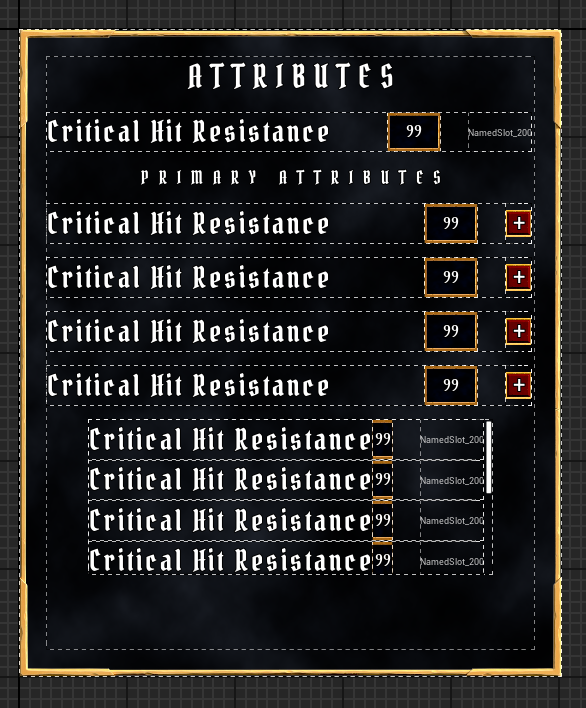
테스트를 위해 현재 보유중인 Attribute중 가장 긴 Critical Hit Resistance를 텍스트박스에 입력해보변 WBP_FramedValue 가 사라지는 것을 확인할 수 있다.
Graph 탭에서 BoxWidgth 의 값을 800으로 변경하고

Spacer 의 크기를 40으로 수정한다.

버튼을 추가할 Named Slot 을 미리 추가한다.
7.5.3 버튼 위젯 추가
7.5.2에서 생성한 위젯은 Attribute명과 수치만 표시하는 위젯이고, 해당 챕터에서는 +버튼을 추가하여 값을 변경시킬 수 있도록 위젯을 만들 것이다.
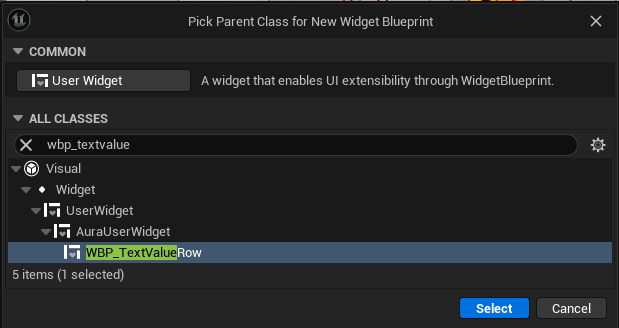
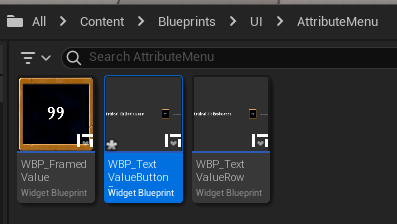
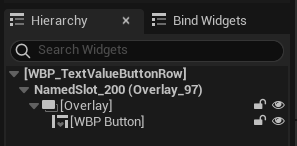
WBP_TextValueRow 기반 Widget Blueprint 인 WBP_TextValueButtonRow 를 생성한다.
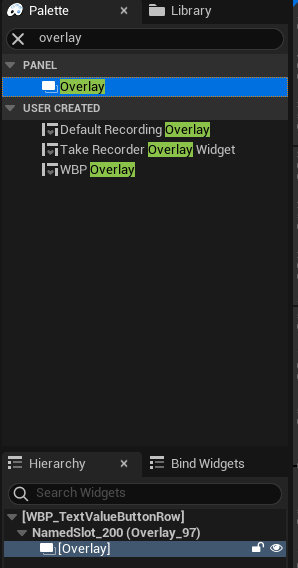
Overlay 를 추가하고
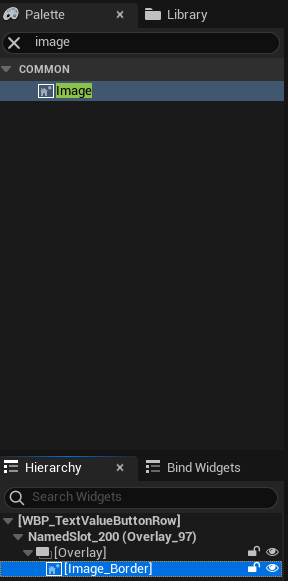
버튼의 외곽을 나타낼 Image 를 추가한다.
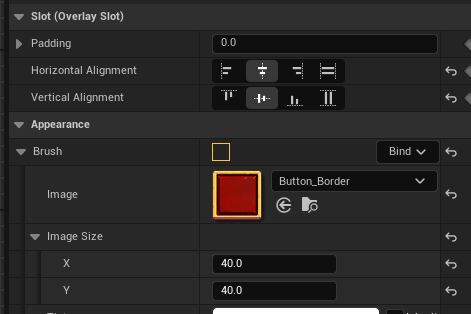
이미지를 중앙정렬하고, 사용할 외곽 이미지를 추가한 다음 가로세로 길이를 40으로 설정한다.
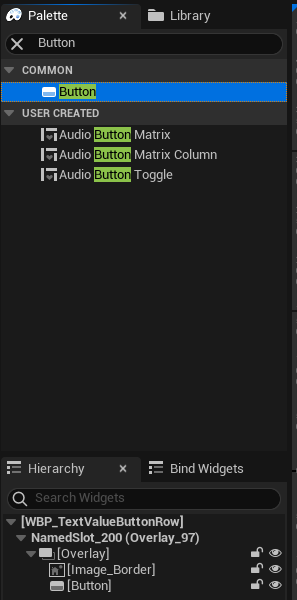
Button 을 추가하고
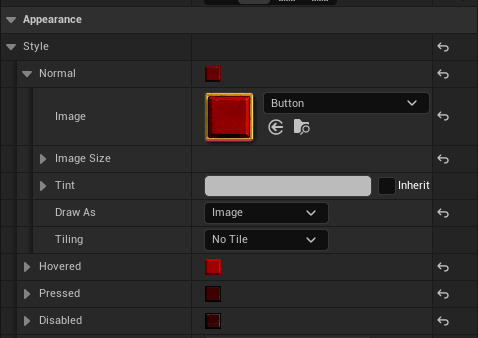
동일하게 중앙정렬한 다음 Style -> Normal -> Tint -> Draw As : Image 로 변경한 다음 가로세로 길이를 40으로 외곽과 동일하게 변경한다.

각 버튼의 상태에 따라 이미지가 변경되도록 할 수 있다.
- Normal
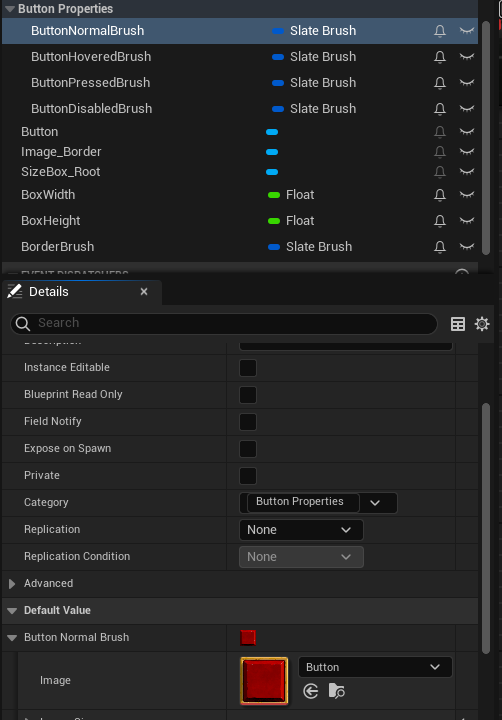
Image : Button, 가로세로 40,Tint->Draw As : Image
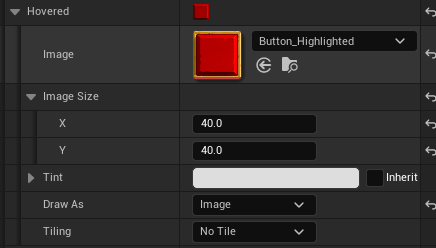
- Hovered
Image : Button_Highlighted, 가로세로 40,Tint->Draw As : Image
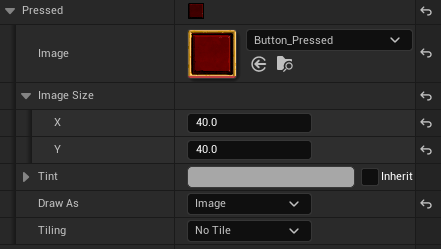
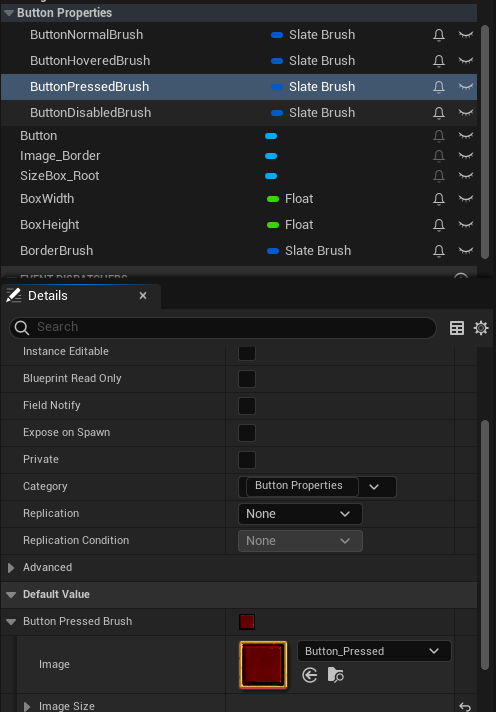
- Pressed
Image : Button_Pressed, 가로세로 40,Tint->Draw As : Image
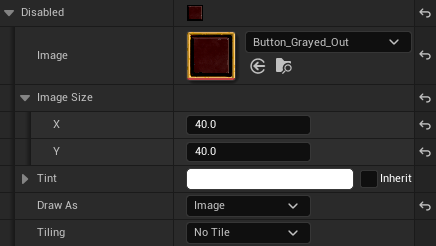
- Disabled
Image : Button_Grayed_Out, 가로세로 40,Tint->Draw As : Image
이제 + 텍스트를 넣어 해당 버튼을 클릭하면 Attribute가 증가된다는 것을 플레이어가 알도록 표시한다.
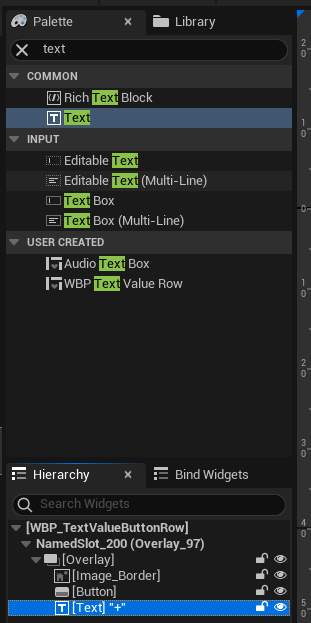
중앙정렬 후 텍스트를 + 로 변경하고
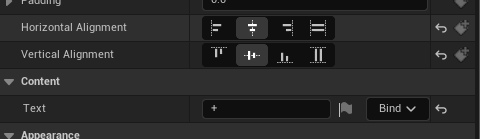
아웃라인의 크기를 1로 설정한 다음, Justification 을 중앙으로 설정한다.

최종적으로 아래와 같은 위젯이 완성된다.

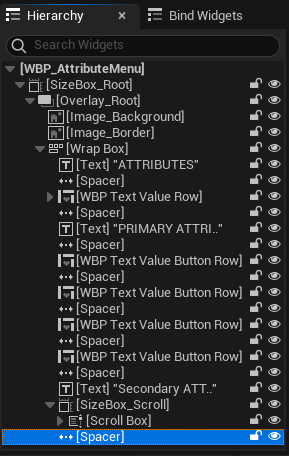
7.5.4 Attribute Menu 위젯 생성
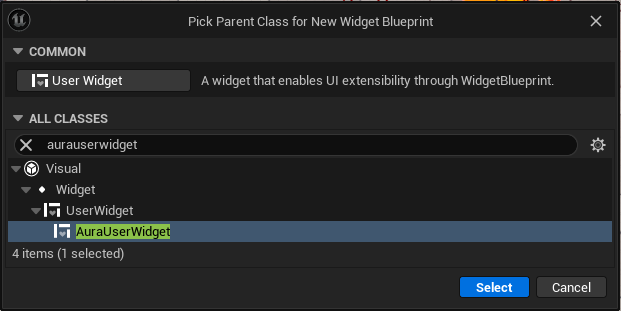
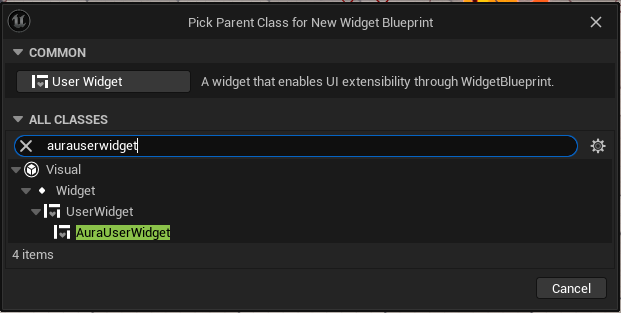
AuraUserWidget 기반 위젯 블루프린트 WBP_AttributeMenu 생성
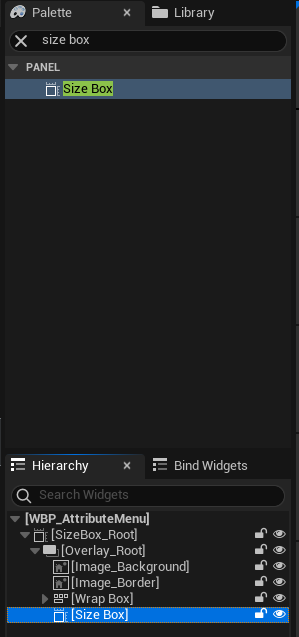
사이즈박스 생성
Fill Screen -> Desired 로 변경후 사이즈 하드코딩
오버레이 생성
배경 추가를 위한 이미지 추가
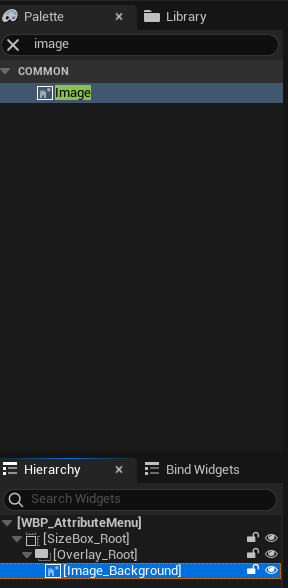
Image_Background 채우기 설정 변경

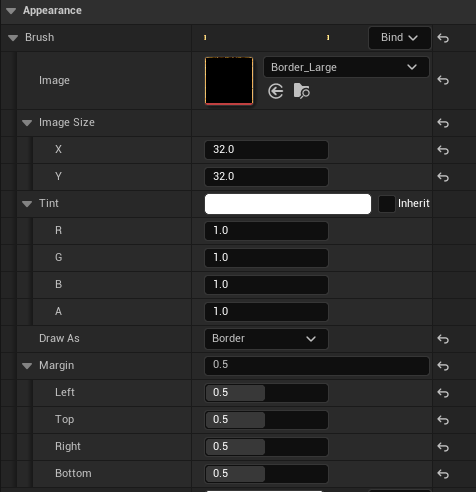
Image_Background 이미지 추가, Draw As : Border 및 여백 0.5씩 추가(두번째 그림이 여백넣는 이유, 사이즈 커지면 액자처럼 보이도록)

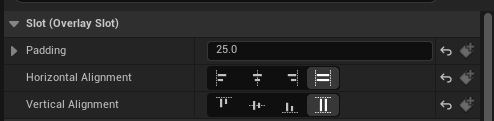
랩 박스 추가
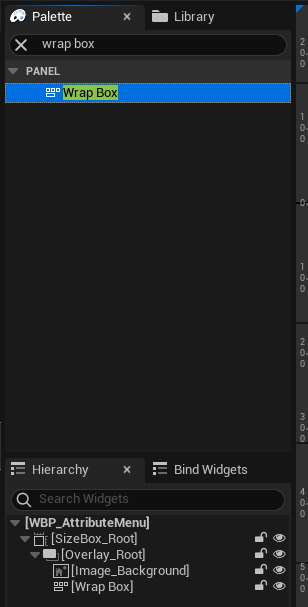
랩박스 Padding : 25 설정 변경

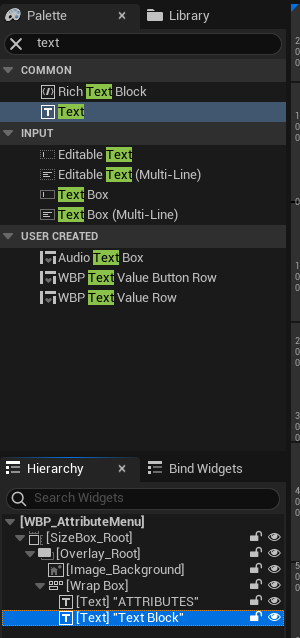
텍스트 추가
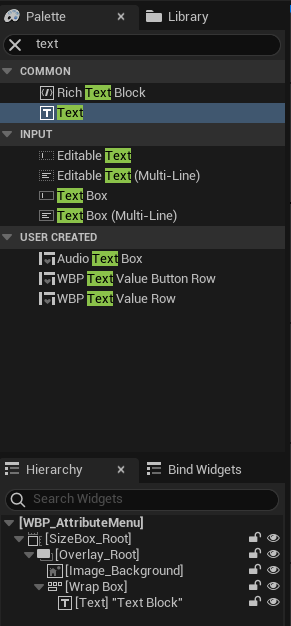
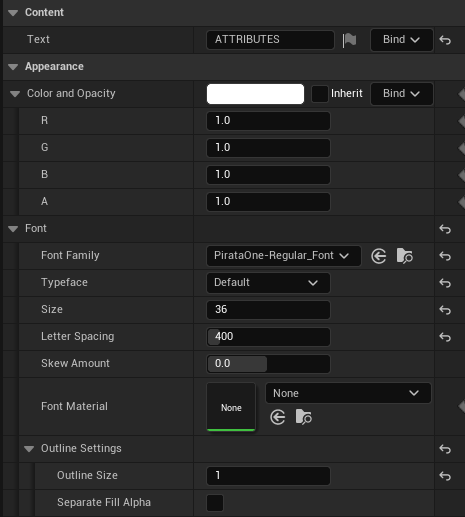
텍스트 설정 변경
Text : ATTRIBUTES
Font Family : PirataOne-Regular_Font
Size : 36
Letter Spacking : 400
Outline Size : 1
다시 랩박스로 돌아와서 전체 채우기
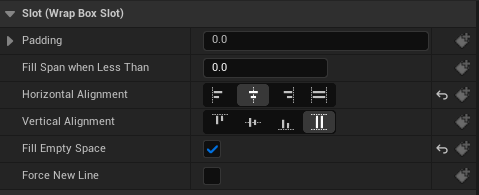
다시 텍스트로 돌아와서 Fill Empty Space 활성화, 수평에 한해서 중앙정렬
 !
!
텍스트 추가
다음 라인에 텍스트가 출력되도록 Fill Span When Less Than : 1000 으로 수정 및 수평에 한해서 중앙 정렬

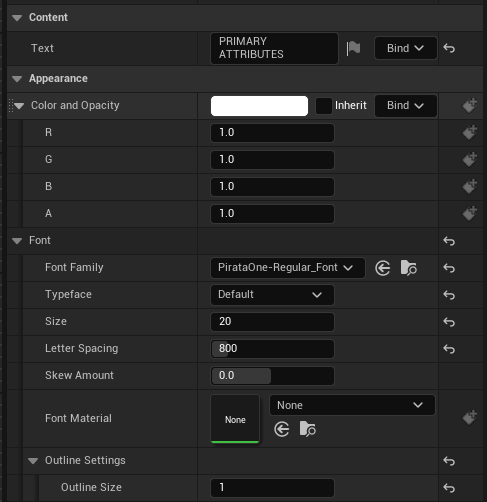
텍스트 설정 변경
TEXT : PRIMARY ATTRIBUTES
Font Family : PirataOne-Regular_Font
Size : 20
Letter Spacing : 800
Outline Size : 1

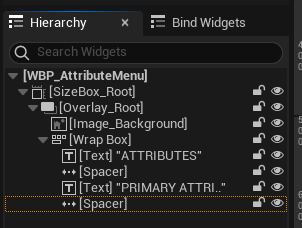
텍스트 사이에 공백 추가를 위해 Spacer 를 Attributes 텍스트와 Primary Attributes 텍스트 사이에 추가
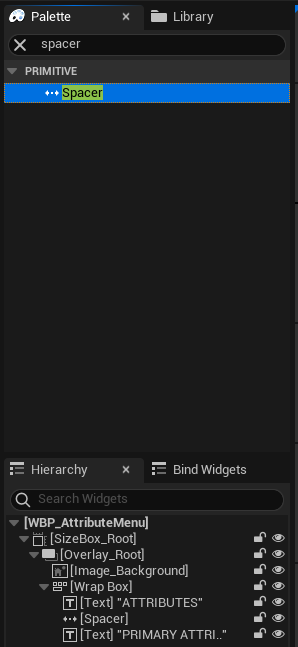
공백 사이즈 조정(x축을 늘리다보면 그림과 같이 개행 발생)

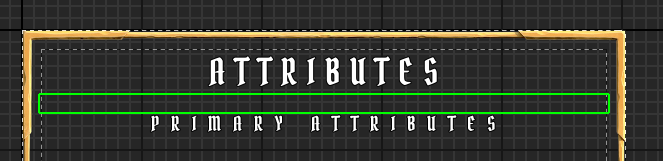
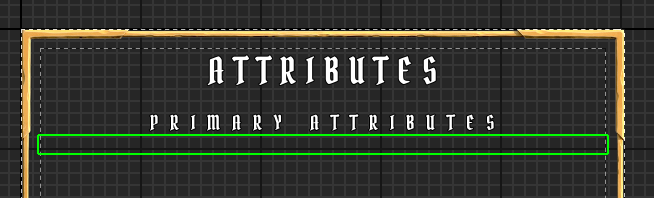
공백 복사해서 Primary Attributes 다음에 추가되도록 수정
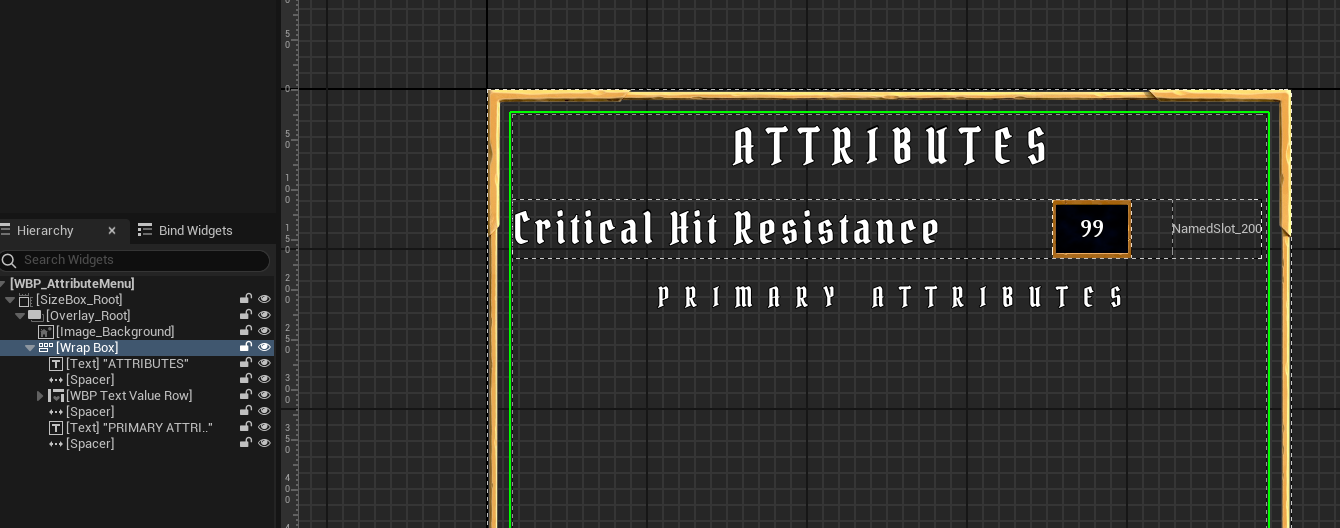
WBP_TextValueRow 추가
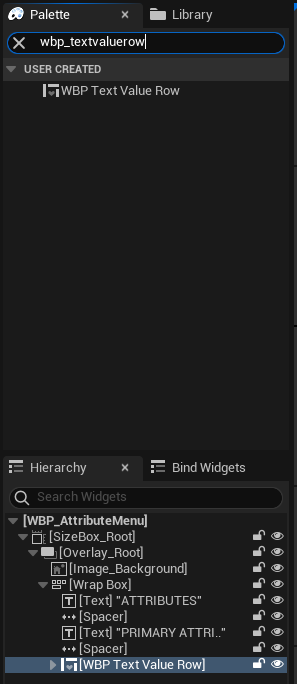
사이즈 조절을 위해 WBP_TextValueRow 파일을 열고 눈모양 표시를 켜 다른곳에서 접근 가능하도록 public화
추가
WBP_TextValueRow에서Row Properties카테고리 추가 및 정리
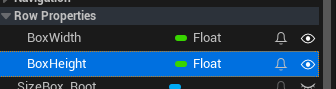
가로 길이 750으로 조정
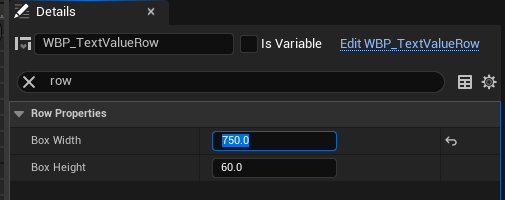
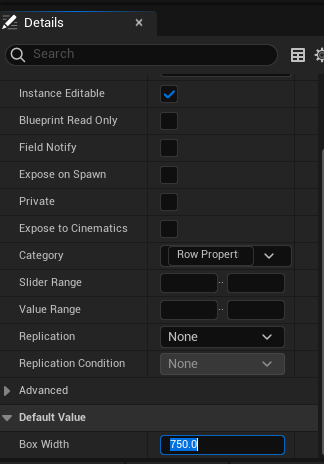
750이 적절한 사이즈인 것을 확인하였으므로 다시 WBP_TextValueRow 로 돌아와 초기값 750으로 변경
위치조정
WBP_TextValueButtonRow 추가
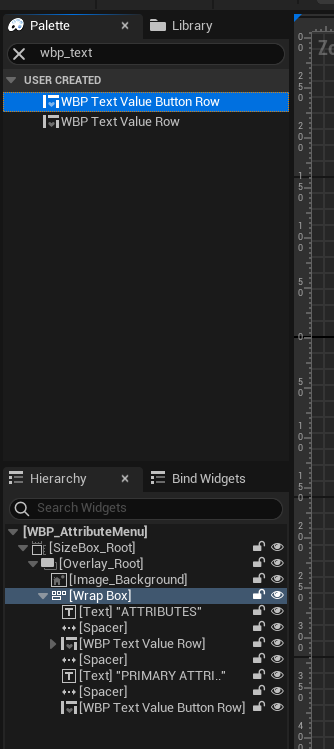
WBP_TextValueButtonRow 는 WBP_TextValueRow 로부터 상속받아 만들어졌으므로 수정된 가로길이 750을 적용받음
추가
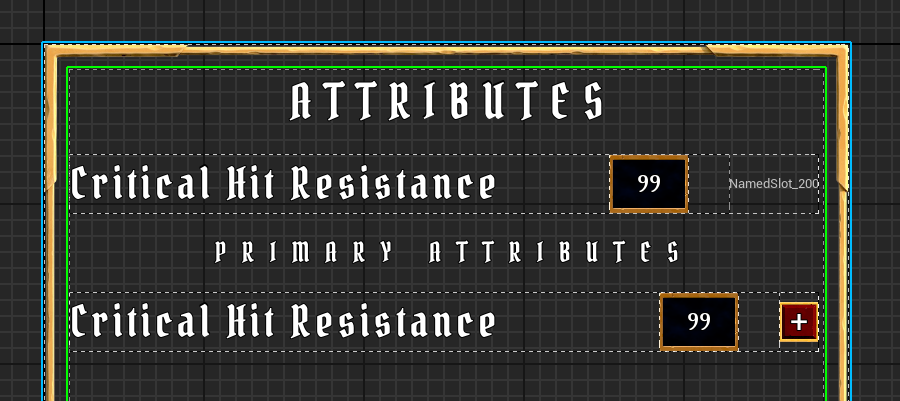
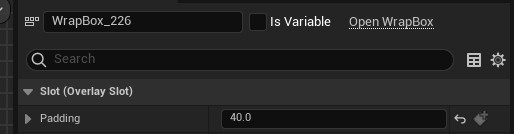
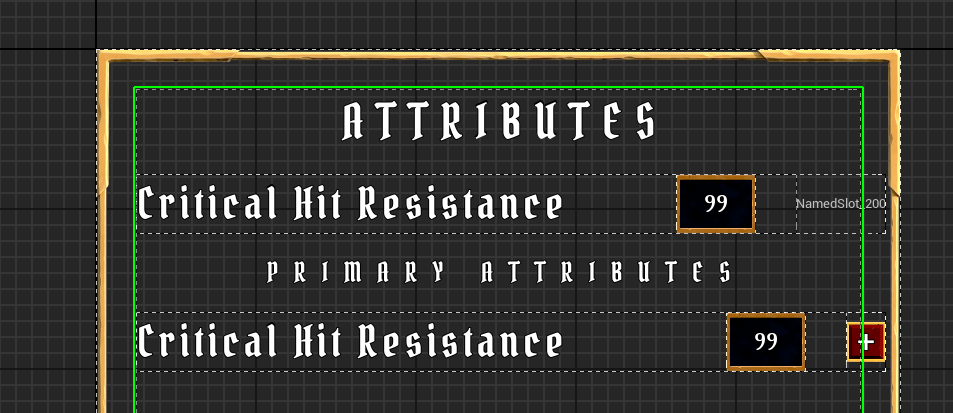
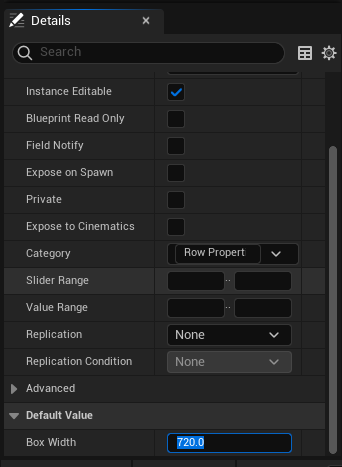
Wrap Box의 Padding값 40으로 변경
그에 맞춰WBP_TextValueRow의Box Width : 720변경
결과
Primary Attributes 는 4개이므로 더 추가
Spacer 복사해서 붙여넣고
Primary Attributes 복사해서 Secondary Attributes 텍스트 배치
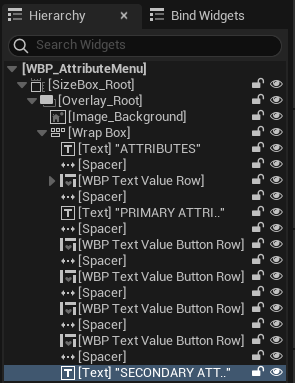


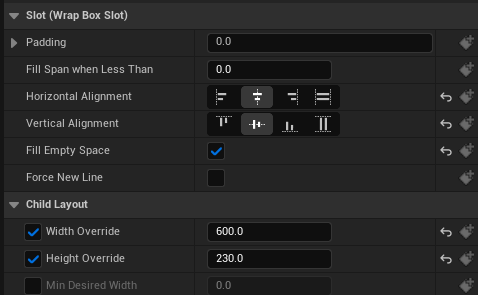
Secondary Attributes 를 배치하기 위한 Size Box 추가
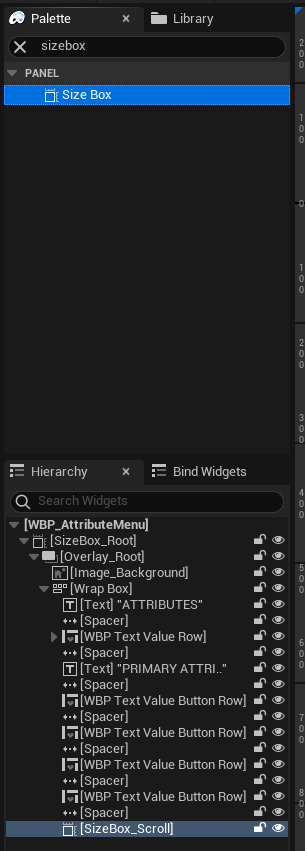
중앙정렬 후 Fill empty Space 활성화하고 적당한 길이로 초기화
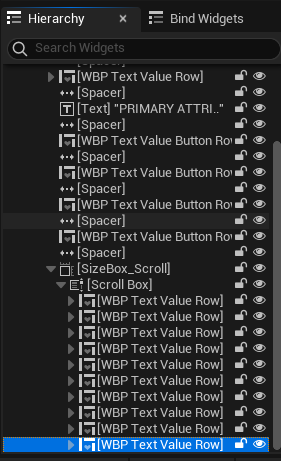
Scroll Box 추가
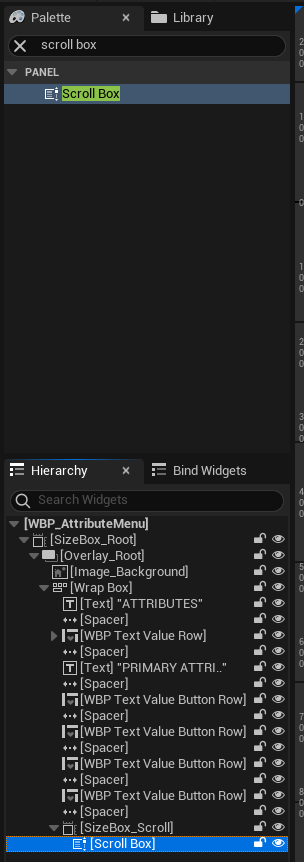
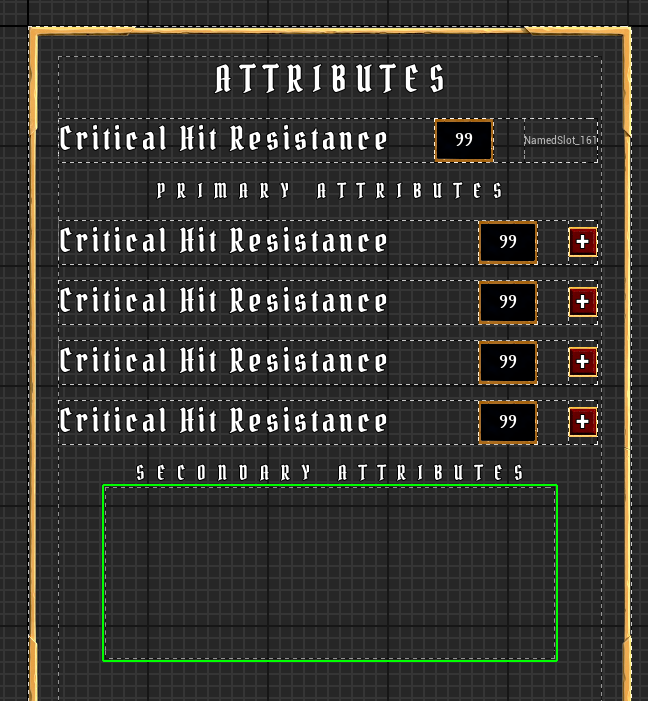
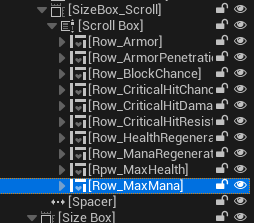
Secondary Attributes 개수인 10개의 WBP_TextValueRow 추가
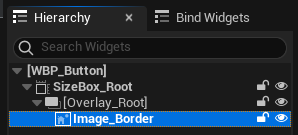
이미지 추가
( 기존의 Image_Background 는 Image_Border 로 rename )
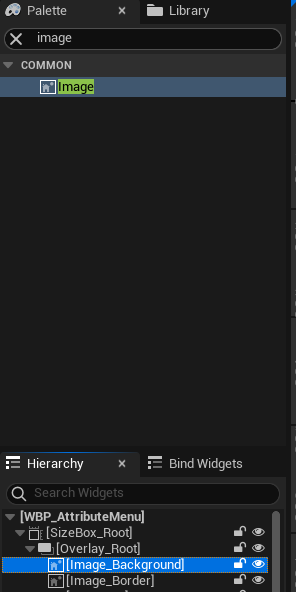
전체 채우기 진행
위젯을 살펴보면 빈공간까지 Image_Background 가 보이므로 Padding : 4 추가
이미지 추가
틴트 설정 변경으로 좀더 어둡게 변경
추가
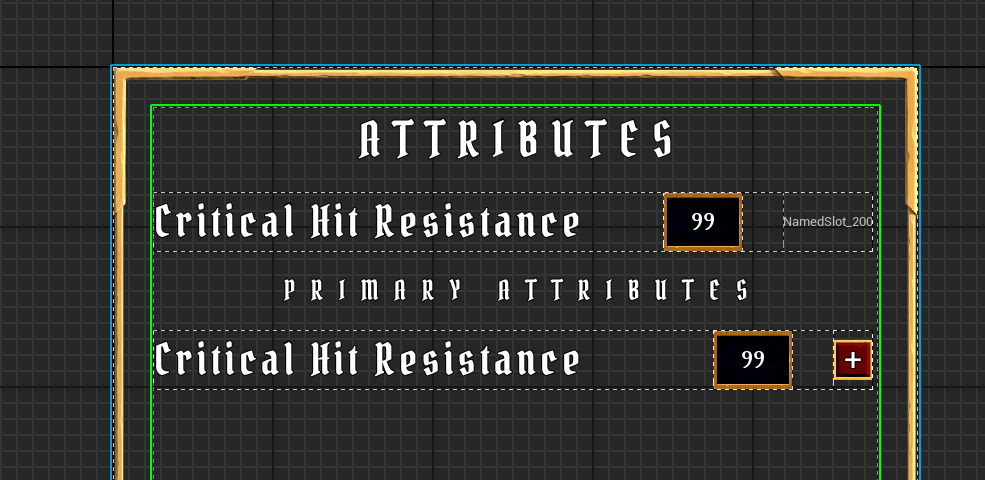
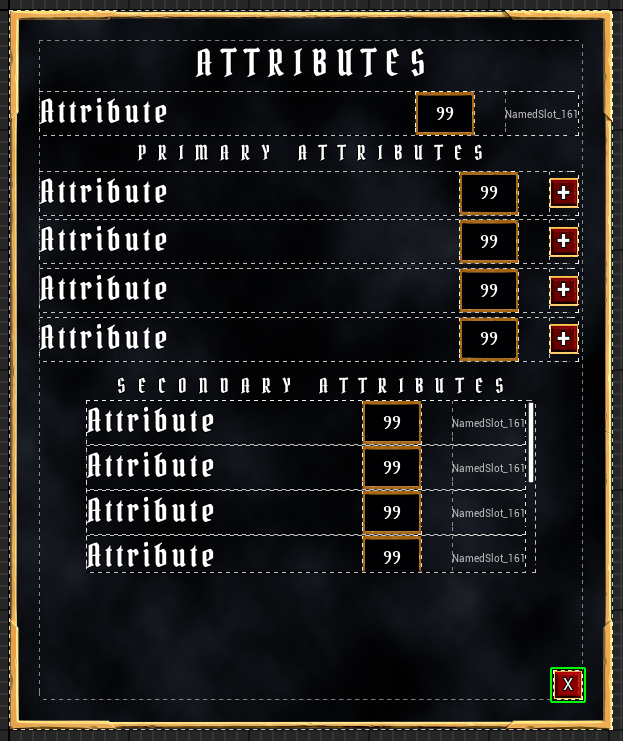
텍스트 길이때문에 수치 위젯이 압축되어 표시되어 임시로Attribute로 변경
WBP_TextValueRow에서 변경 가능
추가
여백 부족으로 공백크기 조정
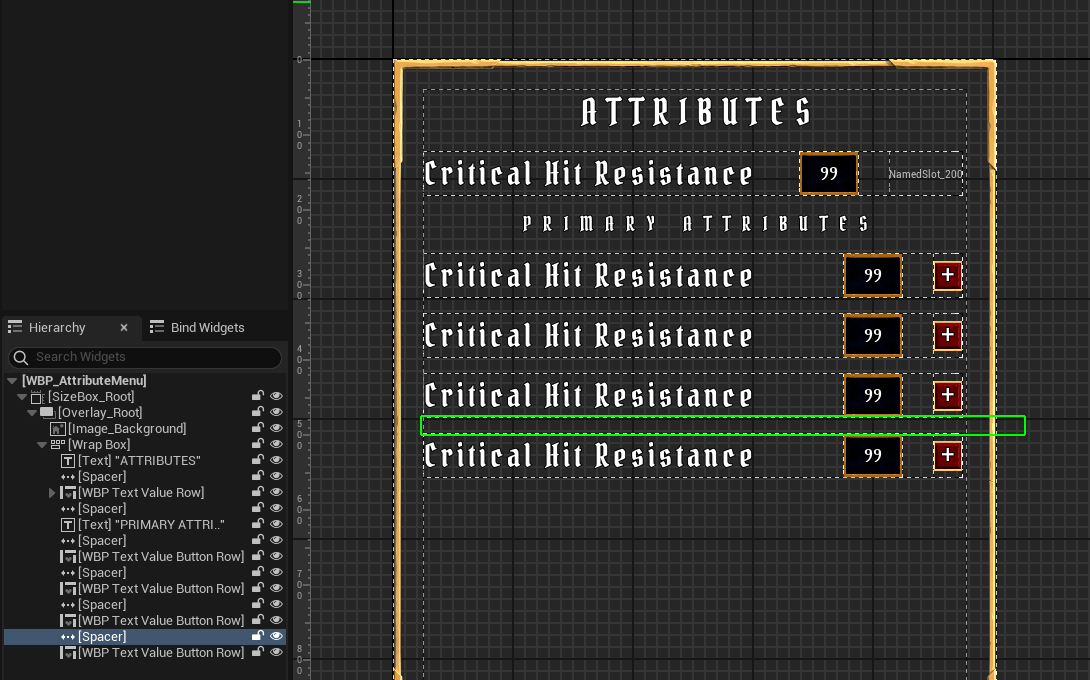
Attributes텍스트 아래와Secondary Attributes위를 제외한 나머지Spacer의 크기를 5로 정정
Secondary Attributes위의 공백은 15로 정정

Scroll Box 아래에 Spacer 복사 붙여넣기(y축 길이 15)

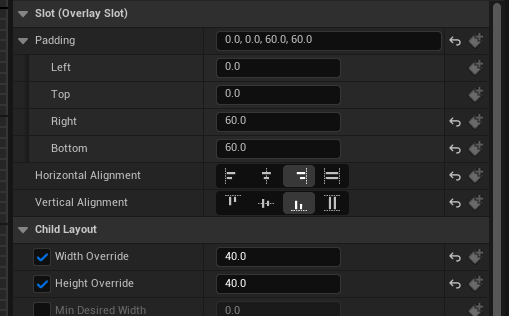
Attributes Menu 위젯을 닫기 위한 버튼 생성을 위한 Size Box 추가
우측 하단 정렬후 Width Overlay : 40 , Height Overay : 40 , 우측과 하단 Padding : 40
Attributes Menu 를 닫기 위한 버튼 위젯이 필요하다.
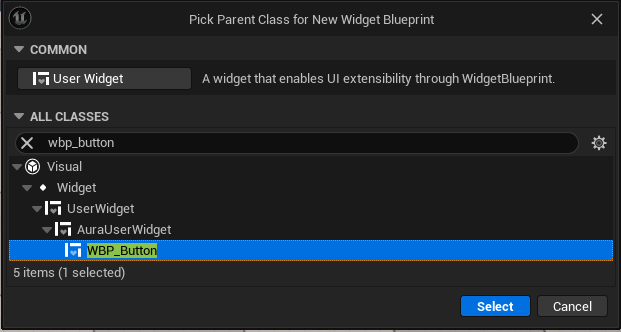
WBP_AuraUserWidget 기반 블루프린트 클래스 WBP_Button 을 생성한다.
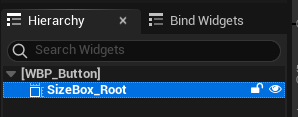
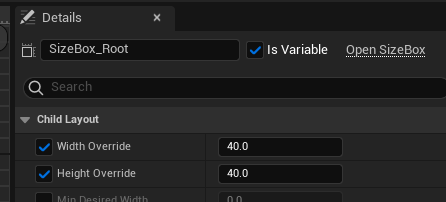
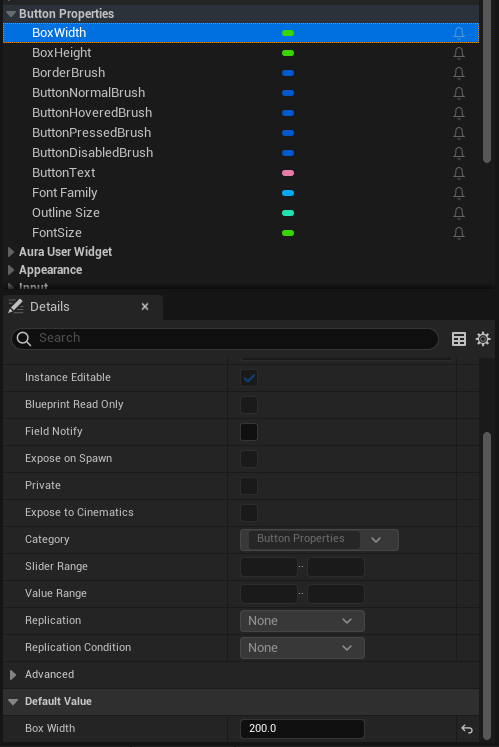
Size Box 를 추가하고, Fill Screen -> Desired , Width Overlay : 40 , Height Overlay : 40 으로 변경한 다음 IsVariable 를 활성화한다.
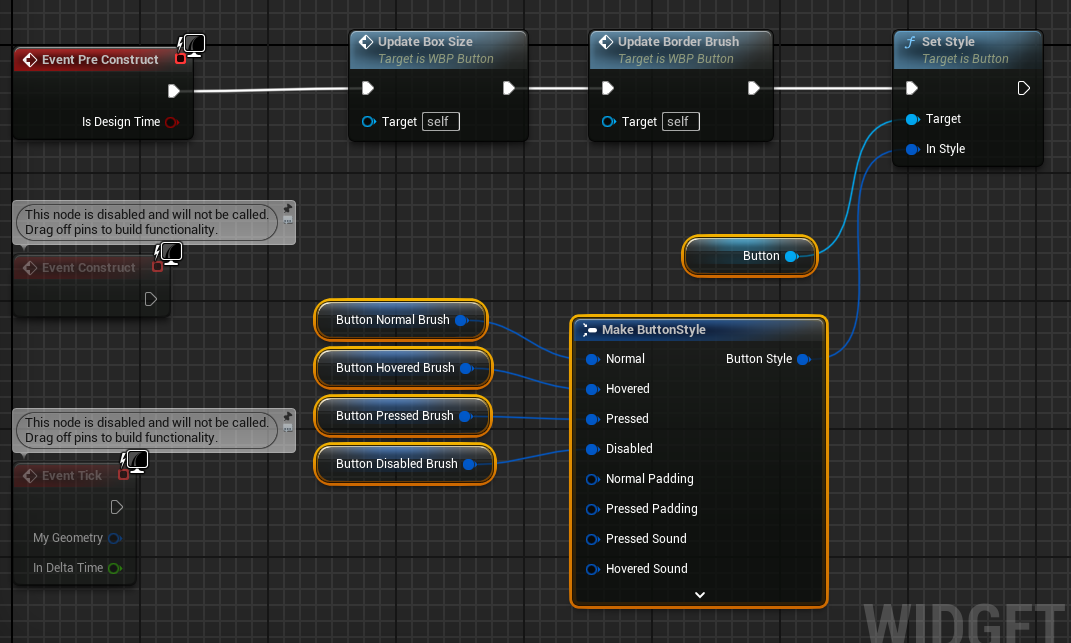
Graph 탭에서 변수를 통한 값의 초기화를 진행하기 위한 노드를 구성한다.
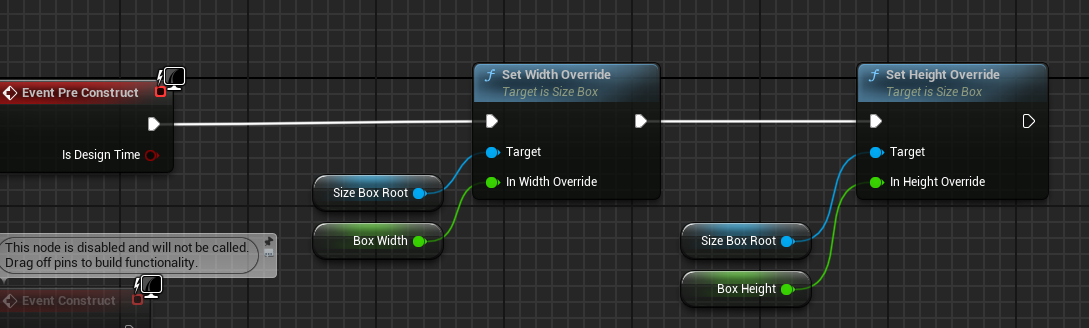

노드를 묶어 함수로 리팩토링한다.

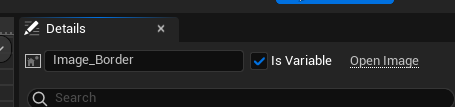
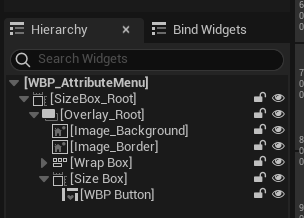
Overlay 와 Image 를 하나 생성하고 IsVariable 를 활성화와 중앙정렬을 진행하고 이미지를 추가한다.

Graph 탭에서 Slate Brush 를 통한 초기화가 가능하도록 노드를 구성한다.
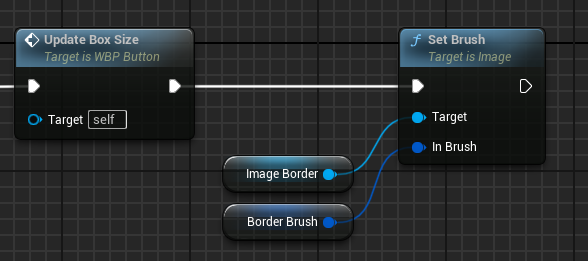

노드를 묶어 함수로 리팩토링한다.

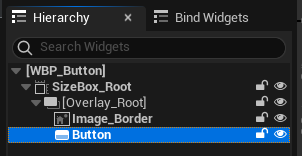
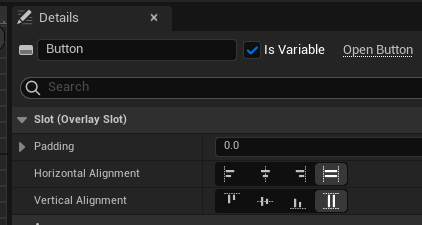
Button 을 추가하고 IsVariable 활성화, 전채 채우기로 설정한다.
Graph 탭에서 초기화를 위해 노드를 구성한다.
Make ButtonStyle 노드를 통해 다양한 상태에서의 버튼 이미지를 추가할 수 있다.
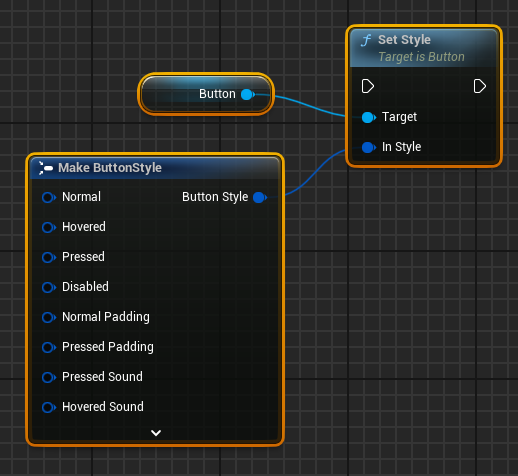
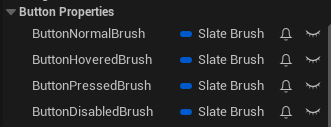
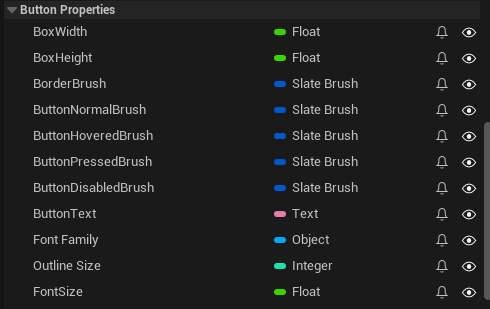
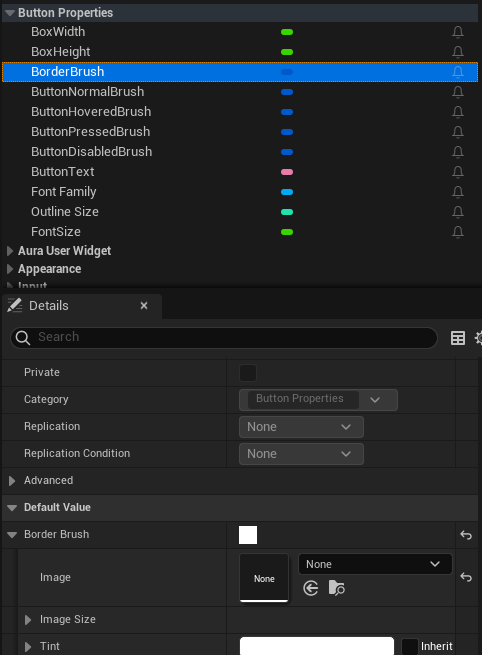
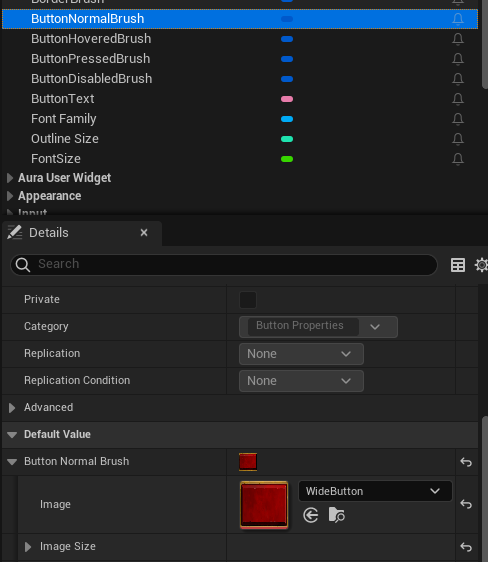
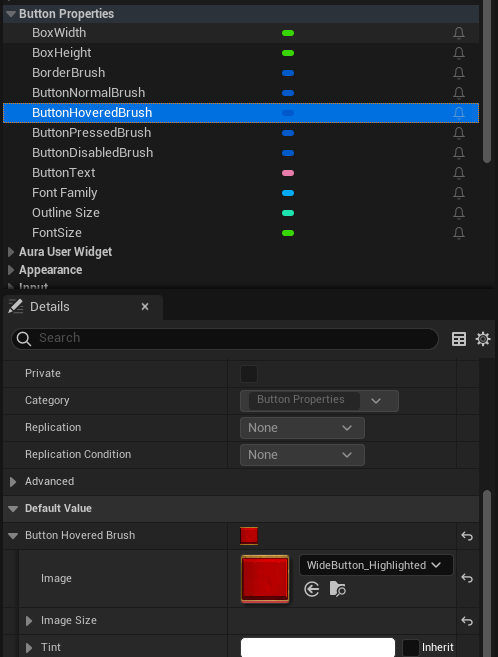
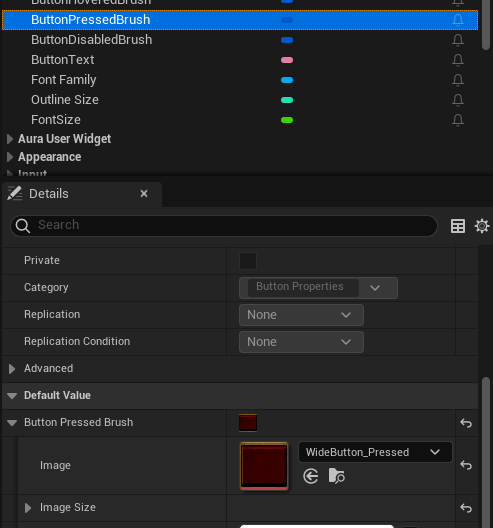
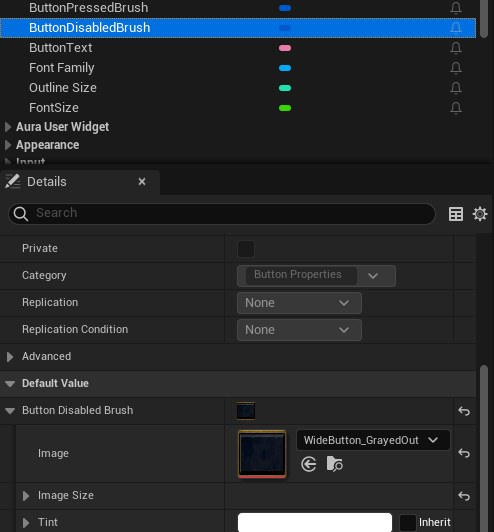
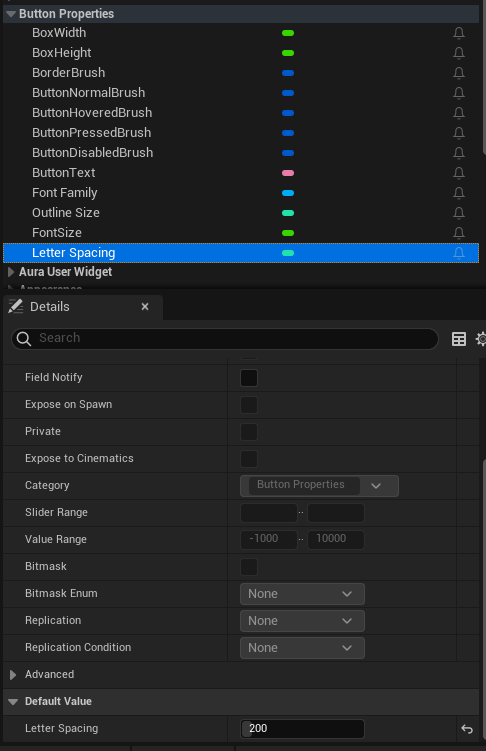
각각의 핀에서 드래그하여 변수로 승격시킨 다음 변수명을 변경하고, Button Properties 카테고리를 생성하여 정리한다.
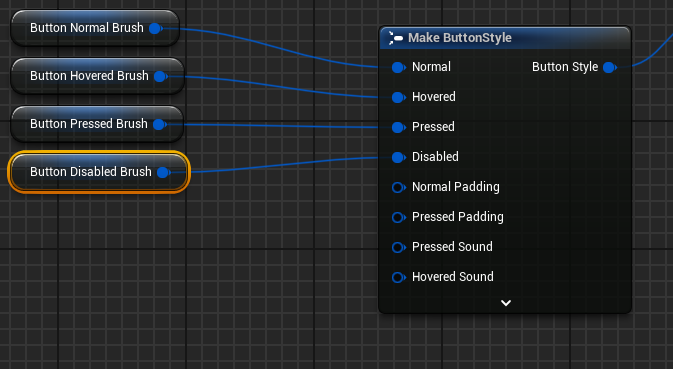
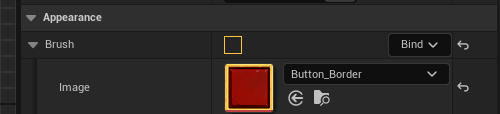
제각기 맞는 이미지를 추가하고
- ButtonNormalBrush
- ButtonHoveredBrush

- ButtonPressedBrush
- ButtonDisabledBrush
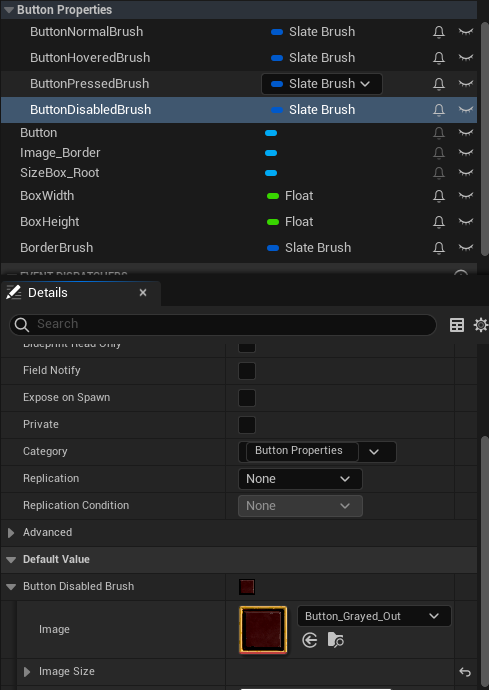
노드를 연결하고 함수로 리팩토링한다.

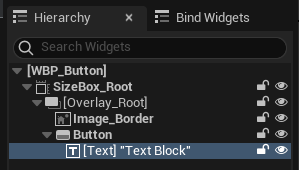
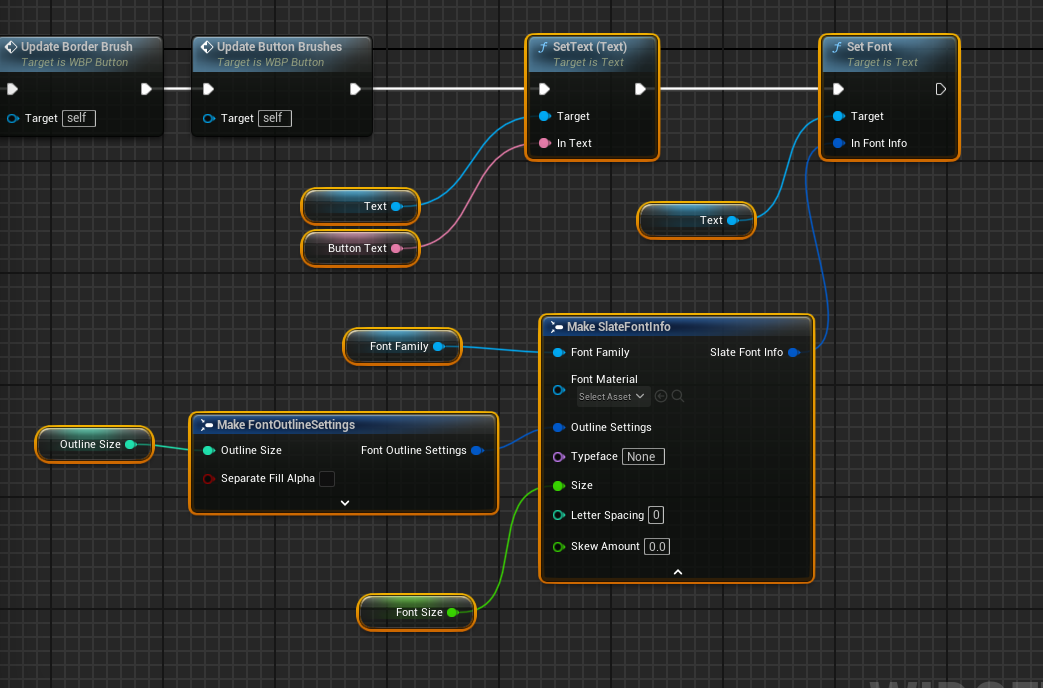
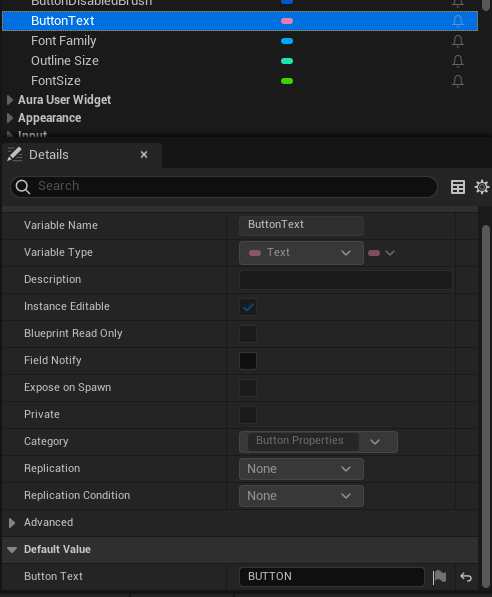
Text를 추가하고,IsVariable활성화, 중앙정렬 진행 및Text : X하드코딩

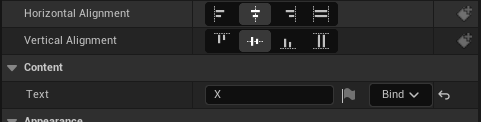
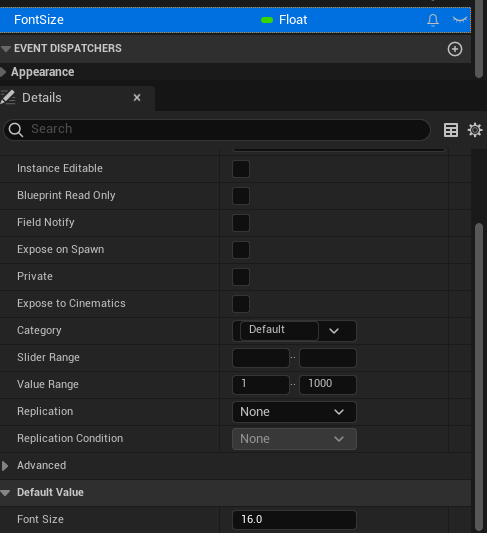
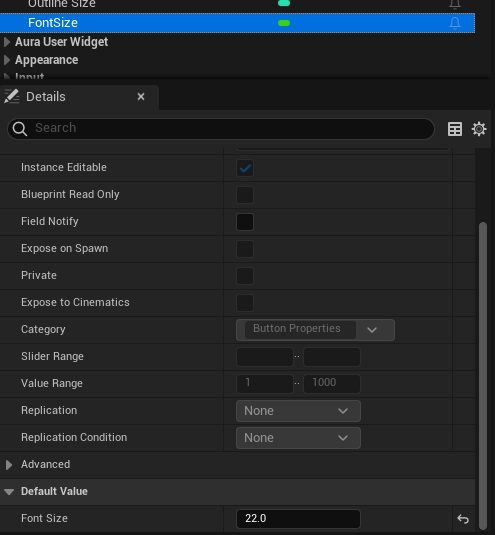
Font Size : 16,Outline Settings : 1,Justification : 중앙
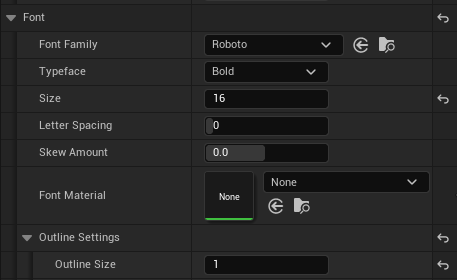

Graph탭에서 초기화를 위한 노드 구성
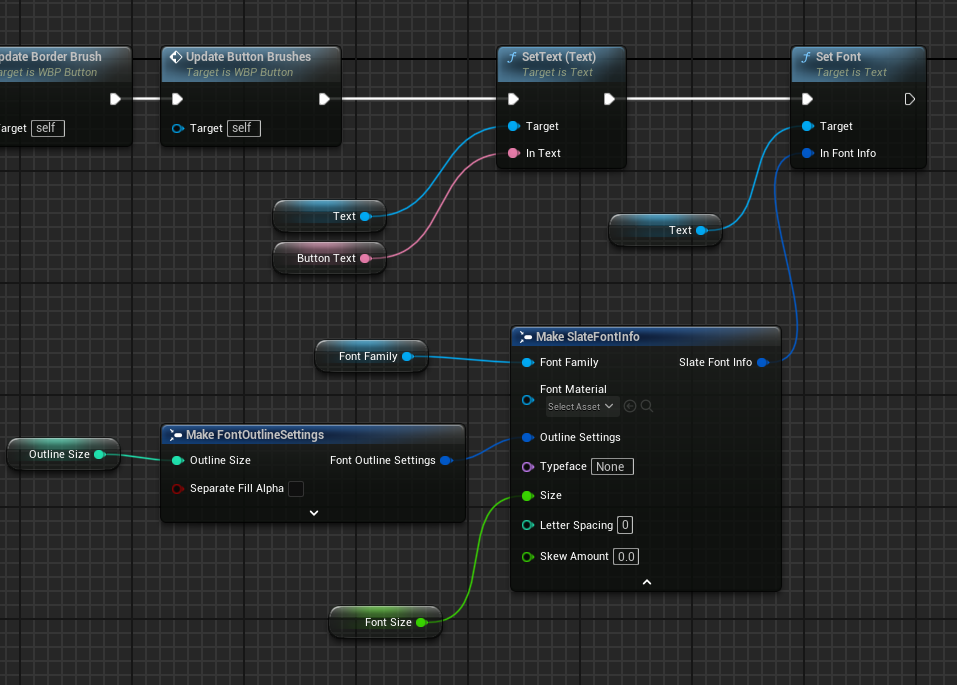
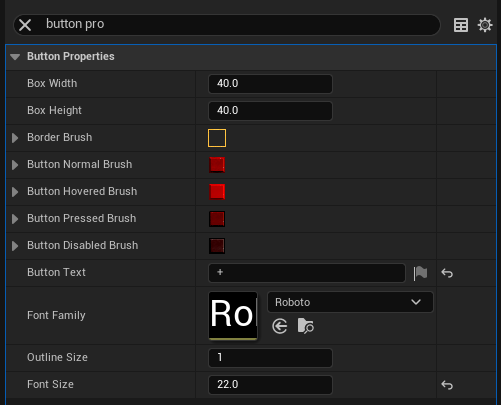
필요에 따라Button Category에 정리

ButtonText : X

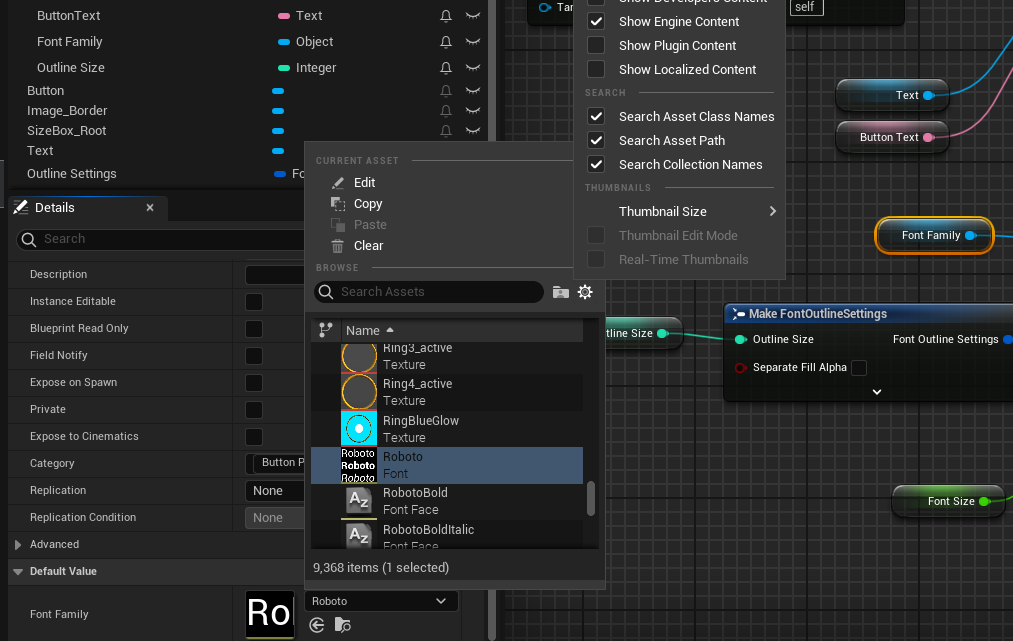
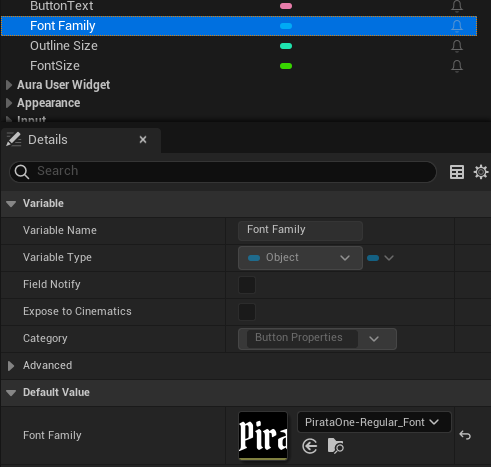
Font Family의 경우Show Engine Content체크 후 기본폰트인Roboto사용
Outline Size : 1
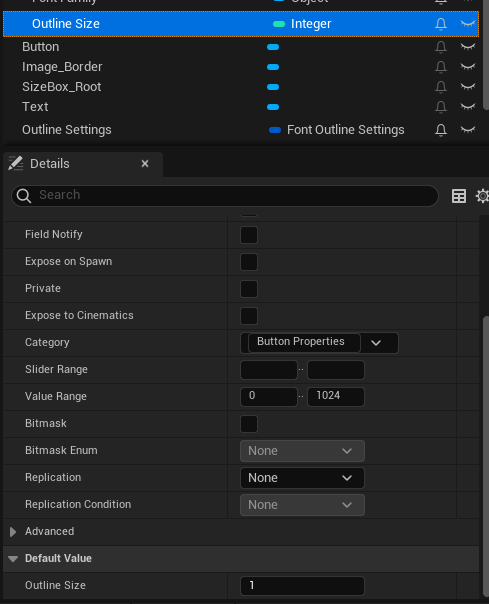
Font Size : 16
노드를 묶어 함수로 리팩토링을 진행

이제WBP_Button을WBP_AttributeMenu에 적용시켜야 한다.
WBP_Button을 추가해준다.
추가
버튼 위젯을 새로 생성하였으므로 기존의WBP_TextValueButtonRow의 버튼을 대체할 수 있다.
Overlay를 제외한 하위항목 전부 삭제 후WBP_Button추가 및 중앙정렬

값의 수정을 위해WBP_Button에서 변수들을 다른 곳에서 수정가능하도록 public화
WBP_TextValueButtonRow로 돌아와서Button Properties에서 텍스트+로 변경
Font Size : 22
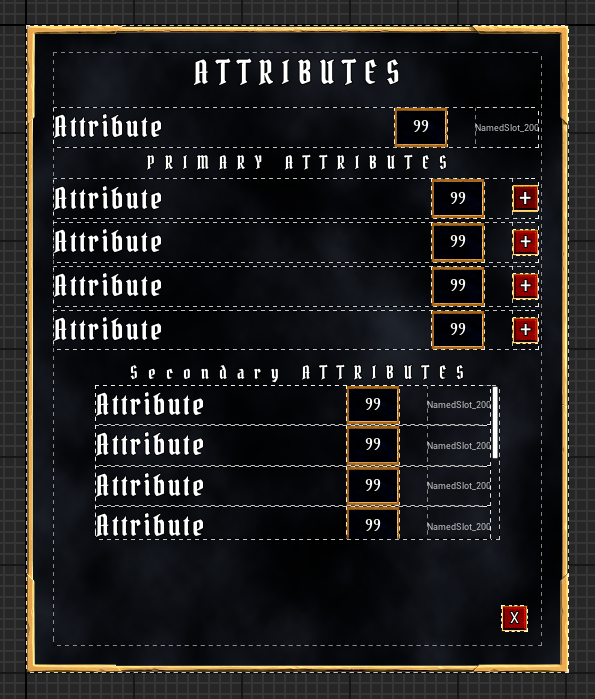
WBP_AttributeMenu로 돌아가서 확인해보면 변경점이 적용된 것을 확인할 수 있다
7.5.5 Attributes 위젯 실행버튼 생성
Attribute Menu 위젯을 열기 위한 버튼 위젯을 만들어야 한다.
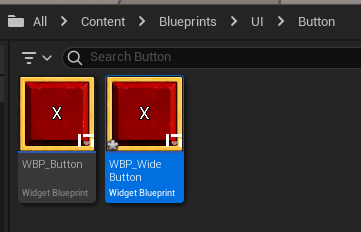
먼저 WBP_Button 기반 블루프린트 WBP_WideButton 을 생성한다.
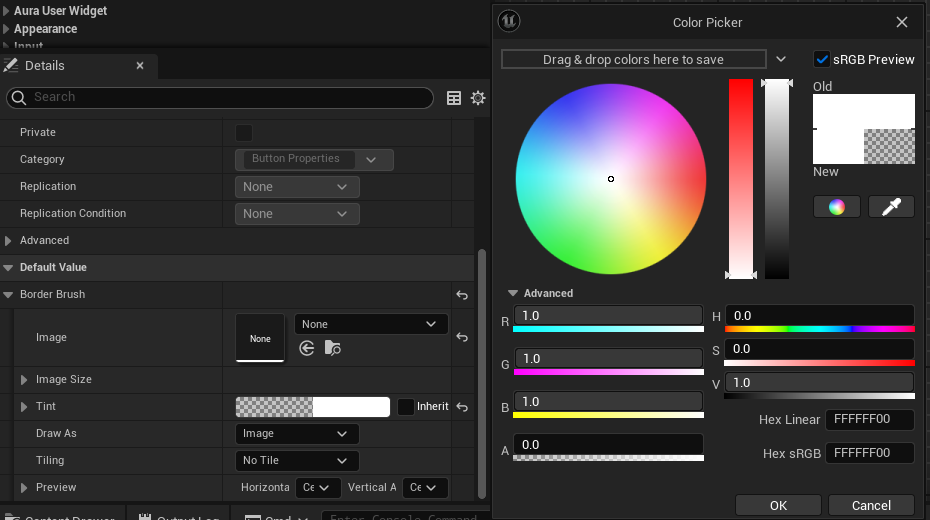
Graph 탭에서 BorderBrush 에 추가된 이미지를 clear시키고(추가할 이미지에 외곽선 따로 있음) Tint 의 알파값도 0으로 변경한다
- ButtonNormalBrush
WideButton으로 변경
- ButtonHoveredBrush
WideButton_Highlighted로 변경
- ButtonPressedBrush
WideButton_Pressed로 변경
- ButtonDisabledBrush
WideButton_GrayedOut으로 변경
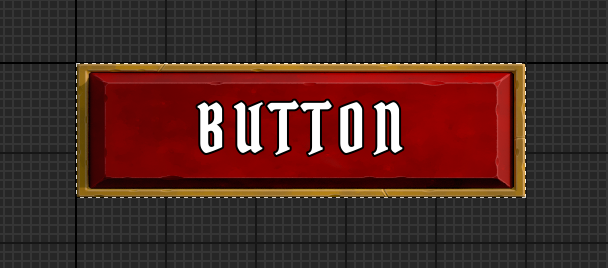
BoxWidth : 200 , BoxHeight : 60 으로 변경한다.
Button Text : BUTTON 으로 변경하고
Font Family : PirataOne-Regular_Font 로 변경
Font Size : 22 로 변경
추가
WBP_Button에서UpdateText함수의Letter Spacing을 변수로 승격시키기
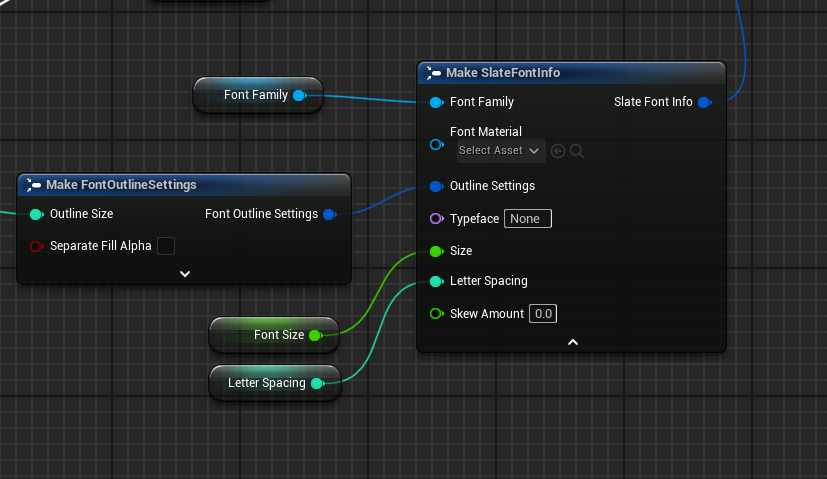
Letter Spacing : 200 으로 변경
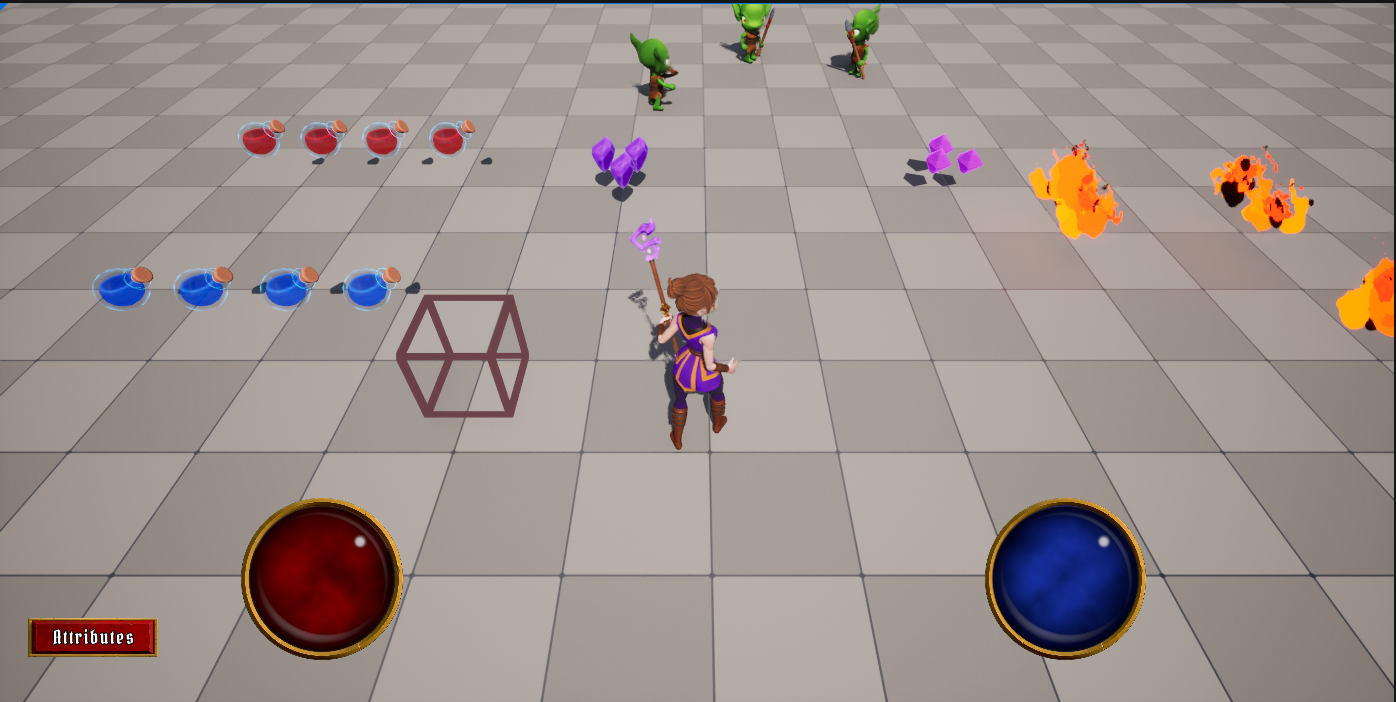
WBP_Overlay 를 열고 생성한 WBP_WideButton 을 추가한다.
(왜인지 모르겠지만 Hierarchy 탭에 추가하면 사이즈가 작아지므로 바로 Designer 탭에 바로 추가)

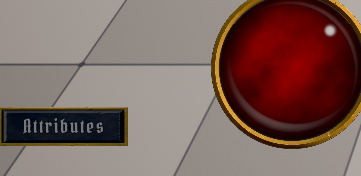
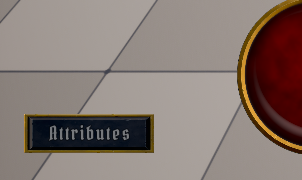
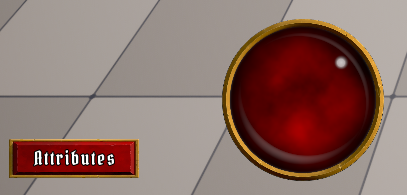
텍스트를 Attributes 로 변경하고

실행하면 아래와 같이 정상적으로 실행된다.
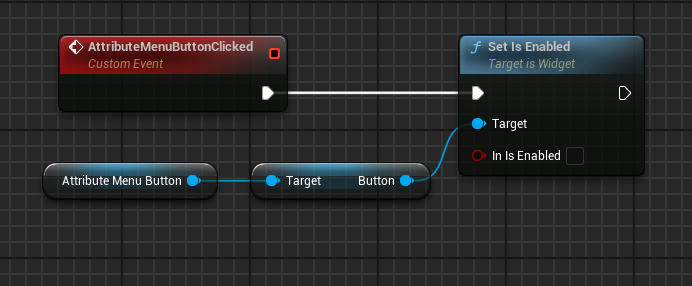
Disable 상태를 확인하기 위해서 AttributeMenuButton 의 IsVariable 을 활성화한 다음
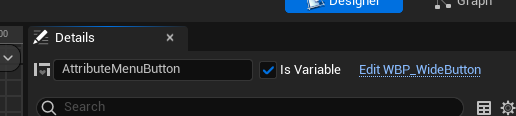
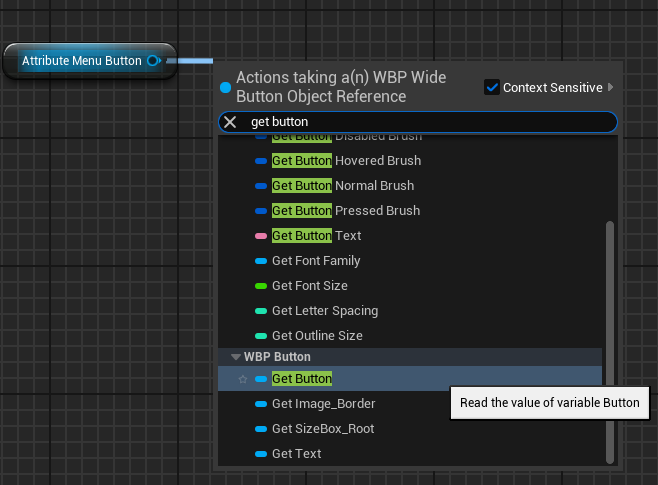
AttributeMenuButton 에서 Get Button 노드를 통해 Set is Enabled 노드와 연결시켜준다.
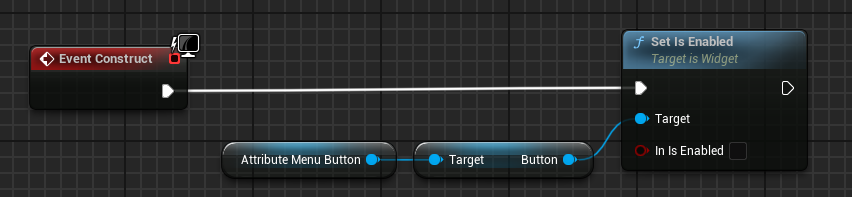
컴파일 후 실행하면 Disabled 상태도 정상적으로 동작하는 것을 확인할 수 있다.
7.5.6 Attributes Menu 위젯 열고 닫기
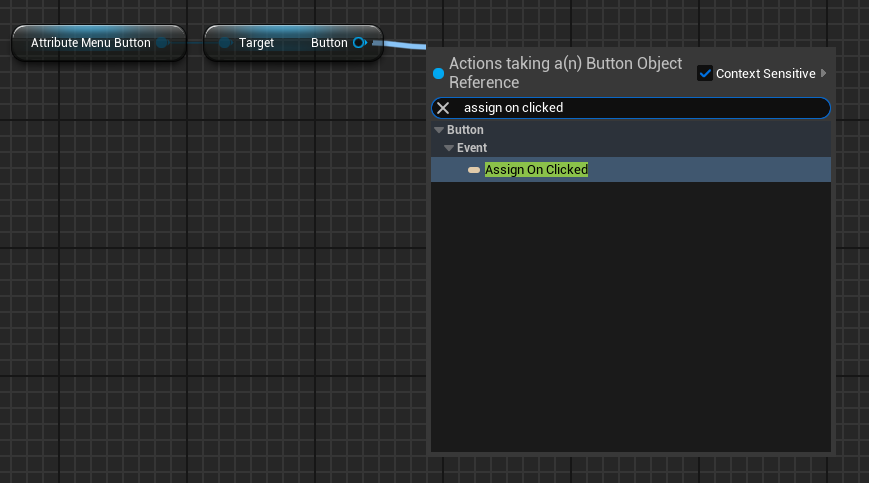
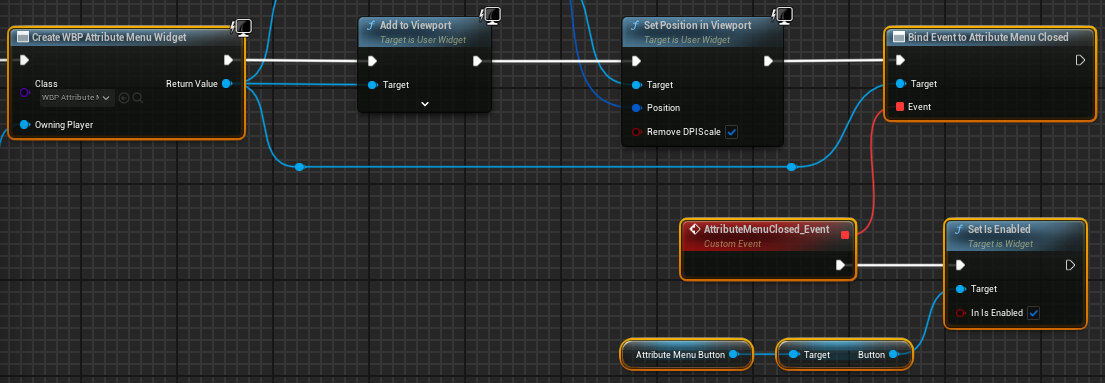
Attribute Menu 위젯을 열기 위해 WBP_Overlay 의 Graph 탭에서 AttributeMnuButton 을 통해 Get Button 노드 생성한다.

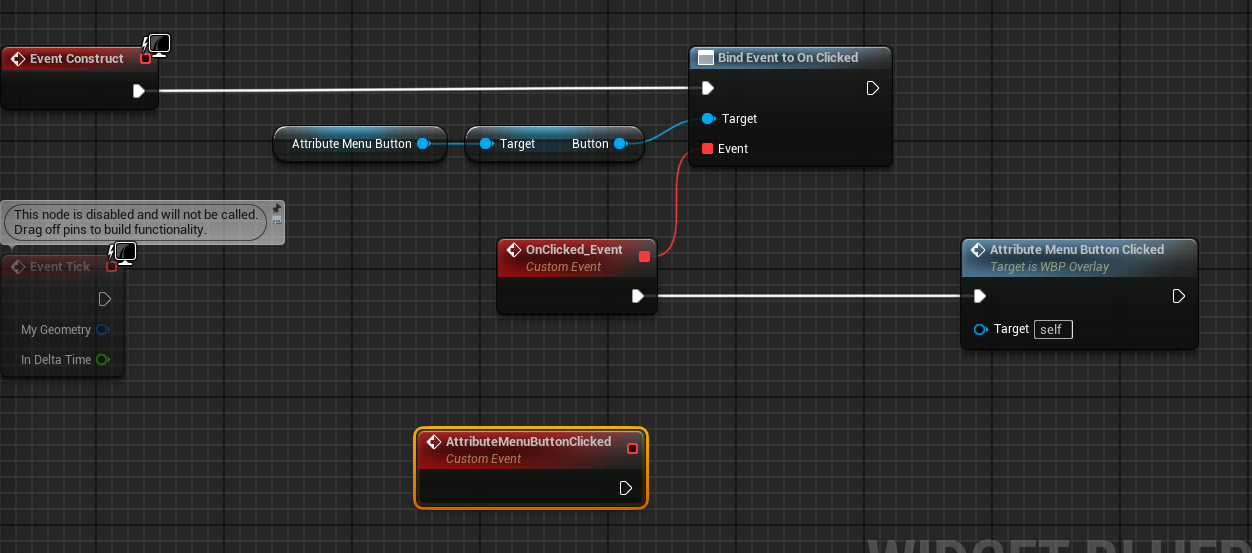
Assign On Click 노드를 통해 클릭시 이벤트 발생하도록 노드 구성한다.

Custom Event 인 AttributeMenuButtonClicked 추가하고 클릭 이벤트 발생시 해당 이벤트가 발생하도록 노드를 수정한다.
Attribute Menu 가 열린 상태에서는 Attribute 버튼이 비활성화 되어야 하므로 노드를 아래와 같이 구성한다.
컴파일 후 실행하면 실제로 Attribute 버튼이 비활성화되는 것을 확인할 수 있다.
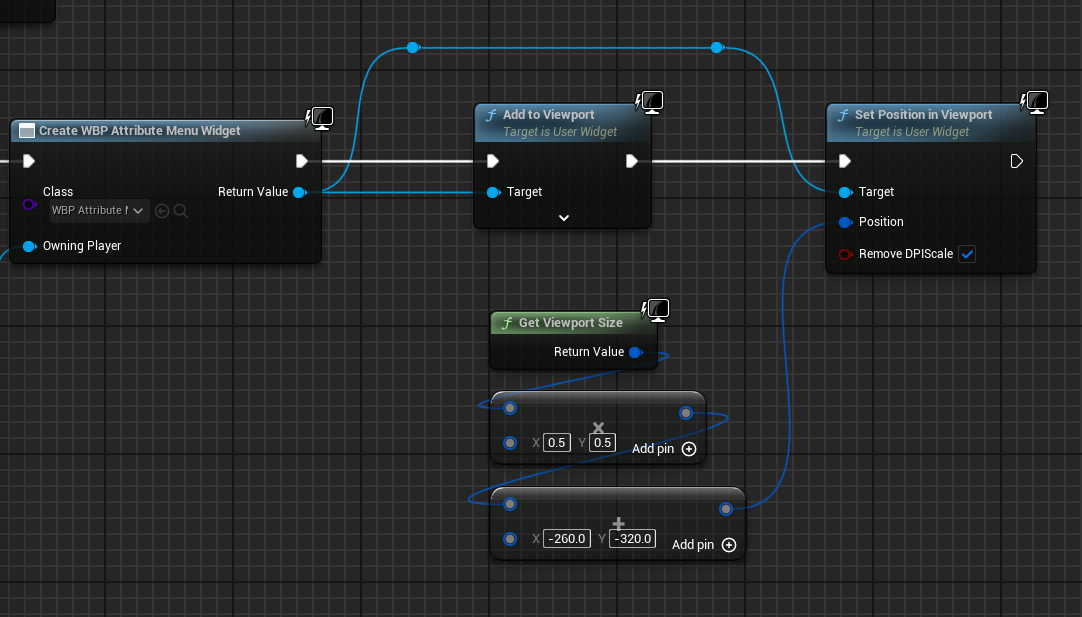
비활성화시킨 다음 Create Widget 노드를 통해 WBP_AttributeMenu 위젯을 생성하도록 하고, Get Player Controller 노드를 생성하여 Owning Player 핀과 연결시킨다.
마지막으로 Return Value 핀에서 Add to Viewport 노드를 생성하여 연결시킨다.
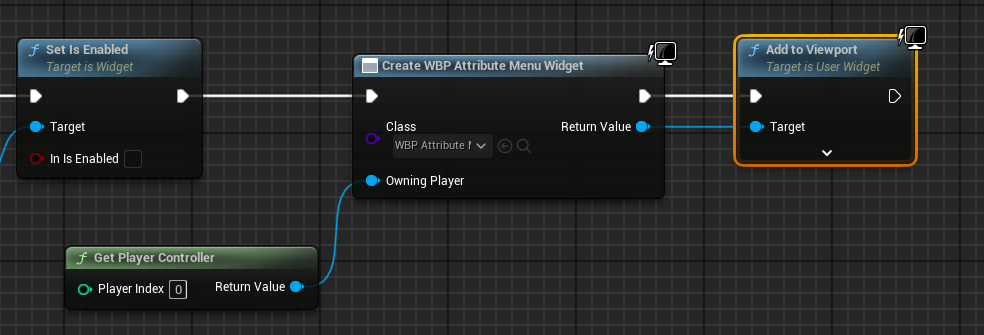
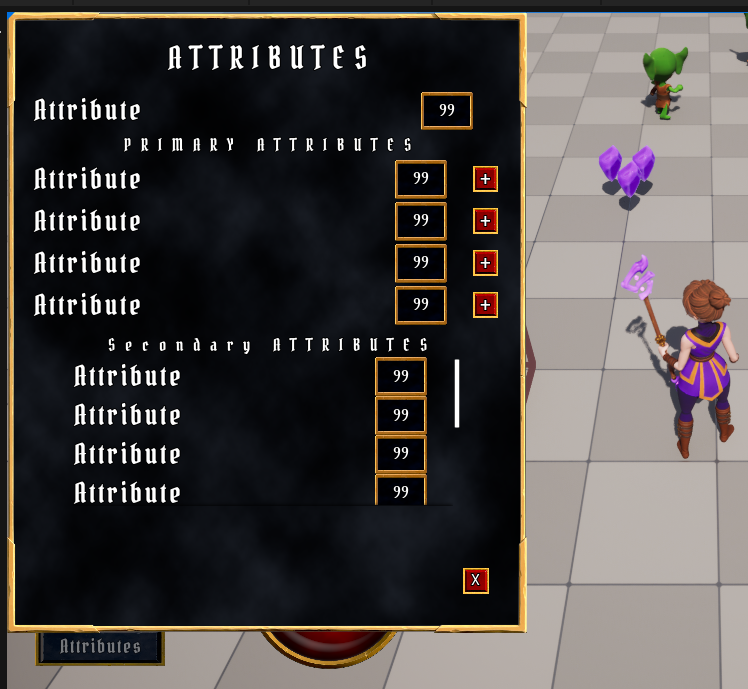
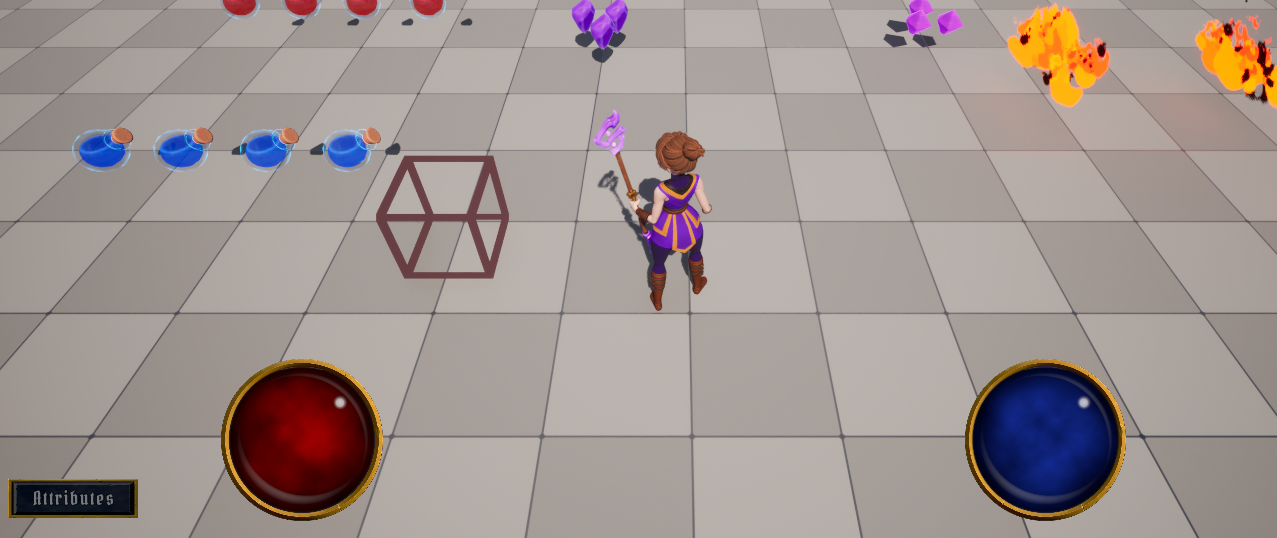
실행시 버튼을 누르면 Attribute Menu 위젯이 나타나는 것을 확인할 수 있다.
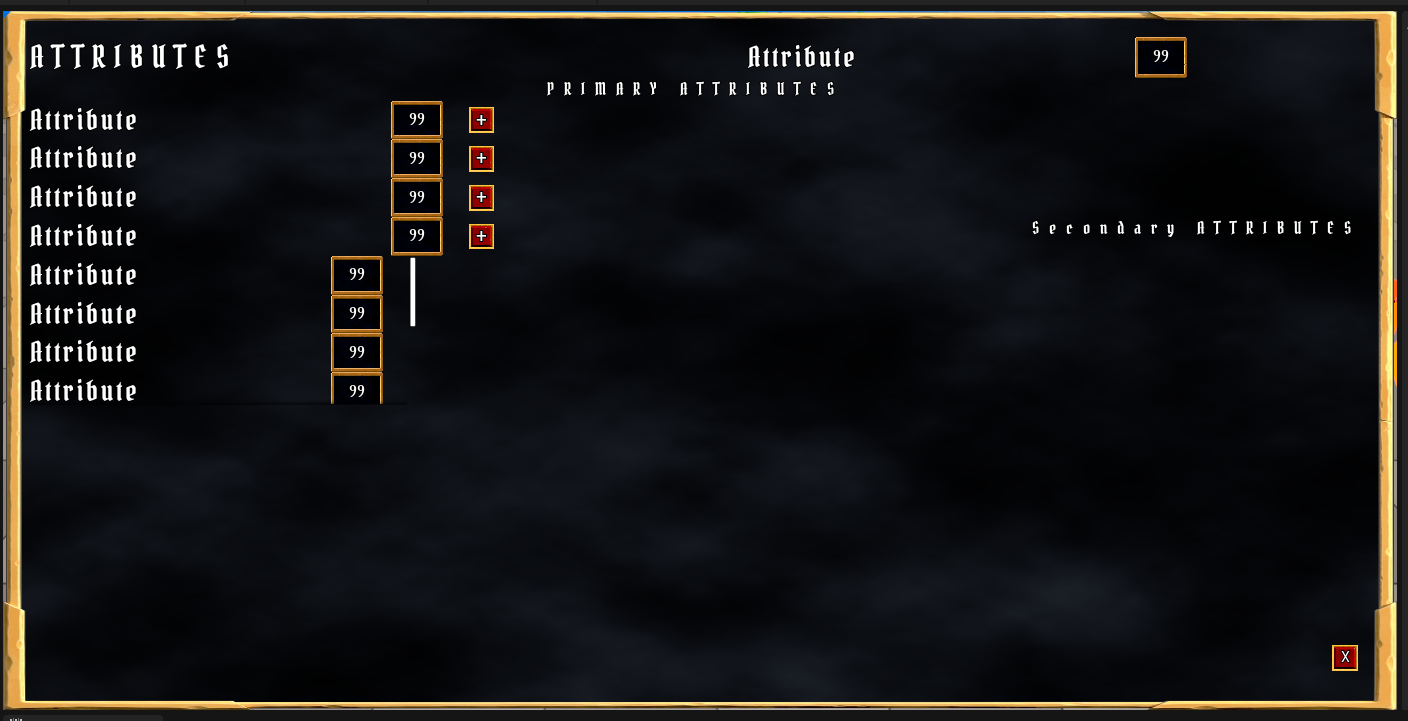
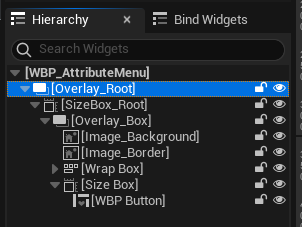
화면 전체를 채우는 문제를 해결하기 위해 WBP_AttributeMenu 로 돌아와서 기존의 Overlay_Root 를 Overlay_Box 로 변경하고
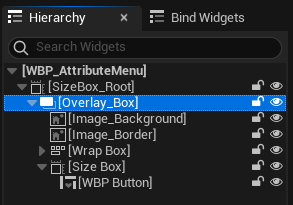
새로운 Overlay 를 추가하여 전체를 해당 Overlay 에 속하도록 수정한다.
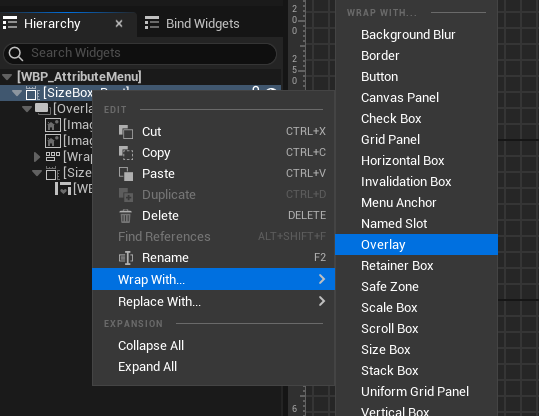
이름을 Overlay_Root로 변경
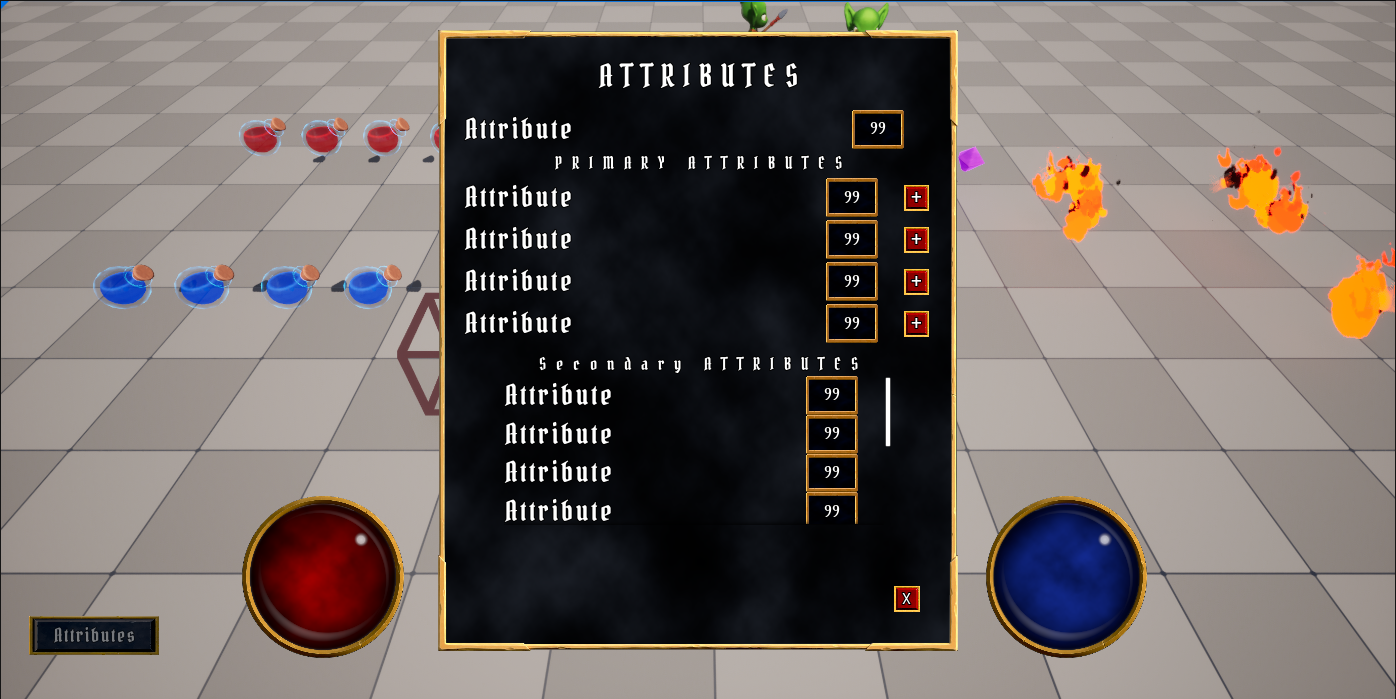
실행시 더이상 꽉채워서 화면에 나타나지 않는다.
위치를 조정해주기 위해 다시 WBP_Overlay 로 돌아와서 Return Value 로부터 Set Position in Viewport 노드를 생성하고 위치를 적당히 조절해준다.
이제 Attribute Menu 위젯을 닫기 위해 WBP_AttributeMenu 를 열고 버튼명을 변경한 다음 IsVariable 을 활성화시킨다.
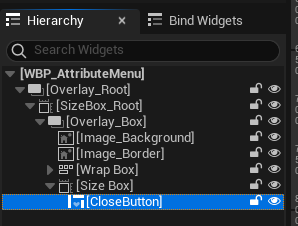
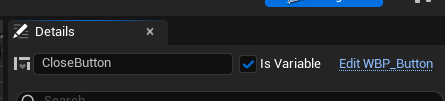
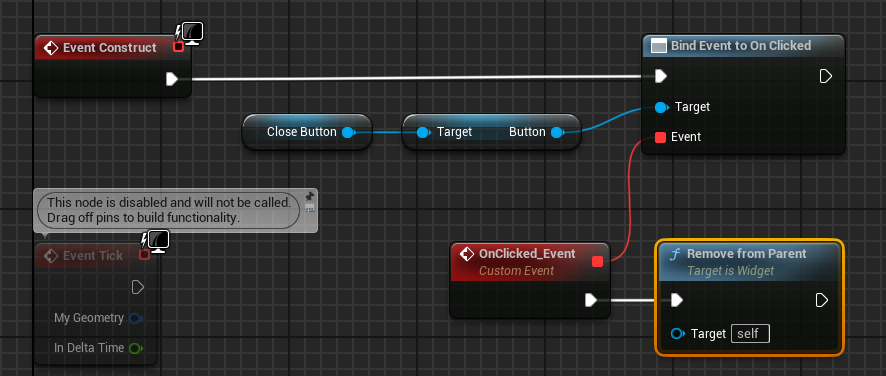
동일하게 Clost Button -> Get Button -> Assign on Clicked 를 통해 클릭 발생시 이벤트가 발생하도록 노드를 구성하고, 클릭시 Remove from Parent 노드를 통해 위젯을 없애도록 한다.
실행시 x를 클릭하면 Attribute Menu 위젯이 닫히는 것을 확인할 수 있다.
문제점은 한번 닫으면 다시 Attributes 버튼이 비활성화되어서 열 수 없어진다.
이를 해결하는 방법은 WBP_AttributeMenu 에서 X버튼을 통한 위젯 닫힘이 발생하면 Broadcast를 통해 이를 알리는 것이다.
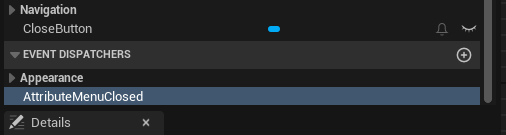
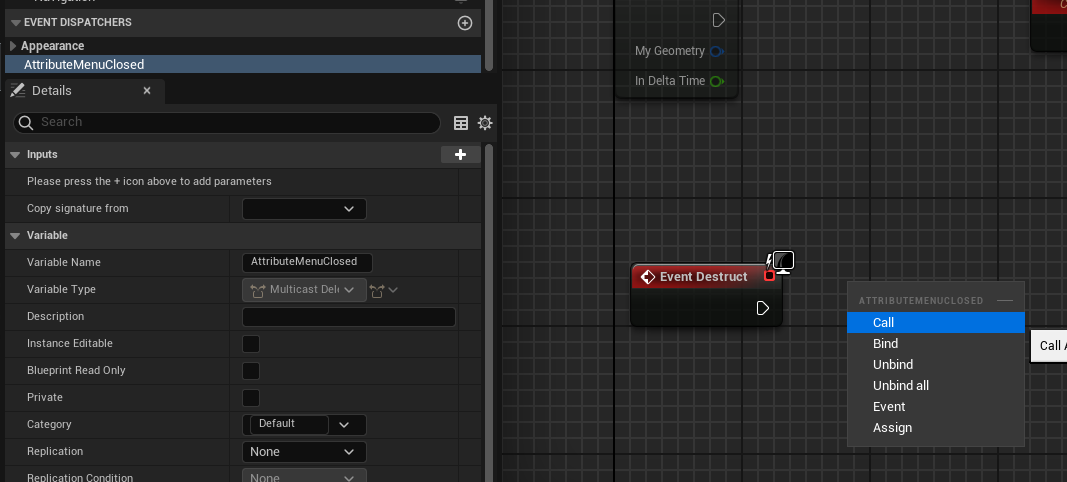
먼저 WBP_AttributeMenu 의 Apperance 에 AttributeMenuClosed 를 하나 생성하고
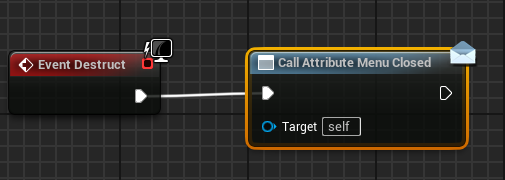
Event Destruct 노드를 통해 파괴 발생시 AttributeMenuClosed 가 호출되도록 한다.
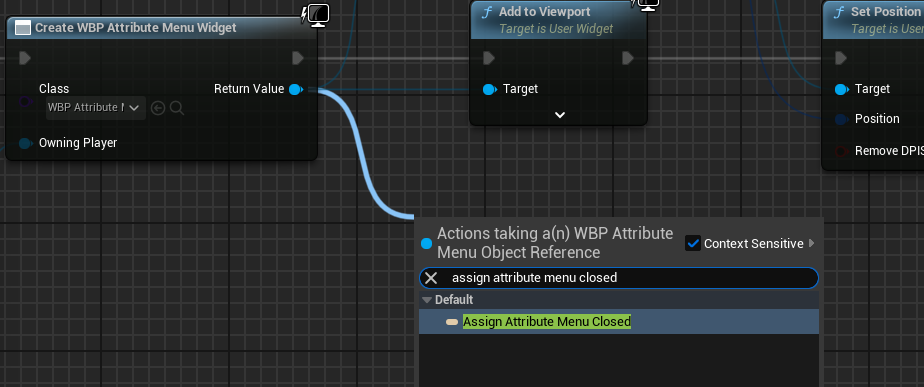
다시 WBP_Overlay 로 돌아와서 Return Value 로부터 Assign Attribute Menu Closed 노드를 생성한다.
Broadcast에 의해 위젯이 닫혔다는 것을 알게 되면 AttributeMenuButton -> Get Button -> Set is Enabled 의 값을 참으로 하여 다시 활성화시킨다.
실행시 Attribute Menu 를 열고 닫으면 다시 버튼이 활성화되는 것을 확인할 수 있다.
7.6 Attribute Menu 데이터 설정
개념요약
1. Attribute 변경시 AbilitySystem 에서 Broadcast를 진행
2. UAttributeMenuWidgetController 에서 Broadcast된 것을 받음
3. 태그를 통해 어떤 Attribute 인지 확인
4. UAttributeInfo 라는 데이터 에셋을 생성하고, 태그를 통해 구조체를 반환.
해당 구조체를 통해 위젯에 Broadcast 진행.
5. 해당 구조체의 정보를 토대로 위젯에 Broadcast를 진행하여 값 변경
7.6.1 Secondary Attribute에 GameplayTag 설정
먼저 GameplayTag만 따로 설정하기 위한 클래스를 하나 생성한다.
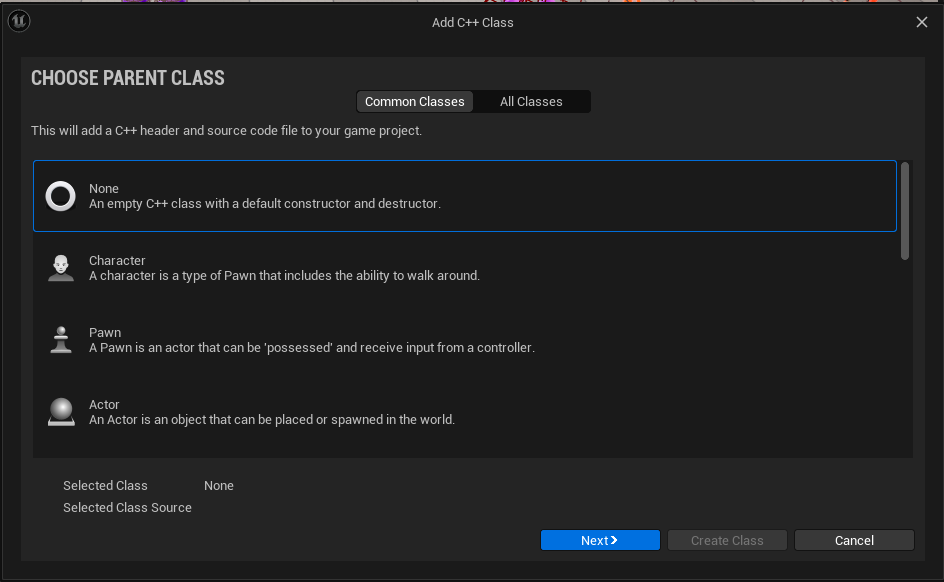
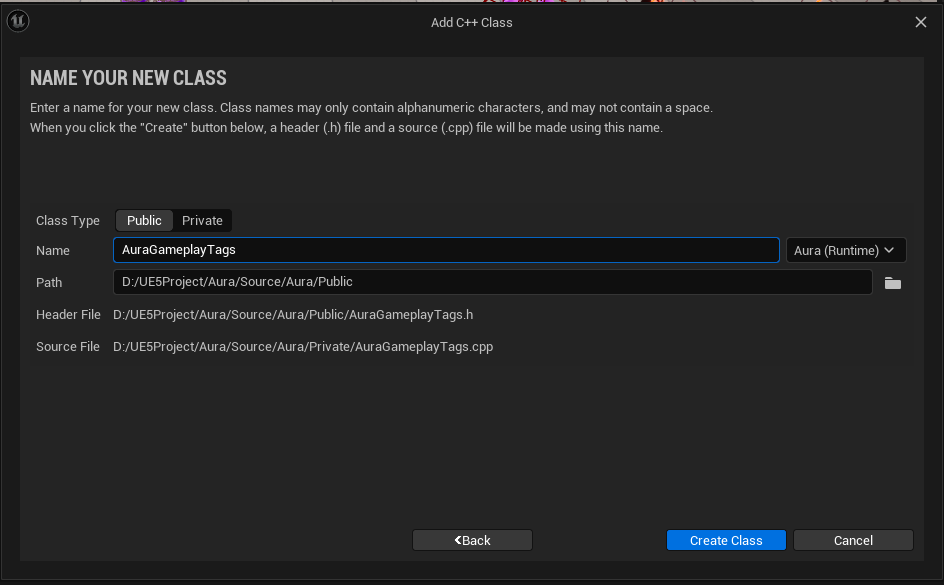
생성경로(에디터에 안나타남)

필요없는 Constructor와 Destructor를 삭제하고 구조체를 생성한다.
추가
Singleton은 객체 지향 프로그래밍에서 특정 클래스의 인스턴스를 오직 하나만 생성하도록 보장하는 디자인 패턴이며, 해당 인스턴스는 프로그램 내에서 공유됨.
또한 프로그램 어디서든지 이 인스턴스에 접근할 수 있음(전역 접근).
싱글톤 객체는 필요할 때 처음으로 생성(Lazy Initialize라고 부름)
- AuraGameplayTags.h
// Copyright ...

#pragma once

#include "CoreMinimal.h"
#include "GameplayTagContainer.h"

/**
 * AuraGameplayTags
 *
 * Singleton containing native Gameplay Tags
 */

struct FAuraGameplayTags
{
public:
	// 클래스의 싱글톤 인스턴스를 반환하는 함수
	static const FAuraGameplayTags& Get() { return GameplayTags; }
    // GameplayTag 초기화 함수
    static void InitializeNativeGameplayTags();
protected:

private:
	static FAuraGameplayTags GameplayTags;
};- AuraGameplayTags
// Copyright ...
#include "AuraGameplayTags.h"
#include "GameplayTagsManager.h"
// static 변수는 정확하게 한 번만 생성되고 초기화되도록 명시적으로 타입 선언을 해주어야 함
FAuraGameplayTags FAuraGameplayTags::GameplayTags;
void FAuraGameplayTags::InitializeNativeGameplayTags()
{
// Get() 함수를 통해 Manager 호출, AddNativeGameplayTag()를 통해 태그와 설명 추가
UGameplayTagsManager::Get().AddNativeGameplayTag(FName("Attributes.Secondary.Armor"), FString("Reduces damage taken, improves Block Chance"));
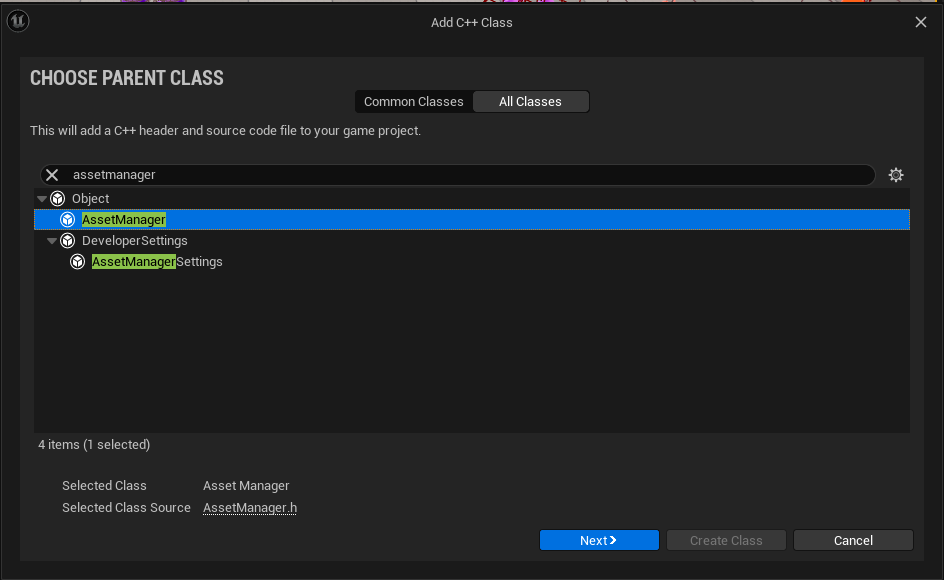
}이제 InitializeNativeGameplayTags() 함수를 호출할 AssetManager 를 생성해야 한다.
추가
AssetManager은 또다른 Singleton이다.
AssetManager클래스는 언리얼 엔진에서Assets을 효율적으로 관리하고 로드하는 데 사용되는 중요한 클래스.
이 클래스는 특히 대규모 프로젝트에서 자산의 로딩, 스트리밍, 메모리 관리 등을 최적화하는 데 도움을 줌.
AssetManager는 일반적으로 게임 초기화 시점에 한 번 생성되며, 싱글톤 패턴으로 사용됨.
이를 통해 게임 전반에서 동일한AssetManager인스턴스를 참조하고 사용할 수 있음.
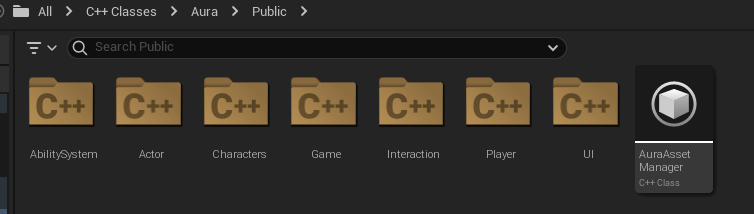
AssetManager 기반 클래스 AuraAssetManager 를 생성하고
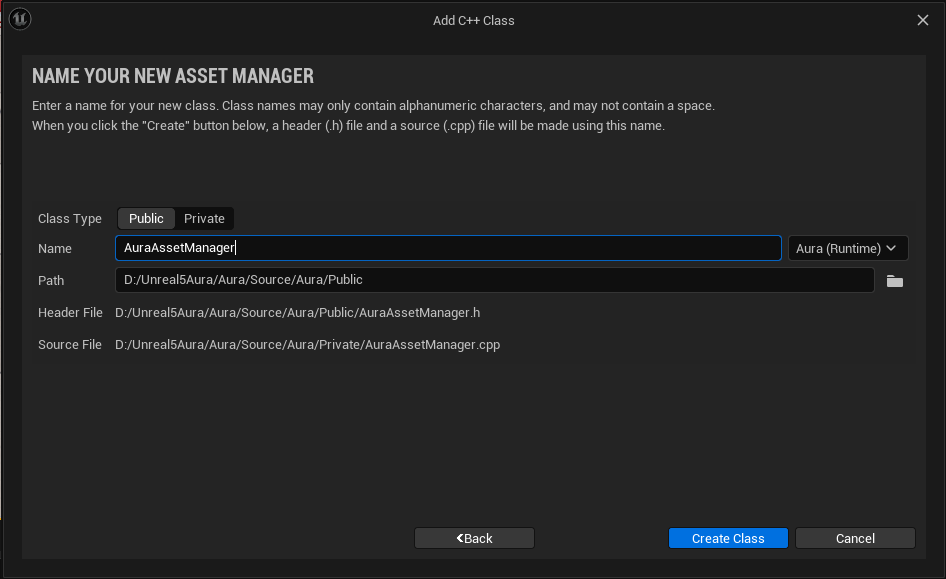
AuraGameplayTags 클래스와 동일하게 Get() 함수를 만들어주고 기타 코드도 작성한다.
- AuraAssetManager.h
// AuraAssetManager.h

...
public:
	// 클래스의 싱글톤 인스턴스를 반환하는 함수
	static UAuraAssetManager& Get();

protected:
	// AuraGameplayTags 클래스의 InitializeNativeGameplayTags() 함수와 동일한 역할
virtual void StartInitialLoading();- AuraAssetManager.cpp
// AuraAssetManager.cpp

...
#include "AuraGameplayTags.h"
...

UAuraAssetManager& UAuraAssetManager::Get()
{
	check(GEngine);

	UAuraAssetManager* AuraAssetManager = Cast<UAuraAssetManager>(GEngine->AssetManager);
    // 참조 반환
	return *AuraAssetManager;
}

void UAuraAssetManager::StartInitialLoading()
{
	Super::StartInitialLoading();

    FAuraGameplayTags::InitializeNativeGameplayTags();
}
이제 AuraAssetManager 를 현재 프로젝트의 AssetManager에 세팅해주어야 한다.
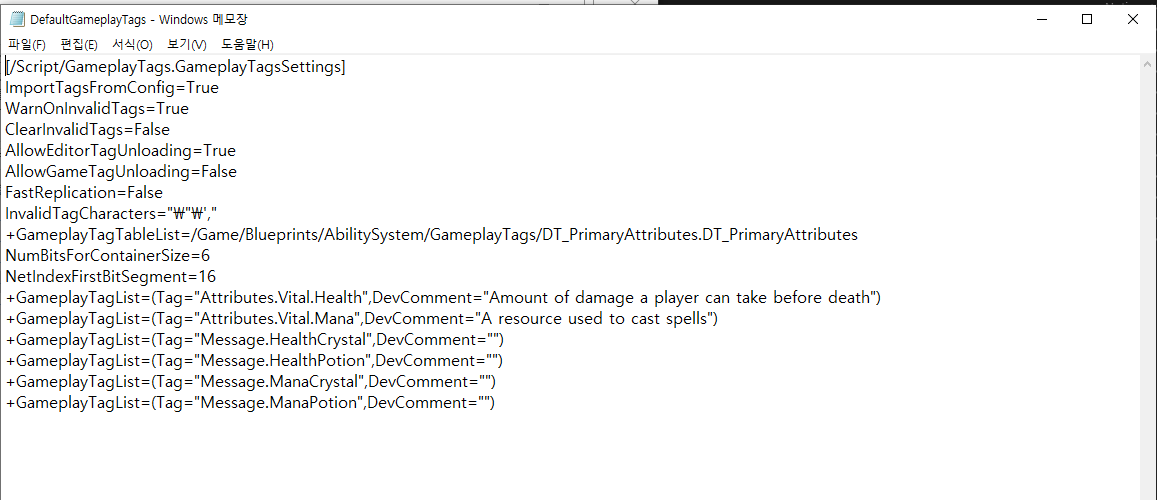
먼저 컴파일을 통해 오류가 없는지 확인하고 프로젝트 파일이 위치한 폴더에서 Congfig -> DefaultEngine.ini 파일을 연다.
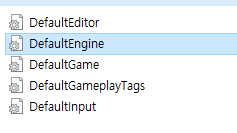
[/Script/Engine.Engine] 에 AssetManagerClassName=/Script/Aura.AuraAssetManager 를 추가한다.

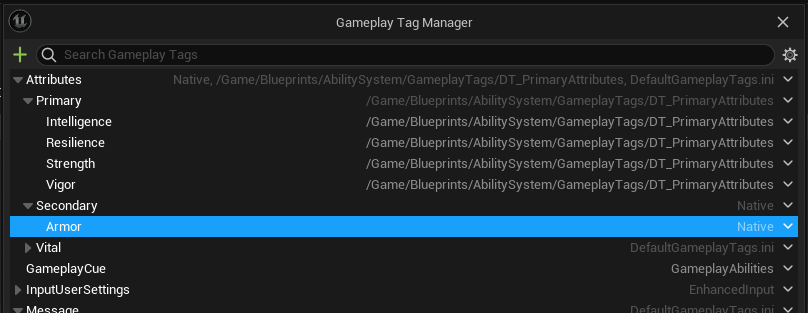
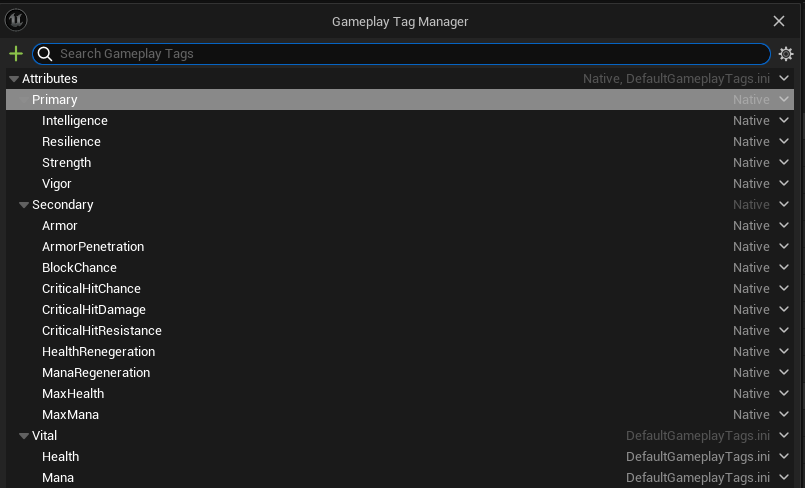
엔진으로 돌아와서 Project Settings -> GameplayTags 탭에 보면 Secondary : Armor 가 추가된 것을 확인할 수 있다.
Primary Attributes 에 있는 것들도 데이터테이블이 아닌 코드로 관리하기 위해 삭제한다.


GameplayTag 를 사용해하기 위한 코드를 작성한다.
- AuraGameplayTags.h
// AuraGameplayTags.h

...
public:
	...

    // GameplayTag 추가
FGameplayTag Attributes_Secondary_Armor;- AuraGameplayTags.cpp
// AuraGameplayTags.cpp

...

void FAuraGameplayTags::InitializeNativeGameplayTags()
{
	/** 코드 수정 : GameplayTags.Attributes_Secondary_Armor = 추가 */
	GameplayTags.Attributes_Secondary_Armor = UGameplayTagsManager::Get().AddNativeGameplayTags(FName("Attributes.Secondary.Armor"), FString("Reduces damage taken, improves Block Chance"));
	/** 코드 수정 */
}- AuraAbilitySystemComponent.cpp
// AuraAbilitySystemComponent.cpp
...
#include "AuraGameplayTags.h"
...
void UAuraAbilitySystemComponent::AbilityActorInfoSet()
{
OnGameplayEffectAppliedDelegateToSelf.AddUObject(this, &UAuraAbilitySystemComponent::EffectApplied);
/** 코드 추가 */
// FAuraGameplayTags에서 GameplayTag를 가져오기 위한 코드
const FAuraGameplayTags& GameplayTags = FAuraGameplayTags::Get();
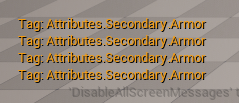
GEngine->AddOnScreenDebugMessage(-1, 10.f, FColor::Orange, FString::Printf(TEXT("Tag: %s"), *GameplayTags.Attributes_Secondary_Armor.ToString()));
/** 코드 추가 */
}
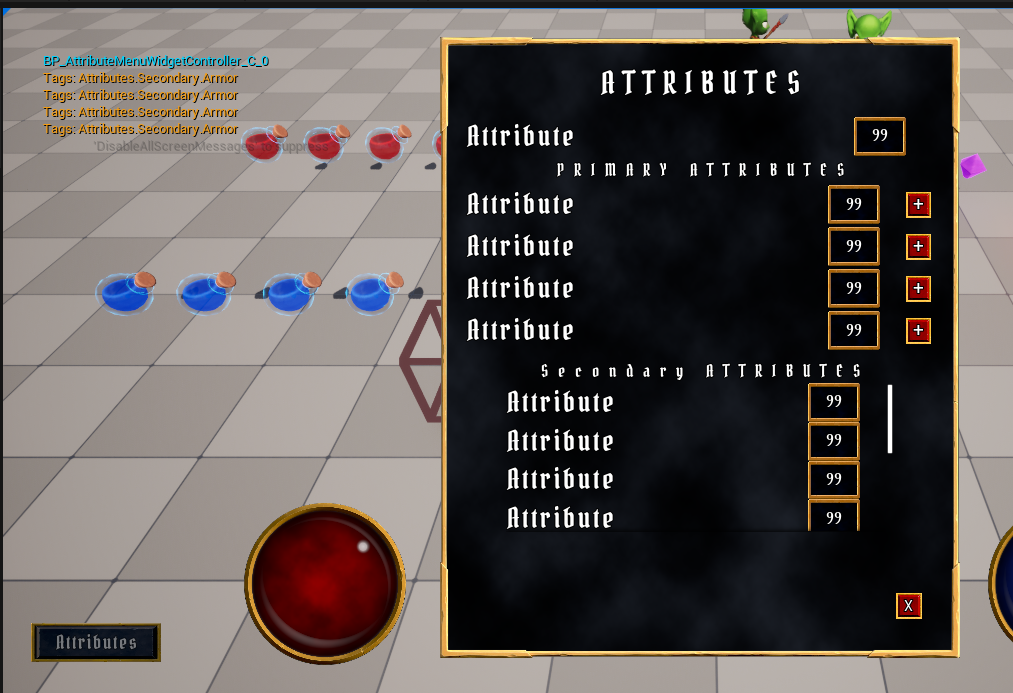
...실행시 정상적으로 뷰포트에 디버그메세지가 출력된다.
이제 나머지 GameplayTag 를 추가해야 한다.
먼저 MaxHealth 와 MaxMana 도 Secondary 의 Native Attributes 에서 관리하기 위해 삭제한다.
추가
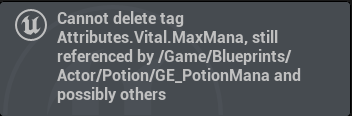
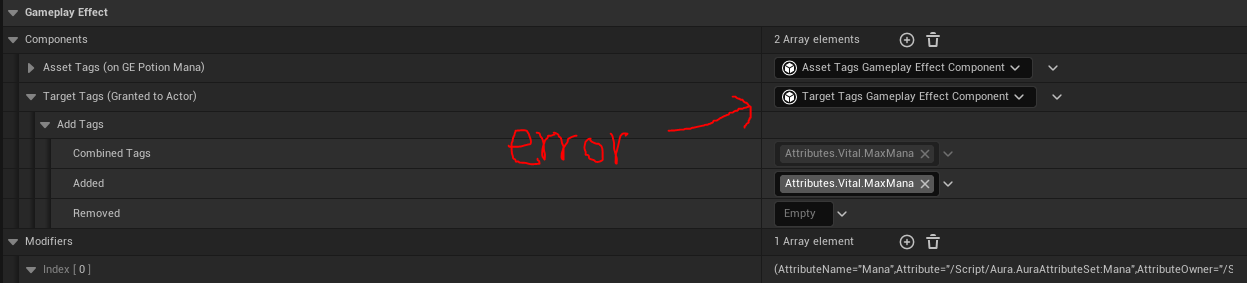
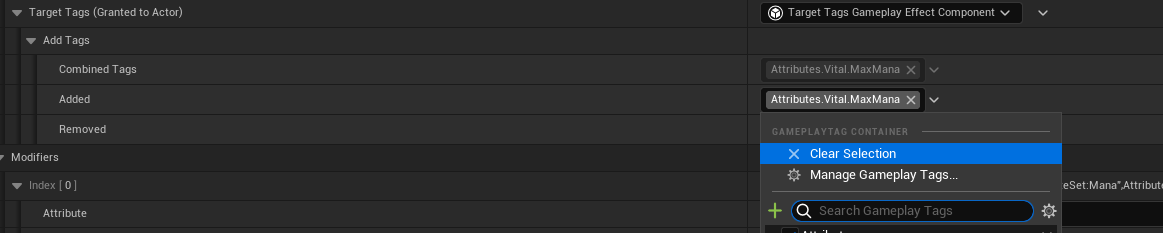
삭세지 이미 참조중이라 삭제가 불가능할 경우
이전에GameplayEffect에서 태그를 추가할 때Component에서 잘못된 옵션에 대하여 태그를 할당해 Clear하지 않고 다른 옵션 선택시 생성되는 버그.
잘못된 옵션으로 다시 태그 할당 후 Clear를 통해 해결 가능.
1. 잘못된 옵션에 태그 지정후
2.Clear를 통해 지우기
3. 다시 원상복구

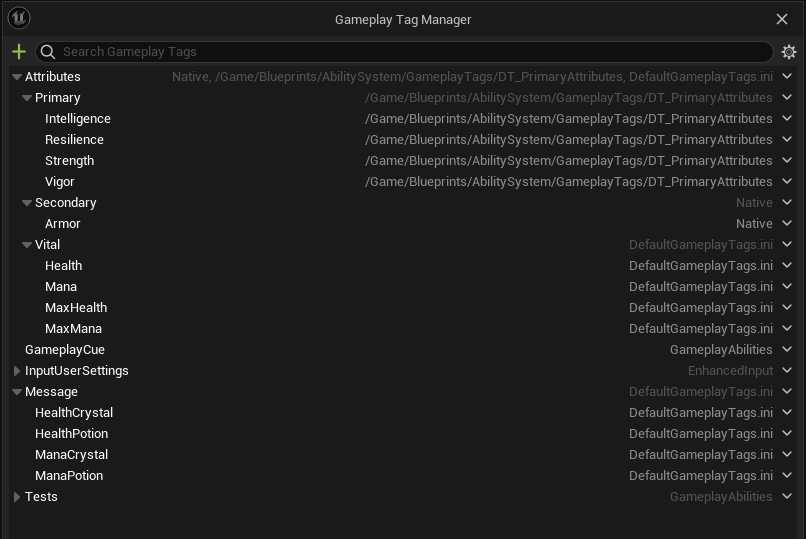
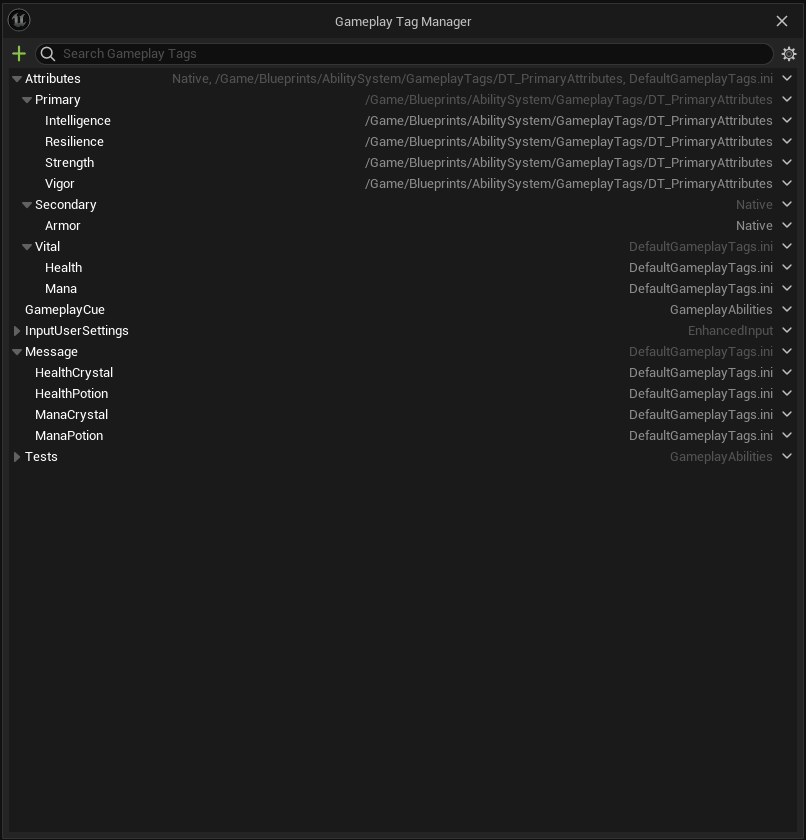
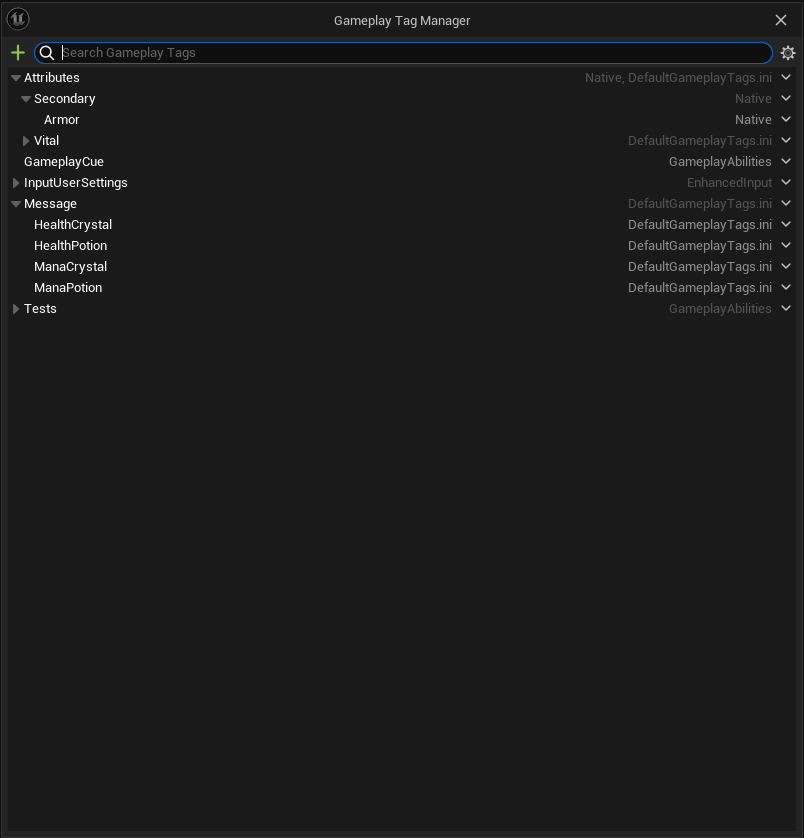
DefaultGameplayTags 에서 삭제가 되었는지 확인하고 코드를 작성한다.
- AuraGameplayTags.h
// AuraGameplayTags.h

...
public:
	...

    /*
     * Primary Attributes Tags
     */
    FGameplayTag Attributes_Primary_Strength;
    FGameplayTag Attributes_Primary_Intelligence;
    FGameplayTag Attributes_Primary_Resilience;
    FGameplayTag Attributes_Primary_Vigor;

    /*
     * Secondary Attributes Tags
     */
    // Armor만 제외한 나머지는 전부 추가된 코드
    FGameplayTag Attributes_Secondary_Armor;
    FGameplayTag Attributes_Secondary_ArmorPenetration;
    FGameplayTag Attributes_Secondary_BlockChance;
    FGameplayTag Attributes_Secondary_CriticalHitChance;
    FGameplayTag Attributes_Secondary_CriticalHitDamage;
    FGameplayTag Attributes_Secondary_CriticalHitResistance;
    FGameplayTag Attributes_Secondary_HealthRegeneration;
    FGameplayTag Attributes_Secondary_ManaRegeneration;
    FGameplayTag Attributes_Secondary_MaxHealth;
    FGameplayTag Attributes_Secondary_MaxMana;

...- AuraGameplayTags.cpp
// AuraGameplayTags.cpp

...

void FAuraGameplayTags::InitializeNativeGameplayTags()
{
	/*
 	 * Primary Attributes
 	 */
    GameplayTags.Attributes_Primary_Strength = UGameplayTagsManager::Get().AddNativeGameplayTag(
    	FName("Attributes.Primary.Strength"), FString("Increases physical damage"));

    GameplayTags.Attributes_Primary_Intelligence = UGameplayTagsManager::Get().AddNativeGameplayTag(
    	FName("Attributes.Primary.Intelligence"), FString("Increases magical damage"));

    GameplayTags.Attributes_Primary_Resilience = UGameplayTagsManager::Get().AddNativeGameplayTag(
    	FName("Attributes.Primary.Resilience"), FString("Increases Armor and Armor Penetration"));

    GameplayTags.Attributes_Primary_Vigor = UGameplayTagsManager::Get().AddNativeGameplayTag(
    	FName("Attributes.Primary.Vigor"), FString("Increases Health"));

    /*
     * Secondary Attriubtes
     */
	// Armor만 제외한 나머지는 전부 추가된 코드
	GameplayTags.Attributes_Secondary_Armor = UGameplayTagsManager::Get().AddNativeGameplayTag(
    	FName("Attributes.Secondary.Armor"), FString("Reduce damage taken, improves Block Chance"));

    GameplayTags.Attributes_Secondary_ArmorPenetration = UGameplayTagsManager::Get().AddNativeGameplayTag(
    	FName("Attributes.Secondary.ArmorPenetration"), FString("Ignore Percentage of enemy Armor, Increases Critical Hit Chance"));

    GameplayTags.Attributes_Secondary_BlockChance = UGameplayTagsManager::Get().AddNativeGameplayTag(
    	FName("Attributes.Secondary.BlockChance"), FString("Chance to cut incoming damage in half"));

    GameplayTags.Attributes_Secondary_CriticalHitChance = UGameplayTagsManager::Get().AddNativeGameplayTag(
    	FName("Attributes.Secondary.CriticalHitChance"), FString("Chance to double damage plus critical hit bonus"));

    GameplayTags.Attributes_Secondary_CriticalHitDamage = UGameplayTagsManager::Get().AddNativeGameplayTag(
    	FName("Attributes.Secondary.CriticalHitDamage"), FString("Bonus damage added when a critical hit is scored"));

    GameplayTags.Attributes_Secondary_CriticalHitResistance = UGameplayTagsManager::Get().AddNativeGameplayTag(
    	FName("Attributes.Secondary.CriticalHitResistance"), FString("Reduces Critical Hit Chance of attacking enemies"));

    GameplayTags.Attributes_Secondary_HealthRegeneration = UGameplayTagsManager::Get().AddNativeGameplayTag(
    	FName("Attributes.Secondary.HealthRegeneration"), FString("Amount of Health regenerated every 1 second"));

    GameplayTags.Attributes_Secondary_ManaRegeneration = UGameplayTagsManager::Get().AddNativeGameplayTag(
    	FName("Attributes.Secondary.ManaRegeneration"), FString("Amount of Mana regenerated every 1 second"));

    GameplayTags.Attributes_Secondary_MaxHealth = UGameplayTagsManager::Get().AddNativeGameplayTag(
    	FName("Attributes.Secondary.MaxHealth"), FString("Maximum amount of Health obtainable"));

    GameplayTags.Attributes_Secondary_MaxMana = UGameplayTagsManager::Get().AddNativeGameplayTag(
    	FName("Attributes.Secondary.MaxMana"), FString("Maximum amount of Mana obtainable"));
컴파일 후 실행하면 GameplayTag 들이 추가된 것을 확인할 수 있다.
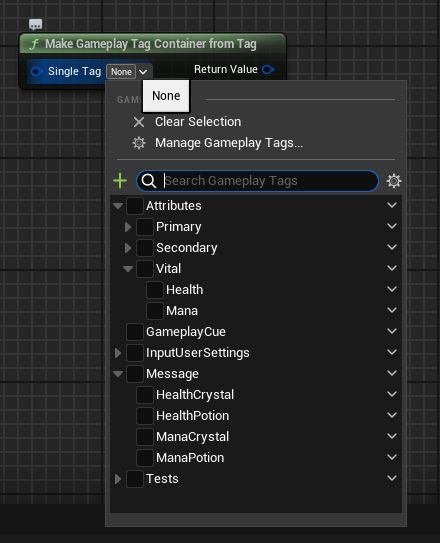
BP_HealthPotion 에서 Make Gameplay Tag Container from Tag 노드를 추가하여 확인하는것도 가능하다.
7.6.2 FAuraAttributeInfo 구조체를 통한 AttributInfo 데이터 에셋 생성
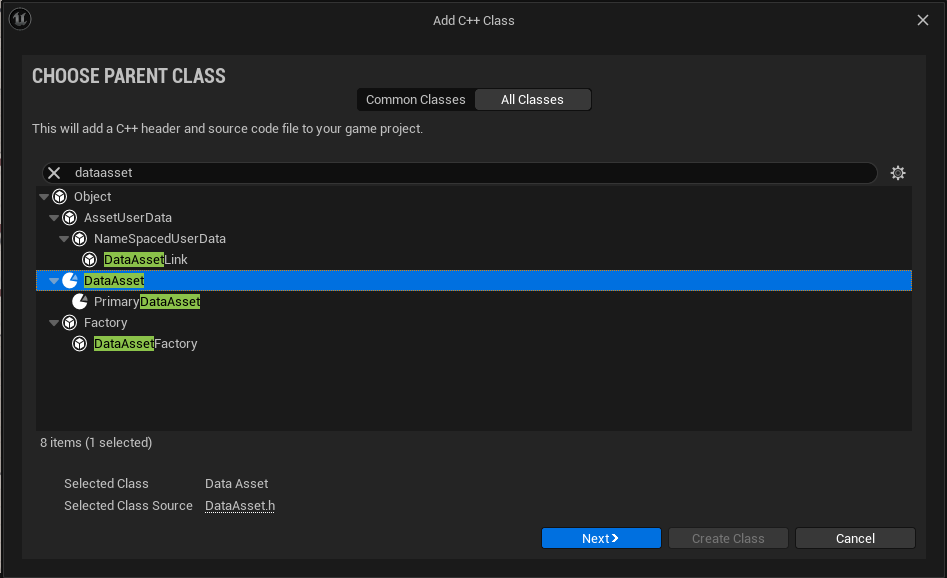
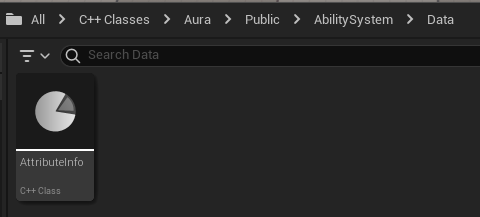
DataAsset 을 사용하기 위한 클래스를 생성한다.
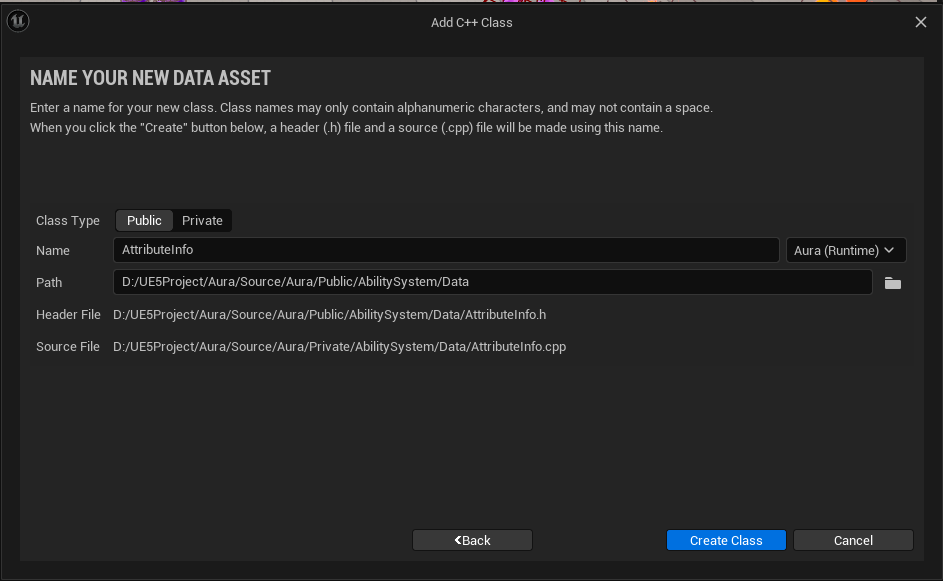
- AttributeInfo.h
// AttributeInfo.h

...
#include "GameplayTagContainer.h"
...

// AttributeInfo 저장을 위한 구조체
USTRUCT(BlueprintType)
struct FAuraAttributeInfo
{
	GENERATED_BODY()

    // 어떤 Attribute의 info인지 태그를 통해 지정
    UPROPERTY(EditDefaultsOnly, BlueprintReadOnly)
    FGameplayTag AttributeTag = FGameplayTag();

    // AttributeMenu 위젯에서 사용할 Attribute명을 지정
    UPROPERTY(EditDefaultsOnly, BlueprintReadOnly)
    FText AttributeName = FText();

    // 추가 설명용
    UPROPERTY(EditDefaultsOnly, BlueprintReadOnly)
    FText Description = FText();

    // Attribute의 값
    UPROPERTY(BlueprintReadOnly)
    float AttributeValue = 0.f;
};

...

public:
	// 태그에 맞는 Attribute를 찾는 함수
	FAuraAttributeInfo FindAttributeInfoForTag(const FGameplayTag& AttributeTag, bool bLogNotFound = false) const;

    // Attribute의 정보를 저장할 구조체배열
	UPROPERTY(EditDefaultsOnly, BlueprintReadOnly)
	TArray<FAuraAttributeInfo> AttributeInformation;
- AttributeInfo.cpp
// AttributeInfo.cpp
FAuraAttributeInfo UAttributeInfo::FindAttributeInfoForTag(const FGameplayTag& AttributeTag, bool bLogNotFound) const
{
// 반복문을 통해 AttributeInformation의 태그가 Attribute의 태그와 일치하는지 확인 후 일치시 return
for(const FAuraAttributeInfo& Info : AttributeInformation)
{
if(Info.AttributeTag.MatchesTagExact(AttributeTag))
{
return Info;
}
}
// 에러 로그 출력
if(bLogNotFound)
{
UE_LOG(LogTemp, Error, TEXT("Can't find Info for AttributeTag [%s] on AttributeInfo [%s]."), *AttributeTag.ToString(), *GetNameSafe(this));
}
return FAuraAttributeInfo();
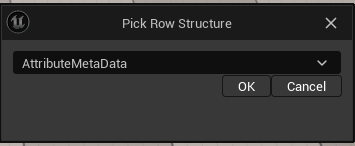
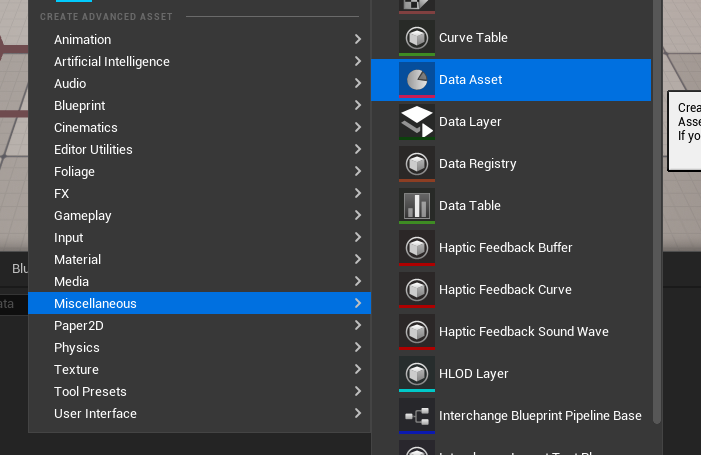
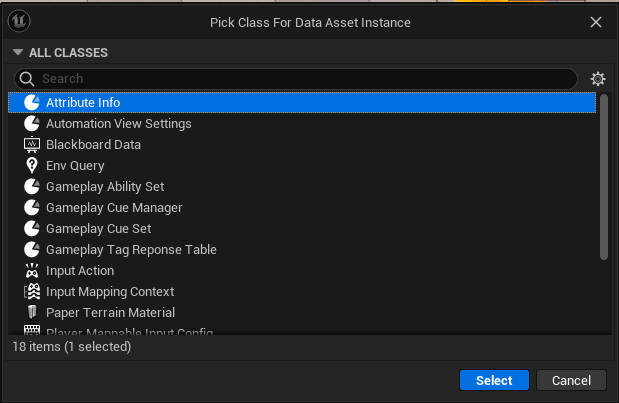
}컴파일 후 실행한 다음 AttributeInfo 기반의 블루프린트 DA_AttributeInfo 를 생성한다.
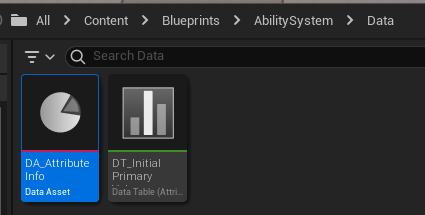
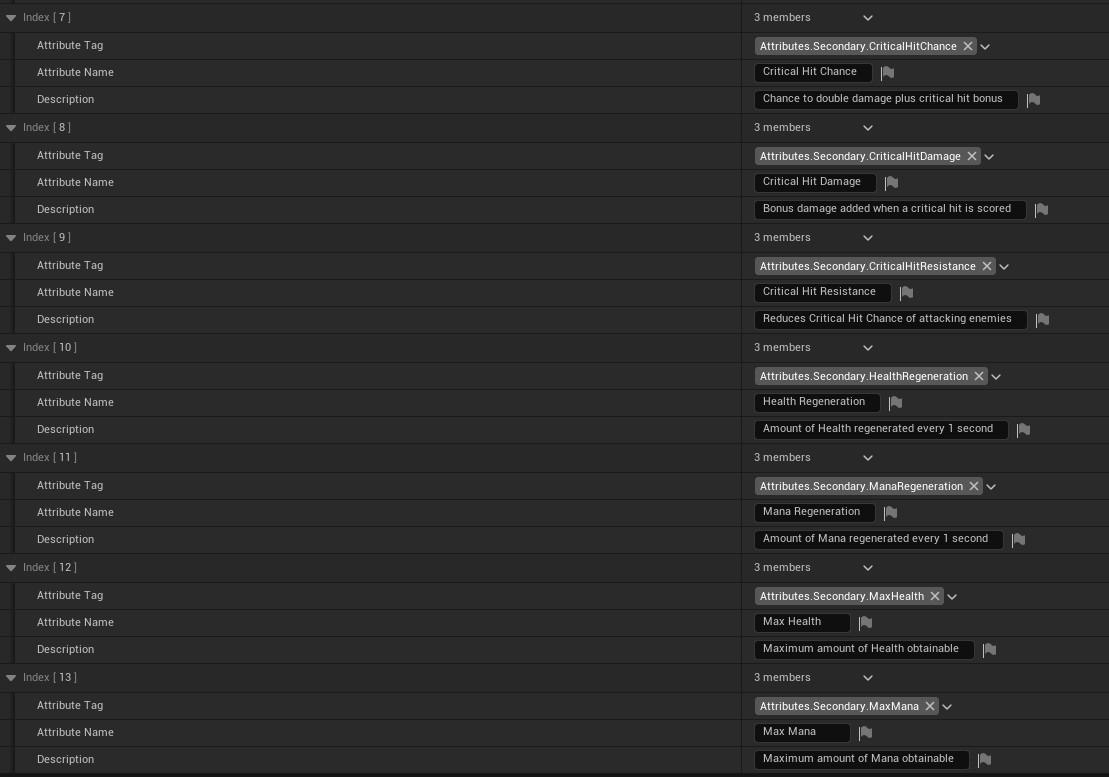
DA_AttributeInfo 파일을 열면 아래와 같이 코드에서 추가한 변수들에 값을 입력할 수 있다.
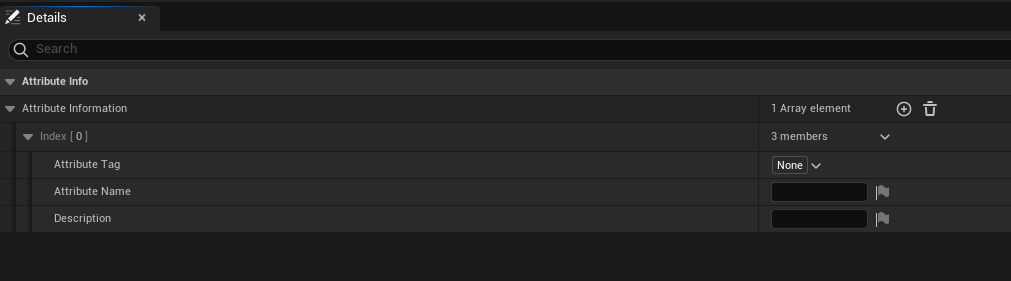
Attribute Tag : Attributes.Primary.Intelligence , Attribute Name : Intelligence , Description : Increases magical damage 로 설정해준다.
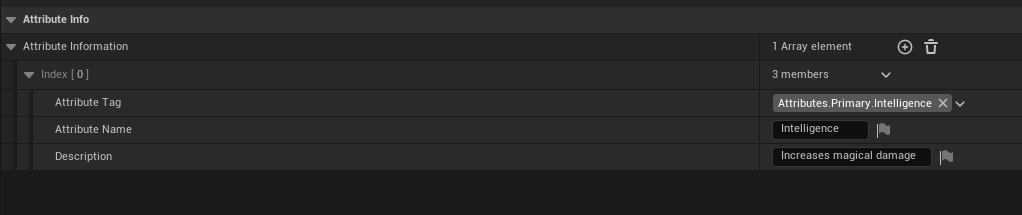
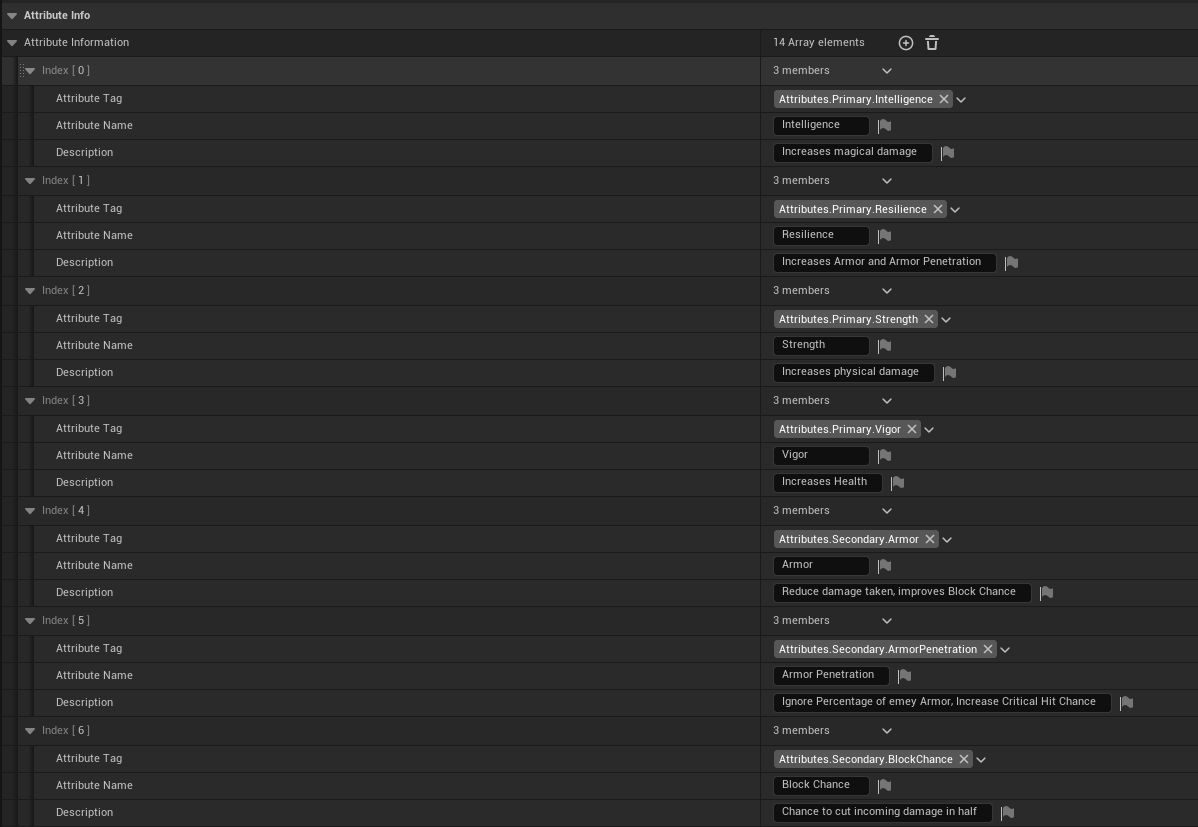
나머지 부분들도 c++ 코드에 있는 FString 부분을 참조하여 설정해준다.
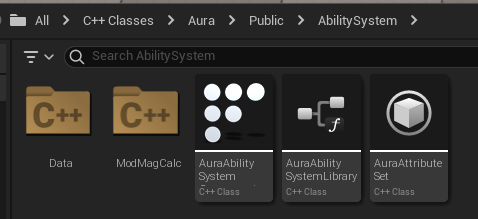
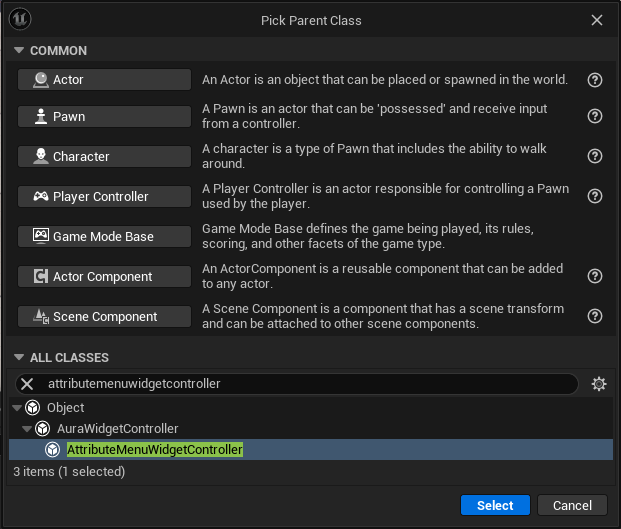
7.6.3 UAttributeMenuWidgetController 클래스 생성
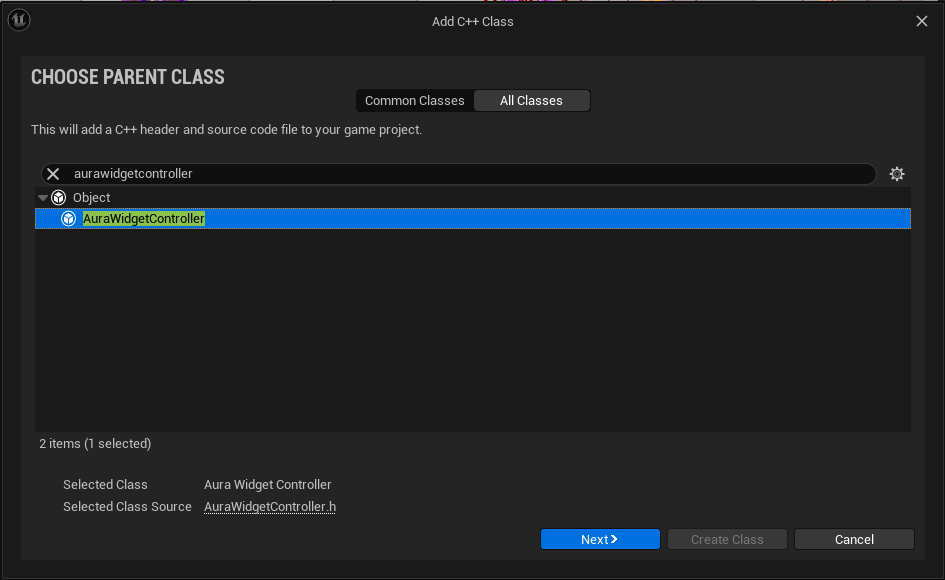
AttributeMenu 위젯 컨트롤을 위한 AuraWidgetController 기반 클래스 AttributeMenuWidgetController 를 생성한다.

- AttributeMenuWidgetController.h
// AttributeMenuWidgetcontroller.h

// Copyright ...

#pragma once

# include ...

/**
 *
 */
 // 추후에 BP_AttributeMenuWidgetController를 생성하기 위해 필요
UCLASS(BlueprintType, Blueprintable)

class AURA_API UAttributeMenuWidgetController : public UAuaraWidgetController
{
	GENERATED_BODY()

public:
	virtual void BindCallbacksToDependencies() override;
virtual void BroadcastInitialValues() override;- AttributeMenuWidgetController.cpp
// AttributeMenuWidgetController.cpp
void AttributeMenuWidgetController::BindCallbacksToDependencies()
{
}
void AttributeMenuWidgetController::BroadcastInitialValues()
{
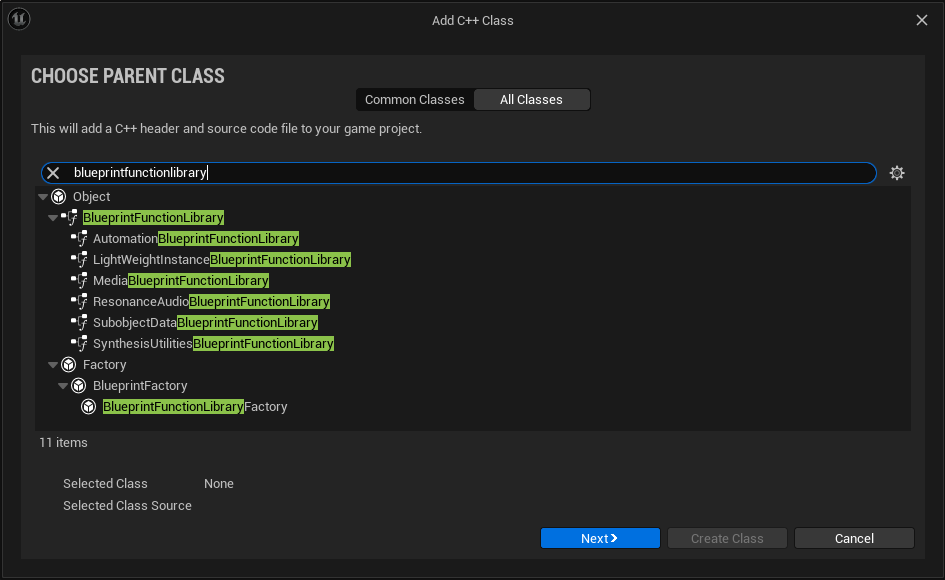
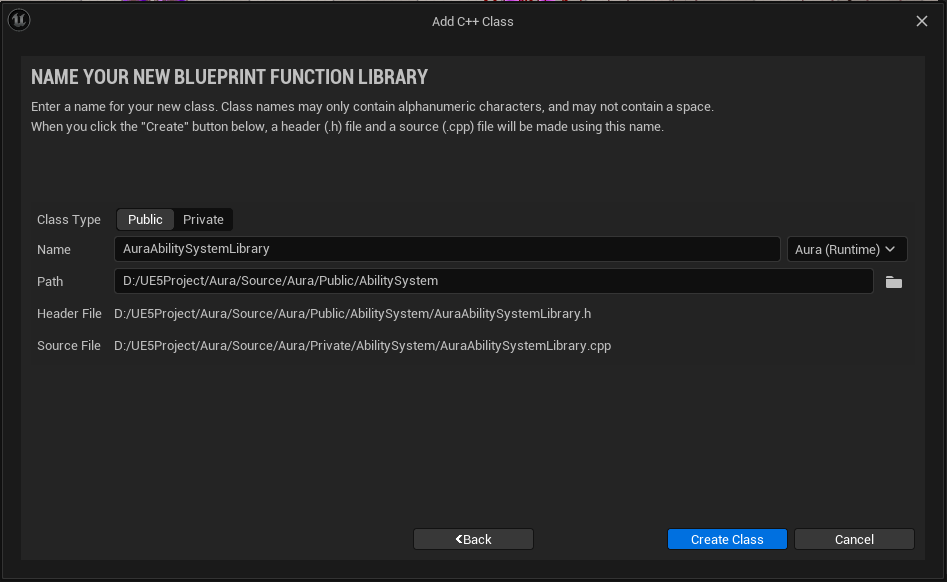
}AttributeMenuWidgetController 에서 ASC 에 접근하기 위해 BlueprintFunctionLibrary 기반 c++ 클래스를 생성하고, 해당 클래스 기반 블루프린트를 생성한다.
해당 클래스는 PlayerController , PlayerState , AbilitySystemComponent , AttributeSet 에 접근 가능하도록 하는 역할을 한다.
(
BlueprintFunctionLibrary을 통해ASC호출 가능)UAbilitySystemBlueprintLibrary::GetAbilitySystemComponent(TargetActor);
- AuraAbilitySystemLibrary.h
// AuraAbilitySystemLibrary.h

class UOverlayWidgetController;

public:
	// 해당 클래스의 인스턴스 생성을 목적으로 하는 것이 아니므로 static 사용
    // BlueprintPure의 경우 Execution 와이어를 연결하지 않고 결과값 바로 도출
    UFUNCTION(BlueprintPure, Category = "AuraAbilitySystemLibrary|WidgetController")
	static UOverlayWidgetController* GetOverlayWidgetController(const UObject* WorldContextObject);
- AuraAbilitySystemLibrary.cpp
// AuraAbilitySystemLibrary.cpp
...
#include "Kismet/GameplayStatics.h"
#include "UI/HUD/AuraHUD.h"
#include "Player/AuraPlayerState.h"
#include "UI/WidgetController/AuraWidgetController.h"
...
UOverlayWidgetController* UAuraAbilitySystemLibrary::GetOverlayWidgetController(const UObject* WorldContextObject)
{
if(APlayerController* PC = UGameplayStatics::GetPlayerController(WorldContextObject, 0))
{
if(AAuraHUD* AuraHUD = Cast<AAuraHUD>(PC->GetHUD()))
{
AAuraPlayerState* PS = PC->GetPlayerState<AAuraPlayerState>();
UAbilitySystemComponent* ASC = PS->GetAbilitySystemComponent();
UAttributeSet* AS = PS->GetAttributeSet();
const FWidgetControllerParams WidgetControllerParams(PC, PS, ASC, AS);
return AuraHUD->GetOverlayWidgetController(WidgetControllerParams);
}
}
return nullptr;
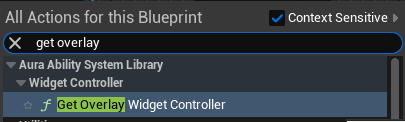
}WBP_Overlay 에서 검색시 GetOverlayWidgetController 노드를 사용할 수 있다.
7.6.4 AttributeMenuWidgetController AuraHUD에 생성
추가
// AuraHUD.h public 에서 private으로 이동
TObjectPtr<UAuraUserWidget> OverlayWidget;
- AuraHUD.h
// AuraHUD.h

...
class UAttributeMenuWidgetController;
...

public:
	UOverlayWidgetController* GetOverlayWidgerController(const FWidgetControllerParams& WCParams);
    /** 추가 코드 */
    UAttributeMenuWidgetController* GetAttributeMenuWidgetController(const FWidgetControllerParams& WCParams);
	/** 추가 코드 */

    ...

private:
	...

    UPROPERTY()
    TObjectPtr<UAttributeMenuWidgetController> AttributeMenuWidgetController;

    UPROPERTY(EditAnywhere)
    TSubclassOf<UAttributeMenuWidgetController> AttributeMenuWidgetControllerClass;
};- AuraHUD.cpp
// AuraHUD.cpp

...
#include "UI/WidgetController/AttributeMenuWidgetController.h"
...

/** 코드 수정 */
UOverlayWidgetController* AAuraHUD::GetOverlayWidgetController(const FWidgetControllerParams& WCParams)
{
	if(OvelrayWidgetController == nullptr)
    {
    	OverlayWidgetController = NewObject<UOverlayWidgetController>(this, OverlayControllerClass);
        OverlayWidgetController->SetWidgetControllerParmas(WCParams);
        OverlayWidgetController->BindCallbacksToDependencies();
        // if문 내부에 있는 return 밖으로 꺼내도 무방하므로 삭제
    }
    return OverlayWidgetController;
}
/** 코드 수정 */

/** 추가 코드 */
UAttributeMenuWidgetController* AAuraHUD::GetAttributeMenuWidgetController(const FWidgetControllerParams& WCParams)
{
	if(AttributeMenuWidgetController == nullptr)
    {
    	AttributeMenuWidgetController = NewObject<UAttributeMenuWidgetController>(this, AttributeMenuWidgetControllerClass);
        AttributeMenuWidgetController->SetWidgetControllerParams(WCParams);
        AttributeMenuWidgetController->BindCallbacksToDependencies();
    }
    return AttributeMenuWidgetController;
}
/**  추가 코드 */

...
7.6.3에서 AuraAbilitySystemLibrary 클래스를 통해 BP_Overlay 에서 OverlayWidgetcontroller 를 호출할 수 있도록 만들었듯이 동일하게 AttributeMenuWidgetcontroller 를 호출할 수 있도록 코드를 작성한다.
- AuraAbilitySystemLibrary.h
// AuraAbilitySystemLibrary.h

...
public:
	...

    UFUNCTION(BlueprintPure, Category = "AuraAbilitySystemLibrary|WidgetController")
    static UAttributeMenuWidgetController* GetAttributeMenuWidgetController(const UObject* WorldContextObject);
};- AuraAbilitySystemLibrary.cpp
// AuraAbilitySystemLibrary.cpp
UAttributeMenuWidgetController* UAuraAbilitySystemLibrary::GetAttributeMenuWidgetController(const UObject* WorldContextObject)
{
if(APlayerController* PC = UGameplayStatics::GetPlayerController(WorldContextObject, 0))
{
if(AAuraHUD* AuraHUD = Cast<AAuraHUD>(PC->GetHUD()))
{
AAuraPlayerState* PS = PC->GetPlayerState<AAuraPlayerState>();
UAbilitySystemComponent* ASC = PS->GetAbilitySystemComponent();
UAttributeSet* AS = PS->GetAttributeSet();
const FWidgetControllerParams WidgetControllerParams(PC, PS, ASC, AS);
return AuraHUD->GetAttributeMenuWidgetController(WidgetControllerParams);
}
}
return nullptr;
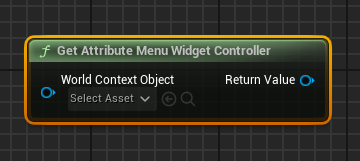
}컴파일 후 WBP_AttributeMenu 의 Graph 탭에서 GetAttributeMenuWidgetController 노드를 생성이 가능한 것을 확인할 수 있다.
이제 AttributeMenuWidgetController 클래스 기반 블루프린트 클래스 BP_AttributeMenuWidgetController 를 생성한다.
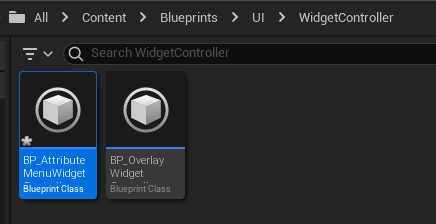
BP_AuraHUD 에서 AttributeMenuWidgetControllerClass 를 생성한 BP_AttributeMenuWidgetControllerClass 로 설정한다.

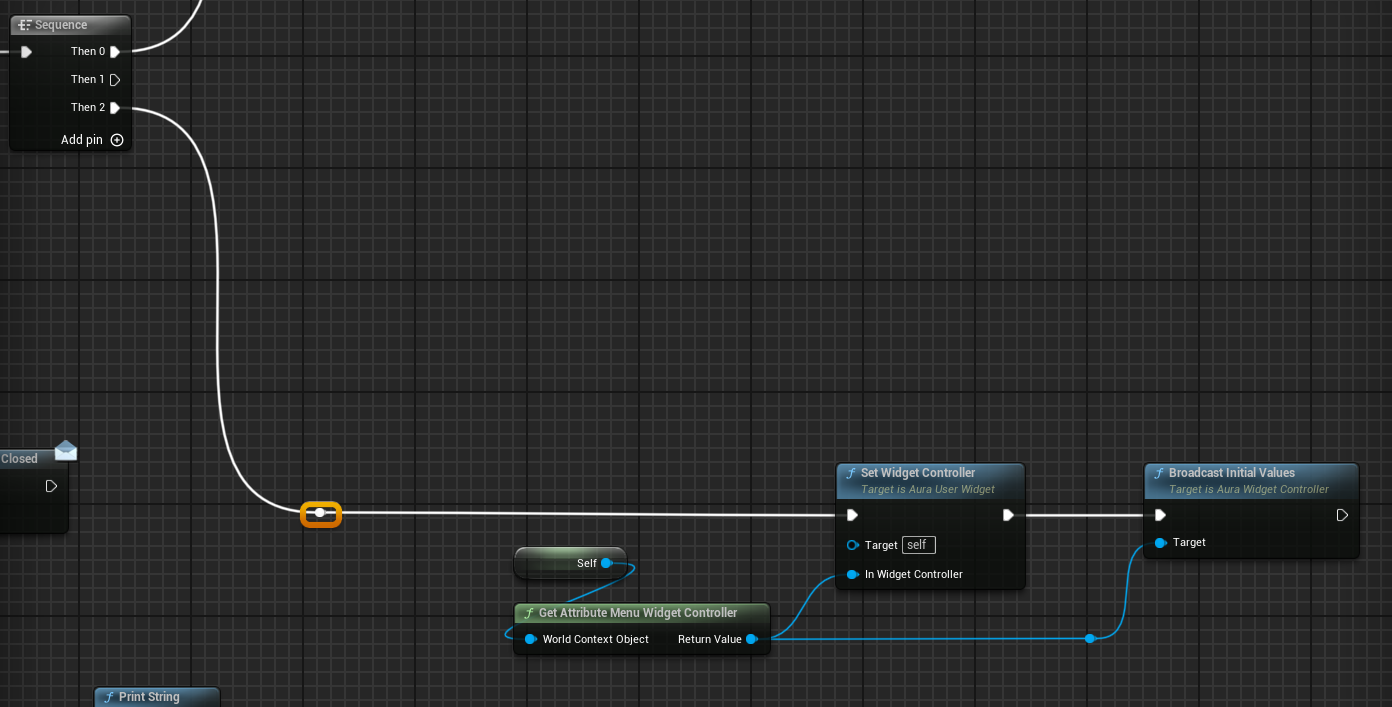
마지막으로 WBP_AttributeMenu 에서 GetAttributeMenuWidgetController 노드를 생성하여 SetWidgetController 노드와 연결해 WidgetController를 설정해주기만 하면 된다.

WidgetController 가 설정되었으니 확인을 위해 노드를 구성하고 컴파일 후 실행한다.
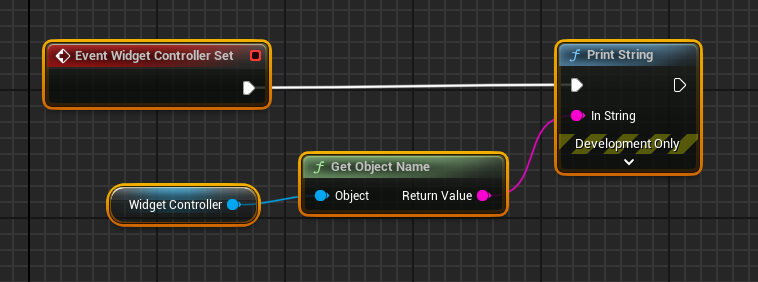
Attributes 버튼을 클릭하면 뷰포트에서 설정된 WidgetController 를 확인할 수 있다.
7.6.5 AttributeInfo를 AttributeMenu로 Broadcast
AttributeInfo 를 AttributeMenu 에서 사용하기 위해서는 AttributeMenuWidgetController 에서 Broadcast를 통해 받아야 한다.
- AttributeMenuWidgetController.h
// AttributeMenuWidgetController.h

#include ...

class UAttributeInfo;
struct FAuraAttributeInfo;

// Broadcast를 위한 델리게이트
DECLARE_DYNAMIC_MULTICAST_DELEGATE_OneParam(FAttributeInfoSignature, const FAuraAttributeInfo&, Info);

...

public:
	...

    UPROPERTY(BlueprintAssignable, Category = "GAS|Attributes")
    FAttributeInfoSignature AttributeInfoDelegate;

protected:
	// AttributeInfo를 통해 Tag를 이용하여 Attribute의 값을 얻기 위함
	UPROPERTY(EditDefaultsOnly)
	TObjectPtr<UAttributeInfo> AttributeInfo;
- AttributeMenuWidgetController.cpp
// AttributeMenuWidgetController.cpp
...
#include "AbilitySystem/AuraAttributeSet.h"
#include "AbilitySystem/Data/AttributeInfo.h"
#include "AuraGameplayTags.h"
...
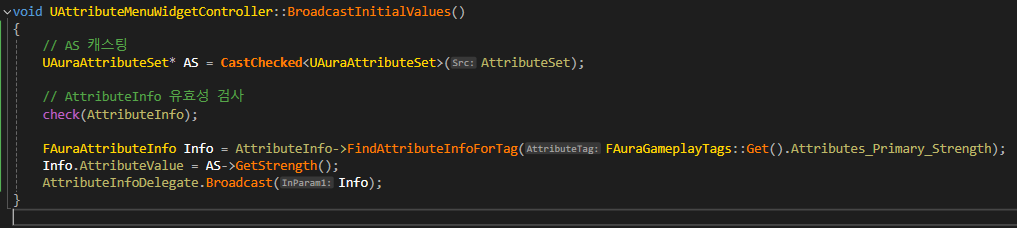
void UAttributeMenuWidgetController::BroadcastInitialValues()
{
// AS 캐스팅
UAuraAttributeSet* AS = CastChecked<UAuraAttributeSet>(AttributeSet);
// AttributeInfo유효성 검사
check(AttributeInfo);
// 태그를 통해 Attributes.Primary.Strength의 값을 얻어내고 Info에 저장
FAuraAttributeInfo Info = AttributeInfo->FindAttributeInfoForTag(FAuraGameplayTags::Get().Attributes_Primary_Strength);
Info.AttributeValue = AS->GetStrength();
AttributeInfoDelegate.Broadcast(Info);
}컴파일 후 에디터로 돌아와 BP_AttributeMenuWidgetController 에서 AttributeInfo 를 사용가능하도록 DA_AttributeInfo 로 설정해준다.

이제 코드를 통해 해당 Tag가 소유하고 있는 Attribute의 값을 델리게이트를 통하여 Broadcast할 수 있게 됬다.
추가
Broadcast를 하기 위해서 AuraWidgetController 클래스의 BroadcastInitialValues() 함수에 UFUNCTION(BlueprintCallable) 필요
7.6.6에 추가설명
7.6.6 AttributeMenu에서 Attribute 호출
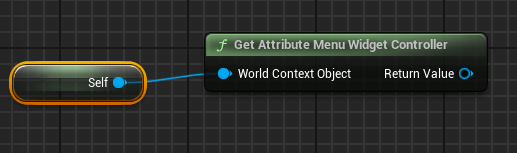
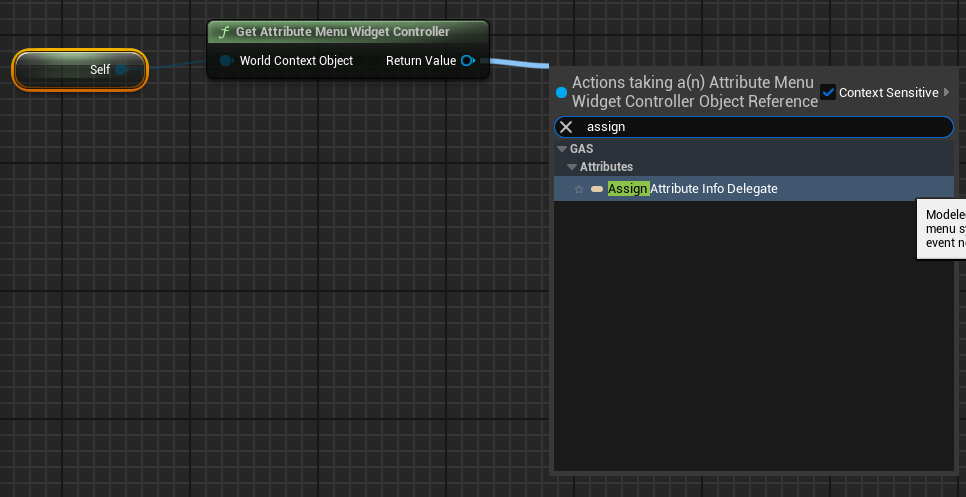
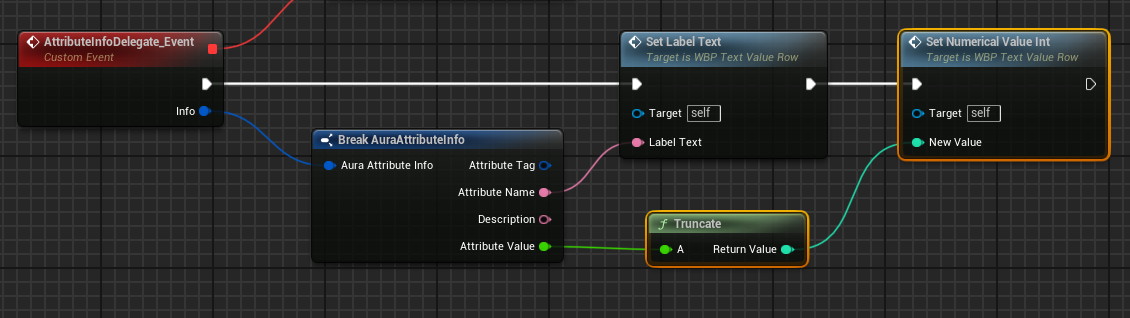
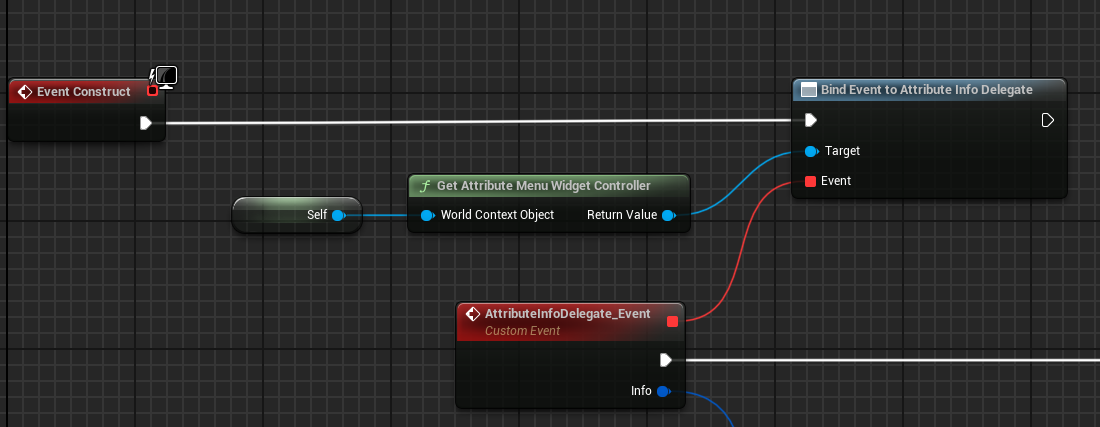
먼저 WBP_TextValueButtonRow 의 Graph 탭에서 Get Attribute Menu Widget Controller 노드를 생성하고 Self Reference 를 World Context Object 에 연결시킨다.
Return Value 를 통해 Assign Attribute Info Delegate 노드를 이용하여 Broadcast 발생시 Info를 얻도록 한다.
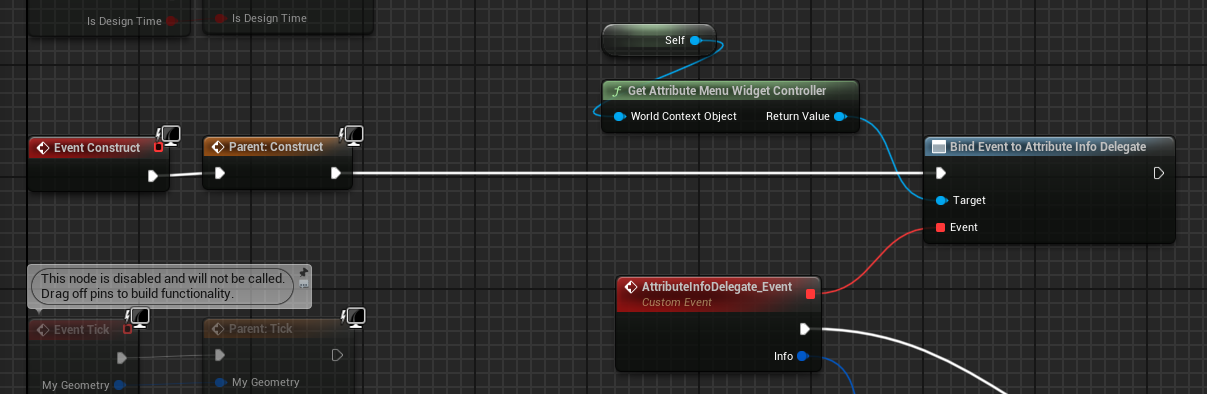
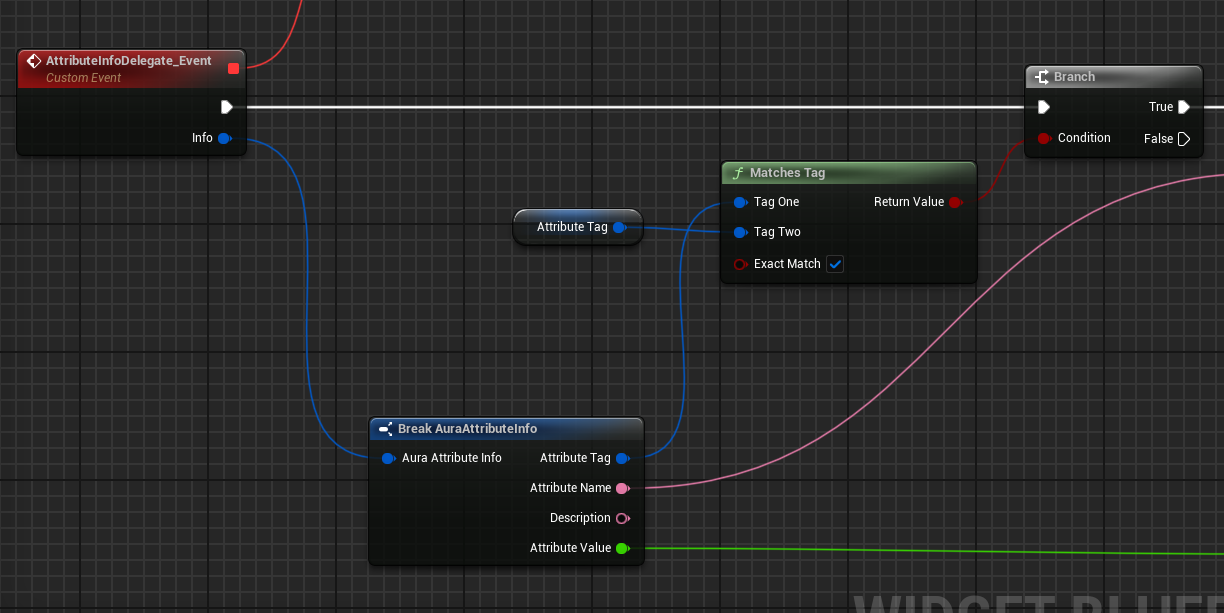
Info 핀에서 Break AuraAttributeInfo 를 선택하여 Info 가 소유한 값들을 따로 사용할 수 있도록 한다.


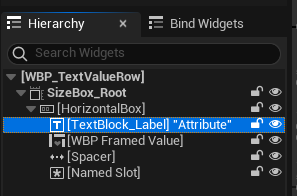
WBP_TextValueButtonRow 블루프린트는 WBP_TextValueRow 기반으로 생성된 블루프린트이므로, Text와 Value를 변경하기 위한 기능을 WBP_TextValueRow 에서 구현한다.
먼저 WBP_TextValueRow 의 Text 를 TextBlock_Label 로 rename하고, IsVariable 을 활성화한다

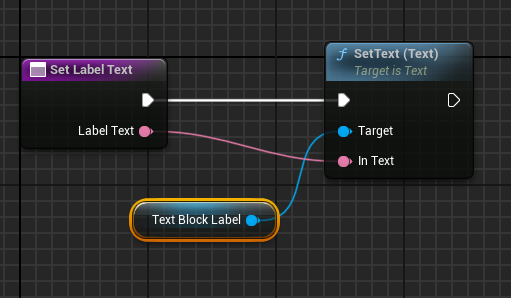
Graph 탭에서 SetLabelText 함수를 생성하고
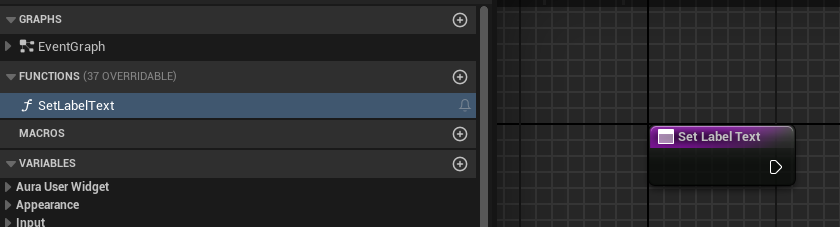
Input 을 추가하여 해당 값으로 TextBlock_Label 의 텍스트를 설정하도록 노드를 구성한다.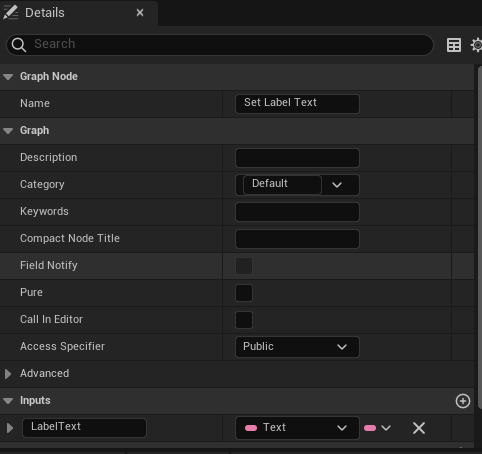
다시 WBP_TextValueButtonRow 로 돌아와서 SetLabelText 함수를 호출하여 AttributeName 으로 설정되도록 한다.

이대로 실행해도 Attrtibute 명은 바뀌지 않는다.
아직 Broadcast를 하지 않았으므로 Broadcast에 따른 델리게이트가 발생하지 않기 때문이다.
해당부분을 블루프린트에서 호출 가능하도록 해야 Broadcast가 진행된다.
AttributeMenuWidgetController 는 AuraWidgetController 기반 클래스이므로 해당 클래스에서 BroadcastInitialValue() 함수에 UFUNCTION(BlueprintCallable) 을 통해 호출가능하도록 수정한다.
- AuraWidgetController.h
// AuraWidgetController.h

...
public:
	...
	UFUNCTION(BlueprintCallable)
	virtual void BroadcastInitialValues();
    ...
컴파일 후 WBP_AttributeMenu 로 돌아와서 WidgetController 셋한 다음 Broadcast를 진행하여 WBP_TextValueButtonRow 에서 값을 얻을 수 있도록 노드를 구성한다.
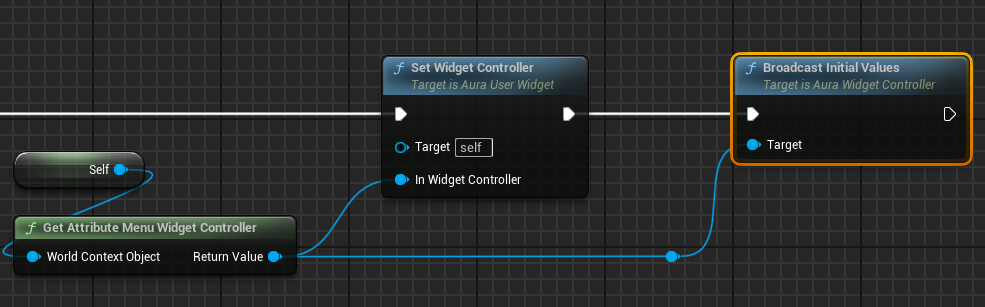
컴파일 후 실행시 AttributeMenu 의 Attribute명이 Strength로 변경된 것을 확인할 수 있다.
동일하게 Value도 AttributeMenu 에 나타낼 수 있다.
다시 WBP_TextValueRow 로 돌아와서 숫자를 표시하는 WBP_FramedValue 의 IsVariable 을 활성화시키고
Graph 탭에서 함수를 하나 생성한다.

Input으로 int값을 하나 받도록 한 다음
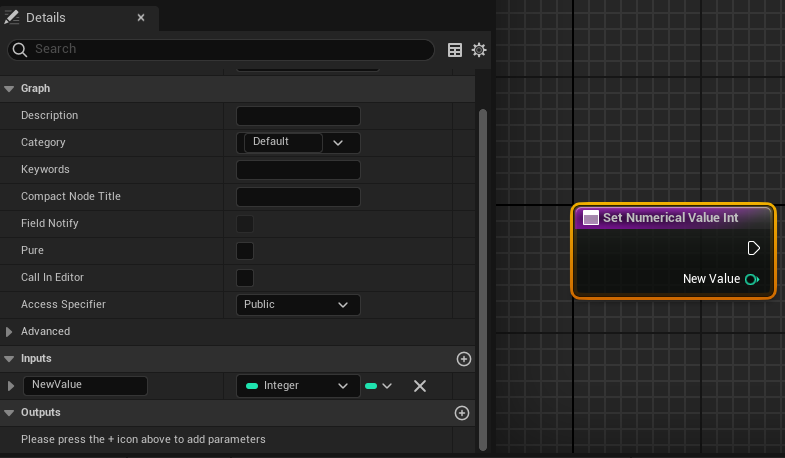
Get 을 통해 접근가능하도록 WBP_FramedValue 에서 TextBlock_Value 의 IsVariable 을 활성화시키고
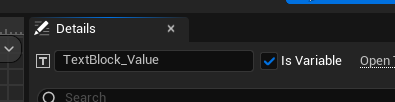
다시 WBP_TextValueRow 로 돌아와서 나머지 노드를 구성한다.
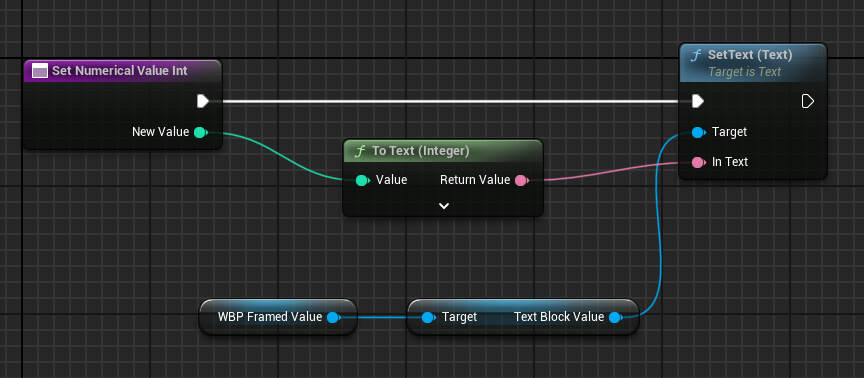
함수 구현이 끝났으면 WBP_TextValueButtonRow 로 돌아와서 델리게이트 발생시 수치를 Info 에 있는 수치로 적용되도록 함수를 호출하여 노드를 구성한다.
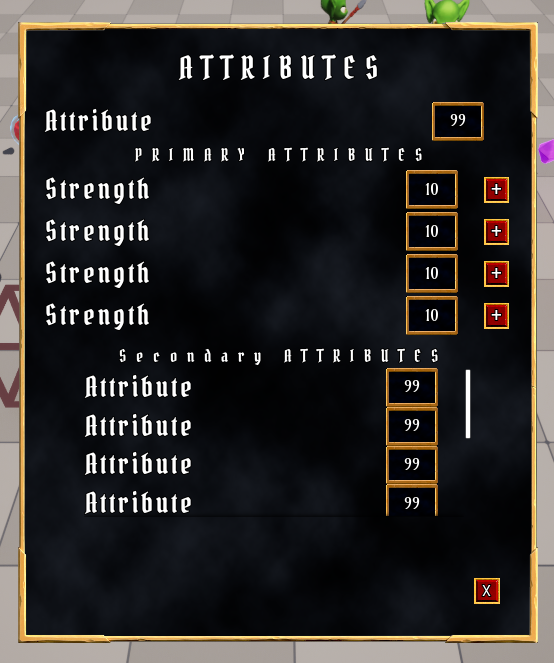
컴파일 후 실행시 아래와 같이 Strength 수치인 10이 적용되는 것을 확인할 수 있다.
7.6.7 Tag에 따라 AttributeMenu에 출력하기
현재 문제점은 모든 PrimaryAttribute 가 Strength 로 출력된다.
해결하기 위해서는 Tag에 따라 출력되도록 변경이 필요하다.
먼저 WBP_TextValueRow 블루프린트 클래스에서 GameplayTag 타입의 AttributeTag 변수를 생성하고, 다른 블루프린트클래스에서 접근 가능하도록 public화한다.
( WBP_TextValueButtonRow 의 상위클래스이기 때문)

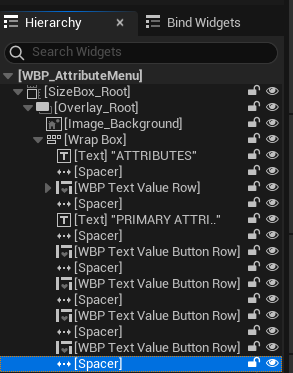
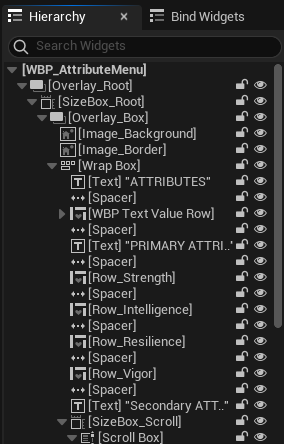
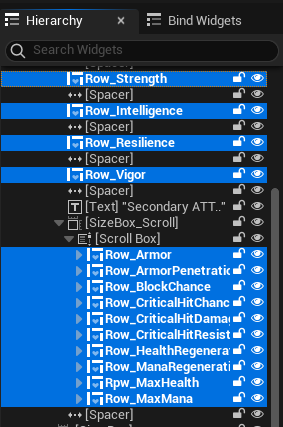
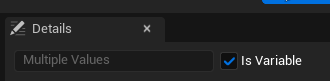
WBP_AttributeMenu 로 돌아와서 우선 구분가능하도록 Hierarchy 탭에 있는 것들을 전부 rename해준 다음 전부 IsVariable 을 활성화시켜준다.
( Strength ~ MaxMana 까지 전부)
Graph 탭의 Event Construct 노드에서 Sequence 노드로 분리하여 첫번째는 Click 관련 기능을 연결하고
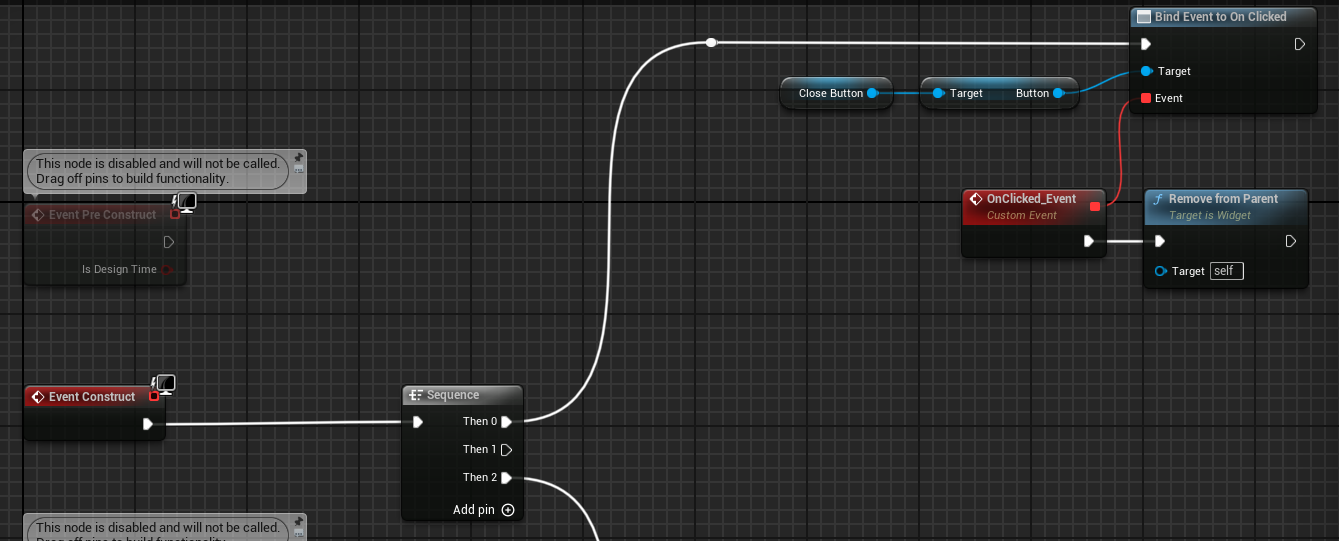
세번째는 Widgetcontroller 를 설정하여 값을 Braodcast하도록 한다.
두번째는 Tag를 통해 모든 Row에 값을 지정해주는 과정을 진행한다.
먼저 SetAttributeTags 함수를 생성하고
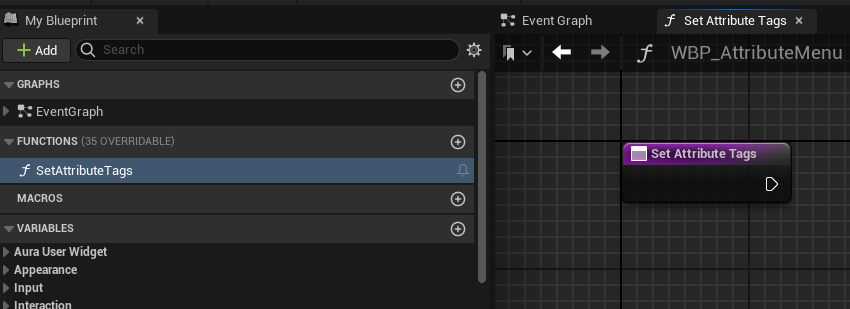
Sequence의 두번째 단계에서 호출되도록 한다.
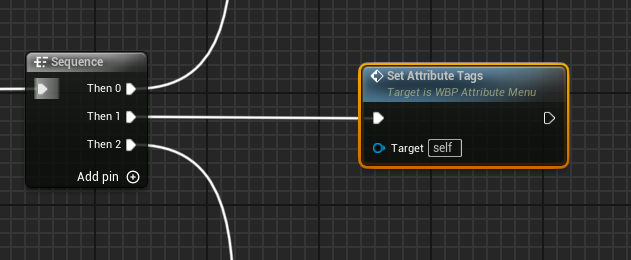
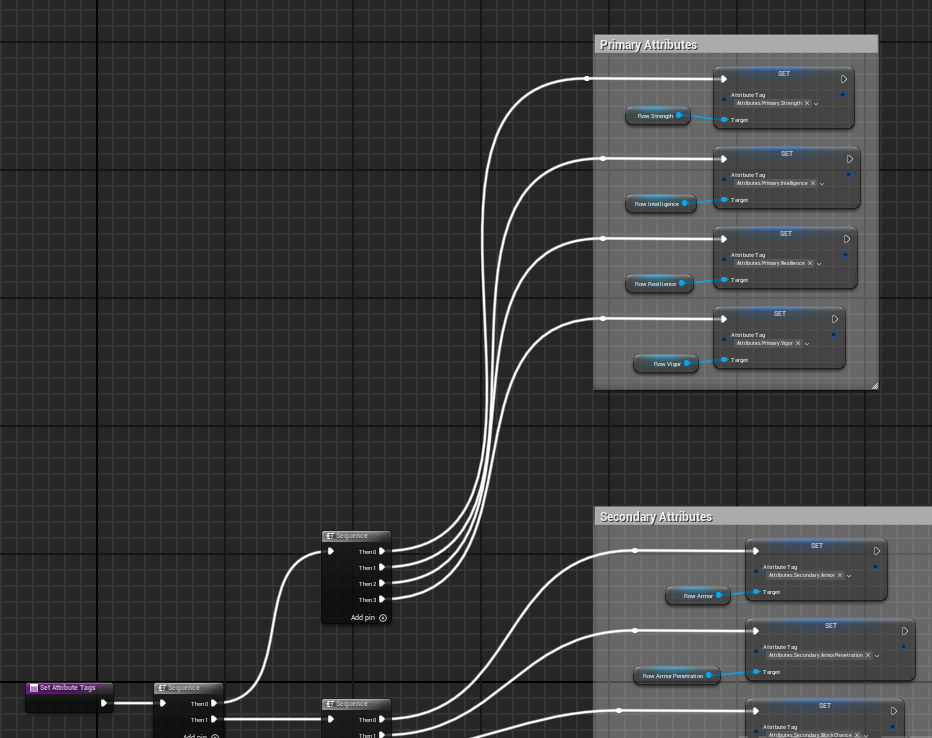
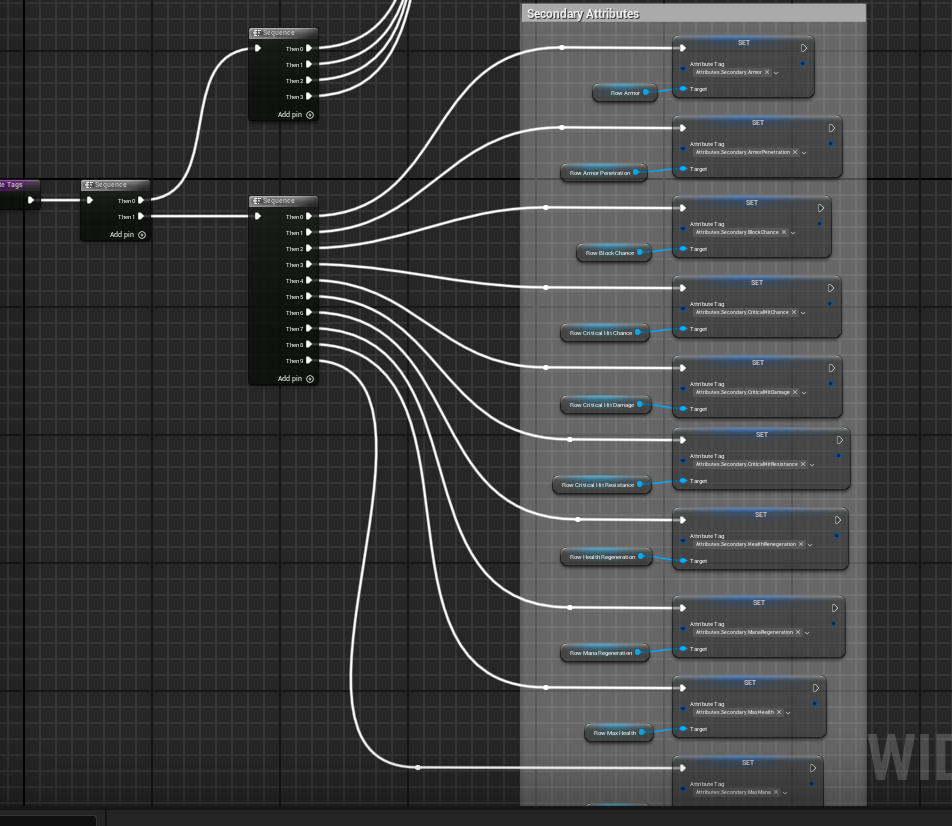
SetAttributeTags 함수에서도 Sequence 를 통해 Primary Attributes 먼저 태그를 설정해준다.

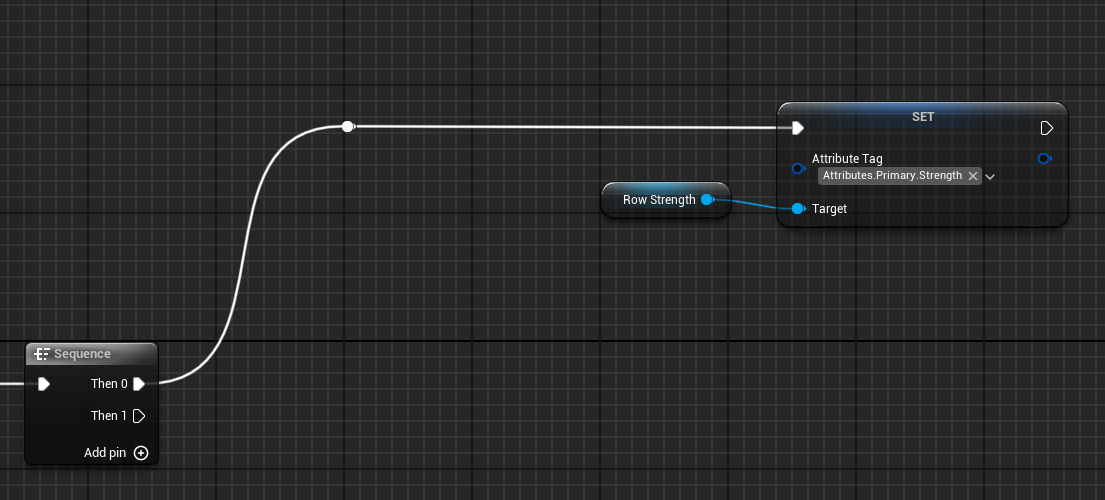
나머지도 동일한 과정을 진행한다.
WBP_TextValueButtonRow 로 돌아와서 소유중인(방금 할당한 태그들) AttributeTag 와 Info 의 AttributeTag 가 일치할 경우 참을 반환하고, Branch 를 통해 참일 경우에만 Text와 Value를 출력하도록 노드를 추가한다.
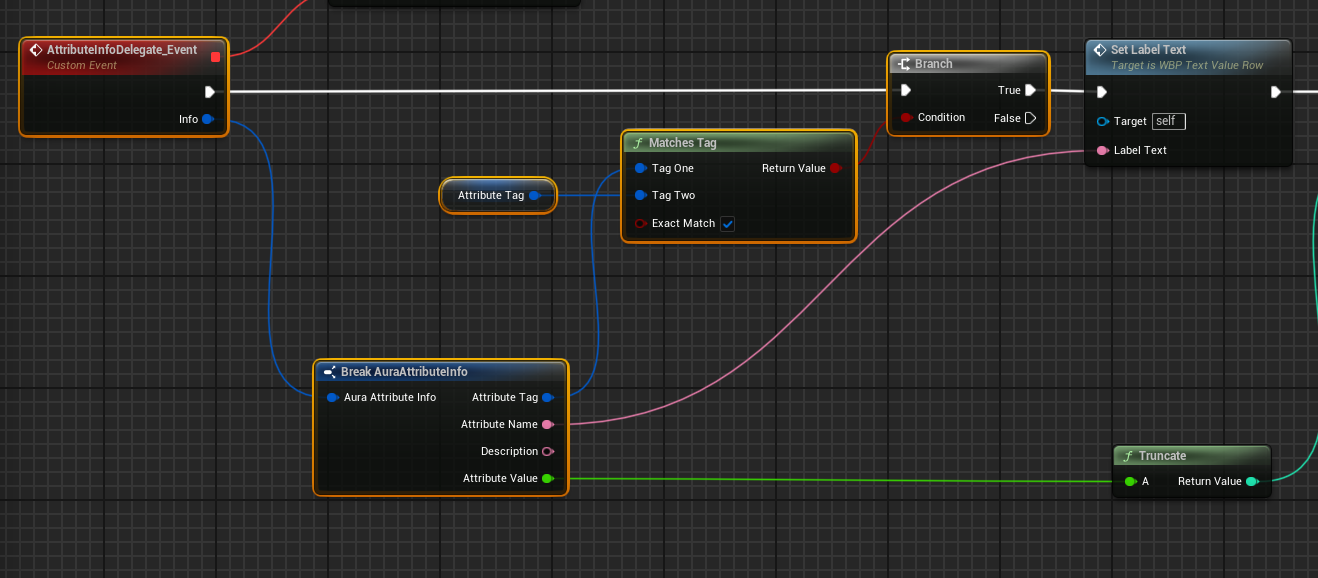
컴파일 후 실행시 일치하는 Strength 만 Text와 Value를 출력하는 것을 확인할 수 있다.
마지막으로 WBP_TextValueButtonRow 는 WBP_TextValueRow 파생 블루프린트 클래스이므로 노드를 WBP_TextValueRow 로 옮긴다.(잘라넣기)

이제 코드에서 모든 Attribute의 Info를 Broadcast하도록 해야 한다.
FAuraAttributeInfo Info = AttributeInfo->FindAttributeInfoForTag(FAuraGameplayTags::Get().Attributes_Primary_Strength);
Info.AttributeValue = AS->GetStrength();
AttributeInfoDelegate.Broadcast(Info);
위의 코드를 계속 복사하여 사용하기엔 다른 Attribute들이 추가될 경우 불편함이 많아진다.
Map을 이용하여 코드를 수정한다.
- AuraAttributeSet.h
// AuraAttributeSet.h

#include ...

#define ...

// RetVal = return value
// 각 Attribute의 Getter 를 델리게이트를 통해 바인딩
DECLARE_DELEGATE_RetVal(FGameplayAttribute, FAttributeSignature);

...
public:
	...

    TMap<FGameplayTag, FAttributeSignature> TagsToAttributes;

    /*
     * Primary Attributes
     */
...- AuraAttributeSet.cpp
// AuraAttributeSet.cpp

...
#include "AuraGameplayTags.h"

UAttributeSet::UAttributeSet()
{
	// GameplayTag를 호출할 수 있도록 하기 위함
	const FAuraGameplayTags& GameplayTags = FAuraGameplayTags::Get();

    // 델리게이트 선언
    FAttributeSignature StrengthDelegate;
    // 델리게이트에 GetStrengthAttribute 함수 바인딩(매크로에 의해 Getter 자동 생성)
    StrengthDelegate.BindStatic(GetStrengthAttribute);
    // Map에 태그와 델리게이트 매핑
	TagsToAttributes.Add(GameplayTags.Attributes_Primary_Strength, StrengthDelegate);

    FAttributeSignature IntelligenceDelegate;
    IntelligenceDelegate.BindStatic(GetIntelligenceAttribute);
	TagsToAttributes.Add(GameplayTags.Attributes_Primary_Intelligence, IntelligenceDelegate);
}- AttributeMenuWidgetController.cpp
// AttributeMenuWidgetController.cpp
#include "..."
#include "AbilitySystem/Data/AttributeInfo.h"

...

void UAttributeMenuWidgetController::BroadcastInitialValues()
{
	// AttributeSet에 접근하기 위함
	UAuraAttributeSet* AS = CastChecked<UAuraAttributeSet>(AttributeSet);

    check(AttributeInfo);

    // 반복문을 통해 AttributeSet의 TagsToAttributes 전체 확인
    for(auto& Pair : AS->TagsToAttributes)
    {
    	// map의 key에 존재하는 태그를 통해 각 태그의 값을 얻어내고 Info에 저장
    	FAuraAttributeInfo Info = AttributeInfo->FindAttributeInfoForTag(Pair.Key);
        // Info의 AttributeValue는 map의 밸류값에 존재하는 델리게이트를 실행시키고 얻은 값을 추출
		// GetNumericValue()의 파라미터로 어느 Attribute와 연관되어 있는지 설정
        Info.AttributeValue = Pair.Value.Execute().GetNumericValue(AS);
        // Info를 Broadcast
        AttributeInfoDelegate.Broadcast(Info);
    }
}
컴파일 후 실행시 Intelligence 가 정상적으로 출력되는 것을 확인할 수 있다.
다른 방법으로도 가능하다.
TMap에 Value값으로 있는 델리게이트를 아래 코드와 같이 변경할 수 있다.
// TBaseStaticDelegateInstance : 언리얼에서 델리게이트를 구현하기 위해 사용되는 템플릿클래스
// 주어진 함수 포인터를 저장하고, 나중에 해당 함수를 호출할 수 있도록 함
// <FGameplayAttribute(), FDefaultDelegateUserPolicy> : <델리게이트가 호출할 함수의 반환 형식, 델리게이트가 메모리를 어떻게 관리할지에 대한 정책>
// TBaseSTaticDelegateInstance 템플릿 클래스의 멤버 타입 FFuncPtr를 사용하여 FunctionPointer라는 변수를 정의.
// FFuncPtr는 함수 포인터를 나타내며, 델리게이트 인스턴스가 실제로 호출할 함수의 주소를 저장
// 코드 요약: 델리게이트 인스턴스를 정의하고, 이를 통해 특정 함수 포인터를 저장하기 위한 준비.
TBaseStaticDelegateInstance<FGameplayAttribute(), FDefaultDelegateUserPolicy>::FFuncPtr FunctionPointer;
해당 코드는 아래처럼 축약이 가능하다.
// FGameplayAttribute : 함수의 반환 형식
// (*)() : 함수 포인터 변수의 이름, 이 변수는 FGameplayAttribute를 반환
FGameplayAttribute(*)()
해당 사항을 적용하여 코드들을 수정한다.
- AuraAttributeSet.h
// AuraAttributeSet.h

/** 코드 삭제 */
DECLARE_DELEGATE_RetVal(FGameplayAttribute, FAttributeSignature);
/** 코드 삭제 */
...
public:
	...

    /** 코드 수정 */
    TMap<FGameplayTag, FGameplayAttribute(*)()> TagsToAttributes;
    /** 코드 수정 */

    /*
     * Primary Attributes
     */
...- AuraAttributeSet.cpp
// AuraTtributeSet.cpp

...

UAuraAttributeSet::UAuraAttributeSet()
{
	...

    /** 코드 삭제 */
    FAttributeSignature StrengthDelegate;
    StrengthDelegate.BindStatic(GetStrengthAttribute);
    /** 코드 삭제 */
    /** 코드 수정 */
    TagsToAttributes.Add(GameplayTags.Attributes_Primary_Strength, GetStrengthAttribute);
    /** 코드 수정 */
    /** 코드 삭제 */
    FAttributeSignature IntelligenceDelegate;
	IntelligenceDelegate.BindStatic(GetIntelligenceAttribute);
    /** 코드 삭제 */
    /** 코드 수정 */
    TagsToAttributes.Add(GameplayTags.Attributes_Primary_Intelligence, GetIntelligenceAttribute);
    /** 코드 수정 */

}- AttributeMenuWidgetController.cpp
// AttibuteMneuWidgetController.cpp

void UAttributeMenuWidgetController:: BroadcastInitialValues()
{
	...

    for(...)
    {
    	FAuraAttributeInfo Info = AttributeInfo->FindAttributeInfoForTag(Pair.Key);
        /** 코드 수정 */
        Info.AttributeValue = Pair.Value().GetNumericValue(AS);
        /** 코드 수정 */
        AttributeInfoDelegate.Broadcast(Info);
    }
}
컴파일 후 실행하면 동일하게 실행되는 것을 확인할 수 있다.
코드가 너무 길어지므로 템플릿함수를 이용하여 축소한다.
- AttributeSet.h
// Attributeset.h

...

// TODO: 이 방법을 써도 되고 아래의 템플릿함수 써도 됨, 이해되면 바로 아래코드 삭제
// typedef는 FGameplayAttribute signature에 대해 특정적이지만, TStaticFuncPtr는 어떤 signature에도 일반적임(범용적이라는 의미). 그러므로 template 사용
// typedef TBaseStaticDelegateInstance<FGameplayAttribute(), FDefaultDelegateUserPolicy>::FFuncPtr FAttributeFuncPtr;
template<class T>
using TStaticFuncPtr = typename TBaseStaticDelegateInstance<T, FDefaultDelegateUserPolicy>::FFuncPtr;

UCLASS()
...
{
	...
public:
	...

    TMap<FGameplayTag, TStaticFuncPtr<FGameplayAttribute()>> TagsToAttributes;

    // /** TStaticFunctionPtr 사용 예시 */
    // TStaticFunctionPtr<float(int32, float, int32)> RandomFuncdtionPointer;
    // static float RandomFunction(int32, I, float, F, int32 I2) { return 0.f; }
    // /** AttributeSet.cpp 생성자에 코드 작성 */
    // RandomFunctionPointer =RandomFunction'
    // float F = RandomFunctionPointer(0, 0.f, 0);
    // /** AttributeSet.cpp 생성자에 코드 작성 */

    ...
이제 나머지 Attribute에 대해서도 AttributeMenu에 나타나도록 코드를 작성한다.
- AttributeSet.cpp
// AttributeSet.cpp
...
UAttributeSet::UAttributeSet()
{
...
TagsToAttributes.Add(GameplayTags.Attributes_Primary_Strength, GetStrengthAttribute);
TagsToAttributes.Add(GameplayTags.Attributes_Primary_Intelligence, GetIntelligenceAttribute);
TagsToAttributes.Add(GameplayTags.Attributes_Primary_Resilience, GetResilienceAttribute);
TagsToAttributes.Add(GameplayTags.Attributes_Primary_Vigor, GetVigorAttribute);
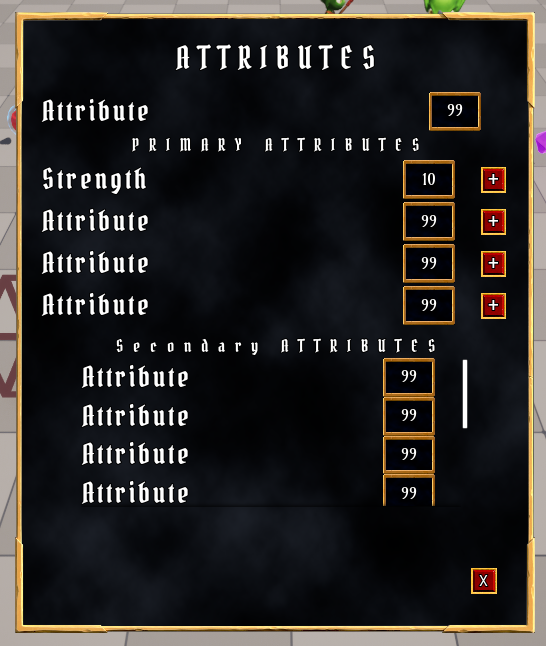
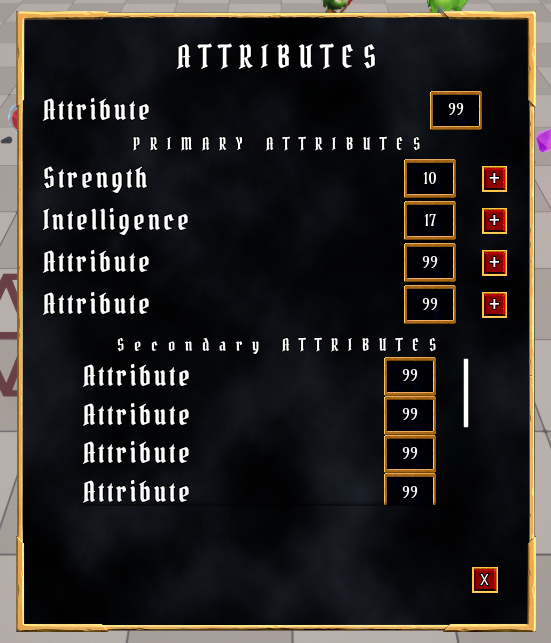
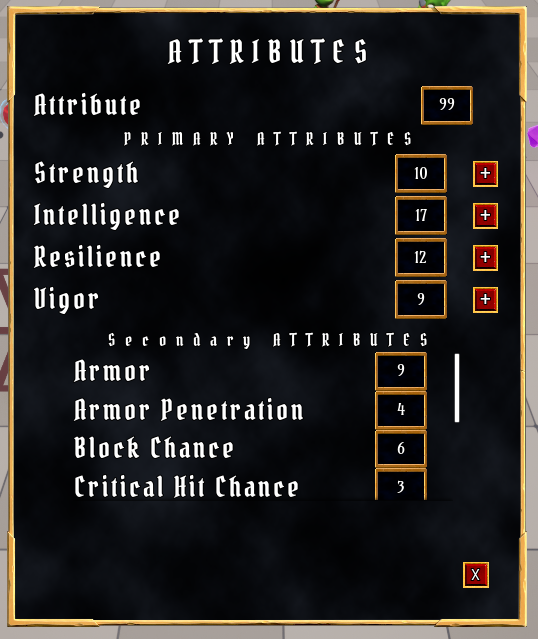
}컴파일 후 실행하면 나머지 Primayr Attributes 에 대해서도 메뉴에 출력되는 것을 확인할 수 있다.

이어서 Primary Attributes 값 변화에 따라 Broadcast를 진행하여 값을 바꾸는 코드를 작성한다.
- AttributeMenuWidgetController.cpp
// AttributeMenuWidgetController.cpp

...

void UAttributeMenuWidgetController::BindCallbacksToDependencies()
{
	UAuraAttributeSet* AS = CastChecked<UAuraAttributeSet>(AttributeSet);
    // 반복문을 통해 순회하며 Attribute의 값이 변경될 경우 호출될 콜백을 바인딩함
    for(auto& Pair : AS->TagsToAttributes)
    {
    	// GetGameplayAttributeValuechangeDelegate() : Attribute 값이 변경될 때 호출되는 델리게이트
		AbilitySystemComponent->GetGameplayAttributeValueChangeDelegate(Pair.Value()).AddLambda(
    		[this, Pair, AS](const FOnAttributeChangeData& Data)
        	{
            	// FAuraAttributeInfo 타입 구조체 Info 생성후 Tag저장
            	FAuraAttributeInfo Info = AttributeInfo->FindAttributeInfoForTag(Pair.Key);
                // Info에 값을 수치화하여 저장
                Info.AttributeValue = Pair.Value().GetNumericValue(AS);
                // Info를 Broacast
                AttributeInfoDelegate.Broadcast(Info);
        	}
        );
    }
}
이제 Secondary Attributes 에 대해서도 AttributeMenu 에서 확인할 수 있도록 코드를 작성한다.
- AuraAttributeSet.h
// AuraAttributeSet.h

...

UAuraAttributeSet::UAuraAttributeSet()
{
	...

    /* Primary Attributes */
    // Strength, Intelligence, Resilience, Vigor 관련 코드 여기로 옮기기
    ...

    /* Secondary Attributes */
    TagsToAttributes.Add(GameplayTags.Attributes_Secondary_Armor, GetArmorAttribute);
    TagsToAttributes.Add(GameplayTags.Attributes_Secondary_ArmorPenetration, GetArmorPenetrationAttribute);
    TagsToAttributes.Add(GameplayTags.Attributes_Secondary_BlockChance, GetBlockChanceAttribute);
    TagsToAttributes.Add(GameplayTags.Attributes_Secondary_CriticalHitChance, GetCriticalHitChanceAttribute);
    TagsToAttributes.Add(GameplayTags.Attributes_Secondary_CriticalHitDamage, GetCriticalHitDamageAttribute);
    TagsToAttributes.Add(GameplayTags.Attributes_Secondary_CriticalHitResistance, GetCriticalHitResistanceAttribute);
    TagsToAttributes.Add(GameplayTags.Attributes_Secondary_HealthRegeneration, GetHealthRegenerationAttribute);
    TagsToAttributes.Add(GameplayTags.Attributes_Secondary_ManaRegeneration, GetManaRegenerationAttribute);
    TagsToAttributes.Add(GameplayTags.Attributes_Secondary_MaxHealth, GetMaxHealthAttribute);
    TagsToAttributes.Add(GameplayTags.Attributes_Secondary_MaxMana, GetMaxManaAttribute);
}
컴파일 후 실행하면 정상적으로 출력되는 것을 확인할 수 있다.

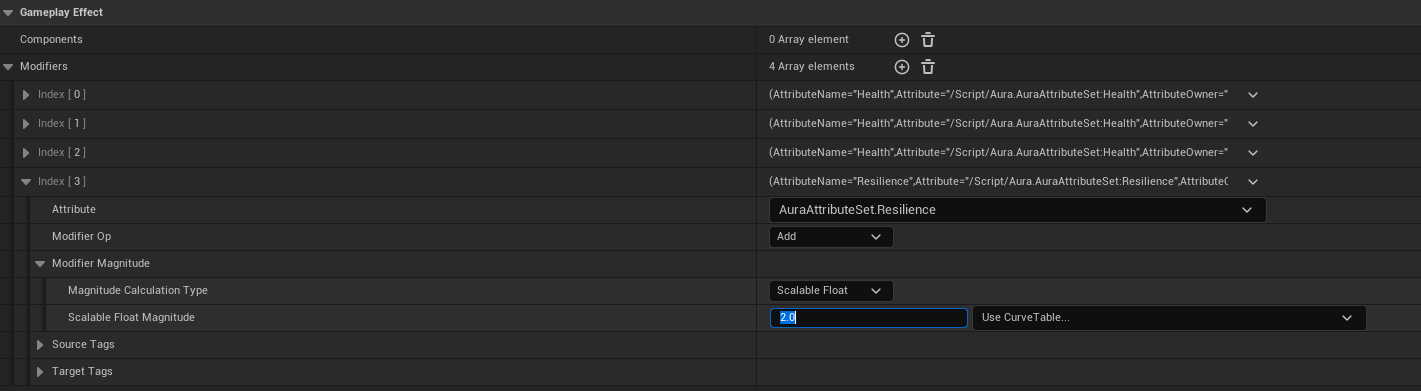
값 변화에 따른 수치 변화가 AttributeMenu 에도 적용되는지 확인하기 위해 GE_TestAttributeBased 를 열고 다른 모든 Modifiers 를 삭제한 다음 새로운 항목을 추가한다.

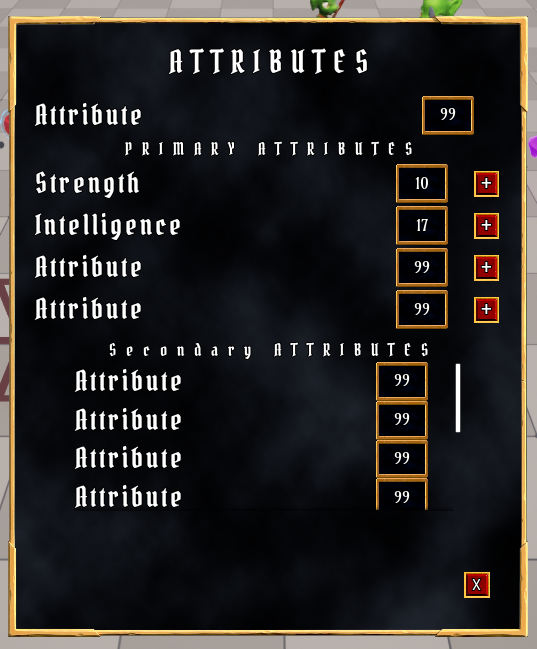
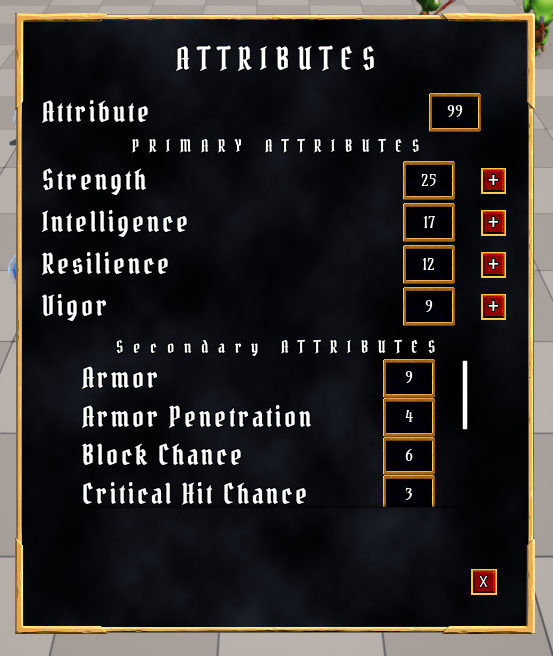
컴파일 후 실행한 다음 AttributeMenu 위젯을 켜둔 상태로 TestActor 와 캐릭터가 겹치게 되면 Strength 가 15만큼 증가하는 것을 확인할 수 있다.
연관된 Attribute 에도 적용되는지 확인하기 위해 GE_TestAttributeBased 를 열고 Modifier 의 Attribute : AuraAttributeSet.Resilience 로 변경하고 컴파일 후 실행한다.
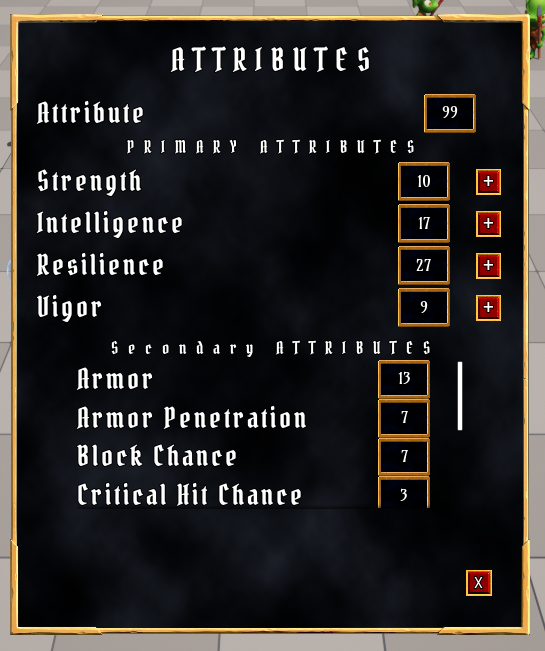
Resilience 와 관련된 Attribute들의 값이 변경되는 것을 확인할 수 있다.
추가
AttributeMenuWidgetController.cpp에서AuraGameplayTags.h를 더이상 사용하지 않으므로 삭제
마지막으로 BindCallbacksToDependencies() 함수와 BroadcastInitialValues() 함수에서 동일한 코드가 있으므로 함수화하여 리팩토링을 진행한다.
- AttributeMenuWidgetController.h
// AttributeMenuWidgetController.h

...

struct FGameplayTag;
struct FGameplayAttribute;
...

...
private:
void BroadcastAttributeInfo(const FGameplayTag& AttributeTag, const FGameplayAttribute& Attribute) const;- AttributeMenuWidgetController.cpp
// AttributeMenuWidgetController.cpp

void UAttributeMenuWidgetController::BindCallbacksToDependencies()
{
	...
    /** 코드 추가 */
    check(AttributeInfo);
    /** 코드 추가 */

    for(...)
    {
    	(...).AddLambda(
        	// [] 안에 AS 사용 안하므로 삭제
        	[...](...)
            {
            	BroadcastAttributeInfo(Pair.Key, Pair.Value());
                // 나머지 코드 3줄의 기능은 위의 함수에 있으므로 삭제
            }
        );
    }
}

void UAttributeMenuWidgetController::BroadcastInitialValues()
{
	...

    for(...)
    {
    	BroadcastAttributeInfo(Pair.Key, Pair.Value());
        // 나머지 코드 3줄의 기능은 위의 함수에 있으므로 삭제
    }
}

void UAttributeMenuWidgetController::BroadcastAttributeInfo(const FGameplayTag& AttributeTag, const FGameplayAttribute& Attribute) const
{
	FAuraAttributeInfo Info = AttributeInfo->FindAttributeInfoForTag(AttributeTag);
    Info.AttributeValue = Attribute.GetNumericValue(AttributeSet);
    AttributeInfoDelegate.Broadcast(Info);
}
컴파일 후 실행시 정상적으로 실행되는 것을 확인할 수 있다.