Xcode 로 새로운 프로젝트를 생성 시에 나타나는 AppDelegate.swift, SceneDelegate.swift, ViewController.swift 가 어떤 구조를 가지고, 가지는 의미를 이해해보는 시간이에요.
프로젝트 생성 시
Xcode에서 프로젝트를 생성하면 기본적으로 제공되는 파일들이 어떤 역할을 하는지 이해하는 것이 중요해요. 단순히 파일이 생성된다는 사실만 알면 부족하니, 각 파일이 앱의 어떤 부분을 담당하는지 알아볼게요.
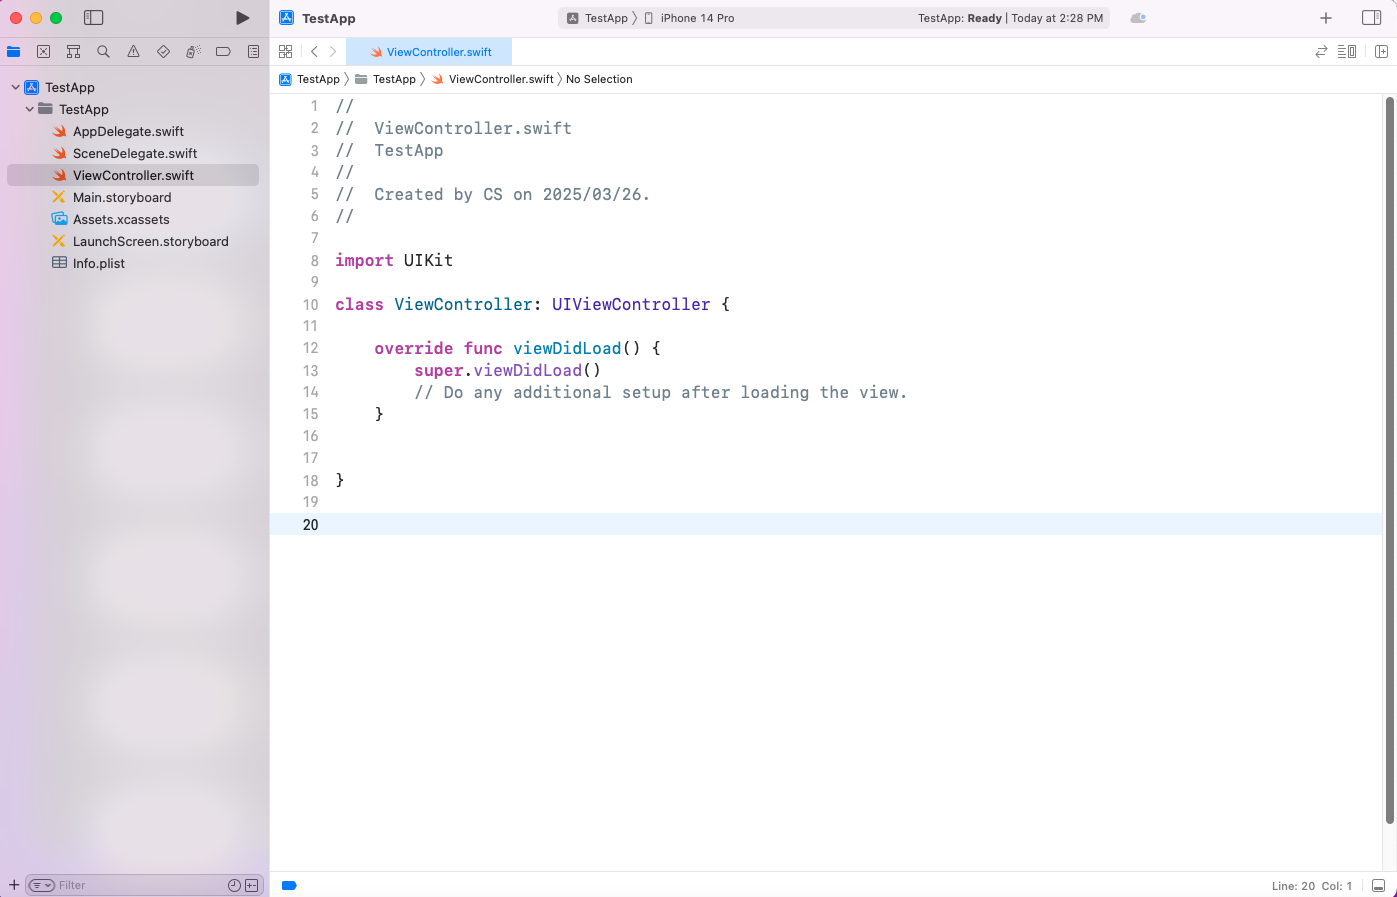
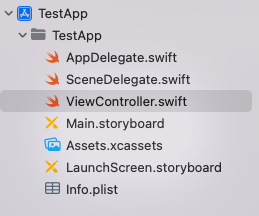
구조를 확인해보면 AppDelegate.swift, SceneDelegate.swift, ViewController.swift 파일이 존재한다는 것을 확인할 수 있어요.
AppDelegate.swift- 앱의 생명주기를 관리하는 중심적인 역할을 해요.
- 앱의 생명 주기(App Life Cycle)는 앱이 최초로 실행된 순간부터 메모리에서 완전히 제거되어 종료될 때까지의 상태와 상태 간의 전환을 의미해요.
- 앱이 처음 실행될 때 호출되는
application(_:didFinishLaunchingWithOptions:)메서드를 통해 초기 설정을 할 수 있어요.
- 앱의 생명주기를 관리하는 중심적인 역할을 해요.
func application(_ application: UIApplication,
	didFinishLaunchingWithOptions launchOptions: [UIApplication.LaunchOptionsKey: Any]?)
    -> Bool {
  print("앱이 시작되었어요!")
  return true
}SceneDelegate.swift- iOS 13부터 도입되어 UI 생명주기를 관리해요.
- 멀티 윈도우 지원을 위해 AppDelegate의 일부 역할을 담당해요.
- Scene의 상태 변화를 처리해요.
ViewController.swift- 앱의 사용자 인터페이스와 데이터 관리를 담당해요.
- 뷰의 생명주기를 관리하고 사용자 상호작용을 처리해요.
- 뷰가 화면에 나타날 때(
viewDidLoad), 사라질 때(viewDidDisappear) 같은 단계를 관리한다고 보면 돼요.
- 뷰가 화면에 나타날 때(
override func viewDidLoad() {
  super.viewDidLoad()
  print("뷰가 로드되었어요!")
  view.backgroundColor = .white
}viewDidLoad()메서드에서 초기 뷰 설정을 수행해요.
함수
C 스타일 함수 vs. Swift 스타일 함수
- C 스타일과 Swift 스타일의 차이가 뭔지 모를 수 있어요. C 스타일은 단순히 함수 이름과 매개변수만 쓰는 반면, Swift는 가독성을 위해 argument label을 추가할 수 있어요.
// C 스타일
func add(int x, int y) { return x + y }

// Swift 스타일
func add(_ x: Int, _ y: Int) -> Int { return x + y }
Swift 함수의 argument label과 parameter name
- argument label은 함수 호출 시 사용하는 이름이고, parameter name은 함수 내부에서 사용하는 변수 이름이에요.
func greet(to name: String) {
  print("안녕, \(name)!")
} // 'to'는 argument label, 'name'은 parameter name
application() 함수의 함수명
- 함수명이 왜 저렇게 생겼는지 이해하기 어려울 수 있어요. Swift에서는 매개변수마다 argument label을 붙여서 가독성을 높이고, 전체 함수 시그니처가
application(_:configurationForConnecting:options:)처럼 보이게 돼요. - 예제:
func application(_ application: UIApplication, configurationForConnecting connectingSceneSession: UISceneSession, options: UIScene.ConnectionOptions) -> UISceneConfiguration {
    return UISceneConfiguration(name: "Default Configuration", sessionRole: connectingSceneSession.role)
}
클래스
Man 클래스 만들기
- 클래스는 객체를 생성하기 위한 설계도로, 속성과 메서드를 가질 수 있어요.
- 예제:
class Man {
    var name: String = "홍길동"
    var age: Int = 30

    func sayHello() {
        print("안녕, 나는 \(name)이야!")
    }
}
let person = Man()
person.sayHello() // "안녕, 나는 홍길동이야!"
클래스를 상속 받아 자식 클래스 만들기
- 부모 클래스의 속성과 메서드를 물려받아 확장하는 거예요.
- 예제:
class Student: Man {
    var grade: Int = 1

    func study() {
        print("\(name)이 \(grade)학년 공부를 해요!")
    }
}
let student = Student()
student.sayHello() // "안녕, 나는 홍길동이야!"
student.study()   // "홍길동이 1학년 공부를 해요!"
부모 클래스 상속 시 주의 사항
- 부모 클래스의 초기화가 제대로 안 되면 자식 클래스가 제대로 동작하지 않을 수 있어요.
super.init()을 먼저 사용하면 안 되는 이유:- 자식 클래스의 속성을 먼저 초기화해야 부모 클래스의 초기화가 의미를 가져요.
class Man {
    var name: String
    init(name: String) {
        self.name = name
    }
}
class Student: Man {
    var grade: Int
    init(name: String, grade: Int) {
        self.grade = grade // 자식 속성 먼저 초기화
        super.init(name: name) // 그 다음 부모 초기화
    }
}
- 자식 클래스의 속성을 먼저 초기화해야 부모 클래스의 초기화가 의미를 가져요.
부모 클래스의 메서드 오버라이드하기
- 부모의 메서드를 자식에서 재정의해서 다르게 동작하게 만드는 거예요.
class Man {
    func sayHello() {
        print("안녕!")
    }
}
class Student: Man {
    override func sayHello() {
        print("안녕, 나는 학생이야!")
    }
}
let student = Student()
student.sayHello() // "안녕, 나는 학생이야!"
프로토콜
프로토콜은 특정 클래스와 관련없는 함수(메서드)들의 선언 집합이에요.
프로토콜 단위로 묶어 표현하고, extension으로 기본적인 것을 구현(protocol default implementation)해서 단일 상속의 한계를 극복한 것이에요.
간단한 예제를 통해서 알아볼게요.
// 프로토콜 정의
protocol Displayable {
    func display()
}

// 기본 클래스 정의
class Vehicle {
    var brand: String

    init(brand: String) {
        self.brand = brand
    }

    func start() {
        print("\(brand) vehicle is starting.")
    }
}

// Vehicle을 상속받고 Displayable 프로토콜을 채택하는 Car 클래스
class Car: Vehicle, Displayable {
    var model: String

    init(brand: String, model: String) {
        self.model = model
        super.init(brand: brand)
    }

    override func start() {
        super.start()
        print("Car engine is running.")
    }

    func display() {
        print("This is a \(brand) \(model).")
    }
}

// 사용 예제
let myCar = Car(brand: "Tesla", model: "Model 3")
myCar.start()
myCar.display()Displayable프로토콜을 정의하여display()메서드를 요구합니다.Vehicle클래스를 기본 클래스로 정의하고,brand속성과start()메서드를 구현합니다.Car클래스는Vehicle클래스를 상속받고Displayable프로토콜을 채택합니다:Vehicle로부터 상속받은brand와start()메서드를 사용합니다.start()메서드를 오버라이드하여 추가 기능을 구현합니다.Displayable프로토콜의 요구사항인display()메서드를 구현합니다.
Car인스턴스를 생성하고start()와display()메서드를 호출하여 사용합니다.
조금 더 자세한 내용으로 작성해서 조금 더 구조적으로 알아볼게요.
프로토콜 정의
protocol restaurantStaff {
    var name: String { get }
    var age: Int { get }
    func greet()
    func takeOrder()
}
기본 클래스 정의
class employee: restaurantStaff {
    let name: String
    let age: Int

    init(name: String, age: Int) {
        self.name = name
        self.age = age
    }

    func greet() {
        print("Hello, I'm \(name).")
    }

    func takeOrder() {
        print("Would you like to place an order?")
    }
}
상속을 통한 세부 클래스 구현
class owner: employee {
    func manageStore() {
        print("\(name) is managing the store.")
    }

    override func takeOrder() {
        super.takeOrder()
        print("Today's special menu is the special pasta.")
    }
}

class partTimer: employee {
    var hourlyWage: Int

    init(name: String, age: Int, hourlyWage: Int) {
        self.hourlyWage = hourlyWage
        super.init(name: name, age: age)
    }

    func cleanStore() {
        print("\(name) is cleaning the store.")
    }
}
음식점 클래스 구현
class restaurant {
    var name: String
    var staffMembers: [restaurantStaff]

    init(name: String) {
        self.name = name
        self.staffMembers = []
    }

    func hireStaff(staff: restaurantStaff) {
        staffMembers.append(staff)
        print("\(staff.name) has been hired at \(name) restaurant.")
    }

    func startBusiness() {
        print("\(name) restaurant is now open for business.")
        for staff in staffMembers {
            staff.greet()
        }
    }
}
사용 예제
let tastyRestaurant = restaurant(name: "Tasty Restaurant")
let kimOwner = owner(name: "Kim Chulsoo", age: 45)
let leePartTimer = partTimer(name: "Lee Younghee", age: 22, hourlyWage: 9620)

tastyRestaurant.hireStaff(staff: kimOwner)
tastyRestaurant.hireStaff(staff: leePartTimer)

tastyRestaurant.startBusiness()

kimOwner.manageStore()
kimOwner.takeOrder()
leePartTimer.cleanStore()