일단 Let's Encrypt 를 사용해 SSL 키부터 받자.
Let's Encrypt 설치
필요한 라이브러리 설치
sudo apt update

sudo apt-get install letsencrypt -y

sudo apt install certbot python3-certbot-nginx
/etc/nginx/sites-available/default에 있는 server_name 수정
...

server {
        listen 80 default_server;
        listen [::]:80 default_server;

        # SSL configuration
        #
        # listen 443 ssl default_server;
        # listen [::]:443 ssl default_server;
        #
        # Note: You should disable gzip for SSL traffic.
        # See: https://bugs.debian.org/773332
        #
        # Read up on ssl_ciphers to ensure a secure configuration.
        # See: https://bugs.debian.org/765782
        #
        # Self signed certs generated by the ssl-cert package
        # Don't use them in a production server!
        #
        # include snippets/snakeoil.conf;

        root /var/www/html;

        # Add index.php to the list if you are using PHP
        index index.html index.htm index.nginx-debian.html;

        server_name 도메인 이름;

        location / {
                # First attempt to serve request as file, then
                # as directory, then fall back to displaying a 404.
                try_files $uri $uri/ =404;
        }

        # pass PHP scripts to FastCGI server
        #
        #location ~ \.php$ {
        #       include snippets/fastcgi-php.conf;
        #
        #       # With php-fpm (or other unix sockets):
        #       fastcgi_pass unix:/var/run/php/php7.4-fpm.sock;
        #       # With php-cgi (or other tcp sockets):
        #       fastcgi_pass 127.0.0.1:9000;
        #}

        # deny access to .htaccess files, if Apache's document root
        # concurs with nginx's one
        #
        #location ~ /\.ht {
        #       deny all;
        #}
}

...
Nginx 재시작 및 상태확인
sudo service nginx restart

sudo nginx -t
80, 443, Nginx 관련 포트 열기
sudo ufw allow http

sudo ufw allow https

sudo ufw allow 'Nginx Full'
Let’s Encrypt SSL 인증서 발급
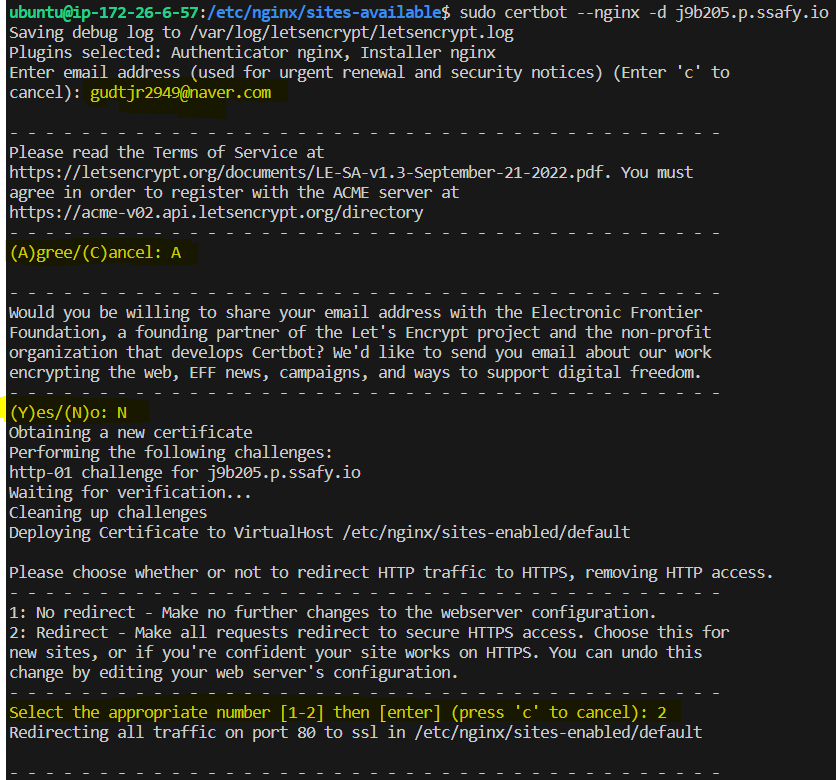
아래 명령어를 입력해 SSL 키 발급받기
sudo certbot --nginx -d 도메인명그러면 이제 4가지 설문? 같은 걸 해야함
1) 이메일 입력
2) 약관 동의
3) 이메일 수신여부 동의
4) http로 요청 들어왔을 때, https로 리다리엑트 할꺼냐 (근데 이건 2을 하면 서버 nginx 설정파일까지 같이 바꿔줘서 나중에 편할 듯? )
발급 완료
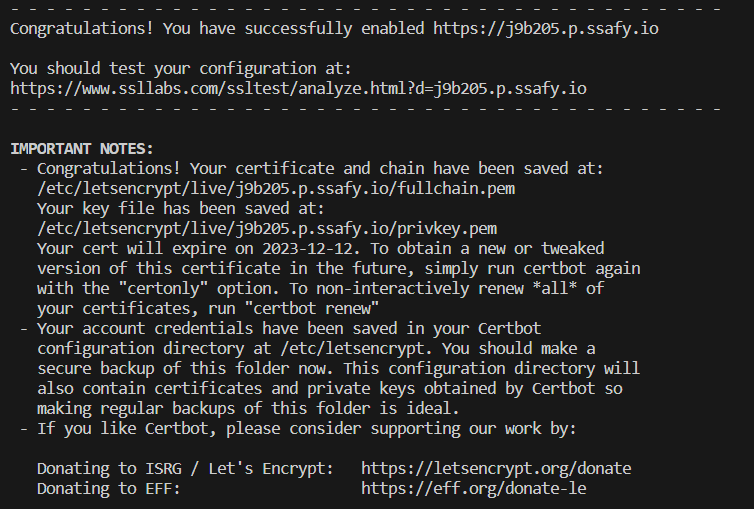
이제 위의 로그를 보면 /etc/letsencrypt/live/j9b205.p.ssafy.io/ 에 fullchain.pem랑 privkey.pem이 있다는 걸 볼 수 있다. 두 pem키를 사용해 SSL을 적용시켜보자

이사중 .. -> https://gudtjr2949.tistory.com/