업로드 결과 반환과 화면 처리
브라우저에서 이미지를 전송받고 결과 데이터를 JSON으로 전송할 것임. 따라서 어떤 구조의 데이터를 전송할 것인지 결정해야 함. 브라우저에 필요한 정보를 정리해보면,
- 업로드된 파일의 원래 이름
- 파일의 UUID 값
- 업로드된 파일의 저장 경로
와 같은 정보가 필요함.
업로드 결과 반환
• 업로드 결과 처리용 DTO
@Data
@AllArgsConstructor
public class UploadResultDTO implements Serializable {

    private String fileName;
    private String uuid;
    private String folderPath;

    public String getImageURL() {
        return URLEncoder.encode(folderPath+"/"+uuid+"_"+fileName, StandardCharsets.UTF_8);
    }

}
• 업로드 받고 결과 반환하는 Controller
@RestController
@Log4j2
public class UploadController {
@Value("${com.example.ex8_fileupload.upload.path}") // application 의 properties 의 변수
private String uploadPath;
/*파일 업로드, 업로드 결과 반환*/
@PostMapping("/uploadAjax")
public ResponseEntity<List<UploadResultDTO>> uploadFile(MultipartFile[] uploadFiles) {
List<UploadResultDTO> resultDTOList = new ArrayList<>();
for (MultipartFile uploadFile: uploadFiles) {
// 이미지 파일만 업로드
if (!Objects.requireNonNull(uploadFile.getContentType()).startsWith("image")) {
log.warn("this file is not image type");
return new ResponseEntity<>(HttpStatus.FORBIDDEN);
}
// 실제 파일 이름 IE나 Edge는 전체 경로가 들어오므로 => 바뀐 듯 ..
String orginalName = uploadFile.getOriginalFilename();
assert orginalName != null;
String fileName = orginalName.substring(orginalName.lastIndexOf("\\") + 1);
log.info("fileName: "+fileName);
// 날짜 폴더 생성
String folderPath = makeFolder();
// UUID
String uuid = UUID.randomUUID().toString();
// 저장할 파일 이름 중간에 "_"를 이용해서 구현
String saveName = uploadPath + File.separator + folderPath + File.separator + uuid + "_" + fileName;
Path savePath = Paths.get(saveName);
try {
uploadFile.transferTo(savePath); // 실제 이미지 저장
resultDTOList.add(new UploadResultDTO(fileName, uuid, folderPath));
} catch (IOException e) {
e.printStackTrace();
}
}
return new ResponseEntity<>(resultDTOList, HttpStatus.OK);
}
/*날짜 폴더 생성*/
private String makeFolder() {
String str = LocalDate.now().format(DateTimeFormatter.ofPattern("yyyy/MM/dd"));
String folderPath = str.replace("/", File.separator);
// make folder --------
File uploadPathFolder = new File(uploadPath, folderPath);
if(!uploadPathFolder.exists()) {
boolean mkdirs = uploadPathFolder.mkdirs();
log.info("-------------------makeFolder------------------");
log.info("uploadPathFolder.exists(): "+uploadPathFolder.exists());
log.info("mkdirs: "+mkdirs);
}
return folderPath;
}
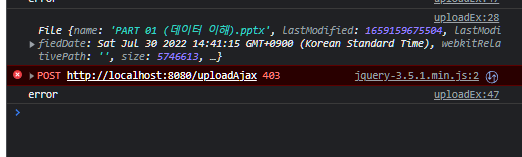
}→ 만일 이미지가 아닌 파일의 경우엔 403 Forbidden을 반환
업로드 이미지 출력 (화면 처리)
JSON으로 반환된 업로드 결과를 화면에 출력하기 위해선
- 브라우저에서 링크를 통해 <img> 태그를 추가
- 서버에서 해당 URL 호출되는 경우 이미지 파일 데이터를 브라우저로 전송
의 작업이 필요하다. 따라서 UploadController에 '/dispaly?fileName=xxxx'와 같은 URL 호출 시 이미지가 전송되도록 메서드를 추가한다.
• 업로드 이미지 불러오는 Controller
/*업로드 이미지 출력하기*/
    @GetMapping("/display")
    public ResponseEntity<byte[]> getFile(String fileName) {

        ResponseEntity<byte[]> result;

        try {
            String srcFileName = URLDecoder.decode(fileName, StandardCharsets.UTF_8);

            log.info("fileName: " + srcFileName);

            File file = new File(uploadPath + File.separator + srcFileName);

            log.info("file: " + file);

            HttpHeaders header = new HttpHeaders();


            // MIME 타입 처리
            header.add("Content-Type", Files.probeContentType(file.toPath()));

            // 파일 데이터 처리
            result = new ResponseEntity<>(FileCopyUtils.copyToByteArray(file), header, HttpStatus.OK);


        } catch (Exception e) {
            log.error(e.getMessage());
            return new ResponseEntity<>(HttpStatus.INTERNAL_SERVER_ERROR);
        }

        return result;

    }
코드 설명 ResponseEntity<byte[]> 인코딩된 파일 이름을 byte[]로 받음 Files.probeContentType() 파일 확장자에 따라 브라우저에 전송하는 MIME 타입이 달라져야 하는 문제 처리
• 화면
<!DOCTYPE html>
<html lang="en">

<head>
	<meta charset="UTF-8">
	<title>uploadEx</title>
</head>

<body>

	<input name="uploadFiles" type="file" multiple>
	<button class="uploadBtn">Upload</button>

	<div class="uploadResult"></div>

	<script src="https://code.jquery.com/jquery-3.5.1.min.js"></script>

	<!--upload btn-->
	<script>

		$('.uploadBtn').click(() => {

            const formData = new FormData();

            const inputFile = $("input[type='file']");

			const files = inputFile[0].files;

            for(let i = 0; i < files.length; i++) {
                console.log(files[i]);
                formData.append("uploadFiles", files[i]);
			}

			const showUploadedImages = arr => {
                console.log(arr);

                const divArea = $(".uploadResult");

                for(let i = 0; i<arr.length; i++){
                    divArea.append("<img src='/display?fileName="+arr[i].imageURL+"' alt='..null'>");
				}
			}

            /*실제 업로드 부분*/
			/*upload ajax*/
			$.ajax({
				url: '/uploadAjax',
				processData: false,
				contentType: false, // 파일 업로드를 multipart/form-data 타입을 사용하기 위함
				data: formData,
				type: 'POST',
				dataType: 'json',
				success: result => {
                    console.log(result);
					showUploadedImages(result);
                },
				error: (jqXHR, textStatus, errorThrown) => {
                    console.log(textStatus)
				}
			})

		})

	</script>

</body>
</html>
섬네일 이미지 생성과 화면 처리
- 업로드된 파일을 저장하고 섬네일 라이브러리를 활용해서 섬네일 파일을 생성한다.
- 섬네일 파일은 파일의 맨 앞에 's_'를 붙여 일반 파일과 구분한다.
- UploadResultDTO에 getTumbnailURL()을 추가해 섬네일 경로를 <img> 태그로 처리한다.
섬네일 관련 디펜던시 추가
implementation group: 'net.coobird', name: 'thumbnailator', version: '0.4.8'• UploadController 의 uploadFile 메서드에 섬네일 이미지 생성을 위한 코드 추가
		try {
                // 원본 파일 저장
                uploadFile.transferTo(savePath);

                // 섬네일 생성
                String thumbnailSaveName = uploadPath + File.separator + folderPath + File.separator + "s_" + uuid + "_" + fileName;

                // 섬네일 생성
                File thumbnailFile = new File(thumbnailSaveName);
                Thumbnailator.createThumbnail(savePath.toFile(), thumbnailFile, 100, 100);

                resultDTOList.add(new UploadResultDTO(fileName, uuid, folderPath));

            } catch (IOException e) {
                e.printStackTrace();
            }
• UploadResultDTO 에 섬네일 이미지 반환을 위한 메서드 추가
 /*섬네일 이미지 반환*/
    public String getThumbnailURL() {
        return URLEncoder.encode(folderPath + "/s_" + uuid + "_" + fileName, StandardCharsets.UTF_8);
    }
• uploadEX.html 파일 수정
/*섬네일 이미지 보여줌*/
			const showUploadedImages = arr => {
                console.log(arr);

                const divArea = $(".uploadResult");

                for(let i = 0; i<arr.length; i++){
                    divArea.append("<img src='/display?fileName="+arr[i].thumbnailURL+"' alt='..null'>");
				}
			}
결과

업로드 파일 삭제
• UploadController 에 삭제를 위한 메서드 추가
   /*업로드 파일 삭제*/
    @PostMapping("/removeFile")
    public ResponseEntity<Boolean> removeFile(String fileName) {

        String srcFileName = URLDecoder.decode(fileName, StandardCharsets.UTF_8);

        File file = new File(uploadPath + File.separator + srcFileName);

        File thumbnail = new File(file.getParent(), "s_" + file.getName());

        boolean result = file.delete() && thumbnail.delete();

        return new ResponseEntity<>(result, HttpStatus.OK);

    }
• uploadEX.html 에 파일 삭제를 위한 버튼 추가
		const showUploadedImages = arr => {
                console.log(arr);

                const divArea = $(".uploadResult");

                for(let i = 0; i<arr.length; i++){
                    divArea.append("<div>" +
						"<img src='/display?fileName="+arr[i].thumbnailURL+"' alt='..null'>" +
						"<button class='removeBtn' data-name='"+arr[i].imageURL+"'>REMOVE</button>" +
						"</div>");
				}
			}
결과
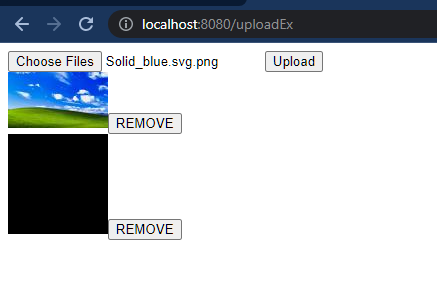
• uploadEX.html 에 삭제 버튼 이벤트 처리
		$(".uploadResult").on("click", ".removeBtn", function(e){

            const target = $(this);
            const fileName = target.data("name");
            const targetDiv = $(this).closest("div");

            console.log(fileName);

            $.post('/removeFile', {fileName: fileName}, function(result) {
                console.log(result);
                if(result===true) {
                    targetDiv.remove();
				}
			})

		})
결과

감사합니다!
참고할게요