현재 K8S팀에서 백엔드 서비스 구현까지 담당하고 있다.
회의를 통해 streamlit을 이용하면 간편하게 웹 앱 구현이 가능하다고 하여 현재 진행중인데 소셜 로그인 구현 과정을 적어본다 🔥
로그인 기능
사용자들이 편하게 서비스를 이용하는 방법은 소셜 로그인을 통한 접근이다.
그런데 streamlit에서 따로 소셜 로그인을 연동하는 방법은 존재하지 않는다 🤔
(아니 있을 수도 있는데 찾지는 못했다)
그래서 third party를 통한 소셜 로그인이 필요했고 난 Auth0를 이용했다.
소셜 로그인(Auth0) 서버
구글을 통한 직접 인증이 아니었기 때문에
streamlit - Auth0 - google 이란 과정을 통해 소셜 로그인을 진행했다 👀
Auth0에서 python을 이용한 quick start를 제공해주기 때문에 쉽게 서버 코드를 작성할 수 있었다.
'소셜 로그인이 가능하냐'에 대한 가능성부터 파악해야 했기에 Auth0 서버에서는 인증, 리다이렉트 과정만 우선 구현했다.
import json
from os import environ as env
from urllib.parse import quote_plus, urlencode
from authlib.integrations.flask_client import OAuth
from dotenv import find_dotenv, load_dotenv
from flask import Flask, redirect, render_template, session, url_for
ENV_FILE = find_dotenv()
if ENV_FILE:
load_dotenv(ENV_FILE)
app = Flask(__name__)
app.secret_key = env.get("APP_SECRET_KEY")
oauth = OAuth(app)
oauth.register(
"auth0",
client_id=env.get("AUTH0_CLIENT_ID"),
client_secret=env.get("AUTH0_CLIENT_SECRET"),
client_kwargs={
"scope": "openid profile email",
},
server_metadata_url=f'https://{env.get("AUTH0_DOMAIN")}/.well-known/openid-configuration'
)
@app.route("/login")
def login():
return oauth.auth0.authorize_redirect(
redirect_uri=url_for("callback", _external=True)
)
@app.route("/callback", methods=["GET", "POST"])
def callback():
token = oauth.auth0.authorize_access_token()
session["user"] = token
streamlit_app_url = env.get("STREAMLIT_APP_URL")
return redirect(f"{streamlit_app_url}/?token={token['access_token']}")
@app.route("/logout")
def logout():
session.clear()
streamlit_app_url = env.get("STREAMLIT_APP_URL")
# 로그아웃 후 Streamlit 앱으로 리디렉션합니다.
return redirect(f"{streamlit_app_url}/?logout=True")
@app.route("/")
def home():
streamlit_app_url = env.get("STREAMLIT_APP_URL")
# 홈 라우트 접근 시 Streamlit 앱의 홈으로 리디렉션합니다.
return redirect(streamlit_app_url)
if __name__ == "__main__":
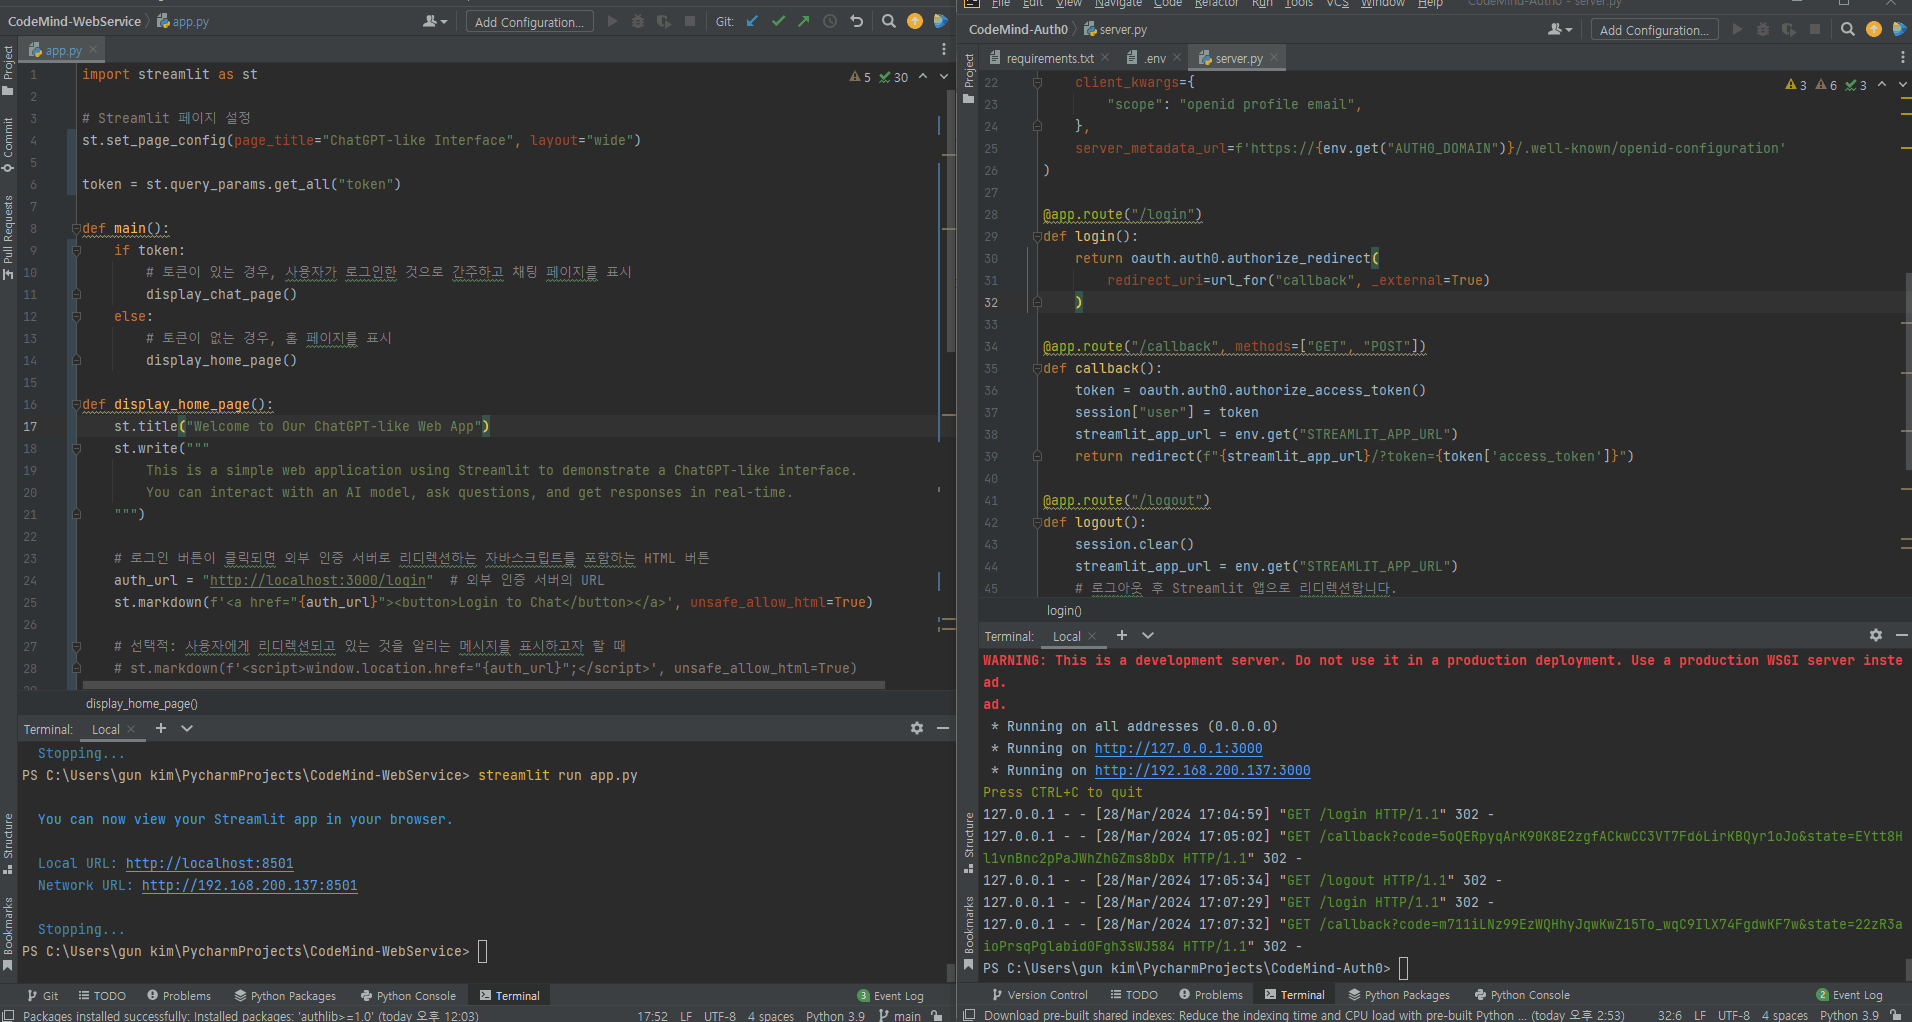
app.run(host="0.0.0.0", port=env.get("PORT", 3000))streamlit 서버
streamlit 서버에서도 db 연동은 후순위로 미루고 '소셜 로그인 가능 여부'부터 테스트했다 👀
import streamlit as st

# Streamlit 페이지 설정
st.set_page_config(page_title="ChatGPT-like Interface", layout="wide")

token = st.query_params.get_all("token")

def main():
    if token:
        # 토큰이 있는 경우, 사용자가 로그인한 것으로 간주하고 채팅 페이지를 표시
        display_chat_page()
    else:
        # 토큰이 없는 경우, 홈 페이지를 표시
        display_home_page()

def display_home_page():
    st.title("Welcome to Our ChatGPT-like Web App")
    st.write("""
        This is a simple web application using Streamlit to demonstrate a ChatGPT-like interface.
        You can interact with an AI model, ask questions, and get responses in real-time.
    """)

    # 로그인 버튼이 클릭되면 외부 인증 서버로 리디렉션하는 자바스크립트를 포함하는 HTML 버튼
    auth_url = "http://localhost:3000/login"  # 외부 인증 서버의 URL
    st.markdown(f'<a href="{auth_url}"><button>Login to Chat</button></a>', unsafe_allow_html=True)


def display_chat_page():
    st.title("Chat with AI")

    # 자동 리디렉션을 위한 로그아웃 링크
    logout_url = "http://localhost:3000/logout"  # 여기서는 예시로 localhost를 사용했습니다. 실제 URL로 교체해야 합니다.
    streamlit_app_url = "http://localhost:8501"  # Streamlit 앱의 홈 URL. 실제 환경에 맞게 수정해야 합니다.

    # 로그아웃 버튼 대신 사용할 자바스크립트를 포함하는 링크
    st.markdown(f'<a href="{logout_url}"><button>Logout</button></a>', unsafe_allow_html=True)

    # 컨테이너 및 레이아웃 구성
    input_container = st.container()
    chat_container = st.container()

    # 채팅 입력 필드
    with input_container:
        user_input = st.text_input("Type your message here:")

    # 채팅 출력 영역
    with chat_container:
        if user_input:
            # 여기에 모델을 호출하는 코드를 추가하고 결과를 변수에 할당하세요.
            model_response = f"You said: '{user_input}'"  # 예시 응답

            # 사용자의 질문과 모델의 응답을 번갈아 표시
            st.text_area("Chat", value=f"You: {user_input}\nAI: {model_response}", height=300, disabled=True)

if __name__ == '__main__':
    main()
소셜 로그인 성공
소셜 로그인은 쉽게 성공할 수 있었다 👍
다만 추가적으로 해야할 것들이 많다 🤣
1. 로그인한 유저의 데이터를 Auth0를 통해 가져올 수 있는지 확인
2. 가져온 데이터를 AWS DynamoDB에 저장
참고 문헌

날씨의 아이 ☀️ Java Spring ☘️