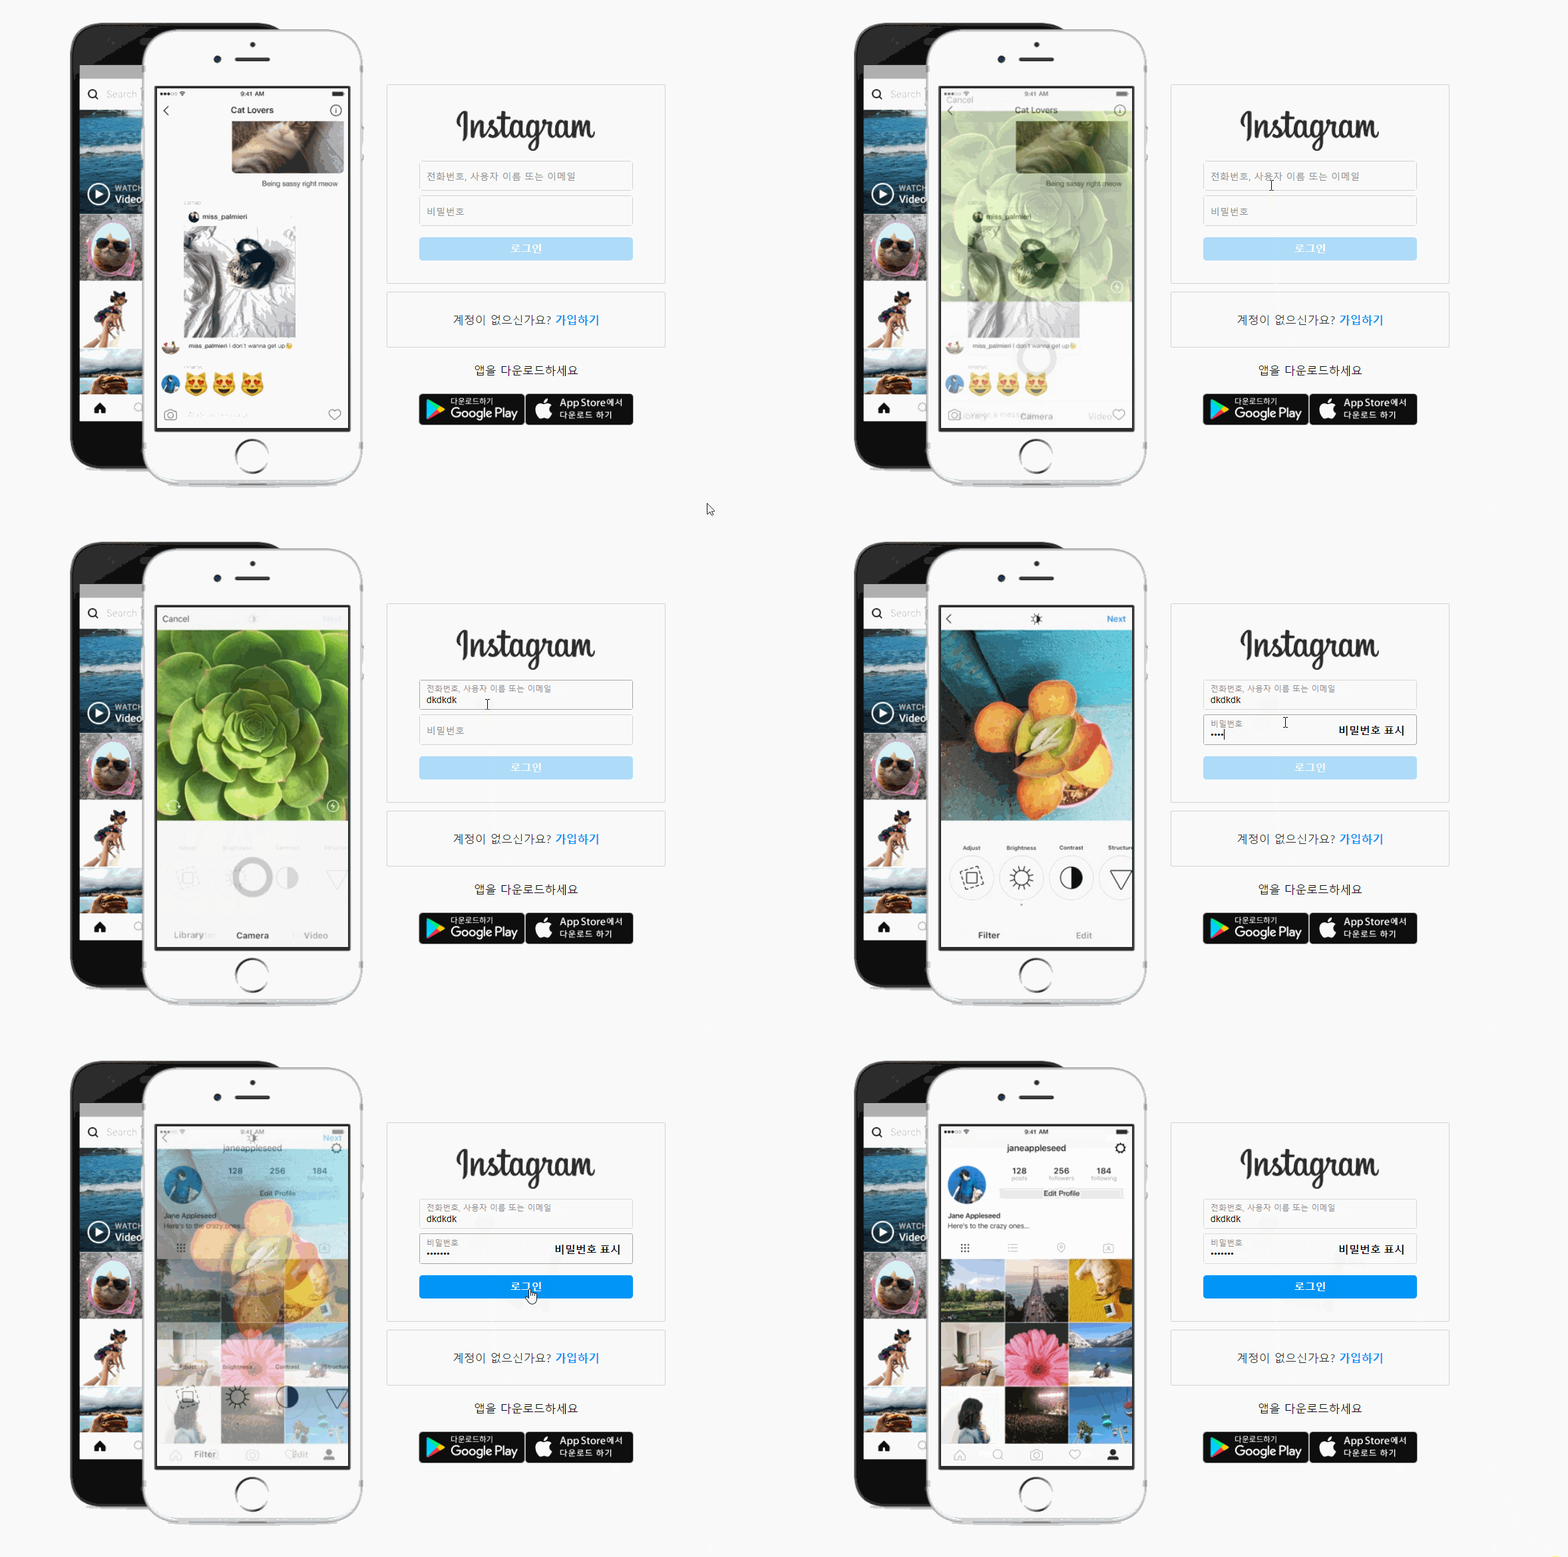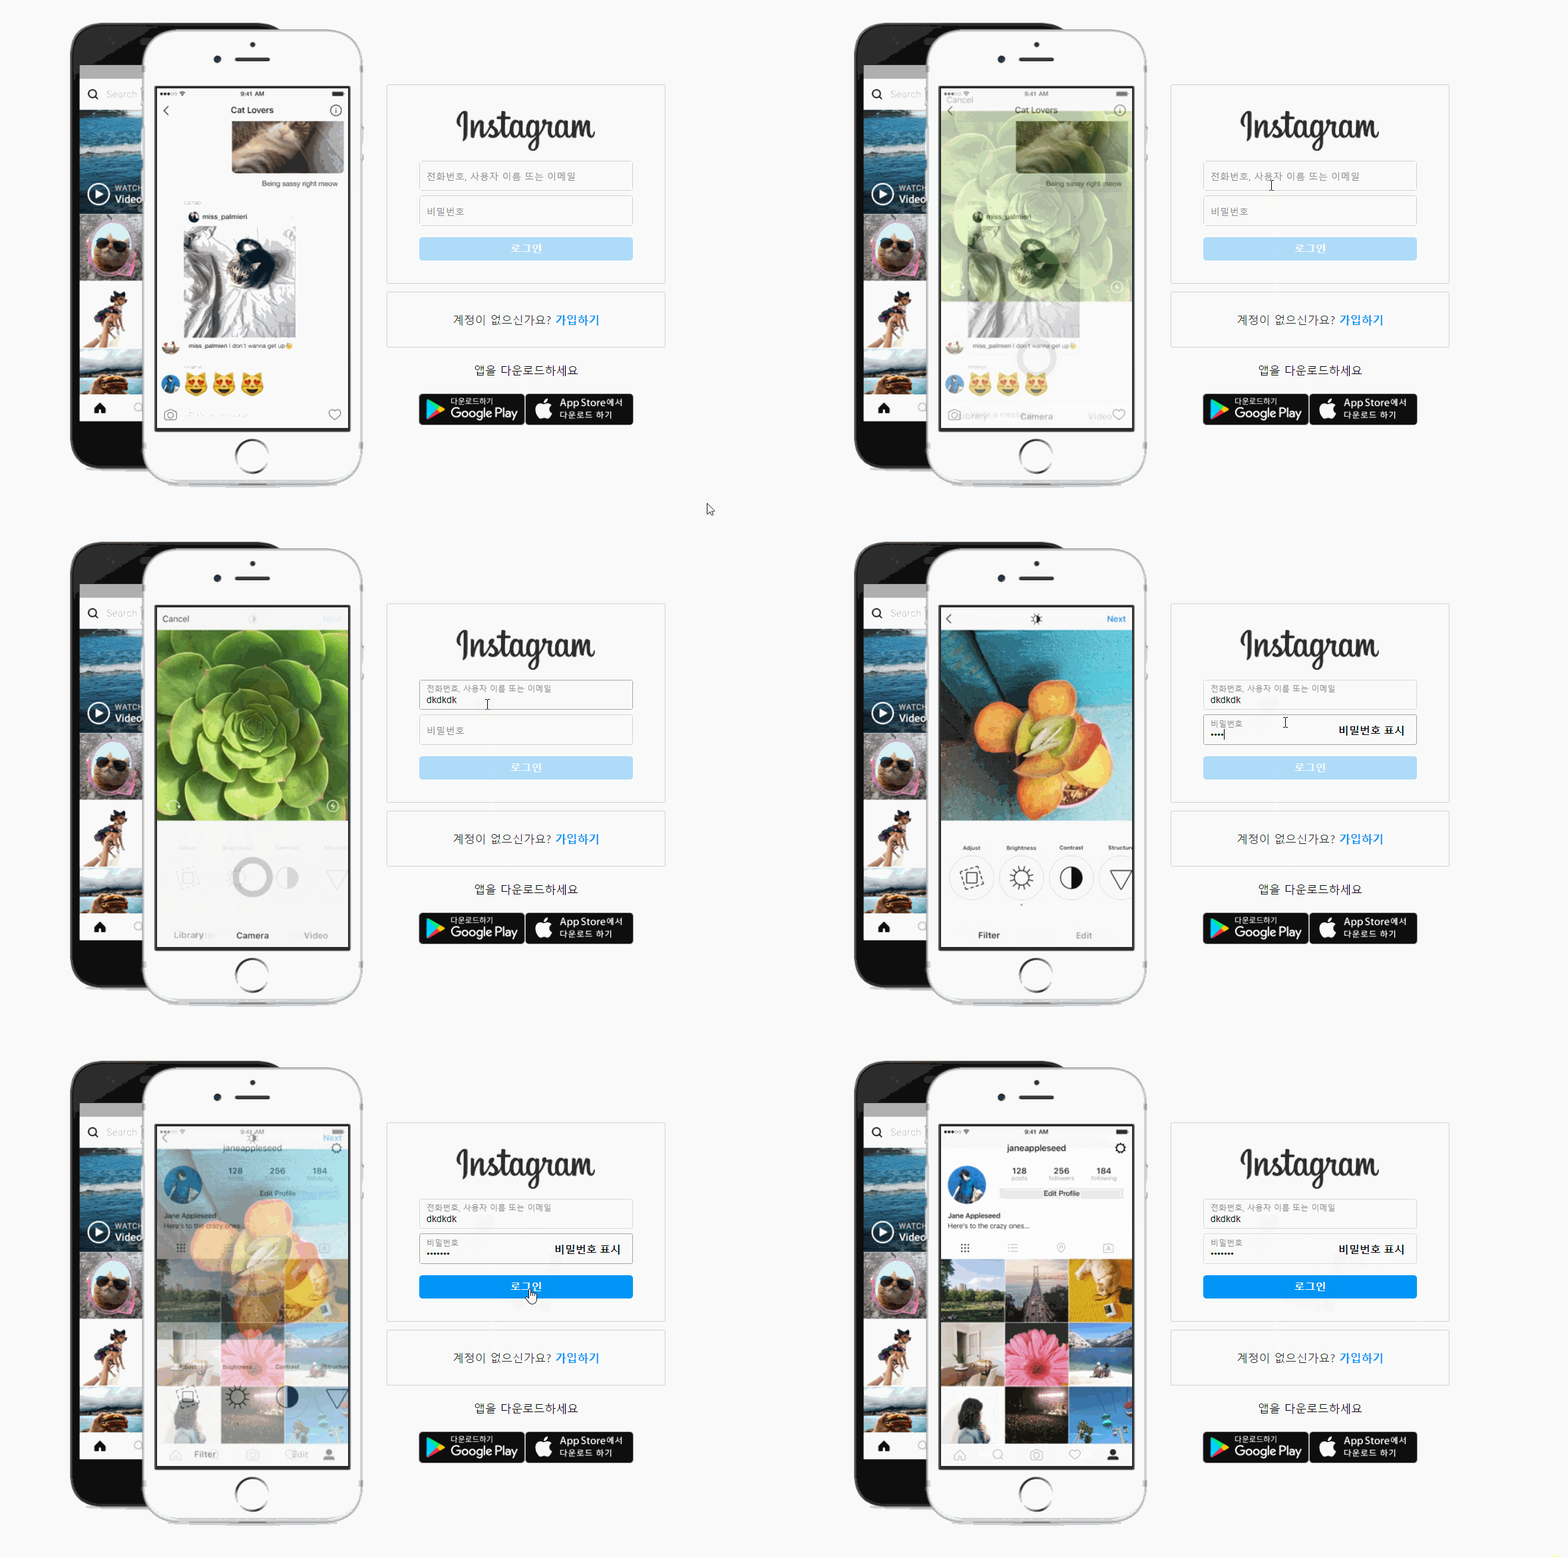
어떻게 시작했더라? 일단 1주차
velog 구경 다니다 스트리밍을 이용한 넷플릭스 클론코딩을 발견했다.
설명도 잘 되어있고 정리도 잘되어있어서 염탐 중에
다른 글인 인스타그램 로그인 페이지를 보고 흥미를 느껴 찾아보니
많은 인스타 클론코딩이 있었고 많은 곳에서 클론코딩을 진행하고 있었다...
나도 할래

클론코딩하면 피싱사이트 뜨는걸 몰랐네요 .. 레포삭제했습니다
목차
1. 이미지 자동슬라이드
2. id/pw 입력란에서 애니메이션
3. 로그인버튼 활성화/비활성화
4. 비밀번호 표시 버튼
한줄평
인스타 페이지의 세가지 기능을 vanillaJS로 만들었다.
로그인 페이지는 간단한 주제 같아서 한 페이지만 간단하게 했음
HTML, CSS , 이미지는 그냥 복붙..
이미지 자동슬라이드
개발자 도구로 인스타그램 확인.gif
확인해본 결과 class를 추가하여 이미지 변경
이미지 슬라이드 방식은 나머지 연산을 이용하였다.
target 기준으로 인접된 노드 두개를 접근한 후
클래스를 추가하여 이미지를 변경하였다.
function imageSet() {
  const imgList = document.querySelectorAll(".image");
  const imgLength = imgList.length;
  let target = 0;
  function circuit(N, length) {
    return (N + length) % length;
  }
  this.changeImagebeta = function () {
    const preTarget = circuit(target - 1, imgLength);
    const nextTarget = circuit(target + 1, imgLength);

    const targetImg = imgList[target];
    const preImg = imgList[preTarget];
    const nextImg = imgList[nextTarget];

    preImg.classList.remove("imageShow");
    targetImg.classList.add("imageShow");
    targetImg.classList.remove("imageAnimation");
    nextImg.classList.add("imageAnimation");

    target = circuit(target + 1, imgLength);
  };
  setInterval(this.changeImagebeta, 3000);
}
const imageRotation = new imageSet;
<!-- html의 이미지컨테이너부분 -->
<div class="imgContainer">
<div class="images">
<img class="image imageAnimation" src="./img/backgroundimage_1.jpg" />
<img class="image " src="./img/backgroundimage_2.jpg" />
<img class="image" src="./img/backgroundimage_3.jpg" />
<img class="image" src="./img/backgroundimage_4.jpg" />
<img class="image" src="./img/backgroundimage_5.jpg" />
</div>
</div>처음에 생각 안하고 짜다 중간에 버린 방법
nextElementSibling 를 사용하여 인접노드를 찾으려했으나
이렇게 짜는건 좀 억지같아서 중간에 버렸음//버린 코드 let imageList = document.querySelector(".imageAnimation"); let nextImageList = imageList; this.changeImage = function () { nextImageList.classList.add("imageShow"); nextImageList.classList.remove("imageAnimation"); nextImageList = nextImageList.nextElementSibling; if (nextImageList === null) { nextImageList = imageList; } nextImageList.classList.remove("imageShow"); nextImageList.classList.add("imageAnimation"); };
입력란에서 애니메이션
밑에서 설명할 부분은 주석쳤음
ID와 PW의 위치에 각각 input 됐을때 어떻게 움직일지 정해줌
parentNode <label>에 .small 이라는 클래스를 추가시키는 것으로 애니메이션을 조정함.
const inputID = document.querySelector('input[name="username"]')
const inputPW = document.querySelector('input[name="password"]')

inputID.addEventListener("input", () => {
    const inputLabel = inputID.parentNode;
    if (inputID.value) {
        inputLabel.classList.add("small");
    } else if (!inputID.value) {
        inputLabel.classList.remove("small");
    }
    // loginBtnDisabled();
})
inputPW.addEventListener("input", () => {
    const inputLabel = inputPW.parentNode;
    if (inputPW.value) {
        inputLabel.classList.add("small");
        // if (!blank.hasChildNodes()) {
        //     postPWShowNode();
        // }
    } else if (!inputPW.value) {
        inputLabel.classList.remove("small");
        // const blankChild = blank.firstChild
        // blank.removeChild(blankChild)
    }
    // loginBtnDisabled();
})
<label> 하위요소 두개 <span>, <input> 두개의 글자 크기를 조정함
평소엔 .inputLabal 밑의 요소로 지내다가.small 클래스가 추가되면 span은 크기를 줄이고, input 부분은 font-size 를 조정함
.small .inputSpan {
  transform: scale(0.83333) translateY(-10px);
}
.inputLabal .inputSpan {
}
.small .size {
  font-size: 12px;
  padding: 14px 0 2px 8px !important;
}
.inputLabal .size {
  font-size: 16px;
}
로그인버튼 제어
단순히 input.value에 조건을 줘서 loginBtn 에 disabled 조건을 줬음
function loginBtnDisabled() {
    const loginBtn = document.querySelector('.loginBtn');
    if (inputPW.value.length > 6 && inputID.value.length > 0) {
        loginBtn.removeAttribute('disabled')
    }
    else {
        loginBtn.setAttribute('disabled', '')
    }
}
물론 색깔은 따로줬음
.loginBtn:disabled {
  opacity: 1;
  background-color: rgba(0, 149, 246, 0.3);
}
비밀번호 표시 버튼
패스워드 뒷쪽에 <blank> 가 숨겨져 있는데,
입력값이 들어오면 <button> 를 생성해준다.
const blank = document.querySelector('.blank')

function postPWShowNode() {
    let div = document.createElement('div');
    div.innerHTML = `
        <button class="pwShowBtn" type="button">
        비밀번호 표시</button>
    `;
    div.classList.add('pwShow');
    blank.appendChild(div);
    const pwShowBtn = document.querySelector('.pwShowBtn');

    pwShowBtn.addEventListener('click', () => {
        if (inputPW.type === "password") {
            inputPW.type = "text";
            pwShowBtn.innerHTML = "숨기기";
        } else {
            inputPW.type = "password";
            pwShowBtn.innerHTML = "비밀번호 표시";
        }
    })
}
추가적으로 input 클릭했을때 테두리 생기는건 이겁니다
.inputBox:focus-within {
  border: 1px solid #a8a8a8;
}
한줄평
실력도 재미도 없는 포스팅


좋게 봐주셔서 감사합니다 !