이제 샘플 프로젝트의 코드를 열어보고 하나씩 이해해보려고 한다. 어디서 보아야할지 모를 때는 Main 함수부터 시작한다. 프로그램을 실행했을 때 Main 화면이 표시되기까지의 과정이 코드에서 어떻게 구현되고 동작하는지 이해하는 것이다.
EntryPoint
프로젝트에서 main으로 검색해보니 App.xaml.cs, Services/ApplicationHostService.cs, ViewModels/Windows/MainWindowViewModels.cs, Views/Windows/MainWindow.xaml, .xaml.cs가 나온다.
일단 Application의 EntryPoint로 사용되는 Main() 함수는 없다. 참고로, WinForm 프로젝트에서는 Program 클래스에 Main()함수가 정의되어 있고, 여기에서 Application 클래스를 통해 MainForm을 실행했었다.
WPF에서는 이 역할을 Hosting 패키지에서 담당하는 것 같고, Services 아래의 HostService 클래스가 이 일에 관여하는 것으로(아직은 짐작이지만) 보인다. 다만 첫 페이지를 띄우는 코드는 분명한데 Main Window를 여는 코드는 분명하지 않다.
App.xaml을 제외한 나머지 파일들은 ViewModels와 Views 같은 MVVM 아키텍처에 의해 만들어진 폴더이기 때문에 이쪽은 아닐 것이다. 그러므로 App.xaml에 비밀이 있을 것으로 기대하고 열어보자.
xaml과 xaml.cs
우선 WPF에서 xaml 파일과 xaml.cs는 한 몸이라는 것을 기억해야 한다. WinForm 프로젝트에서 하나의 Form이 .cs 파일과 .Designer.cs 파일로 구성된 것에 비교해서 .Designer.cs 파일이 xaml이고, .cs 파일이 .xaml.cs가 되었다고 생각하면 당장은 이해하기에 편할 듯 하다. C# 코드로 화면을 정의하는 대신 xaml로 정의한 것이다. WPF에서 화면 디자인은 대부분 xaml파일로 충분해 보이고, .xaml.cs 파일을 작성할 일은 거의 없는 것 같다. 기존 WinForm에서 .cs 파일에 구현되던 이벤트핸들러 같은 로직은 MVVM 아키텍처에서 모두 ViewModel로 이동되었다.
App.xaml
<Application
    x:Class="UiDesktopApp1.App"
    xmlns="http://schemas.microsoft.com/winfx/2006/xaml/presentation"
    xmlns:x="http://schemas.microsoft.com/winfx/2006/xaml"
    xmlns:ui="http://schemas.lepo.co/wpfui/2022/xaml"
    DispatcherUnhandledException="OnDispatcherUnhandledException"
    Exit="OnExit"
    Startup="OnStartup">
    <Application.Resources>
        <ResourceDictionary>
            <ResourceDictionary.MergedDictionaries>
                <ui:ThemesDictionary Theme="Light" />
                <ui:ControlsDictionary />
            </ResourceDictionary.MergedDictionaries>
        </ResourceDictionary>
    </Application.Resources>
</Application>- 이 파일은 Application 클래스를 정의한다.
- Application의 클래스를
UiDesktopApp1.App로 지정한다. 정확한 의미는 잘 모르겠다. 이 xaml 파일의 Behind(Backend) 코드를 지정하는 것 같다. 이 파일은 다른 View 파일과 좀 다르게 동작한다. 자세한 내용은 나중에 다시 다루겠다. - Namespace를 정의하는 코드가 보이는데, WPF UI 기본 클래스는
x:, 이번에 추가한 Fluent UI 패키지의 클래스는ui:로 참조한다는 것을 알 수 있다. - 이 클래스의
Exit,Startup이벤트에 대한 핸들러가 지정되어 있다. - Application.Resource는 App이 사용할 리소스를 정의하는 것 같은데 어떻게 동작하는지는 아직 모르겠다.
- Startup 이벤트 핸들러가
OnStartup이다.App.xaml.cs에 정의되어 있다.
프로젝트 설정에서 시작개체를 App으로 지정할 수 있는 것으로 보아 Application의 진입점(Main)은 App에 있는 것으로 보인다. WinForm은 Program이라는 Static 클래스안에 명시적으로 Main()함수를 가지고 있고, Application.Run()으로 MainForm을 실행한다.
WPF에서도 Application 클래스를 사용해서 동일하게 처리할 수 있다. StartUri 프로퍼티에 MainWindow.xaml을 지정하면 된다. 이 샘플 프로젝트에서는 MainWindow를 생성하기 전에 MVVM 아키텍처를 적용하기 위해 할 일이 있기 때문에 Startup 이벤트로 처리했다. 더 자세한 내용은 튜토리얼을 마무리하고 살펴보겠다.
App.xaml.cs
.xaml.cs에는 별 내용이 없을 줄 알았는데, App 클래스는 예외인가 보다. App.xaml.cs에 많은 코드가 생성되어 있다.
중요해 보이는 내용은 다음과 같다.
IHost _host: Host builder를 사용해서 Host를 생성한다.GetService<T>()서비스 Type 정보로 앞에서 등록한 서비스를 가져온다.OnStartup()Host를 시작한다.OnExit()Host를 종료한다.
이중에서 Host 객체를 생성하고 서비스를 초기화(등록?)하는 내용이 좀 생소하다. 이 내용은 이해하기에 다소 어려워 보인다. 무시하고 넘어가도 프로젝트 소스를 이해하는데는 문제없을 것 같다.
Generic-Host
참조 자료: The.NET Generic Host provides dependency injection, configuration, logging, and other services.
- https://docs.microsoft.com/dotnet/core/extensions/generic-host
- https://docs.microsoft.com/dotnet/core/extensions/dependency-injection
- https://docs.microsoft.com/dotnet/core/extensions/configuration
- https://docs.microsoft.com/dotnet/core/extensions/logging
Generic Host(Microsoft.extensions.hosting.Host)를 생성한다.
IHost _host = Host
            .CreateDefaultBuilder()
            .ConfigureAppConfiguration(c => { c.SetBasePath(Path...); })
            .ConfigureServices(...)
            .Build();
HostBuilder를 생성하고, 이 Builder에 ConfigureApp과 ConfigureServices를 수행한 후 이 Builder를 사용해서 Host를 생성한다. 이렇게 만들어진 Host를 Start()하면 Main Window가 표시되는 것 같다. 구체적으로 어떤 순서에 의해 Window가 생성되고 표시되는지는 더 봐야 할 것 같다.
ConfigureServices
Host는 Service Provider를 가지고 있다. 이 Provider에 Service를 등록해야 Host가 Service를 제어할 수 있는 것으로 보인다.
services.AddHostedService<ApplicationHostService>();
services.AddSingleton<IPageService, PageService>();
services.AddSingleton<IThemeService, ThemeService>();
services.AddSingleton<ITaskBarService, TaskBarService>();
services.AddSingleton<INavigationService, NavigationService>();프로젝트Services 폴더에 정의된 ApplicationHostService, PageService를 등록하고, WPF-UI에 정의된 ThemeService, TaskBasrService, NavigationService를 등록한다.
마지막으로 View, ViewModel 폴더에 정의된 클래스들을 등록한다.
// Main window with navigation
services.AddSingleton<INavigationWindow, MainWindow>();
services.AddSingleton<MainWindowViewModel>();
// Navigation Pages
services.AddSingleton<DashboardPage>();
services.AddSingleton<DashboardViewModel>();
services.AddSingleton<DataPage>();
services.AddSingleton<DataViewModel>();
services.AddSingleton<SettingsPage>();
services.AddSingleton<SettingsViewModel>();AddSinglton<T>은 의존성 주입(Dependency Injection) 패턴을 구현한다. 이것이 왜 필요한지, 어떻게 동작하는지 궁금한데 좀 어려워보이니까 나중에 다시 보자.
Host.Start()
지금 Main Window가 어떻게 생성되고 실행되는지를 확인하고 있다.
Application이 실행되면 App.xaml에 정의된 Startup 핸들러 OnStartUp()이 호출되고, 여기서 _host.Start()를 수행하면 Host(static member)가 먼저 생성되고, Start()가 호출되면서 등록된 ApplicationHostService(StartAsync, HandleActivationAsync)를 통해 NavigationWindow를 Show하는 것으로 보인다.
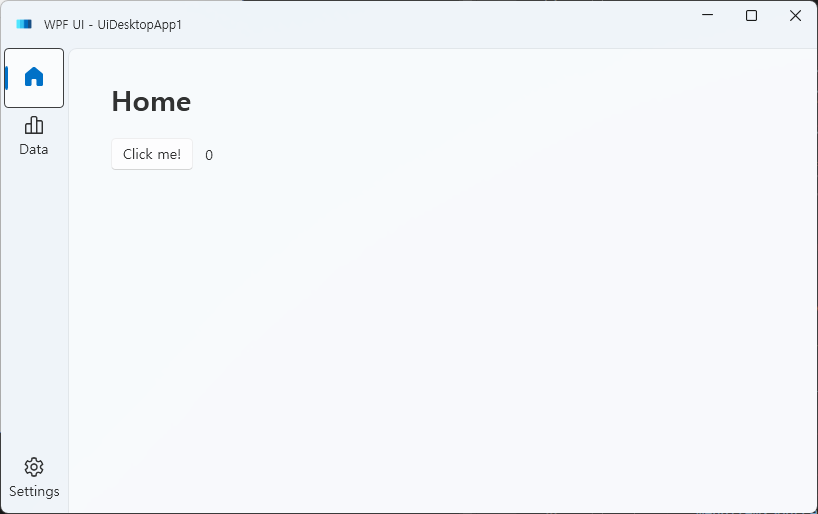
디버거를 사용해서 코드의 실행순서를 추적해 보면 이 때 MainWindow가 생성되고 'DashboardPage'로 Navigation했을 때 Window의 내용이 표시되는 것을 확인할 수 있다.
Generic-Host 다시 보기
Main() 함수가 없으니 코드의 실행 순서가 명확하게 보이지 않는다. 만약에 직접 Main함수를 만들고 Generic Host를 통해 Appication을 실행한다면 코드는 어떻게 작성되어야 할까?
(참고) https://stackoverflow.com/questions/79219594/correct-usage-of-net-generic-host-and-ihostapplicationlifetime-in-net-8-0-wpf
위 링크에서 발췌된 아래 코드를 보면 지금까지 살펴보았던 코드들이 어떻게 동작하는 것인지 이해할 수 있다.
public class Program
{
    [STAThread]
    public static void Main()
    {
        // creating application host
        var host = Host.CreateDefaultBuilder()
            // injecting services
            .ConfigureServices(services =>
            {
                services.AddSingleton<App>();
                services.AddSingleton<MainWindow>();
            })
            .Build();
        // getting a service - App class object
        var app = host.Services.GetService<App>();
        // starting application
        app?.Run();
    }
 }
(나중에 추가)
Application.Run()을 호출하는 코드가 닷넷이나 WPF-UI 라이브러리 또는 Host 객체 어딘가에 숨겨져 있을 것이라고 가정했는데, 그렇지 않다.
이것은 App.xaml의 독특한 구조 때문이다. 원래는 App 클래스가 Application을 상속받아 구현되어야 한다. 실제로 WPF Application 프로젝트를 새로 생성했을 때 App.xaml.cs의 내용은 다음과 같다.
namespace WpfApp1
{
    /// Interaction logic for App.xaml
    public partial class App : Application
    {
    }
}App클래스가Application클래스를 상속 받고 있다.
App.xaml의 내용은 다음과 같다.
<Application x:Class="WpfApp1.App"
             ...
             StartupUri="MainWindow.xaml">
    <Application.Resources>
    </Application.Resources>
</Application>- Application의 StartupUri 속성을 통해서 Application의 초기 UI로
MainWindow를 지정하고 있다.
그렇다면 왜 이 샘플 프로젝트에서는 App 클래스가 Application 클래스를 상속받지 않았을까? 사실은 상속받지 않은 것이 아니라 생략된 것이다.
App.xaml이 컴파일되면 아래와 같은 .cs 코드가 생성된다.
namespace UiDesktopApp1 {
    public partial class App : System.Windows.Application {
        ...
        #line 8 "..\..\..\App.xaml"
        this.Startup += new System.Windows.StartupEventHandler(this.OnStartup);

        #line hidden
        System.Uri resourceLocater = new System.Uri("/UiDesktopApp1;component/app.xaml", System.UriKind.Relative);
            ...
        }

        /// Application Entry Point.
        [System.STAThreadAttribute()]
 		[System.Diagnostics.DebuggerNonUserCodeAttribute()]
        [System.CodeDom.Compiler.GeneratedCodeAttribute("PresentationBuildTasks", "8.0.6.0")]
        public static void Main() {
            UiDesktopApp1.App app = new UiDesktopApp1.App();
            app.InitializeComponent();
            app.Run();
        }
    }
}UiDesktopApp1에는class App과public static void Main()이 정의된다.App은System.Windows.Application을 상속받고 있다.Main()은 Application의 진입점이다. App을 생성해서Run()메소드를 호출한다.- 프로젝트 설정에서 EntryPoint 객체를
UiDesktopApp1로 지정했기 때문에Main()이 정상적으로 호출되고 Run() 메소드가 호출되면서 앞에서 설명한 Startup 이벤트가 발생하는 것이다.