- json2csv
참고(json2csv 공식 git) : https://github.com/zemirco/json2csv/blob/master/docs/parser-examples.md - google cloud storage
참고(image를 google cloud storage에 저장하기) : https://kuros.in/typescript/nestjs-upload-download-file-from-cloud-storage/
참고(공식 문서 cloud storage) : https://cloud.google.com/storage/docs/uploading-objects-from-memory?hl=ko#storage-upload-object-from-memory-nodejs
참고(공식 문서 IAM 서비스 계정 만들기) : https://cloud.google.com/iam/docs/service-account-overview?hl=ko
- 회사에서 앱에서 rpm데이터 모아 서버에 보내면 받아서 csv로 변환하여 google cloud storage에 저장하는 기능을 개발하게 되어 정리한다.
json2csv 사용
- 먼저 json2csv를 설치한다.
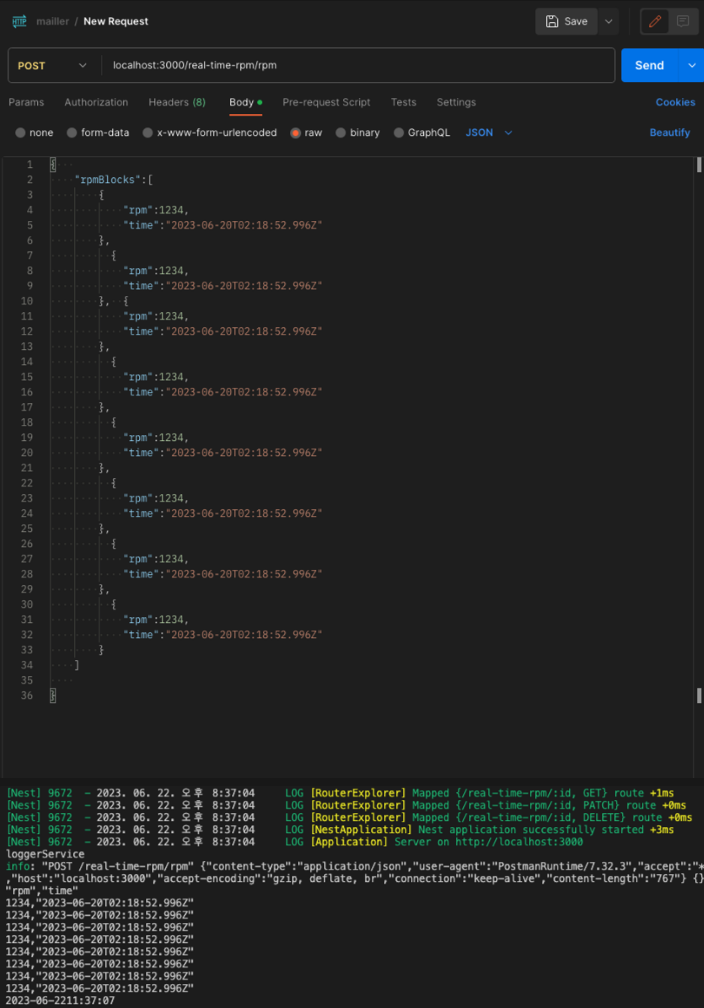
npm i json2csv그다음 post로 보내준 데이터를 받아서 아래 코드 처럼 적용하면 csv형식으로 변환된다.
import { Parser } from 'json2csv';

async convertCsv(createRealTimeRpmDto: CreateRealTimeRpmDto) {
    const fields = ['rpm', 'time']; //필드이름 정의

    const json2csvParser = new Parser({ fields });//필드이름 적용
    const csv = json2csvParser.parse(createRealTimeRpmDto.rpmBlocks);
    console.log(csv);

}- 결과
Cloud Storage에 저장하기
-
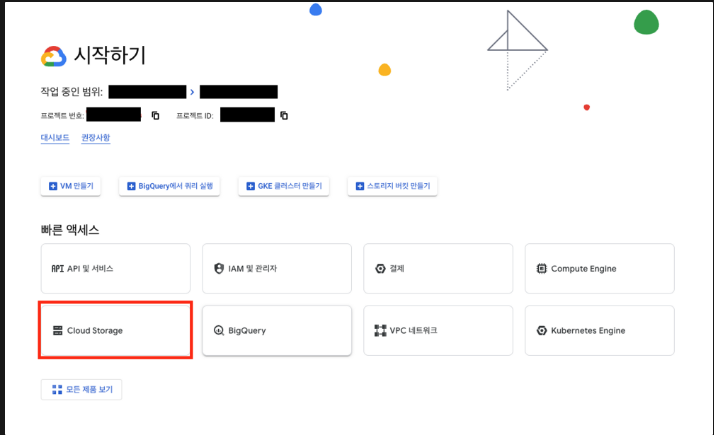
GCP에 들어가 Cloud Storage항목을 선택합니다.
-
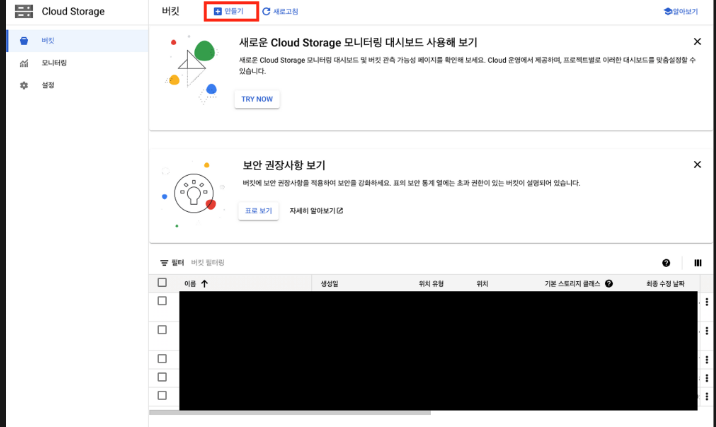
버킷을 만들어 줍니다. 자세한 내용은 참고에 있는 링크를 참고해주세요.
- 다음으로 서비스 계정을 생성하고 키를 다운받습니다.
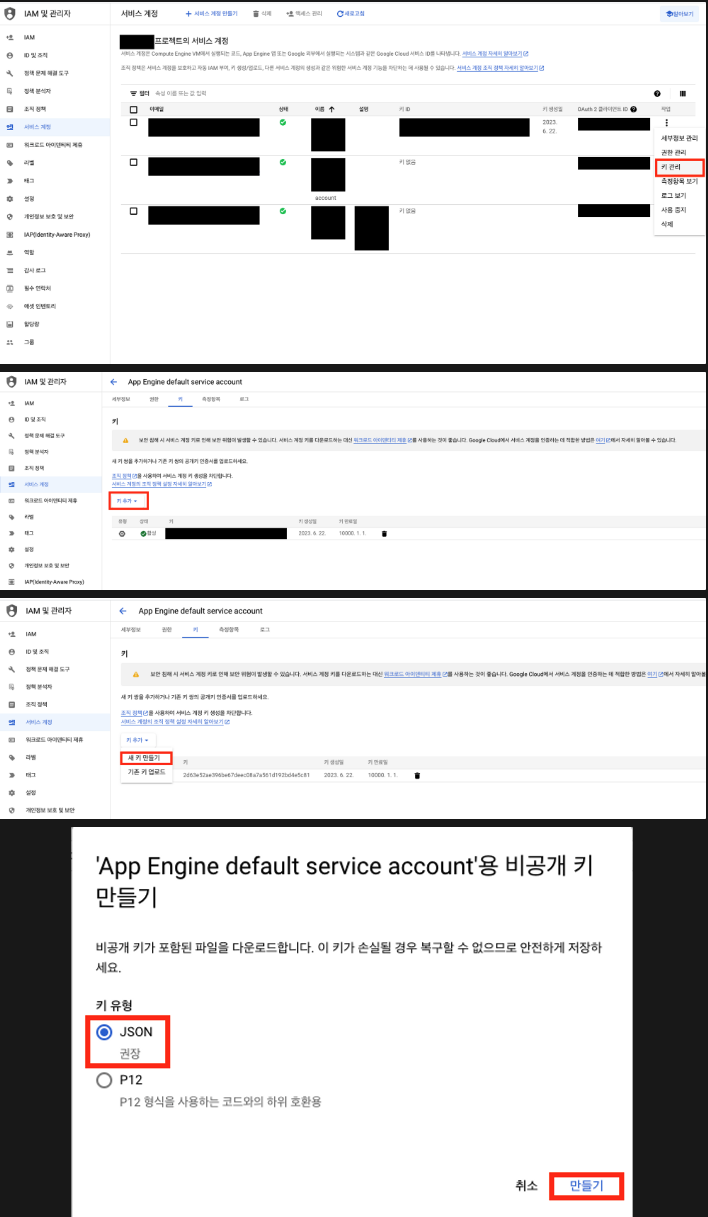
- 키를 생성하면 json 파일이 컴퓨터에 저장된다. 파일을 열어서 필요한 항목들을 .env에 추가한다.
.env

PROJECT_ID = "project_id"
PRIVATE_KEY = "private_key"
CLIENT_EMAIL = "client_email"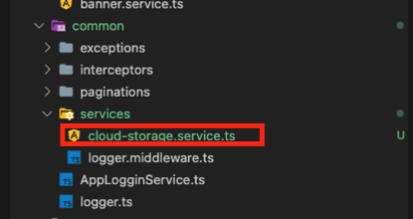
STORAGE_MEDIA_BUCKET = "buket_name" // 위에서 생성한 버켓의 이름을 넣어주면 됨- common에 cloud-storage 서비스를 생성해준다.
- cloud storage 서비스에 업로드 관련 코드를 작성한다. 위에 참고에 있는 이미지 업로드 코드를 수정 하여 사용하였다.
import { ConfigService } from '@nestjs/config';
import { Bucket, Storage } from '@google-cloud/storage';
import { BadRequestException, Injectable } from '@nestjs/common';
import { parse } from 'path';
@Injectable()
export class CloudStorageService {
private bucket: Bucket;
private storage: Storage;
constructor(private readonly configService: ConfigService) {
this.storage = new Storage({
projectId: this.configService.get('PROJECT_ID'),
credentials: {
client_email: this.configService.get('CLIENT_EMAIL'),
private_key: this.configService.get('PRIVATE_KEY'),
},
});
this.bucket = this.storage.bucket(
configService.get('STORAGE_MEDIA_BUCKET'),
);
}
async uploadFromMemory(uploadedFile: string, destination: string) {
const file = this.bucket.file(destination);
try {
await file.save(uploadedFile);
} catch (error) {
throw new BadRequestException(error?.message);
}
return {
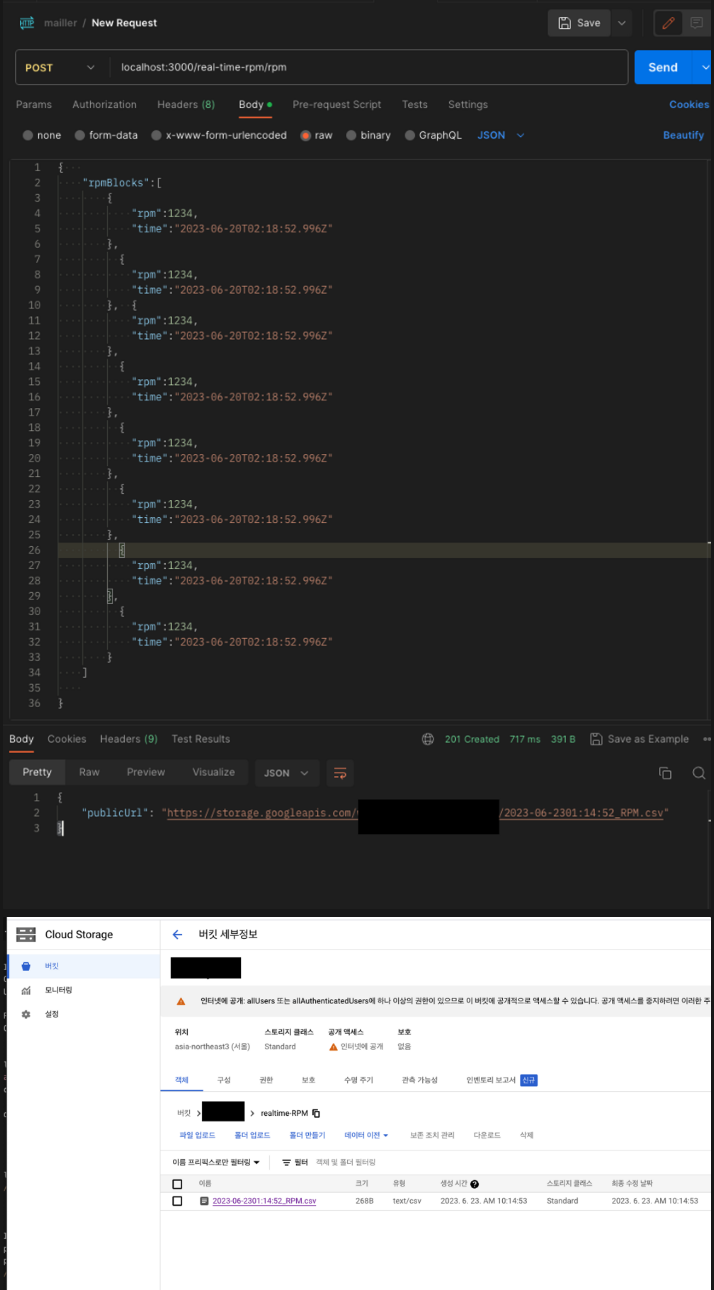
publicUrl: `https://storage.googleapis.com/${this.bucket.name}/${file.name}`,
};
}- 위에 작성한 코드에 cloud storage 코드 추가해 준다.
- 파일 이름에 .csv을 붙여 저장하면 된다.
import { Injectable } from '@nestjs/common';
import { CreateRealTimeRpmDto } from './dto/create-realtime-rpm.dto';
import { UpdateRealTimeRpmDto } from './dto/update-realtime-rpm.dto';

import { Parser } from 'json2csv';
import { CloudStorageService } from 'src/common/services/cloud-storage.service';

@Injectable()
export class RealTimeRpmService {
  constructor(private readonly cloudStorageService: CloudStorageService) {}

  async convertCsv(createRealTimeRpmDto: CreateRealTimeRpmDto) {
    const fields = ['rpm', 'time'];

    const json2csvParser = new Parser({ fields });
    const csv = json2csvParser.parse(createRealTimeRpmDto.rpmBlocks);
    console.log(csv);
/////////////////////////////////cloud storage 코드 추가
    const TIME_ZONE = 9 * 60 * 60 * 1000; // 9시간

    const now = new Date(Date() + TIME_ZONE)
      .toISOString()
      .replace('T', '')
      .replace(/\..*/, '');
//////////////////////////파일 이름에 저장한 시간 추가
    const destination = 'realtime-RPM/' + now + '_RPM.csv';

    const csvFile = await this.cloudStorageService.uploadFromMemory(
      csv,
      destination,
    );

    return csvFile;
}- 결과
- 아래처럼 post요청을 보내면 cloud-storage에 저장되고 저장된 파일의 url을 반환해 준다.
느낀점
- 예전에 이미지를 저장 할 때는 셋팅이나, 적용하는 법을 잘 몰라 고생 했다면 이번에는 예제 코드를 csv파일 저장을 위해 수정하는 부분이 많이 힘들었다.
- 구글링 하느라 많은 고생을 했지만 역시 결과를 보니 짜릿하다.

nestjs 백앤드 개발자