- default_layout.dart
import 'package:flutter/material.dart';
class DefaultLayout extends StatelessWidget {
final Color? backgroundColor;
final Widget child;
final String? title;
final Widget?
bottomNavigationBar; // 물음표를 쓴 이유 => bottomNavigationBar 사용 안 하는 곳도 있으니까
final Widget? floatingActionButton;
const DefaultLayout({
required this.child,
this.backgroundColor,
this.title,
this.bottomNavigationBar, // bottomNavigationBar 외부에서 받도록 여기에 정의
this.floatingActionButton,
super.key,
});
Widget build(BuildContext context) {
return Scaffold(
backgroundColor: backgroundColor ?? Colors.white,
appBar: renderAppBar(),
body: child,
// 하단에 탭 만들기
bottomNavigationBar: bottomNavigationBar,
floatingActionButton: floatingActionButton,
);
}
// 물음표 => null 가능
AppBar? renderAppBar() {
// 타이틀이 입력 안 됐을 때
if (title == null) {
return null;
} else {
// 타이틀이 입력됐을 때
return AppBar(
backgroundColor: Colors.white,
elevation: 0,
centerTitle: true,
title: Text(
title!, // 느낌표 => 절대로 null이 될 수 없다
style: const TextStyle(
fontSize: 16.0,
fontWeight: FontWeight.bold,
),
),
foregroundColor: Colors.black,
);
}
}
}
- view/root_tab.dart
그런데!!!
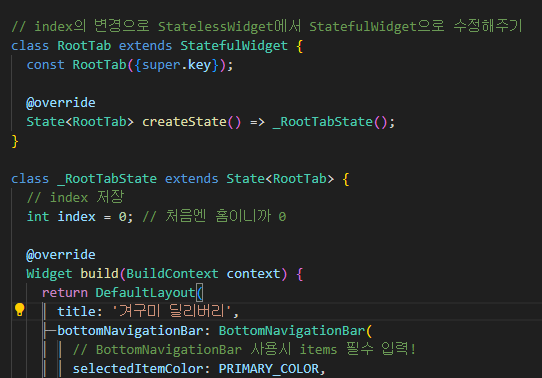
index가 선택될 때마다 상태가 변경되니까 StatelessWidget에서 StatefulWidget으로 수정해주자!
- 수정된 코드는 아래와 같음
import 'package:flutter/material.dart';
import 'package:flutter_actual/common/const/colors.dart';
import 'package:flutter_actual/common/layout/default_layout.dart';
// index의 변경으로 StatelessWidget에서 StatefulWidget으로 수정해주기
class RootTab extends StatefulWidget {
const RootTab({super.key});
State<RootTab> createState() => _RootTabState();
}
class _RootTabState extends State<RootTab> {
// index 저장
int index = 0; // 처음엔 홈이니까 0
Widget build(BuildContext context) {
return DefaultLayout(
title: '겨구미 딜리버리',
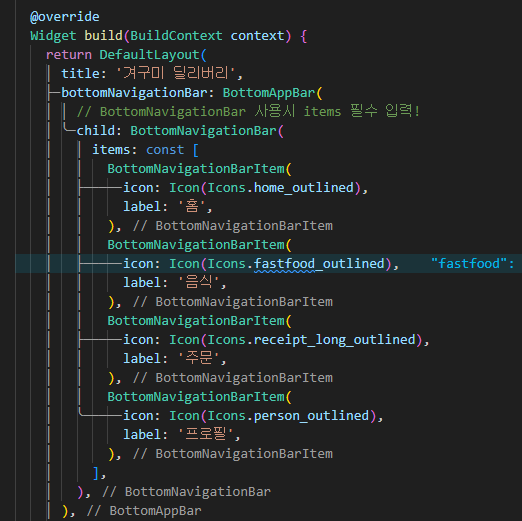
bottomNavigationBar: BottomNavigationBar(
// BottomNavigationBar 사용시 items 필수 입력!
selectedItemColor: PRIMARY_COLOR,
unselectedItemColor: BODY_TEXT_COLOR,
selectedFontSize: 10,
unselectedFontSize: 10,
type: BottomNavigationBarType.fixed, // shifting 선택된 탭 확대 효과
backgroundColor: Colors.white,
// onTap은 함수를 넣어줘야 함!
// 이때, int index인 이유 => 클릭한 탭의 인덱스에 숫자가 들어가니까!
onTap: (int index) {
setState(() {
// this.index == class _RootTabState의 index로 즉, int index = 0;
this.index = index;
});
},
currentIndex: index,
items: const [
BottomNavigationBarItem(
icon: Icon(Icons.home_outlined),
label: '홈',
),
BottomNavigationBarItem(
icon: Icon(Icons.fastfood_outlined),
label: '음식',
),
BottomNavigationBarItem(
icon: Icon(Icons.receipt_long_outlined),
label: '주문',
),
BottomNavigationBarItem(
icon: Icon(Icons.person_outlined),
label: '프로필',
),
],
),
child: const Center(
child: Text('Root Tab'),
),
);
}
}
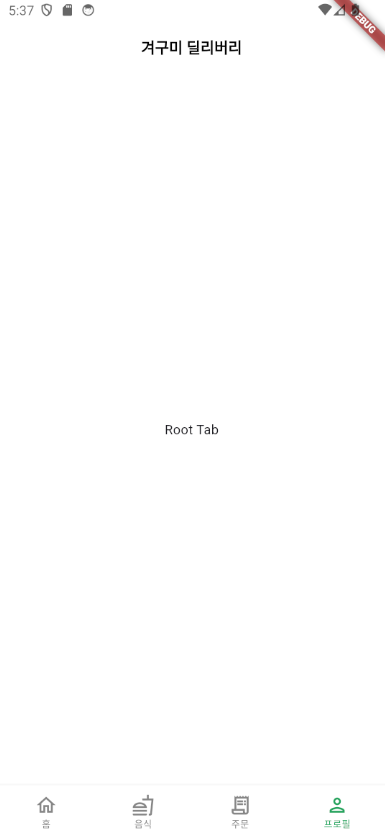
완성된 탭바의 모습은 이러하다!

호떡 신문지에서 개발자로 환생