그냥 따라 만드는 건 의미가 없기 때문에, 몇 번 따라서 만들어보고,
이후에는 내가 처음 부터 이 프로젝트를 시작한다면 어떻게 단계를 나누어 접근할지 차근차근 정리해가며 기존 코드를 전혀 보지 않은 채고 직접 다시 새로 만들어보기로 했다.
결국 스스로 이 단계들이 머릿속에 들어와 있어야 하고, 왜 이 함수가 필요한지,이 코드를 왜 작성했는지 정확히 알고 있어야 나중에 또 다른 방법,더 효율적인 방법을 고민할 수 있고, 내 것이 되기 때문!
HTML로 뼈대 만들기
버튼만들기-로고, 이미지, 텍스트
총 세 종류의 버튼을 만들 것이다.
로고 버튼
*시멘틱 태그 사용
      <div class="logobtn"></div>
    //이전에는 이렇게 썼지만,

      <button class="logobtn"></button>
   //이제는 의도와 용도를 명확히 알 수 있도록 시멘틱 태그를 사용하기로 했다.
간편하게 코드 작성하기
button.class명*반복 생성하고 싶은 횟수
//를 쓰면 한번에 같은 태그가 여러 개 생성된다.
텍스트,이미지 버튼
 <!-- 로고 -->

 <button class="logobtn"><img src="img/logo.png" /></button>

 <!-- 이미지,텍스트 버튼 -->
 <!-- 한 줄에 들어가야 하기 때문에, 한 영역에 함께 만든다. -->
 <button class="imgbtn"><img src="img/blue_p.png" /></button>
 <button class="imgbtn"><img src="img/blue_t.png" /></button>
 <button class="imgbtn"><img src="img/blue_s.png" /></button>

 <!-- 텍스트 버튼 -->
 <button class="txtbtn">blue</button>
 <button class="txtbtn">pink</button>
 <button class="txtbtn">yellow</button>
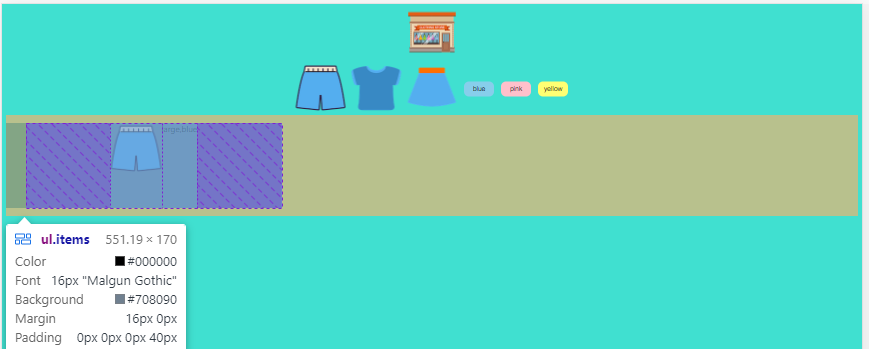
한 줄로 가지런히 가로정렬되어 출력된다.

CSS로 다듬기
각 요소 알맞게 배치하기
로고는 맨 위에, 이미지버튼과 텍스트 버튼은 함께 두번째 줄에 가로정렬
한 줄에 정렬시키고 싶은 것들만 섹션으로 묶은다음, 별도의 클래스를 부여해야겠다. (아이템들을 넣을 컨테이너 만들기)
    <!-- 이미지,텍스트 버튼 -->
    <!-- 한 줄에 들어가야 하기 때문에, flexbox로 정렬해도 묶이도록 섹션으로 묶은 뒤 별도의 클래스를 부여한다. -->
    <section class="btns">
      <button class="imgbtn"><img src="img/blue_p.png" /></button>
      <button class="imgbtn"><img src="img/blue_t.png" /></button>
      <button class="imgbtn"><img src="img/blue_s.png" /></button>

      <!-- 텍스트 버튼 -->
      <button class="txtbtn">blue</button>
      <button class="txtbtn">pink</button>
      <button class="txtbtn">yellow</button>
    </section>
가운데 정렬하기

왜 하단 아이템 나열 영역이 display:flex; justify-content:center;로 해도 가운데 정렬이 안되나 싶었다.
개발자도구 커서를 올려보니 오른쪽 패딩이 40px이나 적용되어 있었다.

호버/클릭 시 효과 주기
클릭 영역에 들어오면 커서 바꿔주기
.logobtn {
  background-color: transparent;
  border-color: transparent;
  cursor: pointer;
}
마우스를 올렸을 때 사이즈 커지게 만들기
.txtbtnb {
  background-color: skyblue;
  border: none;
  border-radius: var(--border-radius);
  margin: var(--btn-margin);
  cursor: pointer;
  transition: transform var(--duration) ease;
}
.txtbtnp {
  background-color: pink;
  border: none;
  border-radius: var(--border-radius);
  margin: var(--btn-margin);
  cursor: pointer;
  transition: transform var(--duration) ease;
}
.txtbtny {
  background-color: rgb(255, 255, 115);
  border: none;
  border-radius: var(--border-radius);
  margin: var(--btn-margin);
  cursor: pointer;
  transition: transform var(--duration) ease;
}
.txtbtnb:hover,
.txtbtnp:hover,
.txtbtny:hover,
.logobtn:hover {
  transform: scale(1.1);
}
궁금한 점: button태그로 이미지 버튼을 만들면 사이즈 지정은 불가능한 것일까?
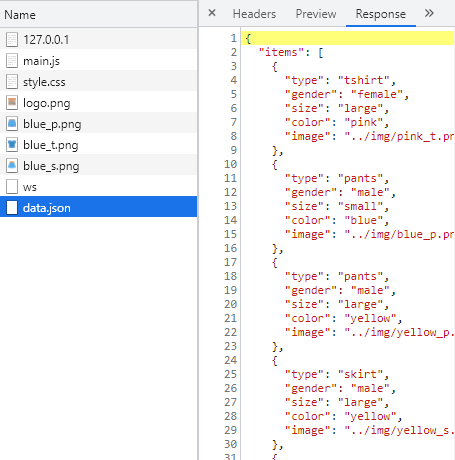
Json 데이터 준비하기
ㅇ
브라우저 동작 함수 만들기
JSon데이터 불러오기
fetch()
https://www.daleseo.com/js-window-fetch/
함수는 첫번째 인자로 URL, 두번째 인자로 옵션 객체를 받고, Promise 타입의 객체를 반환합니다. 반환된 객체는, API 호출이 성공했을 경우에는 응답(response) 객체를 resolve하고, 실패했을 경우에는 예외(error) 객체를 reject합니다.
// json 데이터를 가져온다.
function loaditems() {
 return (
   fetch("data/data.json")
     // load items라는 함수를 실행하면,fetch()로 데이터 폴더의 json데이터를 가져온다.
     //   .then((response) => response.json())//테스트
     .then((response) => console.log(response))
   //   fetch()로 받은 응답을 json형태로 만드다.
   //   .then((json) => json.items)
   //   json형태의 데이터인 items를 가져온다.
); 

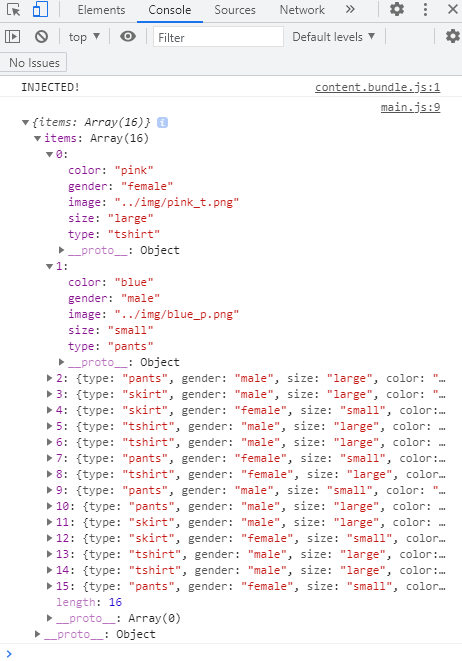
데이터가 성공적으로 불러와진 것을 확인할 수 있다. (이게 안돼서 얼마나 헤맸는지 모른다 흑흑 ㅠㅠㅠㅠ)
function loaditems() {
 return (
   fetch("data/data.json")
     // load items라는 함수를 실행하면,fetch()로 데이터 폴더의 json데이터를 가져온다.
     .then((response) => response.json())
     // json이라는 API를 사용해, response 오브젝트의 바디를 json형태로 변환한다.
     //   .then((response) => console.log(response)) //테스트
.then((json) => console.log(json)) 
join()
