한번 해보자 drf-yasg
Installation
항상 공식 Document가 기본이다.
https://drf-yasg.readthedocs.io/en/stable/readme.html#table-of-contents
- pip install
pip install djangorestframework
pip install -U drf-yasg
In settings.py
INSTALLED_APPS = [
   ...
   'django.contrib.staticfiles',  # required for serving swagger ui's css/js files
   'rest_framewwork'
   'drf_yasg',
   ...
]
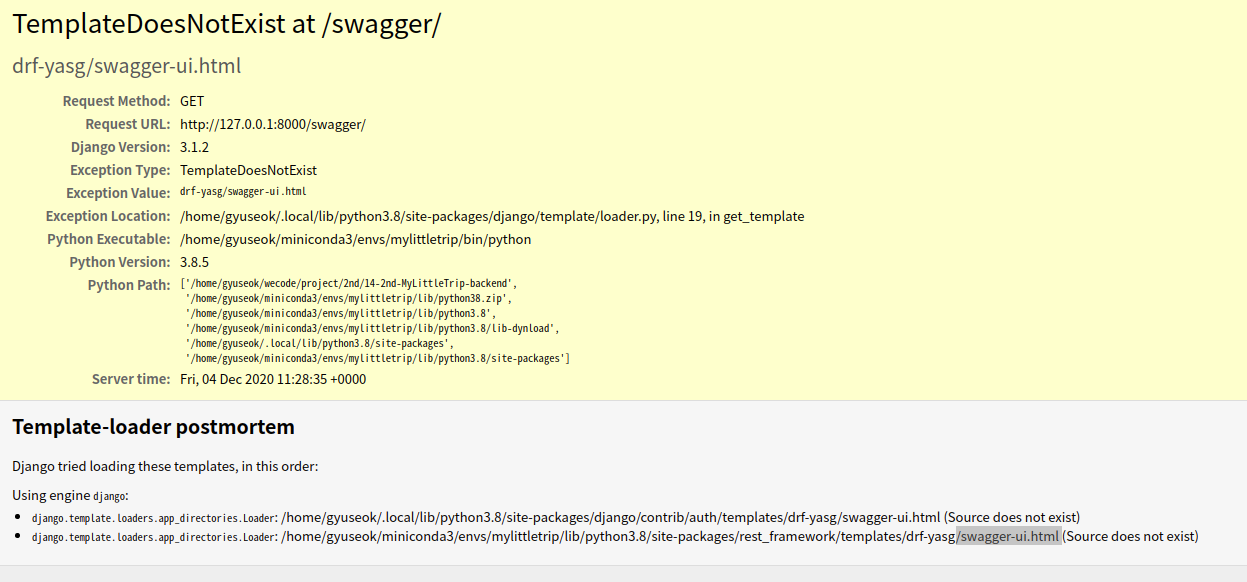
여기서 나처럼 'drf_yasg'가 아닌 'drf-yasg'로 넣으면 접속했을 때 다음과 같이 뜬다.

존재하지 않는 폴더를 뒤지고 있으니 파일이 있을리가 없다.
공식문서를 볼땐 눈을 똑바로 뜨자
In [APPNAME]/urls.py
...
from rest_framework import permissions
from drf_yasg.views import get_schema_view
from drf_yasg import openapi
...

schema_view = get_schema_view(
   openapi.Info(
        title="MyLittleTrip API",
        default_version='v1',
        description="위코드 2차 프로젝트 마이리틀트립(마이리얼트립 클론)",
        terms_of_service="http://www.googole.com/policies/terms/",
        contact=openapi.Contact(email="contact@snippets.local"),
        license=openapi.License(name="BSD License"),
   ),
   public=True,
   permission_classes=(permissions.AllowAny,),
)

urlpatterns = [
   url(r'^swagger(?P<format>\.json|\.yaml)$', schema_view.without_ui(cache_timeout=0), name='schema-json'),
   #본인은 해당 swagger ui를 사용할 것이다.
   url(r'^swagger/$', schema_view.with_ui('swagger', cache_timeout=0), name='schema-swagger-ui'),
   url(r'^redoc/$', schema_view.with_ui('redoc', cache_timeout=0), name='schema-redoc'),
   ...
]
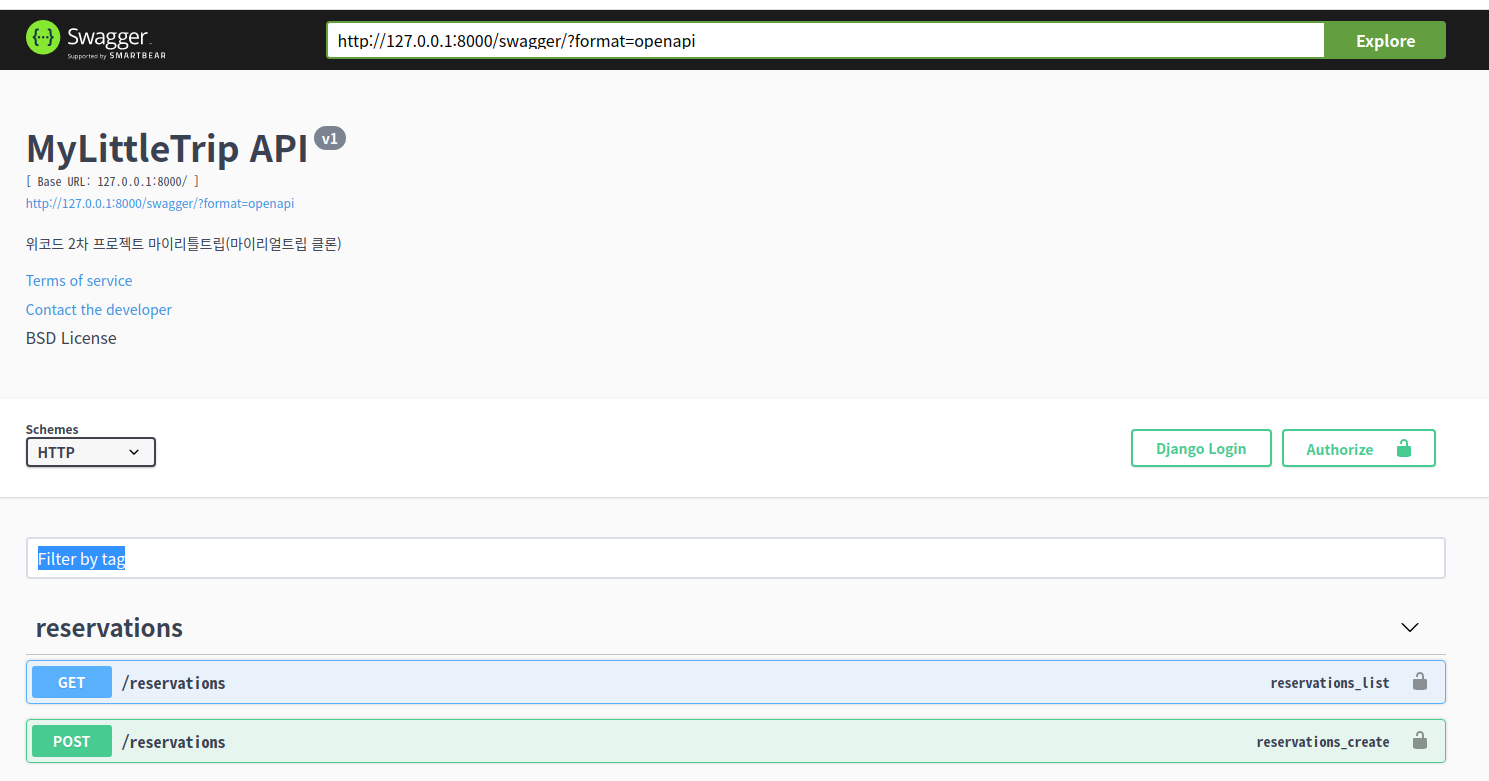
저장하고 서버를 돌려보자.
python manage.py runserver 0:8000 이대로 서버를 돌리면 대강의 UI는 잘나오지
이제 어떻게 추가 할까? 기존의 위코드 프로젝트를 띄웠을 때는 아무 endpoint도 나오지 않는다.
공식문서에도 잘안나오는....
이럴때는 example을 보고 내 코드와 다른 점을 찾아보자.
https://drf-yasg.readthedocs.io/en/stable/readme.html#example-project
In Example users/views.py
...
from rest_framework.views import APIView
...

class UserList(APIView):
    """UserList cbv classdoc"""

    @swagger_auto_schema(
        query_serializer=UserListQuerySerializer,
        responses={200: UserSerializerrr(many=True)},
        tags=['Users'],
    )
    def get(self, request):
        queryset = User.objects.all()
        serializer = UserSerializerrr(queryset, many=True)
        return Response(serializer.data)
...
여기서 모든 앱이 View가 아닌 rest_framework의 APIView를 상속받는다.
그럼 나의 것에 적용을 해보자.
In [APPNAME]/views.py
import json

from django.views import View
from django.http import JsonResponse
from rest_framework.views import APIView

from .models import Reservation
from serializers import ReservationSerializer

class ReservationListView(APIView): #View가 아닌 APIView로 선정해주자
    def post(self, request):
        data = json.loads(request.body)

        serializer = ReservationSerializer(data=data)
        if serializer.is_valid():
            serializer.save()
            return JsonResponse(serializer.data, status=201)
        else:
            return JsonResponse(serializer.errors, status=400)

    def get(self, request):
        reservation = Reservation.objects.all()
        serializer = ReservationSerializer(reservation, many=True)
        return JsonResponse({'data': serializer.data}, status=200)
'''
endpoint가 보인다. 이제 적용시키기만 하면된다.

