몬스터 게임은 RPG 게임으로, 게임에는 크게 두 가지 모드가 있다. 모험, 휴식, 종료 중에서 선택하는 일반 모드와 모험을 떠나서 적을 만나게 될 때 돌입하는 전투 모드이다. 전투 모드에서는 적을 공격하거나 체력을 회복하거나 도망간다.
html, css 코드
// rgp.html

<body>
  <form id="start-screen">
    <input id="name-input" placeholder="주인공 이름을 입력하세요!" />
    <button id="start">시작하기</button>
  </form>
  <div id="screen">
    <!-- 주인공 스탯 -->
    <div id="hero-stat">
      <span id="hero-name"></span>
      <span id="hero-level"></span>
      <span id="hero-hp"></span>
      <span id="hero-xp"></span>
      <span id="hero-att"></span>
    </div>
    <!-- 일반 모드 -->
    <form id="game-menu" style="display: none;">
      <div id="menu-1">1. 모험하기</div>
      <div id="menu-2">2. 휴식하기</div>
      <div id="menu-3">3. 게임 종료하기</div>
      <input id="menu-input" />
      <button id="menu-button">입력</button>
    </form>
    <!-- 전투 모드 -->
    <form id="battle-menu" style="display: none;">
      <div id="battle-1">1. 공격하기</div>
      <div id="battle-2">2. 회복하기</div>
      <div id="battle-3">3. 도망가기</div>
      <button id="battle-button">입력</button>
    </form>
    <div id="message"></div>
    <!-- 몬스터 스택 -->
    <div id="monster-stat">
      <span id="monster-name"></span>
      <span id="monster-hp"></span>
      <span id="monster-att"></span>
    </div>
  </div>
</body>
// rpg.scss
@mixin center {
position: absolute;
top: 50%;
left: 50%;
transform: translate(-50%, -50%);
}
#start-screen {
@include center;
}
#screen {
@include center;
}1. document 연결, 게임시작 이벤트 생성
const $startScreen = document.querySelector('#start-screen');
const $gameMenu = document.querySelector('#game-menu');
const $battleMenu = document.querySelector('#battle-menu');
const $heroName = document.querySelector('#hero-name');

let name;
$startScreen.addEventListener('submit', (event) => {
  event.preventDefault(); // form 의 기본 기능 막기
  let name =  event.target['name-input'].value;
  // form 태그는 event.target 으로 안에 있는 id 를 통해 태그를 가져올 수 있다.
  // => 'name-input' 이란 id 를 가진 태그 가져오기
  $startScreen.style.display = 'none';
  $gameMenu.style.display = 'block';
  $heroName.textContent = name;
})
$startScreen 의 form 태그 실행 ⇒ 주인공 이름 입력
$startScreen이 사라짐$gameMenu가 나타남- 주인공 이름이 name 에 저장(데이터),
$heroName의 textContent 로 들어감(화면)⇒ 주인공 이름(name)을 계속 사용하고 싶다면 함수밖으로 let 변수로 빼내어 저장
2. 주인공이나 몬스터 만들기
내가 누른 칸이 몇 번째 행, 몇 번째 줄인지 지정하여 위치를 파악할 수 있어야 한다.
-
주인공 스택, 몬스터 스택 객체화
-
스택 데이터 화면에 표시
-
레벨업 조건 - 1레벨일 때: 경험치(xp) 가 15일 때 레벨 up / 2레벨 일 때: 경험치(xp) 가 30일 때 레벨 업 ...
레벨이 오를 수록 필요한 경험치 증가
const $startScreen = document.querySelector('#start-screen');
const $startScreenInput = document.querySelector('#start-screen input');
const $changeNameBtn = document.querySelector('#change-hero-name');
// 메뉴
const $gameMenu = document.querySelector('#game-menu');
const $battleMenu = document.querySelector('#battle-menu');
// 주인공 스탯
const $savedHeroName = document.querySelector('#saved-hero-name');
const $heroStat = document.querySelector('#hero-stat');
const $heroName = document.querySelector('#hero-name');
const $heroLevel = document.querySelector('#hero-level');
const $heroHp = document.querySelector('#hero-hp');
const $heroXp = document.querySelector('#hero-xp');
const $heroAtt = document.querySelector('#hero-att');
// 몬스터 스탯
const $monsterLevel = document.querySelector('#monster-level');
const $monsterHp = document.querySelector('#monster-hp');
const $monsterAtt = document.querySelector('#monster-att');
// 메시지
const $message = document.querySelector('#message');

// 주인공 스택 데이터
const hero = {
  name: '',
  lev: 1,
  maxHp: 100,
  hp: 100,
  xp: 0,
  att: 10,
};
// 몬스터 스택 데이터
let monster = null;
const monsterList = [
  { name: '슬라임', hp: 25, att: 10, xp: 10 },
  { name: '스켈레톤', hp: 50, att: 15, xp: 20 },
  { name: '마왕', hp: 150, att: 35, xp: 50 },
];

// 게임 시작버튼 누르기
const startGame = (event) => {
  event.preventDefault(); // form 의 기본 기능 막기
  const name = event.target['name-input'].value;
  // let name = event.target['name-input'].value;
  // form 태그는 event.target 으로 안에 있는 id 를 통해 태그를 가져올 수 있다.
  // => 'name-input' 이란 id 를 가진 태그 가져오기
  $startScreen.style.display = 'none';
  $heroStat.style.display = 'block';
  $gameMenu.style.display = 'block';
  // 주인공 스택 화면표시
  $heroLevel.textContent = `${hero.lev}Lev`;
  $heroHp.textContent = `HP: ${hero.hp}/${hero.maxHp}`;
  $heroXp.textContent = `XP: ${hero.xp}/${15 * hero.lev}`; // 레벨업 조건
  $heroAtt.textContent = `ATT: ${hero.att}`;
  $heroName.textContent = name;
};

$startScreen.addEventListener('submit', startGame);
$startScreenInput.focus();

// 일반 모드
$gameMenu.addEventListener('submit', (event) => {
  event.preventDefault();
  const input = event.target['menu-input'].value;
  // value 는 항상 string 데이터 이기 때문에 문자 '1' 로 받음
  // 이를 무조건 숫자(1) 로 받고싶다면 value => valueAsNumber 로 바꿈
  if (input === '1') { // 전투 모드일 때
    $gameMenu.style.display = 'none';
    $battleMenu.style.display = 'block';
  }
})

// 전투 모드
$battleMenu.addEventListener('submit', (event) => {

})
3. 깊은 복사와 얕은 복사
const $startScreen = document.querySelector('#start-screen');
const $startScreenInput = document.querySelector('#start-screen input');
const $changeNameBtn = document.querySelector('#change-hero-name');
// 메뉴
const $gameMenu = document.querySelector('#game-menu');
const $battleMenu = document.querySelector('#battle-menu');
// 주인공 스탯
const $savedHeroName = document.querySelector('#saved-hero-name');
const $heroStat = document.querySelector('#hero-stat');
const $heroName = document.querySelector('#hero-name');
const $heroLevel = document.querySelector('#hero-level');
const $heroHp = document.querySelector('#hero-hp');
const $heroXp = document.querySelector('#hero-xp');
const $heroAtt = document.querySelector('#hero-att');
// 몬스터 스탯
const $monsterName = document.querySelector('#monster-name');
const $monsterLevel = document.querySelector('#monster-level');
const $monsterHp = document.querySelector('#monster-hp');
const $monsterAtt = document.querySelector('#monster-att');
// 메시지
const $message = document.querySelector('#message');

// 주인공 스택 데이터
const hero = {
  name: '',
  lev: 1,
  maxHp: 100,
  hp: 100,
  xp: 0,
  att: 10,
};
// 몬스터 스택 데이터
// att: 공격력 / xp: 경험치 / hp: 체력
let monster = null;
const monsterList = [
  {
    name: '슬라임',
    hp: 25,
    att: 10,
    xp: 10,
  },
  {
    name: '스켈레톤',
    hp: 50,
    att: 15,
    xp: 20,
  },
  {
    name: '마왕',
    hp: 150,
    att: 35,
    xp: 50,
  },
];

// 게임 시작버튼 누르기
const startGame = (event) => {
  event.preventDefault(); // form 의 기본 기능 막기
  const name = event.target['name-input'].value;
  // let name = event.target['name-input'].value;
  // form 태그는 event.target 으로 안에 있는 id 를 통해 태그를 가져올 수 있다.
  // => 'name-input' 이란 id 를 가진 태그 가져오기
  $startScreen.style.display = 'none';
  $heroStat.style.display = 'block';
  $gameMenu.style.display = 'block';
  // 주인공 스택 화면표시
  $heroLevel.textContent = `${hero.lev}Lev`;
  $heroHp.textContent = `HP: ${hero.hp}/${hero.maxHp}`;
  $heroXp.textContent = `XP: ${hero.xp}/${15 * hero.lev}`; // 레벨업 조건
  $heroAtt.textContent = `ATT: ${hero.att}`;
  $heroName.textContent = `Name: ${name}`;
};

$startScreen.addEventListener('submit', startGame);
$startScreenInput.focus();

// 일반 모드
$gameMenu.addEventListener('submit', (event) => {
  event.preventDefault();
  const input = event.target['menu-input'].value;
  if (input === '1') {
    // 모험 => 전투 모드
    $gameMenu.style.display = 'none';
    $battleMenu.style.display = 'block';

    // 몬스터 생성
    // 랜덤으로 monster 를 선택해 monster = null 인 자리에 삽입
		// 깊은 복사
    monster = JSON.parse(
      JSON.stringify(
        monsterList[Math.floor(Math.random() * monsterList.length)]
      )
    );

    // 주인공 max 체력 (hp) 는 정해져있지만 몬스터 체력(hp) 은 몬스터마다 각기 다름
    monster.maxHp = monster.hp;
    $monsterName.textContent = monster.name;
    $monsterHp.textContent = `HP: ${monster.hp}/${monster.maxHp}`;
    $monsterAtt.textContent = `ATT: ${monster.att}`;
  } else if (input === 2) {
    // 휴식
  } else if (input === 3) {
    // 종료
  }
});

// 전투 모드
$battleMenu.addEventListener('submit', (event) => {});
깊은 복사, 참조
깊은 복사를 하는 이유 : 객체를 참조를 해버리면, 싸움 이후 몬스터의 상태(hp, xp 등)에 변화가 오는 동시에 몬스터 원본에 손상을 입힐 수 있기 때문에 아예 초기값을 가진 새로운 객체로 무한 생성할 수 있도록 복사를 해준다.
		// monsterList[0] 의 name => 슬라임
    // 1. 깊은 복사: 엄연히 다른 존재로써 복사
    const monster1 = JSON.parse(JSON.stringify(monsterList[0]));

    // 2. 참조: 원본을 대입, 즉 서로 연결되어 참조함
    const monster2 = monsterList[0];
    // ex) monsterlist 값을 바꾸면 monster2 의 값이 바뀌고, 반대로 monster2 의 값을 바꾸면
		// monsterList 의 값도 바뀌는 관계

    monster1.name = '새 몬스터';
    console.log(monsterList[0].name);
		// 새로 생긴 복사본의 name 값이 '새 몬스터' 로 바뀌고, 원본은 그대로 '슬라임' 으로 남아있음
		// => 원본 손상 x
    monster2.name = '새 몬스터';
    console.log(monsterList[0].name);
		// 원본의 name 값이 '새 몬스터' 로 바뀜 => 원본 손상 o

    console.log(monsterList[0] === monster1); // false : 복사
    console.log(monsterList[0] === monster2); // true : 참조
얕은 복사
새로운 객체리터럴을 만든 후 그 안에서 복사를 원하는 대상을 넣어 ... 를 삽입. 즉 중첩된 객체가 있을 때 가장 바깥 객체만 복사되고 내부 객체는 관계를 유지하는 복사를 의미. 배열의 얕은 복사에는 이말고도 대표적으로 slice() 메서드가 있다.
상수(constant)는 변하지 않는 변수를 의미하며(메모리 위치) 메모리 값을 변경할 수 없다. 리터럴은 데이터 그 자체이며 변수의 값이 변하지 않는 데이터(메모리 위치안의 값)를 의미한다.
https://mommoo.tistory.com/14
const array = [ {j: 'k'}, {l: 'm'} ];
const shallowCopy = [...array]; // 얕은 복사
console.log(array === shallowCopy); // false
console.log(array[0] === shallowCopy[0]); // true
깊은 복사 vs 얕은 복사 차이 :
얕은 복사: 겉 껍데기({},[]) 만 복사고 나머지 안의 내용물은 참조 방식
깊은 복사: 참조 관계는 아예 끊기고 전부 새롭게 복사
JSON.parse(JSON.stringify())
가장 간단한 객체는 JSON.parse(JSON.stringify(객체)) 를 사용해도 되지만, 성능도 느리고 함수나 Math, Date 같은 객체를 복사할 수 없다는 단점이 있다.
⇒ 실무에서는 lodash (lodash clone 기능)등 같은 라이브러리 등을 사용한다.
4. 서로 공격하기 (this, 클래스)
const hero = {
  name: '',
  lev: 1,
  maxHp: 100,
  hp: 100,
  xp: 0,
  att: 10,
  // 화살표 함수일 땐 this 가 제대로 작동 안하므로 function 을 쓴다.
  // 공격: 공격시 나의 공격력 만큼 몬스터 체력 떨구기, 몬스터 공격력 만큼 내 체력 떨구기
  attack(monster) {
    monster.hp -= this.att;
    this.hp -= monster.att;
  },
  // 치료: 20씩 힐링
  heal(monster) {
    this.hp += 20;
    this.hp -= monster.att;
  },
};-
공격과 치료해주는 함수 메서드를 작성하여 hero 객체와 위에서 생성된 monster 객체가 상호작용
-
공격시 나의 공격력(att) 만큼 몬스터 체력(hp) 를 떨어뜨리고, 동시에 몬스터 공격력(att) 만큼 내 체력(hp) 을 떨어뜨림
// 전투 모드
$battleMenu.addEventListener('submit', (event) => {
  const input = event.target['battle-input'].value;
  // 공격
  if (input === '1') {
    hero.attack(monster);
    monster.attack(hero);
    $heroHp.textContent = `HP: ${hero.hp}/${hero.maxHp}`;
    $monsterHp.textContent = `HP: ${monster.hp}/${monster.maxHp}`;
    $message.textContent = `${hero.att}의 데미지를 주고, ${monster.att} 만큼의 데미지를 받았다!`
  } else if (input === '2') {
    // 회복
  } else if (input === '3') {
    // 도망
  }
});
주인공이 한명이고 몬스터가 한마리, 1대1로 싸울수도 있지만, 경우에 따라 주인공은 동료를, 몬스터는 여러마리를 두어 겨룰수도 있다. 이때 일일히 변수를 여러 개 만드는 것보다, class 를 이용해 속성이 비슷한 객체를 공장에서 찍듯이 여러 개 생성시킬 수 있다.
클래스(class) :
객체를 생성하는 템플릿 문법이다. class 예약어로 클래스를 선언하고 constructor 메서드 안에 기존코드를 넣는다. new 를 붙여 호출하면 constructor 함수가 실행되고 객체가 반환된다. this 는 생성된 객체 자신을 가리키게된다.
클래스는 최신 자바스크립트 문법으로, 그 이전에는 함수로 객체를 만들었다.
- 이전 객체를 함수로 생성하는 문법들이다.
- 객체를 return 해서 함수로 만드는 방법이다. 이와 같이 객체를 반환하는 함수를 공장(factory)함수 라고 한다. 공장처럼 객체를 찍어낸다는 의미이다.
function createMonster(name, hp, att, xp) {
  return { name, hp, att, xp };
}

const monster1 = **createMonster('슬라임', 25, 10, 11);
const monster2 = createMonster('슬라임', 26, 10, 10);
const monster1 = createMonster('슬라임', 25, 11, 10);
.
.
.- 다음은 생성자 함수 new 를 사용한 방법이다. new 를 통해 가상의 새로운 객체들이 생성된다. 객체의 속성이 this 에 대입되었으며 this 는 생성된 객체 자신에 해당하는 this 가 된다. 이때 생성자 함수는 대문자로 입력하는것이 관례다.
function Monster(name, hp, att, xp) {
  this.name = name;
  this.hp = hp;
  this.att = att;
  this.xp = xp;
}

const monster1 = new Monster('슬라임', 25, 10, 11);
const monster2 = new Monster('슬라임', 26, 10, 10);- 최신 문법인 class 생성자 함수를 이용하는 방법이다 class 예약어로 클래스를 선언하고, constructor 메서드 안에 기본 코드를 작성한다. 클래스에 new 를 붙여 호출하면 constrcutor 함수가 실행되고 객체가 반환된다.
class Monster {
  constructor(name, hp, att, xp) {
    this.name = name;
    this.hp = hp;
    this.att = att;
    this.xp = xp;
  }
}

const monster1 = new Monster('슬라임', 25, 10, 11)
const monster1 = new Monster('슬라임', 26, 10, 10)
const monster3 = new Monster('슬라임', 25, 11, 10)
게임에 적용하여 알아보자
이전의 생성자함수 방식때 메서드를 추가할 경우엔 prototype 란 속성을 붙혀 사용하였다.
function Monster(name, hp, att, xp) {
  this.name = name;
  this.hp = hp;
  this.att = att;
  this.xp = xp;
}

Monster.prototype.attack = function (monster) {
  monster.hp -= this.att;
  this.hp -= monster.att;
}

Monster.prototype.heal = function (monster) {
  this.hp += 20;
  this.hp -= monster.att;
}
현재 생성자함수 class 에 적용해보면 이렇게 된다.
메서드 까지 잘 묶여 하나의 덩어리로 생성된 것을 볼 수 있다.
class Monster {
  constructor(name, hp, att, xp) {
    this.name = name;
    this.hp = hp;
    this.att = att;
    this.xp = xp;
  }
  attack(monster) {
    monster.hp -= this.att;
    this.hp -= monster.att;
  }
  heal(monster) {
    this.hp += 20;
    this.hp -= monster.att;
  }
5. 클래스로 재구성하기
그전의 모든 코드를, 클래스(class)로 재구성해보자
class 를 이용하면 중구난방으로 퍼져있던 함수들을 다 묶음으로 정리되게 코드가 지어진다.
// 클래스 방식
// 게임 내에서 주인공과 몬스터가 상호작용하며, 게임 자체도 클래스로 지정됨
// ex) 게임 내에서 주인공, 몬스터가 생성되는 방식

// (2) Hero 클래스 생성, 입력한 name 값을 인수로 받음
// Game class: 게임을 총괄하는 class
class Game {
  constructor(name) {
    this.monster = null;
		this.hero = null;
    this.monsterList = [
      { name: '슬라임', hp: 25, att: 10, xp: 10 },
      { name: '스켈레톤', hp: 50, att: 15, xp: 20 },
      { name: '슬라임', hp: 150, att: 35, xp: 50 },
    ];
    this.start(name);
  }
  // Game class 내 메서드
	// 시작하는 함수 동작 코드 구분해 묶음
  start(name) {
    $gameMenu.addEventListener('submit', this.onGameMenuInput);
    $battleMenu.addEventListener('submit', this.onBattleMenuInput);
    this.changeScreen('game');
		this.hero = new Hero(this, name); // 게임이 시작될 때 주인공 생성
		// Hero 클래스와 연결해줌
  }
	// 화면 전환 동작 코드 구분해 묶음
  changeScreen(screen) {
    if (screen === 'start') {
      $startScreen.style.display = 'block';
      $gameMenu.style.display = 'none';
      $battleMenu.style.display = 'none';
    } else if (screen === 'game') {
      $startScreen.style.display = 'none';
      $gameMenu.style.display = 'block';
      $battleMenu.style.display = 'none';
    } else if (screen === 'battle') {
      $startScreen.style.display = 'none';
      $gameMenu.style.display = 'none';
      $battleMenu.style.display = 'block';
    }
  }
  // 일반 모드
  onGameMenuInput = (event) => {
    event.preventDefault();
    const input = event.target['menu-input'].value;
    if (input === '1') {
      // 모험
      this.changeScreen('battle');
    } else if (input === '2') {
      // 휴식
    } else if (input === '3') {
      // 종료
    }
  };
  // 전투 모드
  onBattleMenuInput = (event) => {
    event.preventDefault();
    const input = event.target['battle-input'].value;
    if (input === '1') {
      // 공격
    } else if (input === '2') {
      // 회복
    } else if (input === '3') {
      // 도망
    }
  };
}

// 주인공 객체
class Hero {
  constructor(game, name) {
    this.game = game; // Game 클래스와 연결해줌
    this.name = name;
    this.lev = 1;
    this.maxHp = 100;
    this.hp = 100;
    this.xp = 0;
    this.att = 10;
  }
  attack(target) {
    target.hp -= this.att;
  }
  heal(monster) {
    this.hp += 20;
    this.hp -= monster.att;
  }
}

// 몬스터 객체
class Monster {
  construcgtor(game, name, hp, att, xp) {
    this.game = game; // Game 클래스와 연결해줌
    this.name = name;
    this.maxHp = hp;
    this.hp = hp;
    this.xp = xp;
    this.att = att;
  }
  attck(target) {
    target.hp -= this.att;
  }
}

// (1) 게임 시작, 새 Game 클래스 생성
let game = null;
$startScreen.addEventListener('submit', (event) => {
  event.preventDefault();
  const name = event.target['name'].value;
  game = new Game(name);
});
6. 화살표 함수와 this
일반 function 함수와 화살표 함수에서의 this 는 서로 차이가 존재한다.
class Game {
  constructor(name) {

  start(name) {
    $gameMenu.addEventListener('submit', this.onGameMenuInput);
    $battleMenu.addEventListener('submit', this.onBattleMenuInput);
    this.changeScreen('game');
		this.hero = new Hero(this, name)
  }

  // 일반 모드
  // function onGameMenuInput(event) {} (x)
  onGameMenuInput = (event) => {
    event.preventDefault();
    const input = event.target['menu-input'].value;
    if (input === '1') {
      // 모험
      this.changeScreen('battle'); // this: Game 클래스(o) $gameMenu(x)
    } else if (input === '2') {
      // 휴식
    } else if (input === '3') {
      // 종료
    }
  };
  // 전투 모드
  // function onBattleMenuInput(event) {} (x)
  onBattleMenuInput = (event) => {
    event.preventDefault();
    const input = event.target['battle-input'].value;
    if (input === '1') {
      // 공격
    } else if (input === '2') {
      // 회복
    } else if (input === '3') {
      // 도망
    }
  };
}
위의 onGameMenuInput() 이나 onBattleMenuInput() 에는 왜 화살표 함수를 적용했을까?
Game 클래스 내의 this 는 모두 Game 의 객체를 가르키는것이 아니었다. this 는 계속 바뀔 수 있는데, 예를 들어 $gameMenu.addEventListener('submit', this.onGameMenuInput); 에서의 this 는 $gameMenu , 즉 form 돔객체를 가리킨다. 그래서 일반 함수로 작성하면 **form**.changeScreen() 로 인식되어 에러가 발생하는 것이다.
기본적으로 this 는 window 객체를 가리키고, 특정 [객체].메서드 를 실행할 때는 그안에 실행되는 this 는 해당 [객체] 를 가리키게 된다.
특정 메서드는 콜백함수의 this 를 바꾸는데, 대표적으로 **addEventListener()** 가 있다.
⇒ Game 이라는 클래스 내부의 메서드에서 this: Game 클래스 자체
⇒ $gameMenu.addEventListener('submit', this.onGameMenuInput); 에서의 this:
$gameMenu 라는 form 객체
즉 바깥쪽 함수의 this 를 안쪽 함수로 가져오기 위해(바깥쪽과 안쪽의 this 통일) 화살표함수를 사용한다.
⇒ this 가 바뀌는 현상을 막고싶을 때 화살표 함수 사용
- function 일반 함수: 자기자신의 this
document.addEventListener('click', function() {
  console.log(this); // document
})- arrow 화살표함수: 바깥쪽 함수의 this
document.addEventListener('click', () => {
  console.log(this); // window
} )
document 의 바깥쪽은 window
함수선언문의 this 는 bind 를 이용하여 직접 바꿔줄수도 있다. ** 단 화살표 함수는 bind 할 수 없다.
bind : 해당 함수안에서 사용할 this 와 인자를 설정해주는 역할
function a() {
  console.log(this)
}

a.bind(document)(); // document (원래라면 this 는 window 로 나와야함)
7. 클래스간 상호작용하기
Game 클래스 안에 paintHeroStat() 과 **paintMonsterStat** 메서드를 추가해 주인공과 몬스터의 스탯을 화면상으로 그려준다.
class Game {
	paintHeroStat() {
    const { hero } = this;
    if (hero === null) {
      $heroName.textContent = '';
      $heroLevel.textContent = '';
      $heroHp.textContent = '';
      $heroXp.textContent = '';
      $heroAtt.textContent = '';
      return;
    }
    $heroName.textContent = `Name: ${hero.name}`;
    $heroLevel.textContent = `Level: ${hero.lev}Lv`;
    $heroHp.textContent = `HP: ${hero.hp} / ${hero.maxHp}`;
    $heroXp.textContent = `XP: ${hero.xp} / ${15 * hero.lev}`;
    $heroAtt.textContent = `ATT: ${hero.att}`;
}

	paintMonsterStat() {
    const { monster } = this;
    if (monster === null) {
      $monsterName.textContent = '';
      $monsterHp.textContent = '';
      $monsterAtt.textContent = '';
      return;
    }
    $monsterName.textContent = `Monster: ${monster.name}`;
    $monsterHp.textContent = `HP: ${monster.hp} / ${monster.maxHp}`;
    $monsterAtt.textContent = `ATT: ${monster.att}`;
  }
}
Game 클래스와 Hero 클래스는 서로 연결되어있기 때문에 this 를 활용하여 서로의 메서드를 쓰는 동작이 가능하다.
example )
Game 클래스 내에서 Hero 클래스의 메서드인 attack() 을 쓸 수도 있고, ⇒ this.hero.attack();
혹은 Hero 클래스 내에서 Game 클래스의 메서드인 updateHeroStat() 를 쓰는 등의 동작이 가능하다.
⇒ this.game.paintHeroStat();
 class Game {
  constructor(name) {
    this.monster = null;
    this.hero = null;
    this.monsterList = [
      { name: '슬라임', hp: 25, att: 10, xp: 10 },
      { name: '스켈레톤', hp: 50, att: 15, xp: 20 },
      { name: '슬라임', hp: 150, att: 35, xp: 50 },
    ];
    this.start(name);
  }
  start(name) {
    $gameMenu.addEventListener('submit', this.onGameMenuInput);
    $battleMenu.addEventListener('submit', this.onBattleMenuInput);
    this.changeScreen('game');
    this.hero = new Hero(this, name);
    this.paintHeroStat();
		// **this.hero.attack();**
	 }

	// Game class 내 메서드(3)
  // 주인공 스탯 : 화면상 업데이트
  paintHeroStat() {
    ...
}
class Hero {
constructor(game, name) {
this.game = game; // Game 클래스와 연결해줌
this.name = name;
this.lev = 1;
this.maxHp = 100;
this.hp = 100;
this.xp = 0;
this.att = 10;
// **this.game.paintHeroStat();**
}
attack(target) {
target.hp -= this.att;
}
heal(monster) {
this.hp += 20;
this.hp -= monster.att;
}
}- 전투모드
onBattleMenuInput⇒ 1. 공격하기 코드작성 - Game 클래스
quit(): 게임 종료 메서드 - Game 클래스
showMessage(): 메시지 메서드 - Hero 클래스
getXp: 전투 후 받은 경험치(xp) 로 레벨 등 변경
class Game {
  constructor(name) {
    ...
  }
  start(name) {
    $gameMenu.addEventListener('submit', this.onGameMenuInput);
    $battleMenu.addEventListener('submit', this.onBattleMenuInput);
    this.changeScreen('game');
    this.hero = new Hero(this, name);
    this.paintHeroStat();
  }

  changeScreen(screen) {...}

  // 일반 모드
  onGameMenuInput = (event) => {
    event.preventDefault();
    const input = event.target['menu-input'].value;
    if (input === '1') {
      // 모험
      ...
      );
    } else if (input === '2') {
      // 휴식
    } else if (input === '3') {
      // 종료
      this.quit();
    }
  };
  // 전투 모드
  onBattleMenuInput = (event) => {
    event.preventDefault();
    const input = event.target['battle-input'].value;
    if (input === '1') {
      // 공격
      const { hero, monster } = this;
      hero.attack(monster);
      monster.attack(hero);
      // 주인공 or 몬스터가 죽었을 때
      if (hero.hp <= 0) {
        this.showMessage(`${hero.lev} 레벨에서 전사. 새 주인공을 생성하세요!`);
        this.quit();
      } else if (monster.hp <= 0) {
        this.showMessage(
          `몬스터 [${monster.name}]을(를) 잡아 경험치를 얻었다! (+${monster.xp}xp)`
        );
        hero.getXp(monster.xp);
        this.monster = null; // 몬스터 죽음 => 삭제
        this.changeScreen('game'); // 일반 게임모드로 전환
      } else if (hero.hp > 0 && monster.hp > 0) {
        this.showMessage(
          `${hero.name} 은(는) ${hero.att} 의 데미지를 주고,
          ${monster.name} (으)로부터 ${monster.att} 만큼의 데미지를 받았다!
          (-${monster.att}hp)`
        );
      }
      this.paintHeroStat();
      this.paintMonsterStat();
    } else if (input === '2') {
      // 회복
    } else if (input === '3') {
      // 도망
      this.changeScreen('game');
    }
  };

  // 주인공, 몬스터 스탯 화면상 표현
  paintHeroStat() {...}
  paintMonsterStat() {...}

  // 메시지
  showMessage(text) {
    $message.textContent = text;
  }

  // 게임 종료: 초기화
  // 1. let 으로 설정되었던 변수들 null 로 초기화
  // 2. 초기화된 데이터값들 화면상으로 표시
  // 3. Game 클래스의 메서드 start() 로 인해 실행된 이벤트들 초기화
  quit() {
    this.hero = null;
    this.monster = null;
    this.paintHeroStat();
    this.paintMonsterStat();
    $gameMenu.removeEventListener('submit', this.onGameMenuInput);
    $battleMenu.removeEventListener('submit', this.onBattleMenuInput);
    this.changeScreen('start');
    game = null; // Game 클래스 밖에서 설정된 변수이므로 this(x)
    this.showMessage(); // 메시지 칸 비우기
  }
}

// 주인공 객체
class Hero {
  constructor(game, name) {
    this.game = game; // Game 클래스와 연결해줌
    this.name = name;
    this.lev = 1;
    this.maxHp = 100;
    this.hp = 100;
    this.xp = 0;
    this.att = 10;
  }
  attack(target) {
    target.hp -= this.att;
  }
  heal(monster) {
    this.hp += 20;
    this.hp -= monster.att;
  }
  getXp(xp) {
    this.xp += xp;
    // 경험치를 다 채울 때
    if (this.xp >= this.lev * 15)  {
      this.xp -= this.lev * 15; // 레벨업 필요에 쓰인 경험치 차감
      this.lev += 1;
      this.maxHp += 5;
      this.hp = this.maxHp; // hp 최대로 다시 채워주기
      this.att += 5;

      // Game 클래스의 메서드 가져다 쓰기
      this.game.showMessage(
        `레벨업! 현재 Level: ${this.lev}Lv`
      )
    }
  }
}

// 몬스터 객체
class Monster {
  constructor(game, name, hp, att, xp) {
    this.game = game; // Game 클래스와 연결해줌
    this.name = name;
    this.maxHp = hp;
    this.hp = hp;
    this.xp = xp;
    this.att = att;
  }
  attack(target) {
    target.hp -= this.att;
  }
}
this.xp -= this.lev * 15; :
this.xp = 0 이라 적으면 안되는데, 이는 경험치가 반드시 조건에 딱떨어지게 쌓이지 않기 때문이다.
ex) 만약 레벨업 시 필요한 경험치가 15인데 20이 쌓인 경우 레벨업 후 차감되고 남은 경험치가 0이 아닌 5이다.
8. 클래스 상속
Hero 클래스와 Monster 클래스에 겹치는 속성들(game, name, hp, att...) 혹은 메서드 attack() 이 있다.
class Hero {
  constructor(game, name) {
    ...
  }
  attack(target) {
    target.hp -= this.att;
  }
}

class Monster {
  constructor(game, name, hp, att, xp) {
    ...
  }
  attack(target) {
    target.hp -= this.att;
  }
}
이 둘의 공통된 특성은, 바로 "게임캐릭터" 라는 점이다.
이때 클래스의 "상속" 이라는 개념이 등장하는데, Hero 와 Monster 클래스의 공통적인 부분을 추려 새로운 클래스로 만들고, Hero 와 Monster 클래스에 해당 클래스를 가져와 사용할 수 있는데 이를 "상속"받는다고 한다.
공통 클래스인 Unit 을 만들어보자
잠깐! 이때 attack() 메서드가 완전히 같지 않고 console.log() 차이 하나만 있는 비슷한 상태라면?
class Unit {
  constructor(game, name, hp, att, xp) {
    this.game = game;
    this.name = name;
    this.maxHp = hp;
    this.hp = hp;
    this.xp = xp;
    this.att = att;
  }
  attack(target) {
    target.hp -= this.att;
  }
}
// Unit: Hero 의 부모클래스
class Hero extends Unit {
constructor(game, name) {
// 부모클래스(Unit)의 생성자 함수(constructor)호출
super(game, name, 100, 10, 0);
this.lev = 1; // level 은 안겹침 (공통부분이 x)
}
// 비슷하지만 완전히 같지 않은 메서드 해결
attack(target) {
// 부모 클래스의 메서드 호출
super.attack(target);
console.log('영웅이 공격')
}
heal(monster) {...}
getXp(xp) {...}
}
}
// 몬스터 객체
class Monster extends Unit {
constructor(game, name, hp, att, xp) {
super(game, name, hp, att, xp)
}
attack(target) {
super.attack(target);
console.log('몬스터가 공격')
}
}extends : 클래스를 다른 클래스의 자식으로 만들기 위해 class 선언 또는 class 식에 사용
클래스끼리 extends 예약어로 상속할 수 있다. 상속하는 클래스는 부모클래스가 되고 상속받는 클래스는 자식클래스가 된다. 공통되는 속성이나 메서드는 부모 클래스로부터 상속받는다.
super : 부모 오브젝트의 함수를 호출
attack() 부분이 완전히 같다면, 따로 적을 필요가 없다.
monster.attack() 혹은 hero.attack() 을 작성하면, 해당 클래스에서 attack() 메서드를 찾을 것이고, 없다면 자동으로 그 위의 부모클래스(Unit)를 찾아 사용된다.
또한 클래스는 부모, 조부모.. 등등 거슬러 올라가 여러번 상속될 수 있다.
9. 기타 기능 구현하기
일반 모드에서 휴식 기능과 종료 기능, 전투 모드에서 회복 기능, 도망 기능을 추가해보자
일반모드
- 휴식기능: 주인공의 체력을 최대로 회복하는 기능
- 종료기능: 게임을 종료하고 주인공으르 새로 생성하는 화면으로 되돌아감
전투모드
- 회복기능: 전투 중에 체력을 20 회복하는 기능. 다만 회복후에 몬스터에게 한 번 공격을 당한다. 또한 체력은 최대체력 (maxHp) 값을 넘을 수 없다 ex) 최대 체력이 80 , 현재 체력이 70일 때 20 회복되도 체력은 80까지만 참
- 도망기능: 너무 강력한 몬스터를 만났을 때 도망가는 기능으로, 일반 메뉴로 되돌아감
	// 일반 모드
  onGameMenuInput = (event) => {
    event.preventDefault();
    const input = event.target['menu-input'].value;
    if (input === '1') {
      // 모험
      ...
    } else if (input === '2') {
      // 휴식
      this.hero.hp = this.hero.maxHp;
      this.paintHeroStat();
      this.showMessage(`충분한 휴식을 취했다.`);
    } else if (input === '3') {
      // 종료
      this.showMessage('');
      this.quit();
    }
  };
  // 전투 모드
  onBattleMenuInput = (event) => {
    event.preventDefault();
    const input = event.target['battle-input'].value;
    if (input === '1') {
      // 공격

    } else if (input === '2') {
      // 회복
      const { hero, monster } = this;
      // 조건: 회복 20을 해도, maxHp 를 넘어갈 수 없다.
      hero.hp = Math.min(hero.maxHp, hero.hp + 20);
      // 패널티: 회복 하는 도중, 몬스터에게 공격을 한 번 당함
      monster.attack(hero);
      this.showMessage(`체력을 조금 회복했다!`);
      paintHeroStat();
    } else if (input === '3') {
      // 도망
      this.changeScreen('game');
      this.showMessage(`부리나케 도망쳤다!`);
      this.monster = null;
      this.paintMonsterStat();
    }
  };
최종 코드
const $startScreen = document.querySelector('#start-screen');
const $startScreenInput = document.querySelector('#start-screen input');
const $changeNameBtn = document.querySelector('#change-hero-name');
// 메뉴
const $gameMenu = document.querySelector('#game-menu');
const $battleMenu = document.querySelector('#battle-menu');
// 주인공 스탯
const $heroStat = document.querySelector('#hero-stat');
const $heroName = document.querySelector('#hero-name');
const $heroLevel = document.querySelector('#hero-level');
const $heroHp = document.querySelector('#hero-hp');
const $heroXp = document.querySelector('#hero-xp');
const $heroAtt = document.querySelector('#hero-att');
// 몬스터 스탯
const $monsterName = document.querySelector('#monster-name');
const $monsterLevel = document.querySelector('#monster-level');
const $monsterHp = document.querySelector('#monster-hp');
const $monsterAtt = document.querySelector('#monster-att');
// 메시지
const $message = document.querySelector('#message');
// (2) Hero 클래스 생성, 입력한 name 값을 인수로 받음
class Game {
constructor(name) {
this.monster = null;
this.hero = null;
this.monsterList = [
{ name: '슬라임', hp: 25, att: 10, xp: 10 },
{ name: '스켈레톤', hp: 50, att: 15, xp: 20 },
{ name: '마왕', hp: 150, att: 35, xp: 50 },
];
this.start(name);
}
// Game class 내 메서드(1)
start(name) {
$gameMenu.addEventListener('submit', this.onGameMenuInput);
$battleMenu.addEventListener('submit', this.onBattleMenuInput);
this.changeScreen('game');
this.hero = new Hero(this, name);
this.paintHeroStat();
}
// Game class 내 메서드(2)
changeScreen(screen) {
if (screen === 'start') {
$startScreen.style.display = 'block';
$gameMenu.style.display = 'none';
$battleMenu.style.display = 'none';
} else if (screen === 'game') {
$startScreen.style.display = 'none';
$gameMenu.style.display = 'block';
$battleMenu.style.display = 'none';
} else if (screen === 'battle') {
$startScreen.style.display = 'none';
$gameMenu.style.display = 'none';
$battleMenu.style.display = 'block';
}
}
// 일반 모드
onGameMenuInput = (event) => {
event.preventDefault();
const input = event.target['menu-input'].value;
if (input === '1') {
// 모험
this.changeScreen('battle');
const randomIndex = Math.floor(Math.random() * this.monsterList.length);
const randomMonster = this.monsterList[randomIndex];
this.monster = new Monster(
this,
randomMonster.name,
randomMonster.hp,
randomMonster.att,
randomMonster.xp
);
console.log(this.monster);
this.paintMonsterStat();
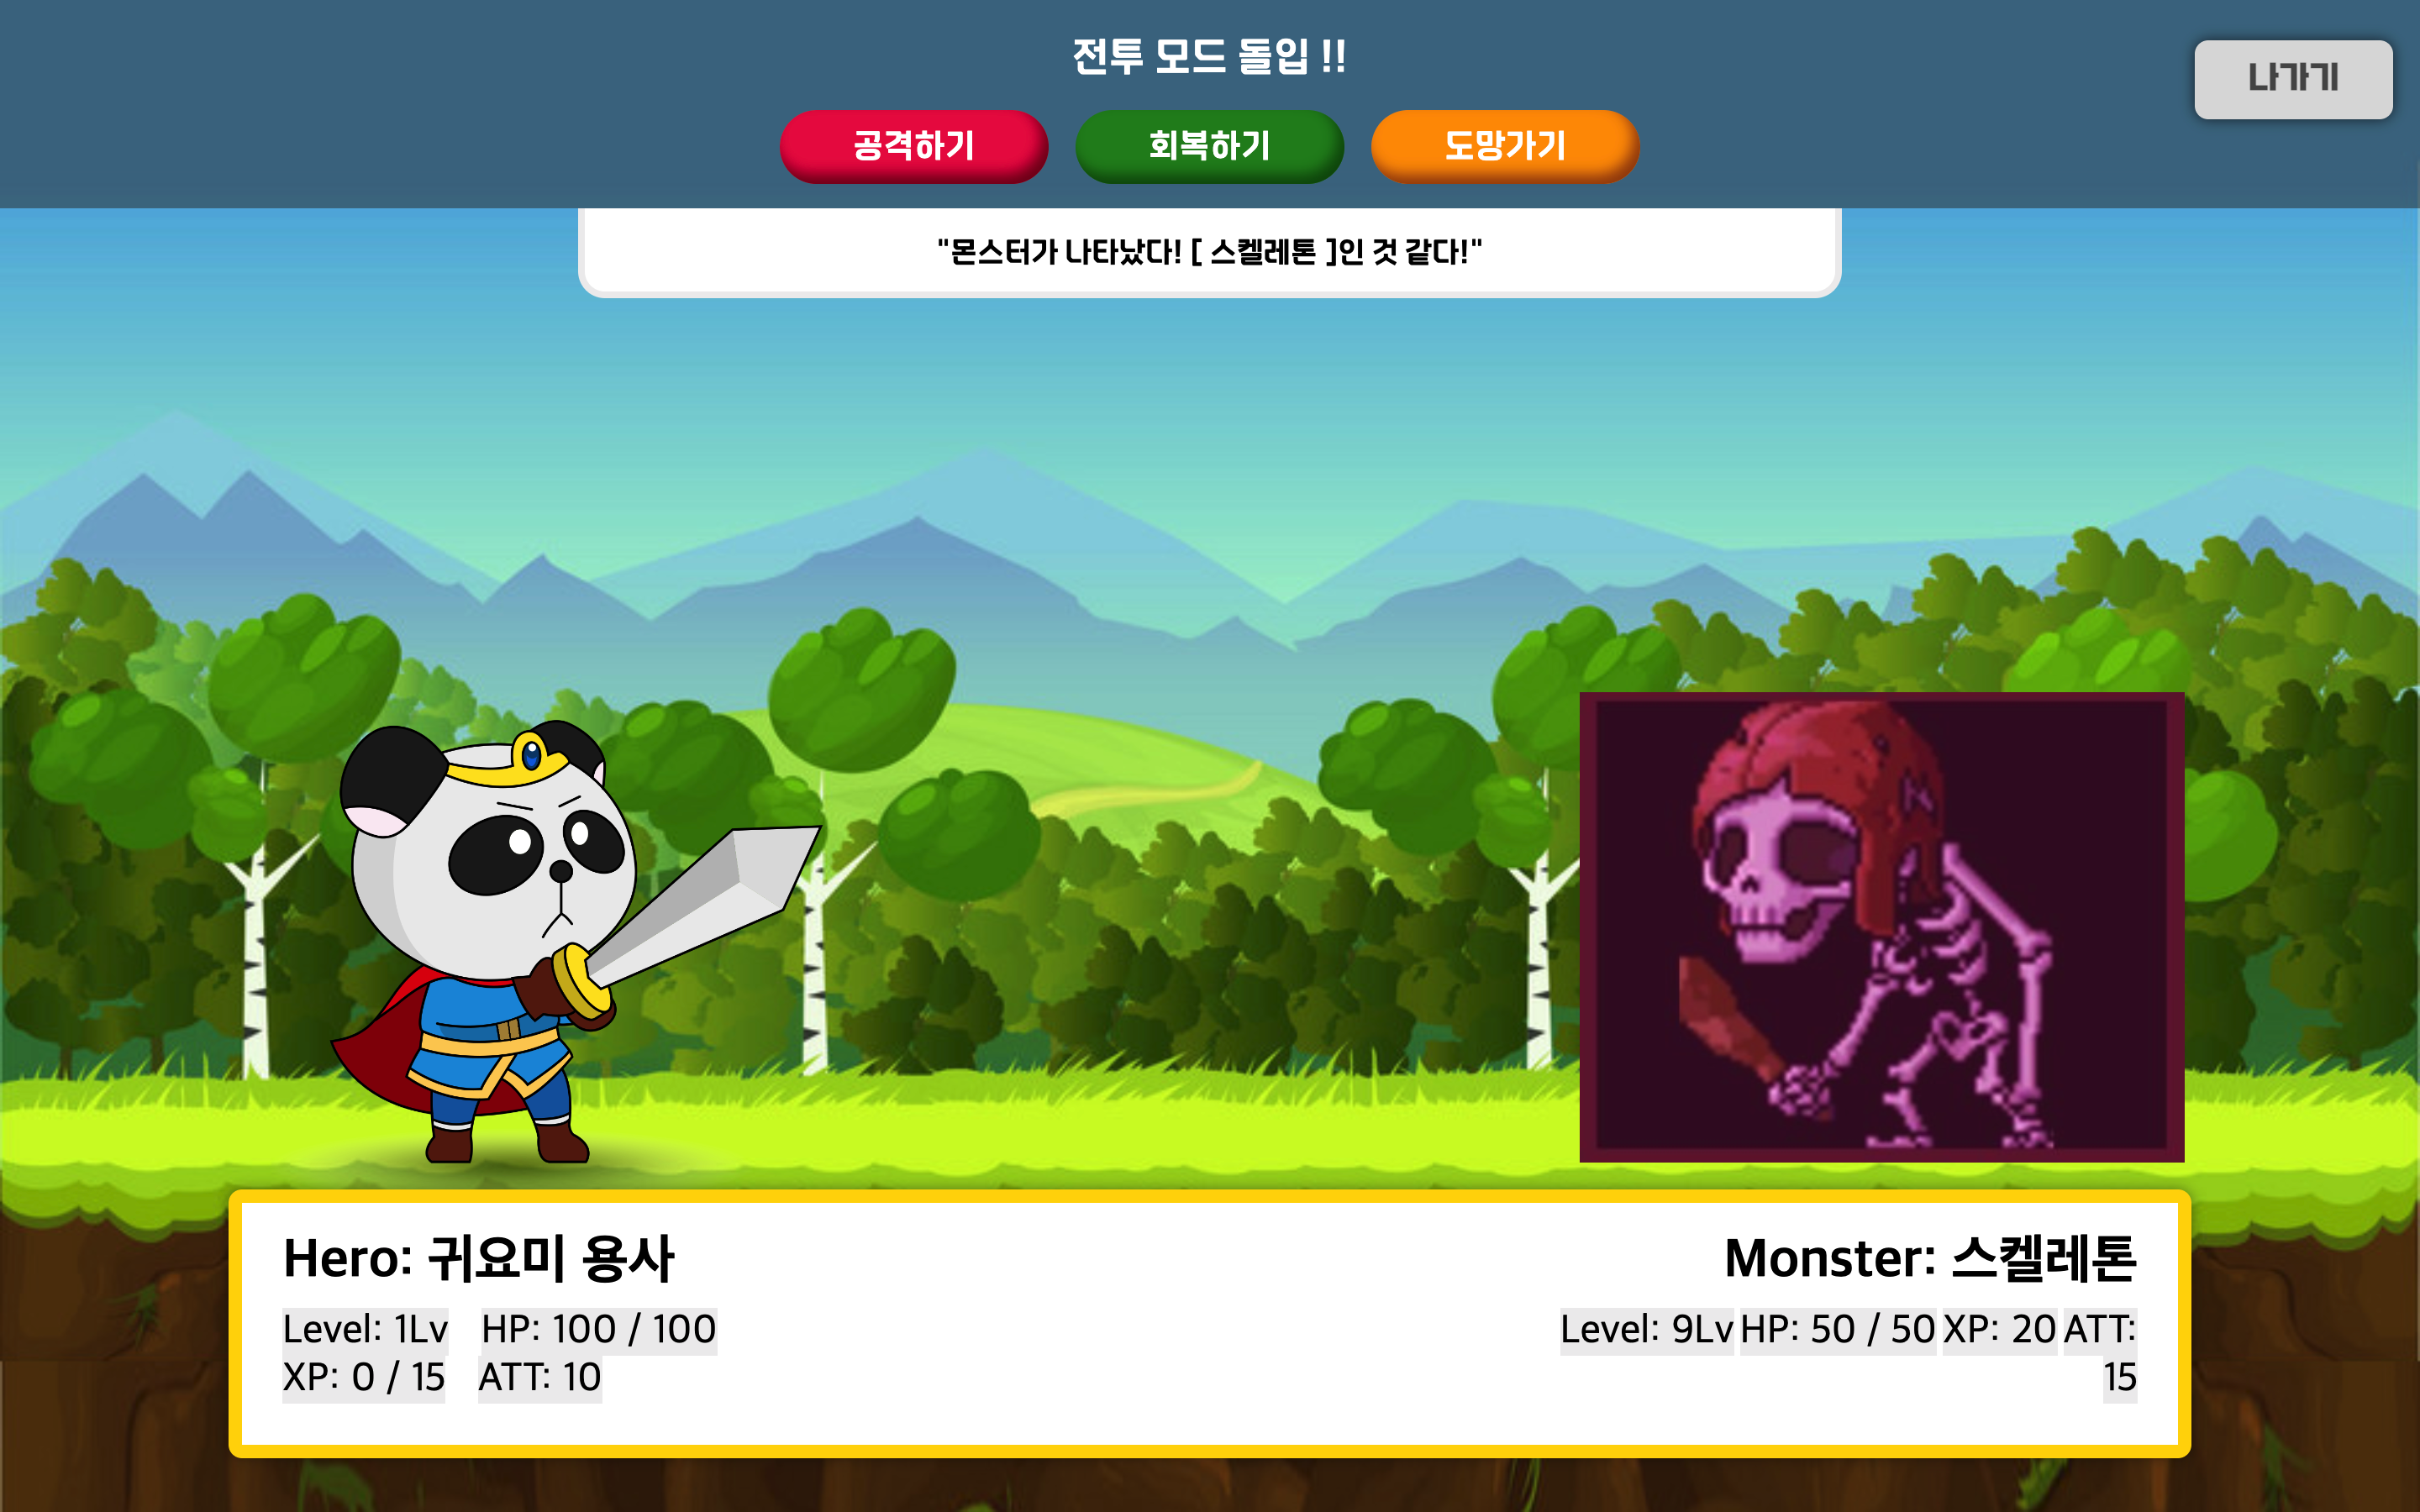
this.showMessage(
`몬스터가 나타났다! [ ${this.monster.name} ]인 것 같다!`
);
} else if (input === '2') {
// 휴식
this.hero.hp = this.hero.maxHp;
this.paintHeroStat();
this.showMessage(`충분한 휴식을 취했다.`);
} else if (input === '3') {
// 종료
this.showMessage('');
this.quit();
}
};
// 전투 모드
onBattleMenuInput = (event) => {
event.preventDefault();
const input = event.target['battle-input'].value;
if (input === '1') {
// 공격
const { hero, monster } = this;
hero.attack(monster);
monster.attack(hero);
// 주인공 or 몬스터가 죽었을 때
if (hero.hp <= 0) {
this.showMessage(`${hero.lev} 레벨에서 전사. 새 주인공을 생성하세요!`);
this.quit();
} else if (monster.hp <= 0) {
this.showMessage(
`몬스터 [${monster.name}]을(를) 잡아 경험치를 얻었다! (+${monster.xp}xp)`
);
hero.getXp(monster.xp);
this.monster = null;
this.changeScreen('game');
} else if (hero.hp > 0 && monster.hp > 0) {
this.showMessage(
`${hero.name} 은(는) ${hero.att} 의 데미지를 주고,
${monster.name} (으)로부터 ${monster.att} 만큼의 데미지를 받았다!
(-${monster.att}hp)`
);
}
this.paintHeroStat();
this.paintMonsterStat();
} else if (input === '2') {
// 회복
const { hero, monster } = this;
// 조건: 회복 20을 해도, maxHp 를 넘어갈 수 없다.
hero.hp = Math.min(hero.maxHp, hero.hp + 20);
// 패널티: 회복 하는 도중, 몬스터에게 공격을 한 번 당함
monster.attack(hero);
this.showMessage(`체력을 조금 회복했다.. 하지만, 방심한 틈에 공격을 당해버렸다!`);
this.paintHeroStat();
} else if (input === '3') {
// 도망
this.changeScreen('game');
this.showMessage(`부리나케 도망쳤다!`);
this.monster = null;
this.paintMonsterStat();
}
};
// Game class 내 메서드(3)
paintHeroStat() {
const { hero } = this;
if (hero === null) {
$heroName.textContent = '';
$heroLevel.textContent = '';
$heroHp.textContent = '';
$heroXp.textContent = '';
$heroAtt.textContent = '';
return;
}
$heroName.textContent = `Name: ${hero.name}`;
$heroLevel.textContent = `Level: ${hero.lev}Lv`;
$heroHp.textContent = `HP: ${hero.hp} / ${hero.maxHp}`;
$heroXp.textContent = `XP: ${hero.xp} / ${15 * hero.lev}`;
$heroAtt.textContent = `ATT: ${hero.att}`;
}
paintMonsterStat() {
const { monster } = this;
if (monster === null) {
$monsterName.textContent = '';
$monsterHp.textContent = '';
$monsterAtt.textContent = '';
return;
}
$monsterName.textContent = `Monster: ${monster.name}`;
$monsterHp.textContent = `HP: ${monster.hp} / ${monster.maxHp}`;
$monsterAtt.textContent = `ATT: ${monster.att}`;
}
// 메시지
showMessage(text) {
$message.textContent = text;
}
// 게임 종료: 초기화
quit() {
this.hero = null;
this.monster = null;
this.paintHeroStat();
this.paintMonsterStat();
$gameMenu.removeEventListener('submit', this.onGameMenuInput);
$battleMenu.removeEventListener('submit', this.onBattleMenuInput);
this.changeScreen('start');
game = null; // Game 클래스 밖에서 설정된 변수이므로 this(x)
}
}
// 클래스 공통부분 클래스
class Unit {
constructor(game, name, hp, att, xp) {
this.game = game;
this.name = name;
this.maxHp = hp;
this.hp = hp;
this.xp = xp;
this.att = att;
}
attack(target) {
target.hp -= this.att;
}
}
// 주인공 객체
class Hero extends Unit {
constructor(game, name) {
super(game, name, 100, 10, 0);
this.lev = 1; // level 은 안겹침 (공통부분이 x)
}
heal(monster) {
this.hp += 20;
this.hp -= monster.att;
}
getXp(xp) {
this.xp += xp;
// 경험치를 다 채울 때
if (this.xp >= this.lev * 15) {
this.xp -= this.lev * 15; // 레벨업 필요에 쓰인 경험치 차감
this.lev += 1;
this.maxHp += 5;
this.hp = this.maxHp; // hp 최대로 다시 채워주기
this.att += 5;
this.game.showMessage(`레벨업! 현재 Level: ${this.lev}Lv`);
}
}
}
// 몬스터 객체
class Monster extends Unit {
constructor(game, name, hp, att, xp) {
super(game, name, hp, att, xp);
}
}
// (1) 게임 시작, 새 Game 클래스 생성
let game = null;
$startScreen.addEventListener('submit', (event) => {
event.preventDefault();
const name = event.target['name-input'].value;
$message.textContent = ''; // 이전 게임에서 생성된 메시지 삭제
game = new Game(name);
});리뉴얼 작업:
input에 메뉴 번호값을 기입하는 방식 대신 버튼을 클릭해 메뉴를 고르는 방식으로 코드 수정- 메시지, 게임 캐릭터들의 스택표시 등의 배치를 기존 시판에 있는 게임처럼 고려하여 디자인 작업함
- 저렙 몬스터일 수록 더 많이 출몰하게 약간의 코드를 수정
문제해결:
(1)
강의에서는 input 에 메뉴의 번호 값을 입력하는 식의 번거로운 메뉴로 작업이 되었고, 이를 버튼을 누르는 식의 작업으로 다시 리뉴얼 하였다. 그런 과정에서 문제가 생겼는데, 메뉴들을 전부 버튼으로 만든 뒤 기존의 input 태그와 input 태그와 관련된 스크립트들을 지우고 게임을 실행하니 버튼을 누를때마다 새로고침이 되는 것이었다. 확인 끝에 나는 메뉴들이 form 태그로 감싸져 있어 버튼 클릭 후 새로고침이 되었던 것이고, input 관련 스크립트 부분을 지우는 과정에서 event.perventDeault() 도 같이 작동이 되지 않았던 것이다. 해결 방법은 간단했다. form 태그를 div 태그로 다시 바꾼 후 실행하니 중간에 새로고침되는 현상은 없어졌다. 또한 버튼 하나하나에 다시 addEventListener 이벤트를 주었고, 콜백함수를 클래스에 메서드로 넣어 작업하며 한번 더 복습을 하게 되었다.
(2)
javascript 를 통해 몬스터가 바뀔 때마다 style.backgroundImage 를 통해 배경이미지를 바꾸려 했지만, 되지 않았다. 그 이유를 찾는 도중 Open Live Server 를 통해서는 이미지가 뜨고, npm run dev 를 통해 브라우저를 띄우면 이미지가 뜨지 않는 현상이 발생했고, 그 과정에서 난 parcel-bundler 때문인 것을 알 수 있었다. 이 번들러를 사용하면 파일들이 dist 폴더에 올라가 브라우저에 뜨는데, 이미지 같은 정적 파일들은 따로 패키지를 통해 dist 폴더로 자동으로 이동시켜야했던 것이다.
