물 마시기 앱
사용자가 물 섭취 시간을 설정하고, 그 시간에 맞춰 알림이 오는 앱
알아야 할 개념
Local Notification
Local Notificaion은 앱 내부에서 자체적으로 만든 특정 메시지를 전달하는 알림이다. 이것은 사용자의 관심을 끄는 데 목적이 되는 기능이다.......
Local Notification의 구성
로컬 알림을 보내려면 로컬 요청인 UNNotificationRequest 작성을 해야 한다. (여기서 UN..! User Notification의 약자)
Request를 작성하려면 아래 3가지 내용이 필수적으로 있어야 한다.
(1) Identifier : 각각의 요청을 구분할 수 있는 id를 작성해 주어야 한다. 중복되지 않도록!!
(2) Content : 알림에 나타날 내용들을 정의한다. 알림의 제목이나 내용.. 알림 소리 뱃지에 표시되는 내용 등등..
(3) Trigger : 어떤 기준에서 알림을 발송할 것인지 선언하는 것이다. 일종의 조건을 걸어 주는 것!! 트리거는 총 3개가 있다. 날짜 기준으로 쏘는 트리거(Calendar), 1시간마다 쏘는 것처럼 시간 간격으로 쏘는 트리거(TimeInterval), 사용자의 위치에 따라 쏘는 트리거(Location).. 이 3가지 조건에 의해서만 로컬 알림을 보낼 수 이씀~!!
위 3가지 요소가 준비되면, 로컬 알림을 요청하는데 즉, Request 객체를 생성하기 위해 필요한 모든 조건이 갖추어진 것이다. 잘 만들어진 Request는 UNNotificationCenter라는 곳에 추가를 해 주어야 한다. 이후 이 UNNotificationCenter에 차곡차곡 쌓인 Request들은 센터에 잘 보관되고 있다가 트리거 순간에 쑝.. 알림을 쏘게 되는...!!!
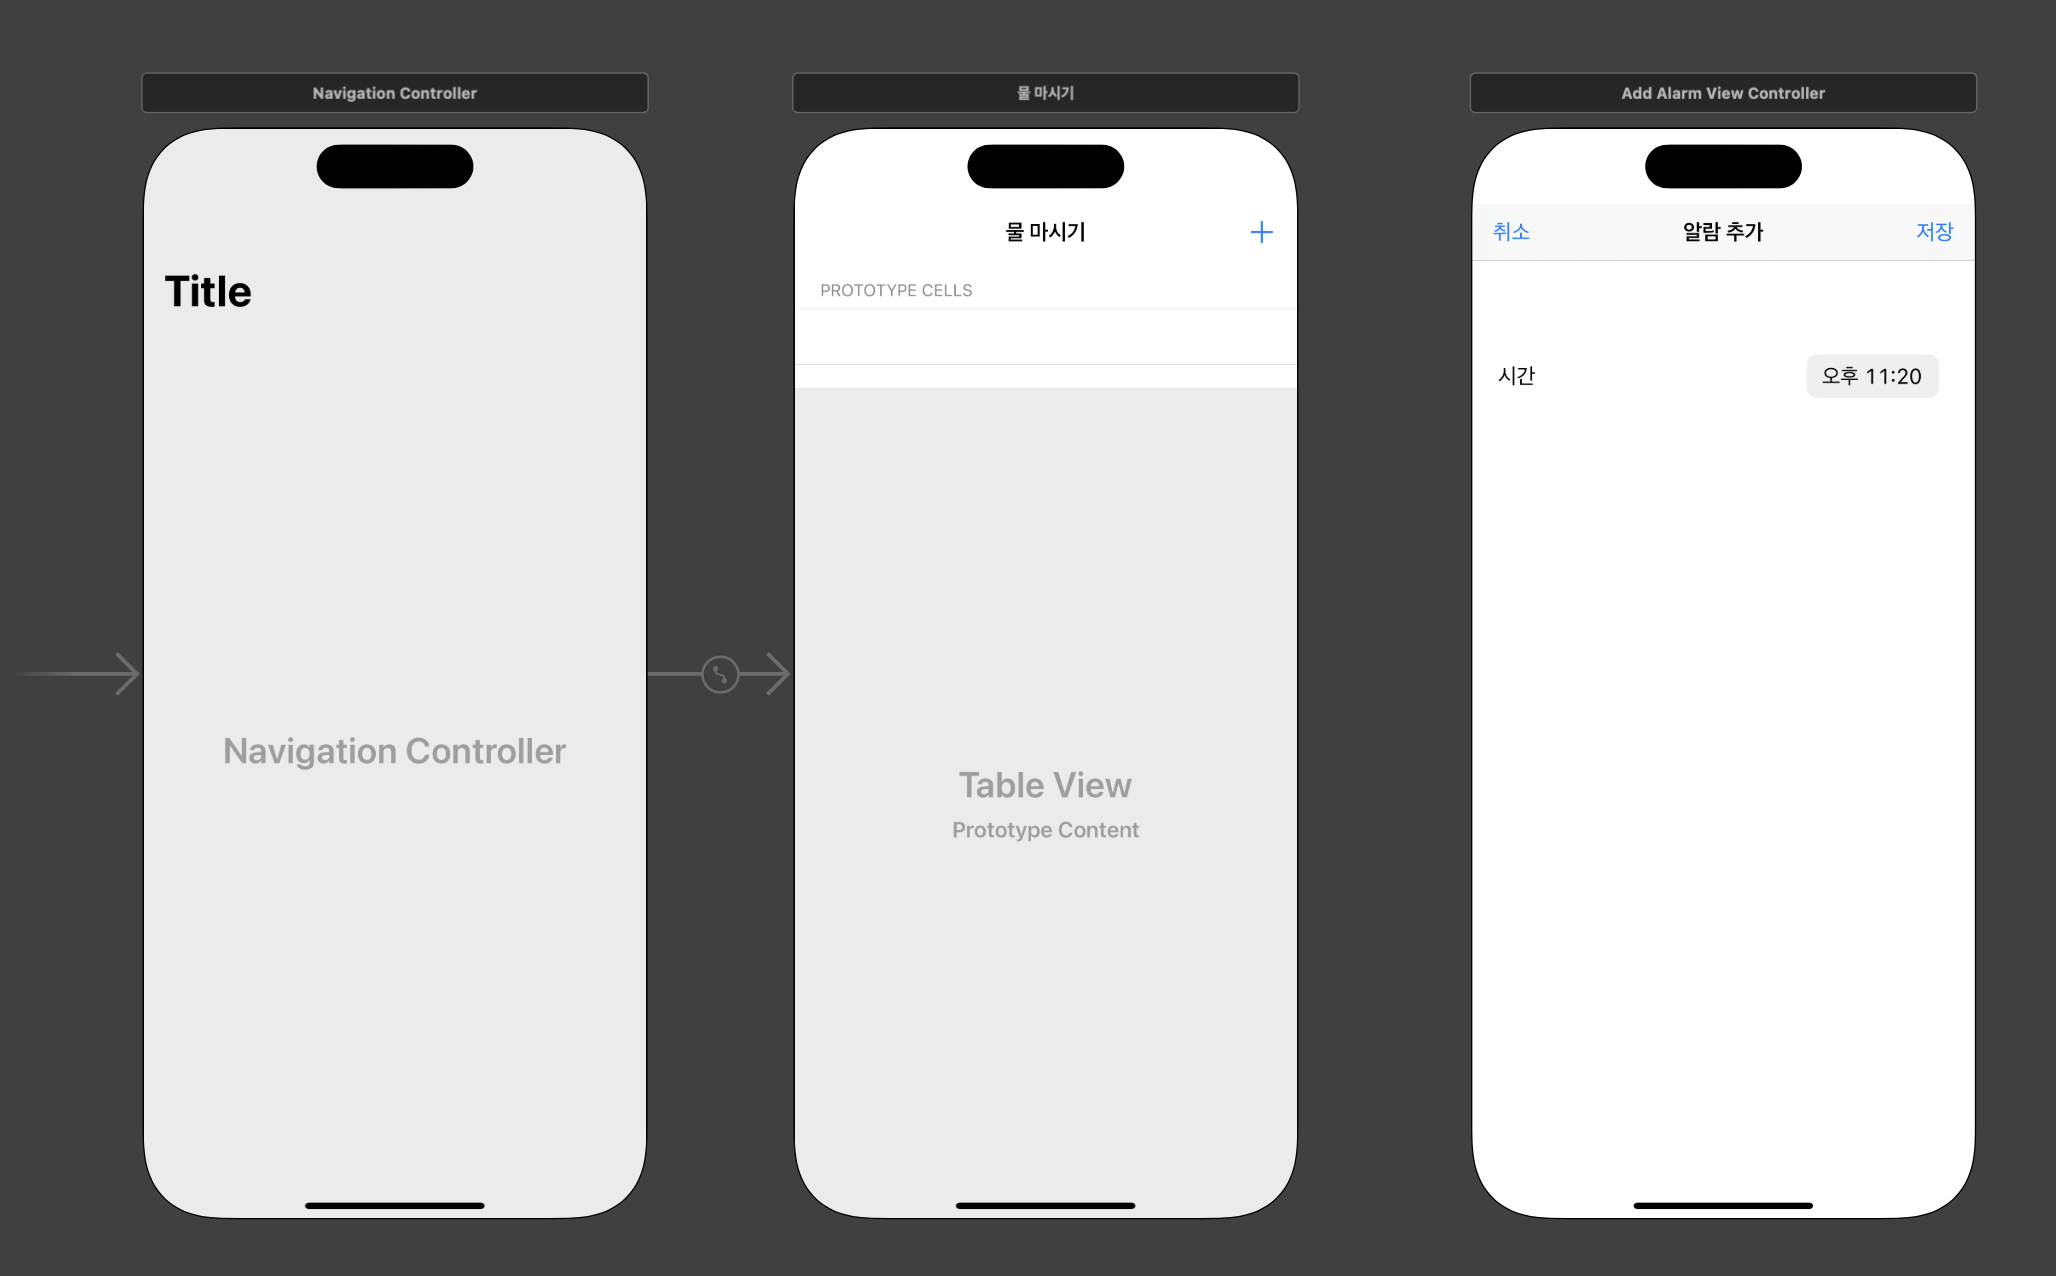
물 마시기 앱 스토리보드
코드
다시 정리해 보쟝
(1) 기본 UI 작성하기
//  AlertListViewController.swift
import UIKit

class AlertListViewController: UITableViewController {
    var alerts: [Alert] = []

    override func viewDidLoad() {
        super.viewDidLoad()

        // 만들어진 셀을 테이블 뷰에 레지스터 하기
        // (1) nibName 만들기
        let nibName = UINib(nibName: "AlertListCell", bundle: nil)
        // (2) tableView에 레지스터
        tableView.register(nibName, forCellReuseIdentifier: "AlertListCell")
        // 리스트에 표현되는 (3) alert 객체 만들기 -> Alert.swift

    }
Nib는 쉽게 말해서 Cell... Cell을 쫌 더 유동적(?)으로 꾸미기 위해 사용해용 그리고 이를 테이블 뷰에 레지스터 해 줍미다. 그리고서! 이제.. 알림 리스트 뷰에 알림들을 차곡차곡 보여 주기 위해 alert 객체를 만들어야 합니다..
//
//  Alert.swift

import Foundation

struct Alert: Codable {
    var id: String = UUID().uuidString
    let date: Date
    var isOn: Bool

    var time: String {
        let timeFormatter = DateFormatter()
        timeFormatter.dateFormat = "hh:mm"

        return timeFormatter.string(from: date)
    }

    var meridiem: String {
        let meridiemFormatter = DateFormatter()
        meridiemFormatter.dateFormat = "a"
        meridiemFormatter.locale = Locale(identifier: "ko")
        return meridiemFormatter.string(from: date)
    }
}
alert 객체를 만들어 주어씁니다. 그럼 이제 Add 버튼을 누르면 발생하는 이벤트를 봐 보까용
// AlertListViewController.swift

@IBAction func addAlertButtonAction(_ sender: UIBarButtonItem) {
        guard let addAlertViewController = storyboard?.instantiateViewController(withIdentifier: "AddAlarmViewController") as? AddAlarmViewController else {return}
        addAlertViewController.pickedDate = {
            [weak self] date in
            guard let self = self else {return}

            var alertList = self.alertList()
            let newAlert = Alert(date: date, isOn: true)

            alertList.append(newAlert)
            alertList.sort {$0.date < $1.date}

            self.alerts = alertList
            UserDefaults.standard.set(try?PropertyListEncoder().encode(self.alerts), forKey: "alerts")
            self.userNotificationCenter.addNotificationRequest(by: newAlert)
            self.tableView.reloadData()
        }

        self.present(addAlertViewController, animated: true, completion: nil)
    }

    func alertList() -> [Alert] {
        guard let data = UserDefaults.standard.value(forKey: "alerts") as? Data, let alerts = try? PropertyListDecoder().decode([Alert].self, from: data) else {return []}
        return alerts
    }
자... 우선 Add 버튼을 누르면 AddAlarmView를 표시합미다. 그리고 사용자가 선택한 날짜 정보를 가져와서 알림 객체를 생성하여 알림 목록에 추가를 하고, 이를 UserDefaults에 저장을 해 줍니다. 그리고 tableView를 새로고침하여 알림 목록을 업데이트! 여기서 "addAlertViewController.pickedDate" 는 "AddAlarmViewController" 에서 선택한 날짜 정보를 전달하는 클로저! 즉, "AddAlarmViewController" 에서 날짜를 선택하고 <저장> 버튼을 누르면, 이 클로저가 호출되는 것.
[weak self] 는 클로저 내에서 "self" 를 약한 참조로 캡처합미다. 이것은 메모리 누수를 방지하기 위한 것! 그리고 "guard let self = self else {return}" 이 코드는 self가 nil인지 아닌지 확인하는 것으로, self가 nil이라면 클로저를 빠져 나옵니당. 이렇게 함으로써 약한 참조를 사용하여 "self"를 캡처할 때, 만약 참조가 이미 해제된 객체에 접근하려고 하면 앱이 충돌하는 것을 <방지>할 수 있습니다!
alertList() 함수는 UserDefaults에 저장된 'Alert' 객체의 배열을 가져오는 함수입미다. "alerts"라는 키로 저장된 데이터를 가져와서
Date타입으로 변환한 후,PropertyListDecoder를 사용하여Alert객체의 배열로 디코딩합미다. 만약, 디코딩에 실패하거나 UserDefaults에 "alerts"라는 키로 저장된 데이터가 없다면 빈 배열을 반환!
// AlertListViewController.swift
// UITableView Datasource, Delegate

extension AlertListViewController {
    override func tableView(_ tableView: UITableView, numberOfRowsInSection section: Int) -> Int {
        return alerts.count
    }

    override func tableView(_ tableView: UITableView, titleForHeaderInSection section: Int) -> String? {
        switch section {
        case 0:
            return "물 마실 시간🚰"

        default :
            return nil
        }
    }

    override func tableView(_ tableView: UITableView, cellForRowAt indexPath: IndexPath) -> UITableViewCell {
        guard let cell = tableView.dequeueReusableCell(withIdentifier: "AlertListCell", for: indexPath) as? AlertListCell else {return UITableViewCell()}

        cell.alertSwtich.isOn = alerts[indexPath.row].isOn
        cell.timeLabel.text = alerts[indexPath.row].time
        cell.meridiemLabel.text = alerts[indexPath.row].meridiem

        cell.alertSwtich.tag = indexPath.row

        return cell
    }

    override func tableView(_ tableView: UITableView, heightForRowAt indexPath: IndexPath) -> CGFloat {
        return 80
    }

    override func tableView(_ tableView: UITableView, canEditRowAt indexPath: IndexPath) -> Bool {
        return true
    }

    override func tableView(_ tableView: UITableView, commit editingStyle: UITableViewCell.EditingStyle, forRowAt indexPath: IndexPath) {
        switch editingStyle {
            case .delete:
                // alerts가 비어 있지 않은지 확인
                guard !alerts.isEmpty else {
                    return
                }
                // check if indexPath.row is within alerts' indices
                guard indexPath.row < alerts.count else {
                    return
                }
                let removedAlert = alerts.remove(at: indexPath.row)
                UserDefaults.standard.set(try? PropertyListEncoder().encode(alerts), forKey: "alerts")
                self.tableView.reloadData()
            return
            default:
                break

        }
    }
UITableViewDataSource 프로토콜에서 정의된 메서드 중 하나인 "numberOfRowsInSection" 함수는 UITableView에서 각 섹션에 대한 행의 개수를 반환하는 함수로, 해당 코드에서는 'alerts' 배열의 원소 개수를 반환합니다.
"titleForHeaderInSection" 함수는 UITableView에서 각 섹션의 헤더 타이틀을 반환하는데, 위 코드에서 구현된 것은 section 값이 0인 경우 "물 마실 시간"을 반환하고 그 외의 경우에는 nil을 반환해 줍니당..
"cellForRowAt" 함수는 UITableView에서 각 행에 대한 셀을 반환하는 함수입니다. 이 함수에서는 tableView의 dequeueReusableCell(withIdentifier:for:) 메서드를 사용하여 재사용 가능한 셀을 가져옴! (재사용 가능한 셀이 없으면 새로운 셀을 생성하겠찌용) 'withIdentifier' 매개변수에는 셀의 식별자를 지정하고 'for' 매개변수에는 해당 행의 IndexPath를 전달. 'alerts' 배열에서 'indexPath.row' 인덱스에 해당하는 'Alert'객체를 가져와 셀의 스위치(알림on/off), 오전/오후, 알림 시간 등의 값을 설정합니당. 마지막으로 셀의 'alertSwitch'에 'indexPath.row'값을 'tag'로 설정하고 셀을 반환한당.