계산기 앱
TableView에 할 일들의 목록들이 표시되어 있는 애플리케이션. 할 일을 추가 및 삭제, 그리고 편집을 할 수 있고, 완료된 할 일을 Tap을 통해 체크할 수 있게 구현하였다.
프로젝트 들어가기 전 알아야 할 개념들
- UITableView
- UserDefaults
1. UITableView
UITableView는 데이터들을 목록 형태로 보여 줄 수 있는 가장 기본적인 UI 컴포넌트이다. 또, UIScrollView를 상속받고 있으므로 스크롤이 가능하여 목록(List) 형태로 많은 정보를 보여 줄 수 있는 장점을 가지고 있다!
아이폰의 기본 연락처 혹은 설정 앱을 보면 UITableView로 구성되어 있는 것을 볼 수 있다.
(설정 앱 사진)
사진을 보면, TableView는 여러 개의 Cell을 가지고 있고, 하나의 열과 여러 줄의 행을 지니고 있으며 수직으로만 스크롤이 가능한 것을 알 수 있다. 또, 섹션을 이용해 행을 그룹화하여 콘텐츠를 좀 더 쉽게 탐색할 수 있고, 섹션의 헤더와 푸터에 View를 구성하여 추가적인 정보를 표시할 수 있다는 장점이 있다!
TableView를 사용하기 위한 방법은 무엇일까? 🔍
우선! UITableViewDataSource와 UITableViewDelegate protocol을 채택하여 구현을 해 주어야 한다! DataSource는 데이터를 받아 View를 그려 주는 역할을 하며, Delegate는 TableView의 동작과 외관을 담당하는 역할을 한다. View가 변경되는 사항을 Delegate, 그리고 이러한 Delegate에 View가 의존하여 View를 업데이트한다. 그래서! TableView는 DataSource와 Delegated의 정의에 따라 TableView를 사용자에게 어떻게 표시할 것인지 결정을 한다. DataSource에는 총 섹션이 몇 개인지, 섹션의 행은 몇 개인지, 행에 어떤 정보를 표시할 것인지 등을 정의하고, Delegate는 행의 높이, 행을 선택하면 어떤 액션을 취할 것인지 등에 대해 정의를 한다.
1-1. UITableViewDataSource
TableView를 생성하고, 수정하는 데 필요한 정보를 TableView 객체에게 제공하는 역할을 한다.
Methode
// 각 섹션에 표시할 행의 개수를 묻는 메서드, Int 타입으로 행의 개수를 반환하여, 테이블 뷰에 반환된 개수만큼 행이 표시됨. 데이터소스 프로토콜을 채택하였을 때 필수로 구현되는 메서드.
func tableView(_ tableView: UITableView, numberOfRowsInSection section: Int) -> Int

// 특정 인덱스 Row의 Cell에 대한 정보를 넣어 Cell을 반환하는 메서드. 셀을 구성하고 보여 줄 데이터를 설정한 후에 해당 메서드에 반환을 하면 구성한 셀이 테이블 뷰에 표시됨. 얘도 필수.
func tableView(_ tableView: UITableView, cellForRowAt indexPath: IndexPath() -> UITableViewCell

// 총 섹션 개수를 묻는 메서드. 테이블뷰에 반환된 개수만큼 섹션이 표시됨.
optional func numberOfSections(in tableView: UITableView) -> Int

// 특정 섹션의 헤더 타이틀을 묻는 메서드
optional func tableView(_ tableView: UITableView, titleForHeaderInSection section: Int) -> String?

// 특정 섹션의 풋터 타이틀을 묻는 메서드. 특정 섹션에 표시하고 싶은 문자열을 반환하면 섹션 헤더와 푸터에 반환된 문자열이 표시됨.
optional func tableView(_ tableView: UITableView, titleForFooterInSection section: Int) -> String?

//특정 위치의 행이 편집 가능한지 묻는 메서드. 트루를 반환하면 특정 셀에 스와이프메뉴 사용 가능.
optional func tableView(_ tableView: UITableView, canEditRowAt indexPath: IndexPath) -> Bool

// 특정 위치의 행을 재정렬 할 수 있는지 묻는 메서드.
optional func tableView(_ tableView: UITableView, canMoveRowAte indexPath: IndexPath) -> Bool

// 테이블 뷰 섹션 인덱스 타이틀을 묻는 메서드. 문자열 배열을 반환을 하면, 오른쪽에 초성과 알파벳으로 색인할 수 있음.
optional func sectionIndexTitles(for tableView: UITableView) -> [String]?

// 인덱스에 해당하는 섹션을 알려 주는 메서드. 오른쪽에 초성과 알파벳으로 구성된 인덱스를 선택하였을 때, 인덱스 인자로 인덱스 중 몇 번째가 눌렷는지 알려줌.
optional func tableView(_ tableView: UITableView, sectionForSectionIndexTitle title: String, at index: Int) -> Int

// 스와이프 모드, 편집 모드에서 버튼을 선택하면 호출되는 메서드. 만약 버튼이 선택되었을 때, 행이 사라지거나 추가가되면 해당 메서드에서 행의 변경 사항을 commit 해야 함.
optional func tableView(_ tableView: UITableView, commit editingStyle: UITableViewCell.EditingStyle, forRowAt indexPath: IndexPath)

// 행이 다른 위치로 이동되면 어디에서 어디로 이동했는지 알려 주는 메서드
optional func tableView(_ tableView: UITableView, moveRowAt sourceIndexPath: IndexPath, to destinationIndexPath: IndexPath)
1-2. UITableViewDelegate
TableView의 시작적인 부분을 설정하고, 행의 액션 관리, 액세서리 뷰 지원, 그리고 TableView의 개별 행 편집을 도와주는 역할을 한다. 해당 protocol을 채택한 타입에선 필수로 구현해야 하는 메서드는 없다.
Methode
// 행이 선택되었을 때 호출되는 메서드
optional func tableView(_ tableView: UITableView, didSelectRowAt indexPath: IndexPath)

// 행이 선택 해제되었을 때 호출되는 메서드
optional func tableView(_ tableView: UITableView, didDeselectRowAt indexPath: IndexPath)


// 특정 위치 행의 높이를 묻는 메서드
optional func tableView(_ tableView: UITableView, heightForRowAt indexPath: IndexPath) -> CGFloat

// 지정된 섹션의 헤더 뷰 도는 푸터 뷰에 표시할 뷰가 어떤 것인지 묻는 메서드
optional func tableView(_ tableView: UITableView, viewForHeaderInSection section: Int) -> UIView?
optional func tableView(_ tableView: UITableView, viewForFooterInSection section: Int) -> UIView?

// 지정된 섹션의 헤더 뷰 또는 푸터 뷰의 높이를 묻는 메서드
optional func tableView(_ tableView: UITableView, heightForHeaderInSection section: Int) -> CGFloat
optional func tableView(_ tableView: UITableView, heightForFooterInSection section: Int) -> CGFloat

// 테이블 뷰가 편집 모드에 들어갔을 대 호출되는 메서드
optional func tableView(_ tableView: UITableView, willBeginEditingRowAt indexPath: IndexPath)

// 테이블 뷰가 편집 모드에서 빠져 나왔을 때 호출되는 메서드
optional func tableView(_ tableView: UITableView, didEndEditingRowAt indexPath: IndexPath?)

// 테이블뷰가 셀을 이용하여 행을 그리기 직전에 호출되는 메서드
optional func tableView(_ tableView: UITableView, willDisplay cell: UITableViewCell, forRowAt indexPath: IndexPath)

// 테이블 뷰로부터 셀이 화면에 사라지면 호출되는 메서드
optional func tableView(_ tableView: UITableView, wdidEndDisplaying cell: UITableViewCell, forRowAt indexPath: IndexPath)
2. UserDefaults
RunTime 환경에서 동작하면서, 앱이 실행되는 동안 기본 저장소에 접근하여 데이터를 기록하고 가져 오는 인터페이스이다. key-value 쌍으로 저장되며, 싱글톤 패턴으로 설계되어 앱 전체에 단 하나의 인스턴스만 존재한다. UserDefaults는 여러 가지 타입을 저장할 수 있는데, Float, Int, Double 등 기본 타입 외에도 NS 관련 타입도 저장이 가능 하다.
To-Do-List 앱 완성!
StoryBoard
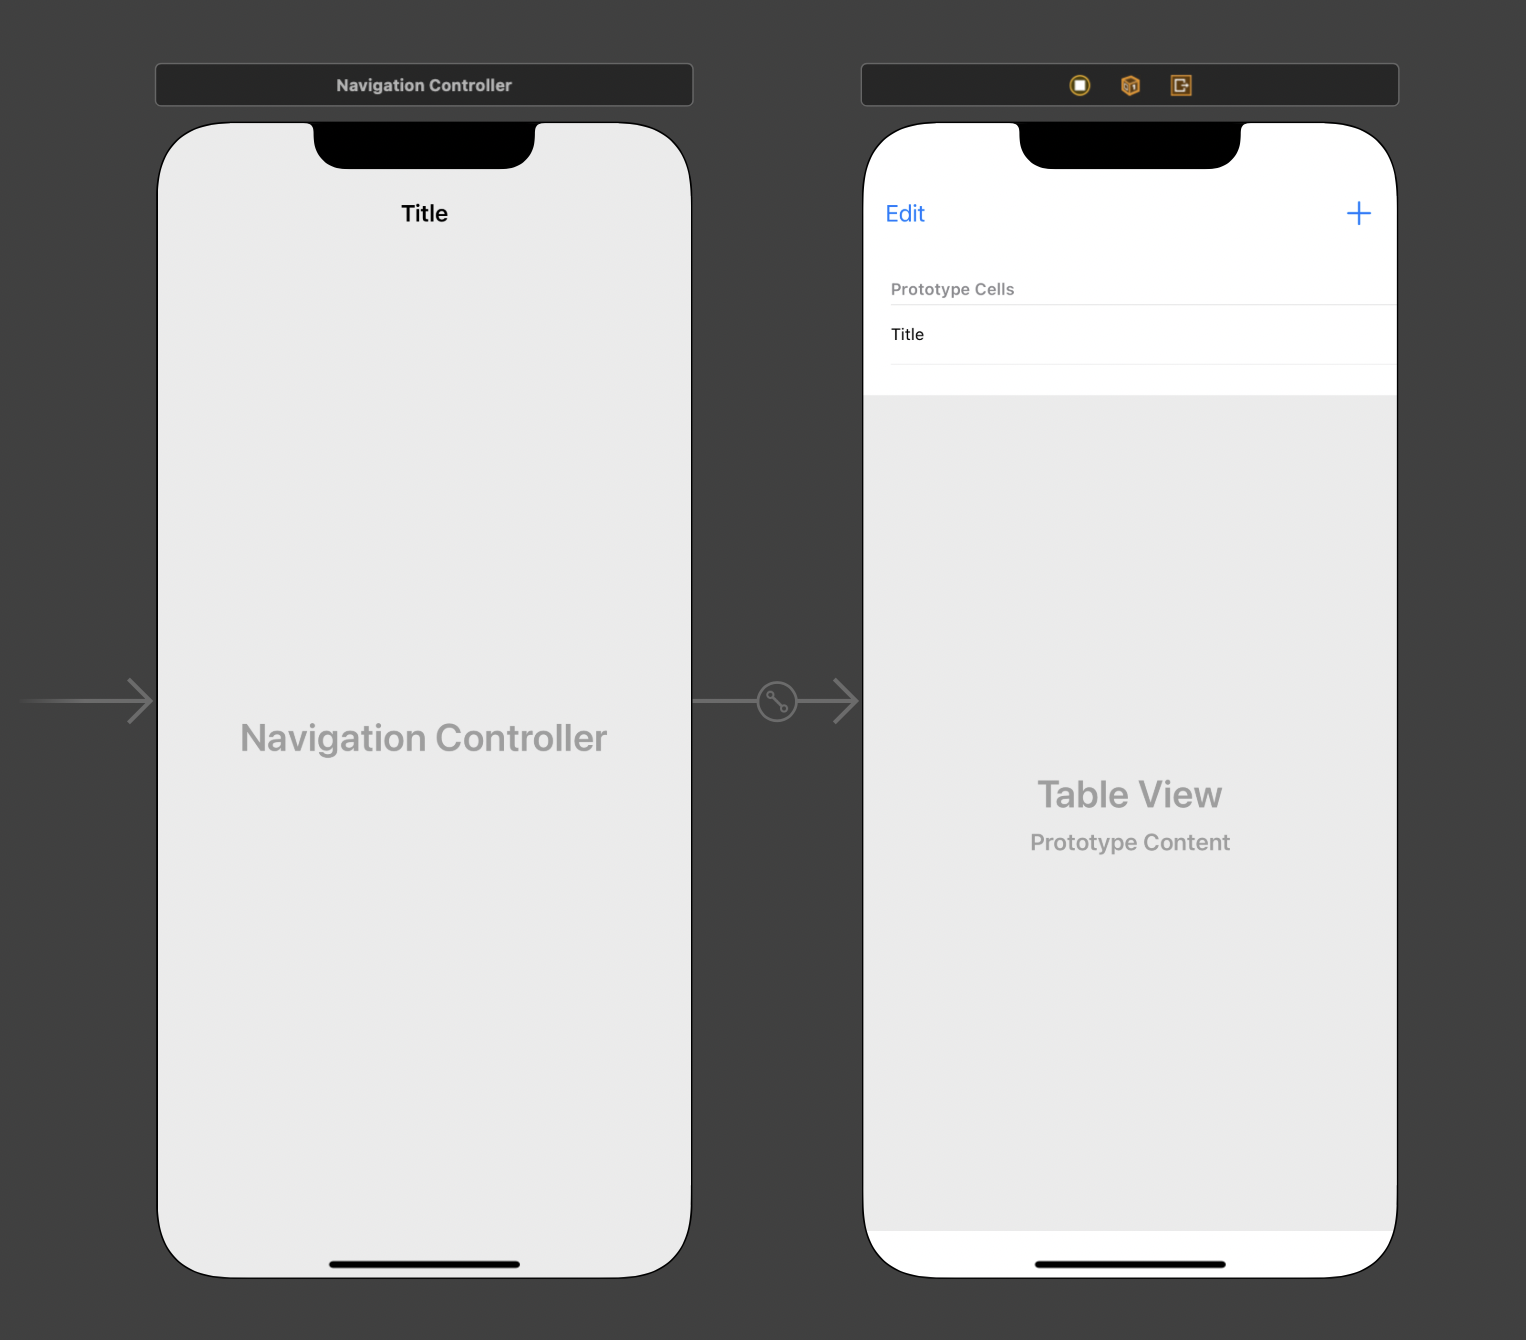
Code
ViewController.swift
import UIKit

class ViewController: UIViewController {
    // 할 일들을 저장하는 배열

    var tasks = [Task](){
        didSet {
            self.saveTasks()
        }
    }


    @IBOutlet var editButton: UIBarButtonItem!
    @IBOutlet weak var tableView: UITableView!
    var doneButton: UIBarButtonItem?

    override func viewDidLoad() {
        super.viewDidLoad()

        self.doneButton = UIBarButtonItem(barButtonSystemItem: .done, target: self, action: #selector(doneButtonTap))
        self.tableView.dataSource = self
        self.tableView.delegate = self
        self.loadTasks()
    }

    @objc func doneButtonTap() {
        self.navigationItem.leftBarButtonItem = self.editButton
        self.tableView.setEditing(false, animated: true)
    }

    @IBAction func tapEditButton(_ sender: UIBarButtonItem) {
        guard !self.tasks.isEmpty else { return }
        self.navigationItem.leftBarButtonItem = self.doneButton
        self.tableView.setEditing(true, animated: true)
    }

    @IBAction func tapAddButton(_ sender: UIBarButtonItem) {
        let alert = UIAlertController(title: "할 일 등록", message: nil, preferredStyle: .alert)

        // 등록 버튼을 눌렀을 때 textField에 입력된 값을 가져오도록 구현한 코드
        let registerButton = UIAlertAction(title: "등록", style: .default, handler: { [weak self] _ in
            guard let title = alert.textFields?[0].text else { return }   // textFields 프로퍼티는 배열임. textFeild를 alert에 하나밖에 추가하지 않았으니 0번째 배열에 접근.
            let task = Task(title: title, done: false)
            self?.tasks.append(task)
            // 할 일을 등록할 때마다 테이블뷰를 갱신하여 추가된 할일이 테이블 뷰에 표시되게 구현하는 코드
            self?.tableView.reloadData()
        })
        let cancelButton = UIAlertAction(title: "취소", style: .cancel, handler: nil)

        alert.addAction(cancelButton)
        alert.addAction(registerButton)

        // alert에 TextField 추가하는 방법, 설명 (1) 참고
        alert.addTextField(configurationHandler: { textField in textField.placeholder = "할 일을 입력해 주세요."
        })

        self.present(alert, animated: true, completion: nil)
    }

    // 할 일들이 UserDefaults 저장되는 코드
    func saveTasks() {
        // 할 일들을 딕셔너리 형태로 저장
        let data = self.tasks.map {  // 배열에 있는 요소들을 딕셔너리 형태로 mapping
            [
                "title": $0.title,
                "done": $0.done
            ]
        }
        let userDefaults = UserDefaults.standard
        userDefaults.set(data, forKey: "tasks")  // UserDefaults에 데이터 저장.
    }

    // UserDefaults에 저장된 데이터들을 로드하는 코드.
    func loadTasks() {
        let userDefaults = UserDefaults.standard
        guard let data = userDefaults.object(forKey: "tasks") as? [[String: Any]] else {return}
        self.tasks = data.compactMap {
            guard let title = $0["title"] as? String else { return nil }
            guard let done = $0["done"] as? Bool else { return nil }
            return Task(title: title, done: done)
        }
    }
}

// 코드의 가독성을 위해 viewController를 따로 빼서, UITableViewDataSource에 정의된 메서드들만 이 extension 안에 정의되게 UITableViewDataSource을 채택.
extension ViewController: UITableViewDataSource {
    // Type 'ViewController' does not conform to protocol 'UITableViewDataSource' : UITableViewDataSource 프로토콜에 정의된 옵셔널이 붙지 않는 함수들을 구현해 주지 않아서 생기는 에러.

    // UITableViewDataSoure를 채택하였을 때 꼭 구현해 주어야 하는 메서드 (1)
    func tableView(_ tableView: UITableView, numberOfRowsInSection section: Int) -> Int {
        // 하나의 섹션에 할 일들을 표시할 것이므로 배열의 개수를 반환.
        return self.tasks.count
    }

    // UITableViewDataSoure를 채택하였을 때 꼭 구현해 주어야 하는 메서드 (2)
    func tableView(_ tableView: UITableView, cellForRowAt indexPath: IndexPath) -> UITableViewCell {
        // 특정 섹션의 n번째 row를 그리는 데 필요한 셀을 반환하는 메서드.
        let cell = tableView.dequeueReusableCell(withIdentifier: "Cell", for: indexPath)  // 설명 (2) 참조
        let task = self.tasks[indexPath.row]  // 할 일들이 저장되어 있는 배열에 indexPath.row 값으로 배열에 저장되어 있는 할 일 요소들을 갖고 옴.
        // cellForRowAt 메서드 파라미터로 전달된 indexPath는 테이블 뷰에서 cell 위치를 나타내는 인덱스. Section과 Row가 0이라면, 가장 위에 보이는 cell의 위치를 의미.
        // indexPath.row 는 0부터 tasks 배열의 개수까지.
        cell.textLabel?.text = task.title

        if task.done {
            cell.accessoryType = .checkmark
        } else {
            cell.accessoryType = .none
        }

        return cell
    }

    func tableView(_ tableView: UITableView, commit editingStyle: UITableViewCell.EditingStyle, forRowAt indexPath: IndexPath) {
        self.tasks.remove(at: indexPath.row)
        tableView.deleteRows(at: [indexPath], with: .automatic)

        if self.tasks.isEmpty {
            self.doneButtonTap()
        }
    }

    func tableView(_ tableView: UITableView, moveRowAt sourceIndexPath: IndexPath, to destinationIndexPath: IndexPath) {

    }
}

extension ViewController: UITableViewDelegate {
    func tableView(_ tableView: UITableView, didSelectRowAt indexPath: IndexPath) {
        var task = self.tasks[indexPath.row]
        task.done = !task.done  // true가 저장되어 있으면 false가 저장되게끔
        self.tasks[indexPath.row] = task
        self.tableView.reloadRows(at: [indexPath], with: .automatic)
    }
}
Task.swift
import Foundation

struct Task {
    var title: String  // 할 일의 내용을 저장
    var done: Bool  // 할 일이 완료되었는지에 대한 여부
}
설명 (1)
configurationHandler 파라미터는 alert을 표시하기 전에 텍스트 필드를 구성하기 위한 클로저. 이 클로저는 반환값이 없고, 텍스트 필드 객체에 해당하는 단일 매개변수를 사용함. 알럿에 표시하는 텍스트 필드를 설정하는 클로저라고 생각하면 된다.
설명 (2)
dequeueReusableCell()은 지정된 재사용 식별자에 대한 재사용 가능한 테이블 뷰 셀 객체를 반환을 하고, 이를 테이블 뷰에 추가하는 역할을 한다. 지정된 재사용 식별자는 withIdentifier 파라미터를 뜻한다. for 파라미터에 indexPath를 넘겨 주는 이유는, indexPath 위치에 해당 셀을 재사용하기 위해서!! 한마디로, 이 dequeueReusableCell 메서드를 이용하면 큐를 사용해서 셀을 재사용하게 된다. 그렇다면.... 큐를 사용해 셀을 재사용하는 이유는 무엇일까? 만약 테이블뷰에 1000개의 셀이 있고, 1000개의 셀을 각각 만들어서 메모리에 할당을 한다면, 불필요한 메모리 낭비가 심해질 것이며 앱이 엄청 느려지거나 비정상적인 앱의 종료가 일어날 것이다. 이러한 메모리 낭비를 방지하기 위해서 dequeueReusableCell 메서드를 사용하는 것이다. 어떻게 셀을 재사용을 하는 것인가? 예를 들어, 현재 내가 볼 수 있는 화면에 총 다섯 개 항목의 셀을 볼 수 있다고 가정해 보자. 그러면 앱은 다섯 개의 셀에 대한 데이터만 메모리 로드하게 되고, 스크롤을 내리면서 점점 더 많은 내용의 데이터가 원래 다섯 개의 셀을 재사용하여 메모리에 로드하게 된다. 이렇게 메모리 낭비를 방지하는 것이다.
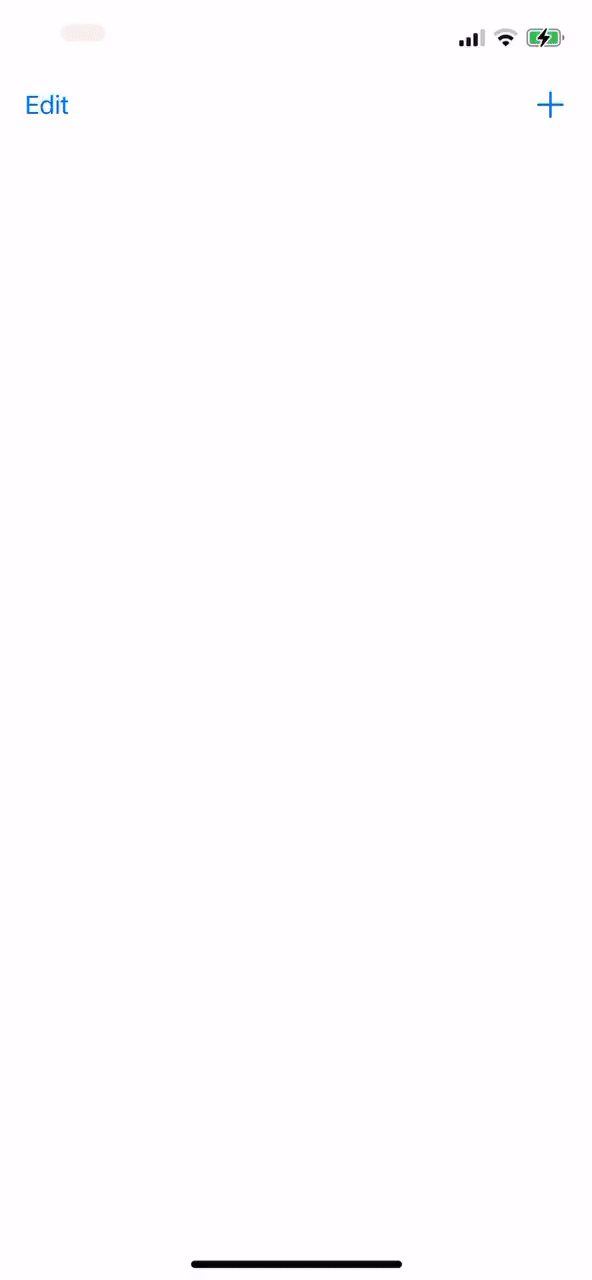
실행 결과