주요 학습내용
1. Local Repository
2. Remote Repository
I. Local Repository
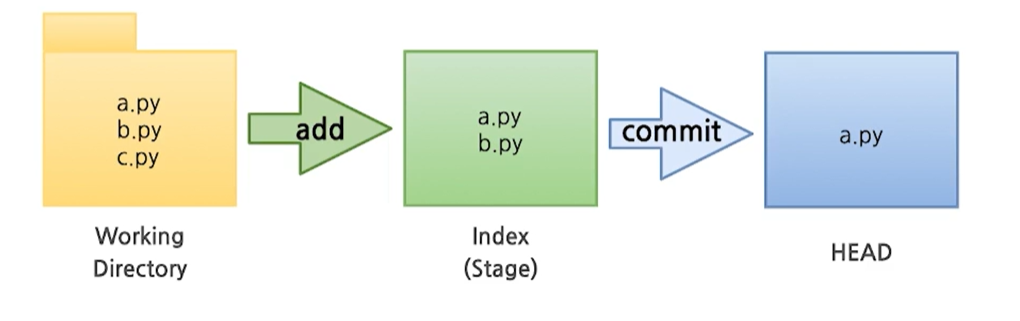
- 3가지 단계로 구성되어 있음
1) Working Directory(작업공간)- 실세 소스 파일, 생성한 파일들이 존재
- Staging area(준비영역)의 역할, git add한 파일들이 존재
- 최종 확정본, git commit한 파일들이 존재
1. Local Repository 생성
1. workspace 생성(최상위 폴더)
2. Working Directory 생성
- git init : 폴더에서 git을 초기화하는 명령어를 사용하면 해당 폴더를 git이 관리하기 시작

- .git 확인: git 폴더가 생성된 것을 확인
3. 파일 생성
- working directory에 파일을 생성
- 참고 - touch 명령어 - 빈 파일을 생성

4. Git Status
- git에 존재하는 파일 확인
5. Git Add
- working Directory에서 변경된 파일을 index(stage)에 추가
6. Git Commit
- index(stage)에 추가된 변경사항을 HEAD에 반영(확정)
git commit -m '커밋할 내용' <파일명>II. Remote Repository(Github 기준)
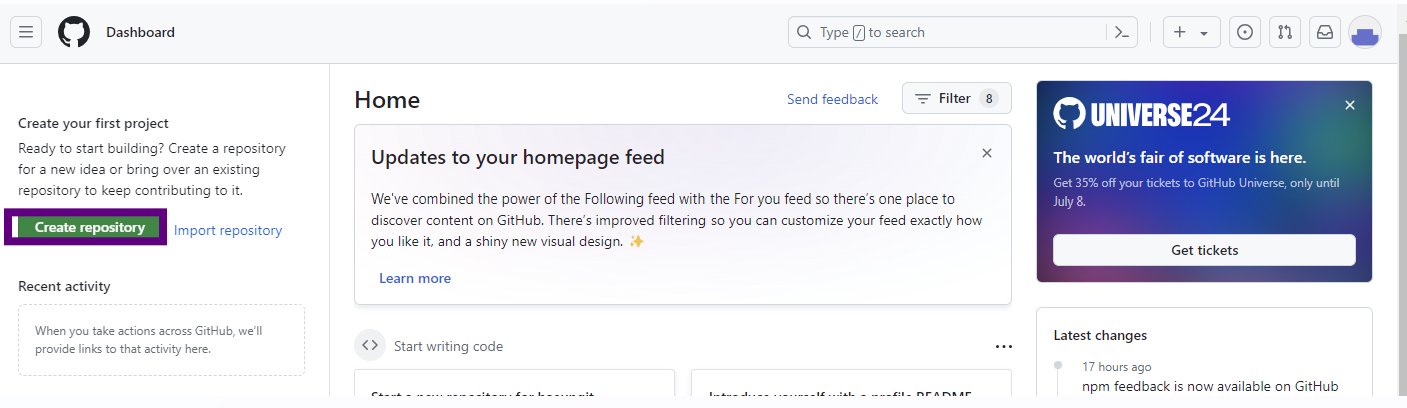
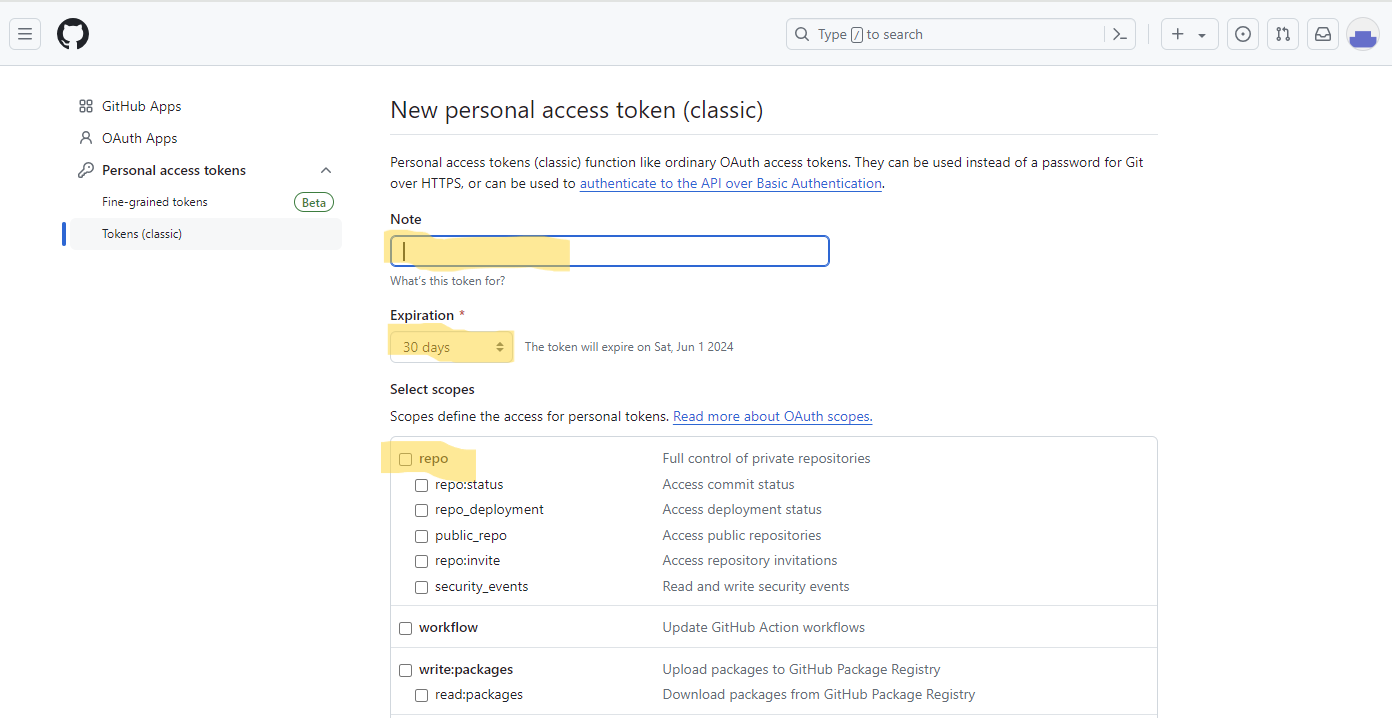
1. 페이지 접속 후, create repository 클릭
2. 이름 설정 후 create 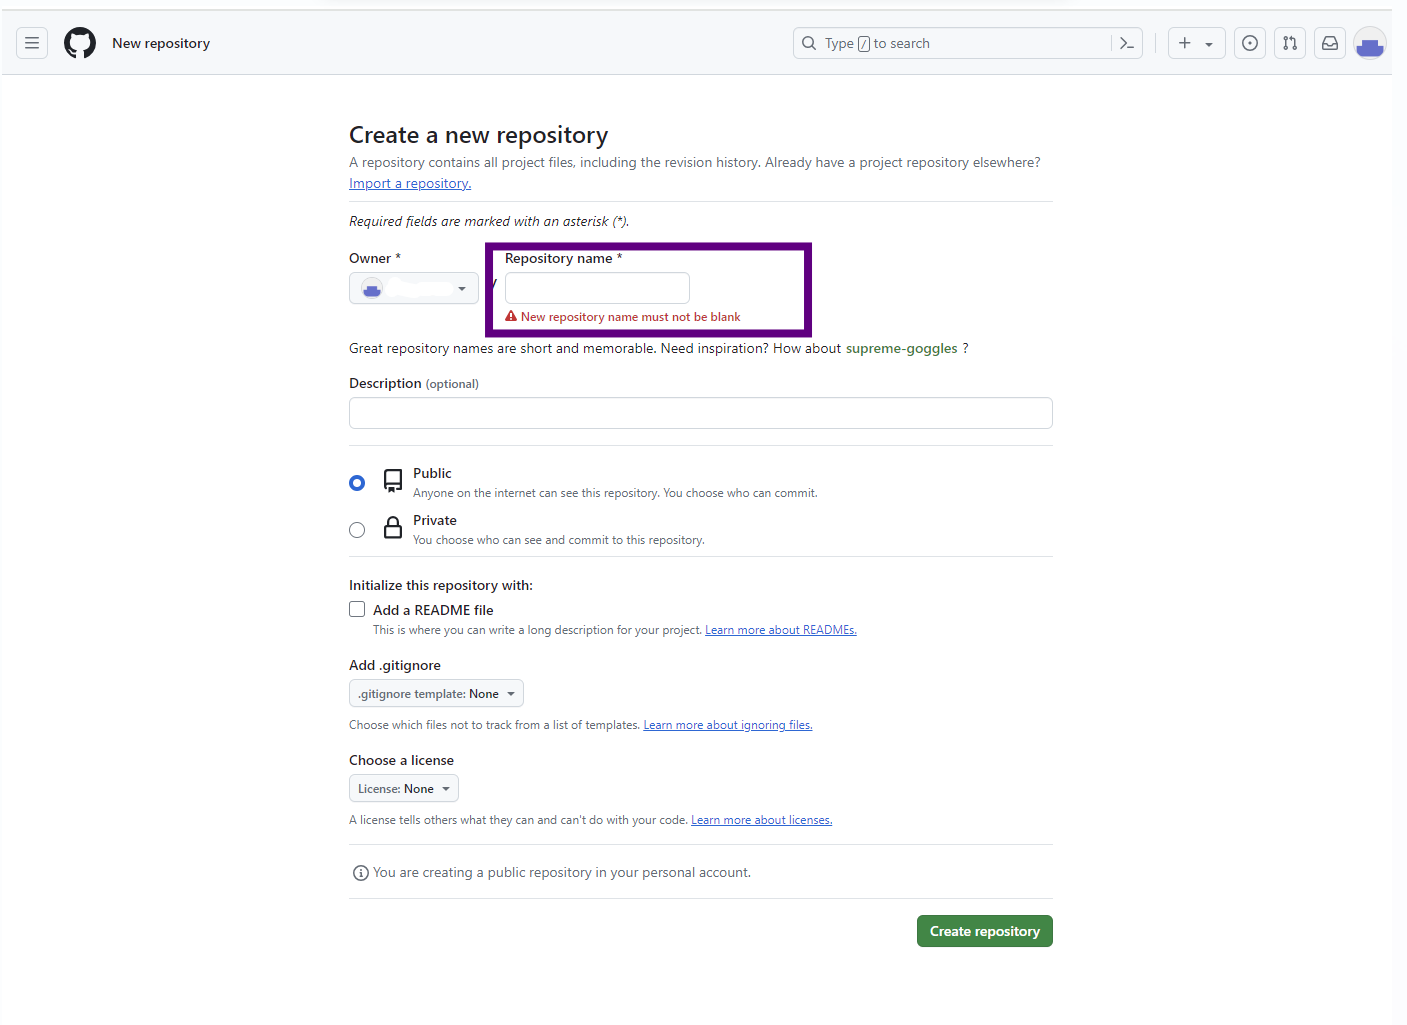
3. 추가설정

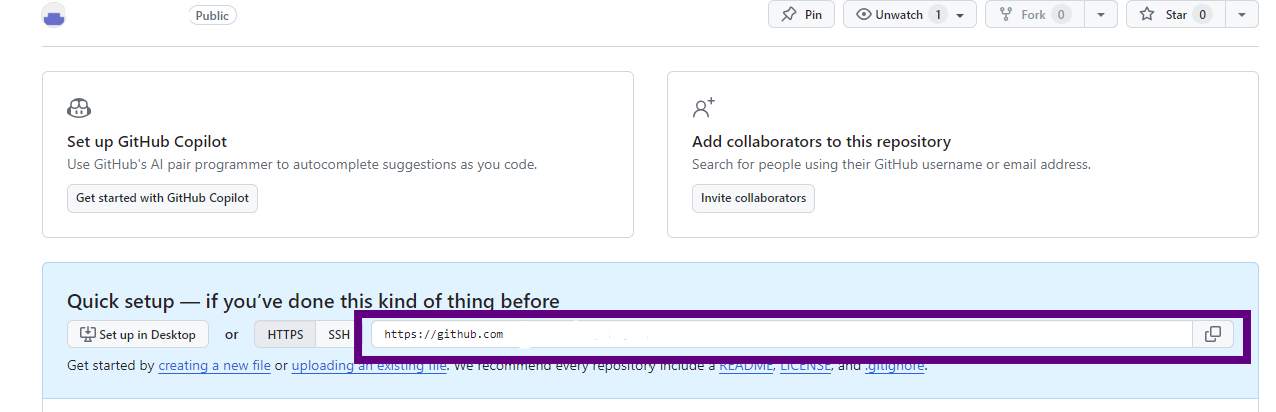
4. 연결

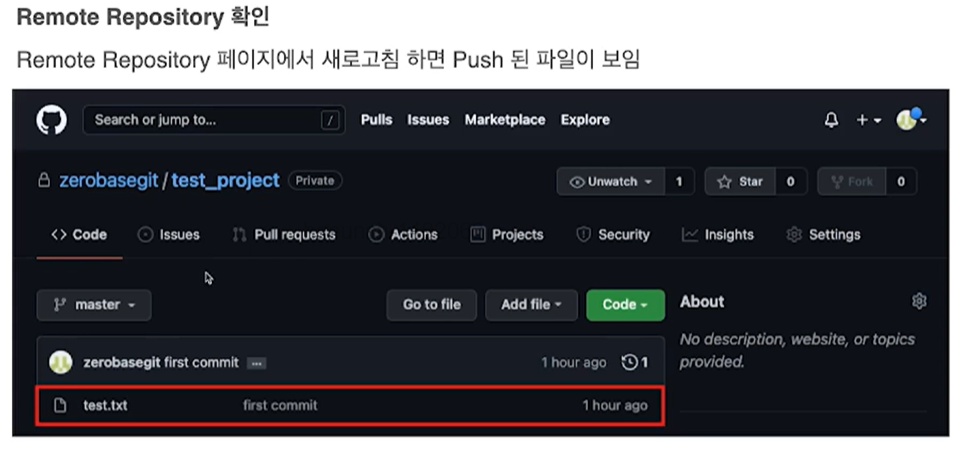
5. Remote Repository에 변경내용 Push하기
6. Remote Repository에 Pull하기
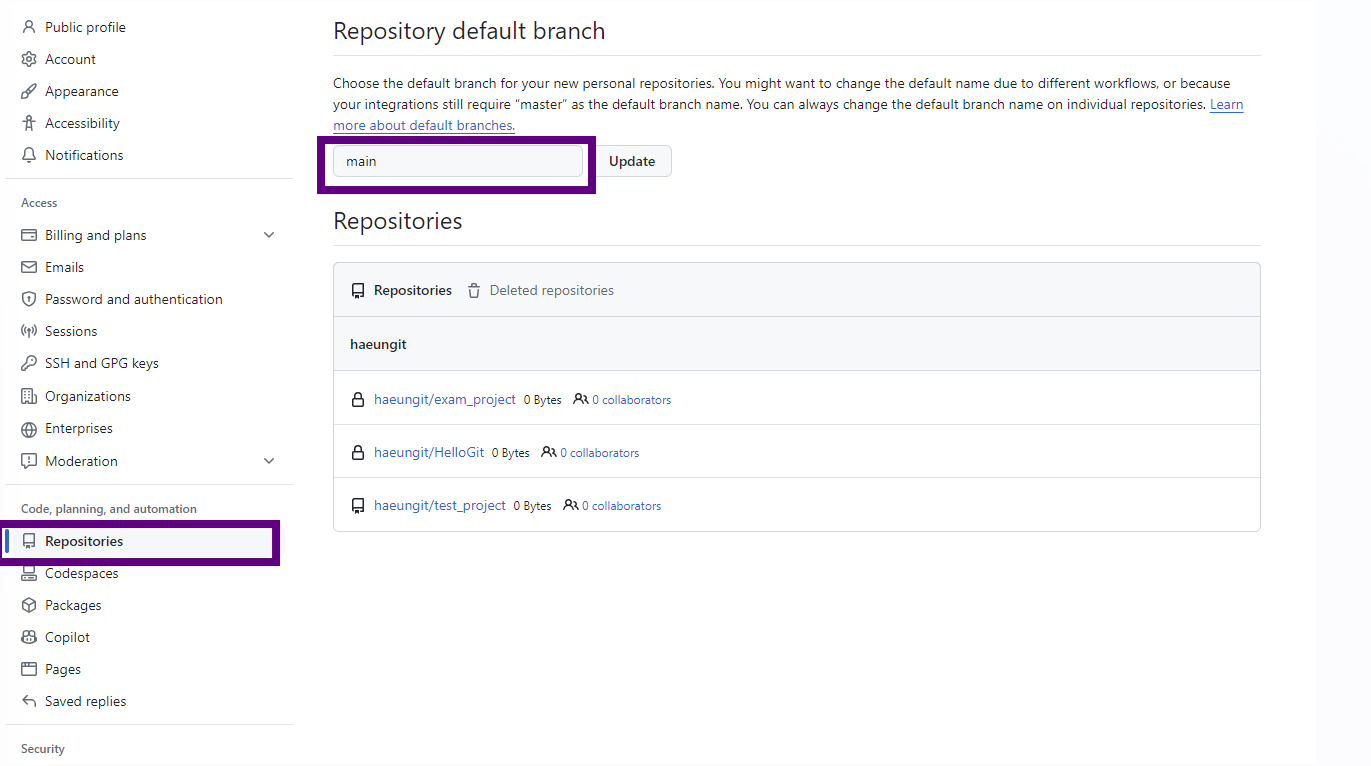
git pull origin master7. Branch 변경하기
-
Branch변경하면 다른 팀원들도 영향을 받기 때문에 신중하게 변경 필요
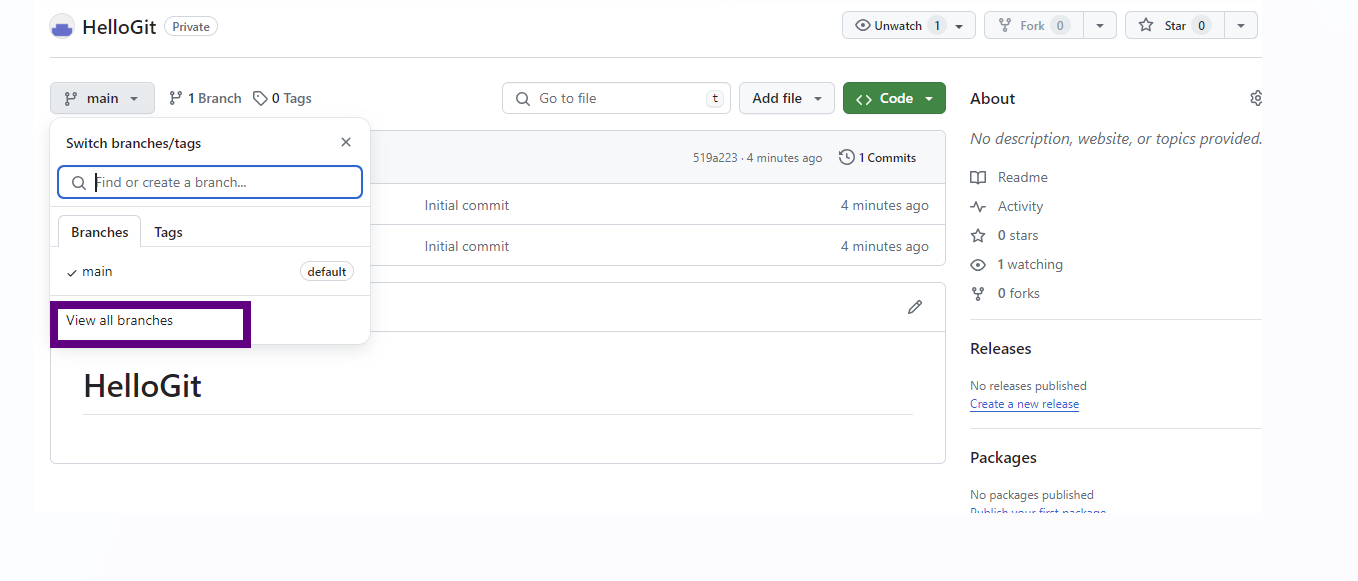
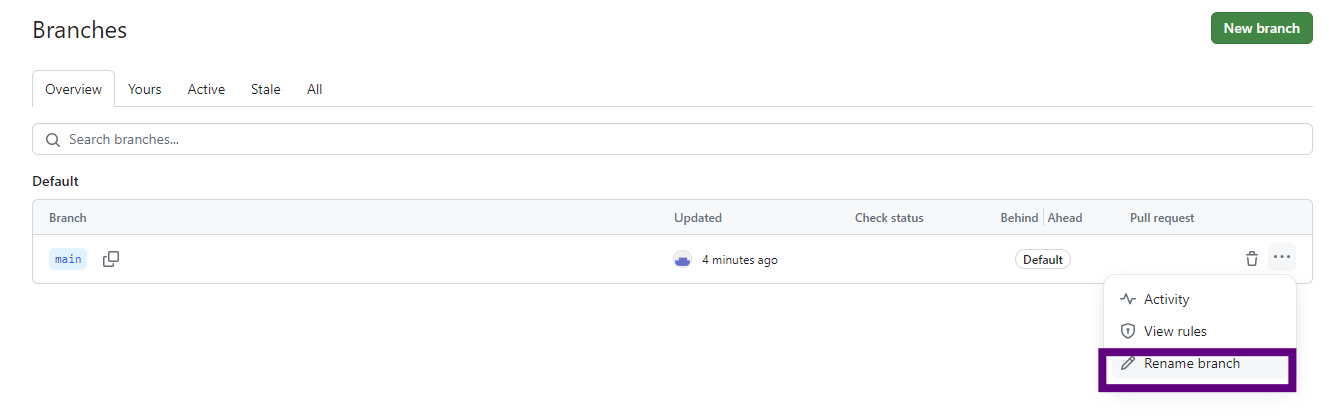
-
디폴트 값으로 master로 설정하고 싶은 경우, 아래 화면의 main부분을 master로 변경하면 됨
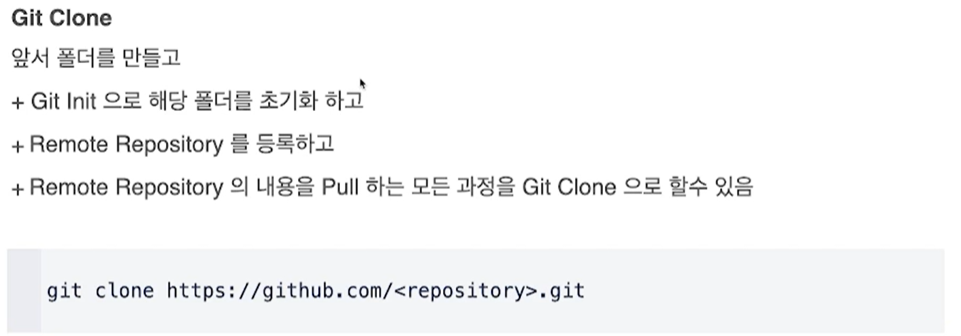
8. Remote Repository 복제하기

9. Branch
- 1) 조회하기(local branch)
git branch- 2) 조회하기(remote Branch)
git branch-r- 3) 조회하기(local + remote)
git branch -a- 4) Branch 생성
git branch <branchname>- 5) Branch 생성(remote)
git push origin <branchname>- 6) Branch 이동
git checkout <branchname>- 7) Branch 삭제(local repository)
- 삭제 전, 해당 branch 활성화 되어있으면 x
- git checkout으로 다른 branch 선택 후 실행
git branch -d <branchname>- 8) Branch 삭제(remote repository)
git push origin --delete <branchname>
할 거면 제대로 하자