request
python사용자들을 위해 만들어진 간단한 Python용 HTTP 라이브러리이며, 간단하게는 HTTP, HTTPS 웹 사이트에 요청하기 위해 자주 사용되는 모듈 중 하나이고 Crawling 과정에서 requests 모듈을 이용해 웹 사이트의 소스코드를 가져온 다음 파싱을 하는 경우가 많다.
설치
requests 모듈 사용을 위해서는 pip로 먼저 설치한 후 import하여 사용한다.
$ pip install requestsimport requestsrequests.get()
1. requests.get(url)
url을 인수로 받아 HTTP 요청을 하고 response객체를 반환한다.
import requests

url = 'https://www.exam.com'

response = requests.get(url)
2. requests.get(url, params=params)
get()메서드 params속성에 값을 전달해 준다.
import requests

url = 'https://www.exam.com'
params = {
	'key1':'value1'
    'key2':'value2'
    }

response = requests.get(url,params)
3. requests.get(url, headers=headers)
브라우저는 웹서버에 요청시 request hearders를 추가해서 보낸다. get()메서드 headers속성에 값을 전달해 준다.
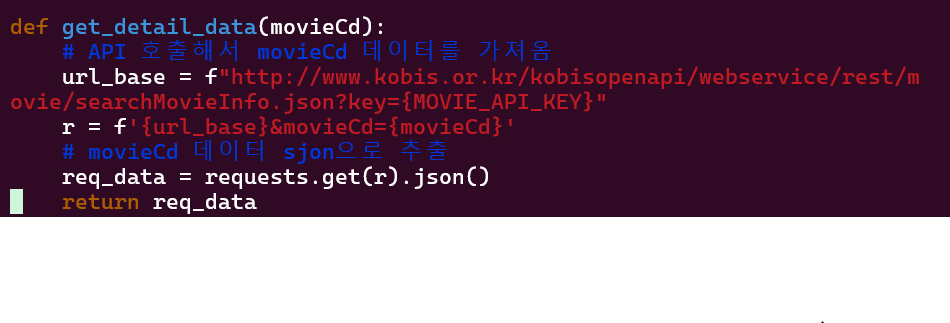
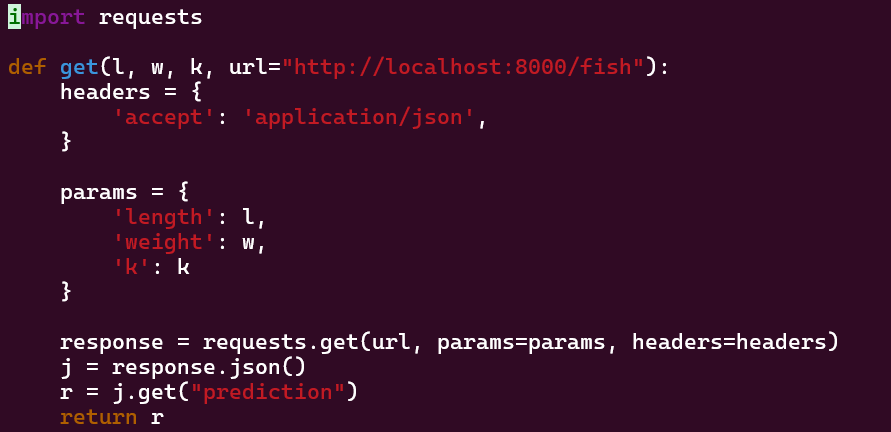
4. example
API url에 params와 heardes를 추가하여 요청을 보낸다. 응답을 json형태로 변환후 prediction 값을 받아온다.
Headers
headers는 HTTP 요청의 헤더정보를 지정하는 역할을 한다. HTTP 헤더는 클라이언트(브라우저나 프로그램)가 서버로 요청을 보낼 때, 혹은 서버가 클라이언트에게 응답할 때 부가적인 정보를 전달하기 위한 데이터이다. 헤더는 주로 요청의 성격을 설명하고 서버와의 통신을 원할하게 하기 위해 사용된다.
1. 인증 및 권한 부여(Authentication and Authorization)
API 서버에 요청할 때, 인증 코튼을 헤더에 추가해 사용자 인증을 수행할 수 있다.
url = 'https://www.api.exam.com'
headers = {
    "Authorization": "Bearer <your_access_token>"
}
response = requests.get(url, headers=headers)
2. 클라이언트 정보 제공(User-Agent)
User-Agent를 통해 요청을 보낸 클라이언트(주로 브라우저)의 정보를 서버에 전달할 수 있다.
url = 'https://www.api.exam.com'
headers = {
    "User-Agent": "Mozilla/5.0 (Windows NT 10.0; Win64; x64) AppleWebKit/537.36 (KHTML, like Gecko) Chrome/91.0.4472.124 Safari/537.36"
}
response = requests.get(url, headers=headers)
3. 콘텐츠 유형 지정 (Content-Type)
Content-Type 헤더는 서버가 요청에서 보내는 데이터의 유형을 알 수 있게 해준다.
url = 'https://www.api.exam.com'
headers = {
    "Content-Type": "application/json"
}
data = '{"key": "value"}'
response = requests.post("https://api.example.com/submit", headers=headers, data=data)
4. Accept
Accept 헤더는 서버에게 클라이언트가 받고자 하는 응답 데이터의 유형을 알리기 위해 사용된다.
url = 'https://www.api.exam.com'
headers = {
    "Accept": "application/json"
}
response = requests.get("https://api.example.com/data", headers=headers)
requests.post()
1. requests.post(url, data)
import requests

url = 'https://www.exam.com'
data = {'key1':'value1', 'key2', 'value2'}

response = requests.post(url, data=data)
2. requests.post(url, json)
import requests

url = 'https://www.exam.com'
data = {'key1':'value1', 'key2', 'value2'}

response1 = requests.post(url, json={'key1':'value1', 'key2', 'value2'})

# 이 경우에는 headers는 application/json을 설정하지 않아야 한다.
response2 = requests.post(url, data=json.dumps(data))
3. example
result가 있으면 line url에 data와 hearders(라인토큰)를 post하는 요청을 보낸다.

Response 응답 객체
1. status_code
응답코드를 확인 할 수 있다. 200:정상이며 이외의 코드는 에러 코드이다.
2. text
응답 데이터 소스를 가져오며 데이터 타입은 str이다.
3. json()
응답 데이터 소스를 가져오며 데이터 타입은 dict 또는 list이다. json 문자열을 가져올 때 사용한다.
4. content
응답 데이터 소스를 가져오며 데이터 타입은 bytes이다. 2진 파일을 가져와 file로 저장할 때 사용한다.
import requests
url = 'https://www.exam/image/exam-image.png'
file_name = './data/image_file.pdf
file_down = requests.get(url)
with open(file_name, 'wb') as f:
	f.write(file_down.content)