1. HTTPS가 필요한 이유.
POST요청이 Body를 통해 이뤄지기 때문에GET요청 보단 안전하다고 하지만 이는 반은 맞고 반은 틀린 내용임.- HTTP 상태에서는 전송되는 데이터가 암호화 되어 전송되지 않음.
- HTTPS를 적용함으로써 클라이언트-서버가 주고받는 데이터를 암호화할 수 있음.
- HTTPS = HTTP + SSL/TLS 임.
2. SSL/TLS
- 무료로 SSL 인증서를 발급할 수 있는
Let's Encrypt를 이용.
sudo apt install certbot
sudo apt install python3-certbot-nginxcertbot: Let’s Encrypt에서 SSL 인증서를 발급,갱신,관리해 주는 프로그램.python3-certbot-nginx: certbot이 Nginx를 제어할 수 있도록 하는 Nginx 전용 플러그인.
sudo certbot certonly --nginx- 관리자 권한으로 certbot을 실행해서 Nginx의 설정 파일은 건들지말고 오직 인증서 파일 발급/갱신만 수행.
--nginx: Nginx 플러그인(python3-certbot-nginx)을 사용해 도메인 소유권 검증.- Nginx 설정을 수정해서 Let's Encrypt의 검증 요청을 처리하고 검증이 끝나면 원래 설정으로 되돌려 놓음.
- 위 명령어를 실행하면 아래 문구가 뜸.
Saving debug log to /var/log/letsencrypt/letsencrypt.log
Enter email address (used for urgent renewal and security notices)
(Enter 'c' to cancel):-
디버그 로그(실행 과정의 상세 기록)를 해당 경로에 저장.
-
인증서 갱신 안내 및 보안 공지용으로 사용할 이메일 입력.
- Let's Encrypt 인증서는
90일마다 갱신해야함.
- Let's Encrypt 인증서는
-
그후 약관 동의? 같은 걸 묻고 아래와 같은 메시지가 나옴.
Which names would you like to activate HTTPS for?
- - - - - - - - - - - - - - - - - - - - - - - - - - - - - - - - - - - - - - - -
1: α.site
- - - - - - - - - - - - - - - - - - - - - - - - - - - - - - - - - - - - - - - -
Select the appropriate numbers separated by commas and/or spaces, or leave input
blank to select all options shown (Enter 'c' to cancel): 1- HTTPS(SSL 인증서)를 적용할 도메인을 선택하면 됨.
- 적용할 도메인이 1개 뿐이라 1개가 떴고 해당 번호를 입력하였음.
Requesting a certificate for α.site

Successfully received certificate.
Certificate is saved at: /etc/letsencrypt/live/α.site/fullchain.pem
Key is saved at:         /etc/letsencrypt/live/α.site/privkey.pem
This certificate expires on 2026-03-14.-
Let’s Encrypt(ACME 서버)에 α.site 도메인용 SSL 인증서 발급 요청을 전송했고
도메인 소유권 검증이 성공해서 Let’s Encrypt가 인증서를 발급해줬음. -
2개의
pem파일이/etc/letsencrypt/live/α.site/경로에 생성되었음.fullchain.pem: 공개키 + 인증서(기관(Let's Encrypt)의 서명).privkey.pem: 비밀키.
-
마지막 줄은 해당 인증서의 유효기간.
-
이렇게 인증서를 받는데 성공했고 이전 명령어에서
certonly옵션을 사용했기 때문에 Certbot이 파일을 받아오기만 했을 뿐 Nginx 설정에는 아직 적용이 안 된 상태임.- 즉, 직접 Nginx 설정을 수정해야됨.
-
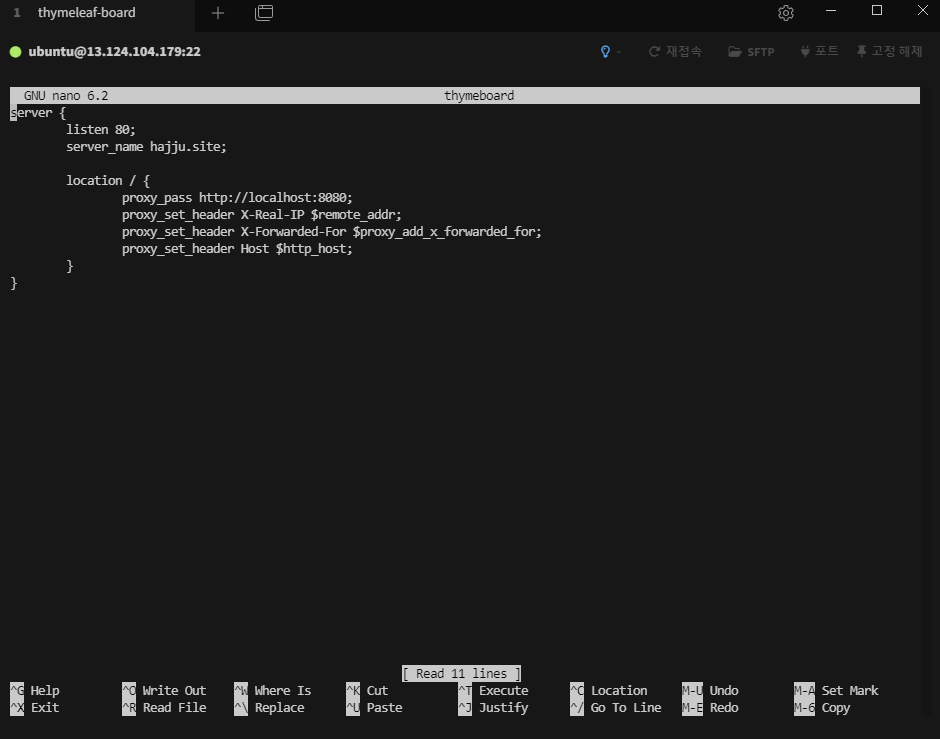
- 해당 파일의 경로: /etc/nginx/sites-available/파일명
server {
        listen 80;
        server_name α.site;

        location / {
                proxy_pass http://localhost:8080;
                proxy_set_header X-Real-IP $remote_addr;
                proxy_set_header X-Forwarded-For $proxy_add_x_forwarded_for;
                proxy_set_header Host $http_host;
        }
}
↓ 수정된 설정 (/etc/nginx/sites-available/파일명)
server {
        listen 80;
        server_name α.site;
        rewrite ^ https://$server_name$request_uri? permanent;
}

server {
        listen 443 ssl;
        server_name α.site;

        ssl_certificate /etc/letsencrypt/live/α.site/fullchain.pem;
        ssl_certificate_key /etc/letsencrypt/live/α.site/privkey.pem;
        include /etc/letsencrypt/options-ssl-nginx.conf;

        location / {
                proxy_pass http://localhost:8080;
                proxy_set_header X-Real-IP $remote_addr;
                proxy_set_header X-Forwarded-For $proxy_add_x_forwarded_for;
                proxy_set_header Host $http_host;
        }
}-
첫 번째 server {} 블록.
- HTTP 포트(80번)로 들어오는 요청을 처리.
- 이 설정을 적용할 도메인.
- ^(정규식)의 의미: 문자열의 시작. (모든 request URI에 매칭)
- 모든 요청을 HTTPS 버전으로 영구 리다이렉트(301)
- permanent: (HTTP)301 Moved Permanently (해당 URL을 영구적으로 새 주소로 리다이렉트 해라)
- 모든 요청을 HTTPS 버전으로 영구 리다이렉트(301)
-
두 번째 server {} 블록.
- HTTPS 포트(443번)로 들어오는 요청을 처리. (SSL 활성화)
- 공개키 + 인증서 경로. (fullchain.pem)
- 비밀키 경로. (privkey.pem)
include /etc/letsencrypt/options-ssl-nginx.conf: Certbot이 자동으로 생성해준 권장 SSL 보안 설정 파일.
-
이제 새로운 설정을 ctrl+o 를 눌러 저장, ctrl + x로 빠져나와서
sudo systemctl restart nginx- 위 명령어를 통해 Nginx를 재시작하면 됨.
2-1. 방화벽 설정.
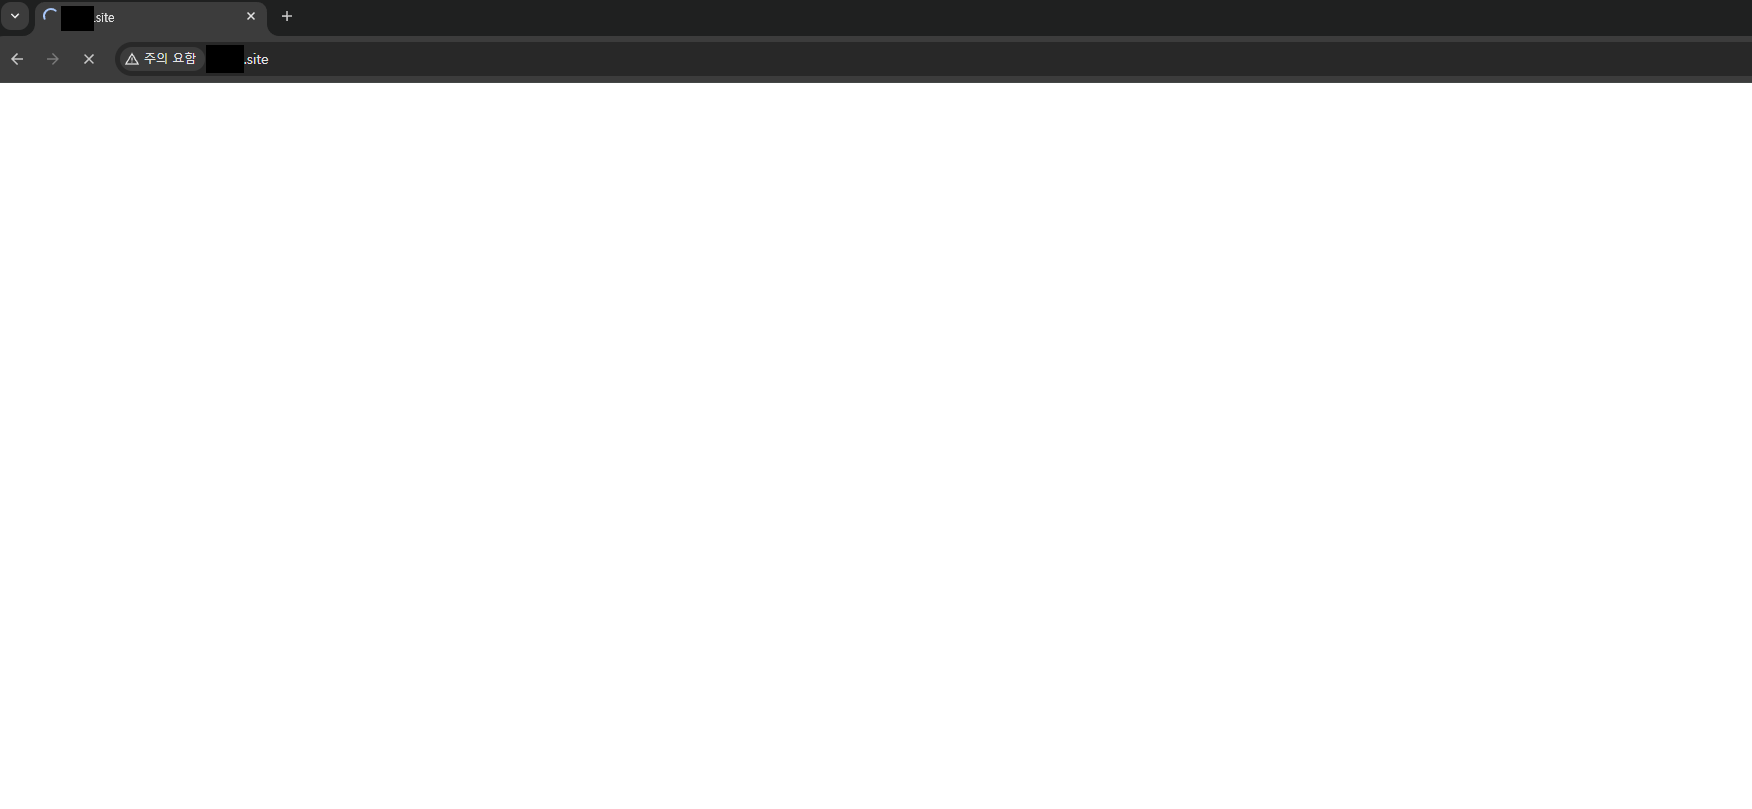
- 성공적으로 끝난 줄 알았으나 접속하려고 하니 계속 로딩만 되고 화면이 안 뜸.
- Gemini의 도움을 받아 여러 경우의 수를 참고 받았고 이전에도 이와 비슷한 상황을 겪은 적이 있어서 Azure 클라우드 컴퓨팅 - 네트워킹 설정 (비공개 게시글)을 참고하였음.
- 현재는 AWS의 Ubuntu 인스턴스를 사용 중인데 인스턴스 상세페이지에 가보면 네트워킹 탭이 있음.
- 하단으로 내리다 보면 방화벽 설정이 있는데 여기서 Https(443) 포트를 열어줘야됨.
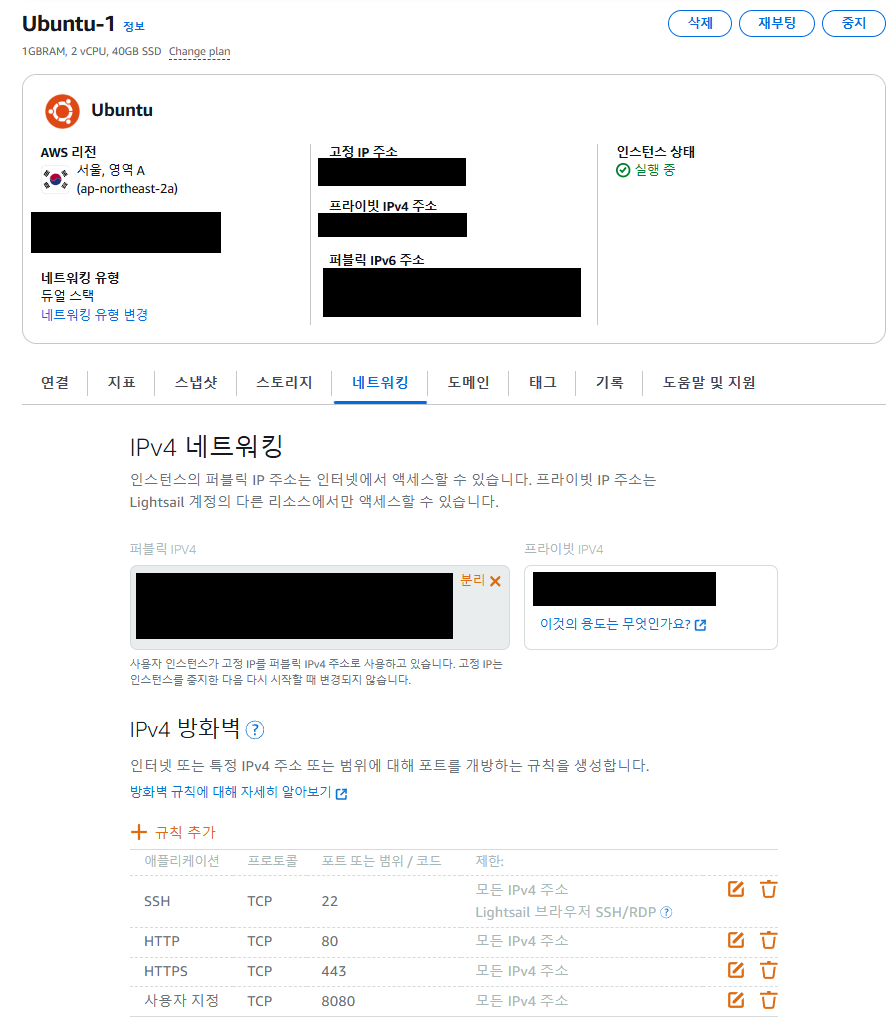
↑HTTPS 443이 추가된 모습.
3. 참고.

Every cloud has a silver lining.ㅤㅤㅤㅤㅤㅤㅤㅤㅤhttps://blog.naver.com/ha_jju_