✨ 개요
최근 릴리즈 한 명함 프로젝트에 검색 기능을 넣고 싶었다. 왜냐하면 궁금한 사람의 명함을 보고 싶은데 메인 페이지의 많은 명함 중에서 그 사람의 명함을 찾을 수 있는 방법이 없었기 때문이다.
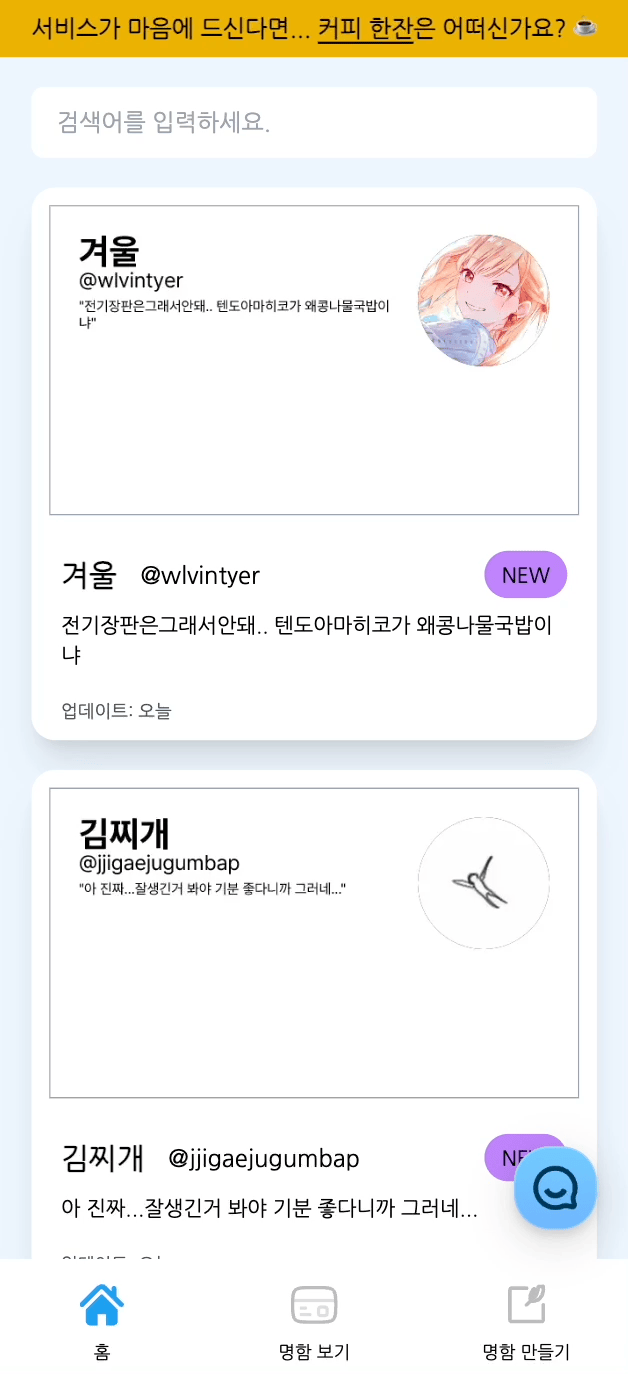
👏 결과 미리보기
결과를 미리 보자면, 아래와 같다. dev라는 검색어를 치면 닉네임 혹은 트위터 아이디에 dev가 포함된 명함들이 뜬다.
📒 구현하고 싶은 내용
구현 이전에 내가 구현하고 싶은 내용은 아래와 같았다.
- 검색 버튼이 없으며, 검색어를 치면 바로바로 필터링이 되어야 한다.
👉 button의 submit 대신 input의 onChange를 이용하기로 했다. - 검색어를 칠 때, 매 글자마다 api 호출을 하지 않았으면 좋겠다.
👉 lodash 라이브러리의 debounce를 사용하여 debounce를 구현하기로 했다.
🔍 검색 api 상세
기존에는 메인 페이지에서 명함들을 받아올 때 /api/cards에 GET 요청을 보냈다.
그리고 검색 기능이 추가되어 GET 요청을 보낼 때 검색어가 있으면 /api/cards에 추가적으로 params를 함께 보내는 것으로 바뀌었다.
따라서 검색 api는 따로 없고, 기존의 명함들 조회 api에 params를 덧붙이는 것으로 변경되었다.
그럼 만약에 dev를 검색했다면 api 요청은 /api/cards?query=dev 이렇게 간다.
이렇게 보내면 백엔드에서 트위터 아이디나 닉네임에 dev가 포함된 명함만 보내준다.
그렇게 필터링된 명함들을 프론트에서는 보여주기만 하면 된다.
(검색해보니 백엔드가 아니라 프론트에서 필터링을 해서 보내는 경우를 더 많이 볼 수 있었다.)
🧑💻 주요 코드
검색창
검색창에서 검색어를 치면 query라는 상태가 검색어로 변한다.
이 query가 바뀔 때마다 api 요청을 보내서 필터링된 명함들을 가져올 것이다.
이때 검색어가 한 글자씩 바뀔 때마다 query도 바뀌면 api 요청을 엄청나게 많이 보내야 할 것이다. 그래서 lodash 라이브러리의 debounce를 사용하여 debounce를 적용하기로 했다.
아래의 onChange의 이벤트 핸들러는 마지막 글자를 치고 0.3초가 지났을 때 query를 변경한다.
import { useState } from 'react';
import { debounce } from 'lodash-es';
const [query, setQuery] = useState('');

<input
  type="search"
  onChange={debounce((e) => setQuery(e.target.value), 300)}
  />
api 요청
여기서 getCards는 실질적으로 명함들의 데이터를 가져오는 부분이다. params에 query를 함께 보내면 백엔드에서 그 query를 사용하여 데이터를 필터링해 보내준다.
그리고 queryKey에 query를 넣어서 query가 바뀔 때마다 요청이 가도록 했다.
import { useQuery } from '@tanstack/react-query';
import axios from 'axios';

const getCards = async (query: string) => {
  const res = await axios.get<Cards>(`${process.env.NEXT_PUBLIC_BACKEND_URL}/api/cards`, {
    params: { query },
  });
  return res.data.cards;
};

export const useGetCards = (query: string) => {
  const { data: cards } = useQuery({
    queryKey: ['cards', query],
    queryFn: () => getCards(query),
  });
  return { cards };
};
💻 전체 코드
// 메인 페이지
import { debounce } from 'lodash-es';
import { ReactNode, useState } from 'react';
import CardItem from '@/components/card/CardItem';
import HomeLayout from '@/components/layout/HomeLayout';
import SEO from '@/components/SEO/SEO';
import { useGetCards } from '@/hooks/queries/useGetCards';
import type { CardType } from '@/types/cards';

export default function Home() {
  const [query, setQuery] = useState('');
  const { cards } = useGetCards(query);

  return (
    <div>
      <SEO description={`트친들의 명함을 둘러보세요🐥`} />
      <main className="flex flex-col gap-5 mx-1 mb-16">
        <label className="input flex items-center gap-2">
          // 아래의 input이 검색창
          <input
            type="search"
            className="grow"
            placeholder="검색어를 입력하세요."
            onChange={debounce((e) => setQuery(e.target.value), 300)}
          />
        </label>
        // 검색창 아래에 명함들을 보여주는 부분
        {cards?.map((card: CardType) => <CardItem card={card} key={card.id} />)}
      </main>
    </div>
  );
}

Home.getLayout = (page: ReactNode) => <HomeLayout>{page}</HomeLayout>;
// useGetCards 커스텀 훅
import { useQuery } from '@tanstack/react-query';
import axios from 'axios';
import { Cards } from '@/types/cards';
const getCards = async (query: string) => {
const res = await axios.get<Cards>(`${process.env.NEXT_PUBLIC_BACKEND_URL}/api/cards`, {
params: { query },
});
return res.data.cards;
};
export const useGetCards = (query: string) => {
const { data: cards } = useQuery({
queryKey: ['cards', query],
queryFn: () => getCards(query),
});
return { cards };
};
✨ 결과
검색 기능이 완성되었다!
🐹 회고
예전에 검색 기능은 이렇게 만드는 거고, debounce는 어떻게 하는 거고~ 이런 말을 듣고는 어려워보여서 무섭게만 느껴졌었다. 그런데 막상 여러 라이브러리를 사용하여 구현해보니 뚝딱뚝딱 만들어진 것 같아 뿌듯했다!