📁 CH07. [예제로 배우는] JavaScript의 이해
📌 JavaScript란?
- JavaScript는 특정 HTML 요소를 선택하여 제어할 수 있는 스크립트 언어.
- 최근에는 백엔드 언어로도 각광 받고 있음
- 글자를 바꿀 수 있음
- 버튼을 비활성화 할 수 있음
- 버튼의 색깔을 바꿀 수 있음
- HTML에 JavaScript를 적용하는 방법은 다음과 같이 3가지가 있음.
- 인라인 (Inline) : 사용자와의 상호작용이 있을때만 가능함.
예를 들어, 버튼을 클릭했을 때, 키보드를 눌렀을 때
- 내부 스크립트 (Internal Script) : HTML 문서 안에 같이 작성함.
- 외부 스크립트 (External Script) : HTML 문서 밖에 작성하고 연결함.
📌 스크린트 언어란?
- 독립적인 프로그램을 개발할 수 있는 프로그래밍 언어가 아닌 "(프로그램 내부의 구성 요소 중 하나로) 프로그램을 제어하는 스크립트 역할을 하는 언어"
- 최근 빠르게 발전하는 런타임 환경 덕분에 스크립트 언어만으로도 충분히 프로그래밍이 가능해져, 역할이 확장되고 있음
- *영화나 드라마 대본을 스크립트라고도 부름
📌 함수
- 함수란 특정 기능을 수행하는 코드 덩어리임.
- 우리는 함수를 다음과 같이 정의함.
function 함수 이름() {
	/* 이 공간에
    함수가 할 일을
    코드로 작성해줍니다.*/
}
<!DOCTYPE html>
<html>
<head>
<meta charset="UTF-8">
<title> LOGIN </title>
<link rel="stylesheet" href="login.css">
</head>
<body>
<h1> Login </h1>
<form>
ID : <input class="login_inputs" type="text">
<br>
PW : <input class="login_inputs" type="password">
<br>
<input id="btn_login" type="button" value="login
onclick="myFunction()">
</form>
<script>
function myFunction() {
alert('1');
alert('2');
alert('3');
}
</script>
</body>
</html>
📌 인라인 (Inline)
<!DOCTYPE html>
<html>
<head>
<meta charset="UTF-8">
<title> LOGIN </title>
<link rel="stylesheet" href="login.css">
</head>
<body>
<h1> Login </h1>
<form>
ID : <input class="login_inputs" type="text">
<br>
PW : <input class="login_inputs" type="password">
<br>
<input id="btn_login" type="button" value="login
onclick="alert('clicked!')">
</form>
</body>
</html>
📌 내부 스크립트 : 특정 태그 지정 방법 아이디 입력 값 파업 띄우기!
- 특정 태그(element)를 찾는 방법
- Javascript에서는 특정 태그를 찾을 때 다음과 같은 기능을 이용함.
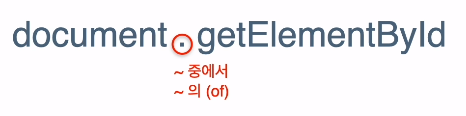
- id로 찾기 :
document.getElementById('아이디')
- class 이름으로 찾기 :
document.getElementsByClassName('클래스 이름')
- tag 이름으로 찾기 :
document.getElementsByTagName('태그 이름')
body 태그 안의 끝 부분의 script 태그 안에 내부 스크립트 작성
<!DOCTYPE html>
<html>
<head>
<meta charset="UTF-8">
<title> LOGIN </title>
<link rel="stylesheet" href="login.css">
</head>
<body>
<h1> Login </h1>
<form>
ID : <input id="txt_id" class="login_inputs" type="text">
<br>
PW : <input class="login_inputs" type="password">
<br>
<input id="btn_login" type="button" value="login
onclick="popId()">
</form>
<script>
function popId() {
alert(document.getElementById('txt_id').value);
}
function myFunction() {
alert('1');
alert('2');
alert('3');
}
</script>
</body>
</html>
📌 조건문
- 만약 아이디 칸이 비어있다면,
- 아니라면, (=칸에 값이 있다면)
if (/* 아이디 칸이 비어있다면 */) {
	/* 아이디를 입력해달라고 팝업창에 띄운다. */
}
else {
	/* 입력된 아이디를 팝업창에 띄운다 */
}
- if문
- 조건에 따라 다른 결과를 선택할 수 잇게 해줌.
- 우리는 이걸 조건문이라 부름
<!DOCTYPE html>
<html>
<head>
<meta charset="UTF-8">
<title> LOGIN </title>
<link rel="stylesheet" href="login.css">
</head>
<body>
<h1> Login </h1>
<form>
ID : <input id="txt_id" class="login_inputs" type="text">
<br>
PW : <input class="login_inputs" type="password">
<br>
<input id="btn_login" type="button" value="login
onclick="popId()">
</form>
<script>
function popId() {
if (!document.getElementById('txt_id').value) {
alert('아이디를 입력해주세요.');
}
else {
alert(document.getElementById('txt_id').value);
}
}
function myFunction() {
alert('1');
alert('2');
alert('3');
}
</script>
</body>
</html>
📌 변수
<!DOCTYPE html>
<html>
<head>
<meta charset="UTF-8">
<title> LOGIN </title>
<link rel="stylesheet" href="login.css">
</head>
<body>
<h1>Login</h1>
<form>
ID : <input id="txt_id" class="login_inputs" type="text">
<br>
PW : <input class="login_inputs" type="password">
<br>
<input id ="btn_login" type="button" value="login"
onclick="popId()">
</form>
<script>
function popId() {
let userId = document.getElementById('txt_id').value;
if (!userId) {
alert('아이디를 입력해주세요.');
}
else {
alert(userId);
}
}
function myFunction() {
alert('1');
alert('2');
alert('3');
}
</script>
</body>
</html>
var : 요즘 사용하지 않음.let : 중복 선언 불가. 재할당 가능. const : 중복 선언 불가. 재할당 불가.
📌 외부 스크립트
<!DOCTYPE html>
<html>
<head>
<meta charset="UTF-8">
<title> LOGIN </title>
<link rel="stylesheet" href="login.css">
<script type="text/javascript" src="login.js"></script>
</head>
<body>
<h1>Login</h1>
<form>
ID : <input id="txt_id" class="login_inputs" type="text">
<br>
PW : <input class="login_inputs" type="password">
<br>
<input id ="btn_login" type="button" value="login"
onclick="popId()">
</form>
</body>
</html>
function compareVariable() {
let num1 = 10;
const num2 = 30;
num1 = 20;
alert('num1 : ' + num1);
}
function popId() {
let userId = document.getElementById('txt_id').value;
if (!userId) {
alert('아이디를 입력해주세요.');
}
else {
alert(userId);
}
}
function myFunction() {
alert('1');
alert('2');
alert('3');
}
Part6. 실전! 쇼핑몰 프로젝트 - 프론트엔드
📁 CH08. 프로젝트 - 프론트엔드
<div style="display:grid; grid-template-columns: 1fr 1fr 1fr;"></div>
display: grid;
- grid container로 만듦.
- 자식 요소들을 그리드 형태로 배치할 수 있음.
grid-template-columns: 1fr 1fr 1fr;
- grid container의 열을 정의함.
- '1fr', 남은 공간을 동등한 비율로 분할한다는 것.
1fr 1fr 1fr;은 세 개의 열을 가지고 각 열이 동일한 너비를 가지도록 설정함.
<table> : 표를 생성하는 가장 상위 태그
<th> : 표의 제목을 나타내는 태그<tr> : 행을 나타내는 태그<td> : 열을 나타내는 태그
table {
margin-left: auto;
margin-right: auto;
}