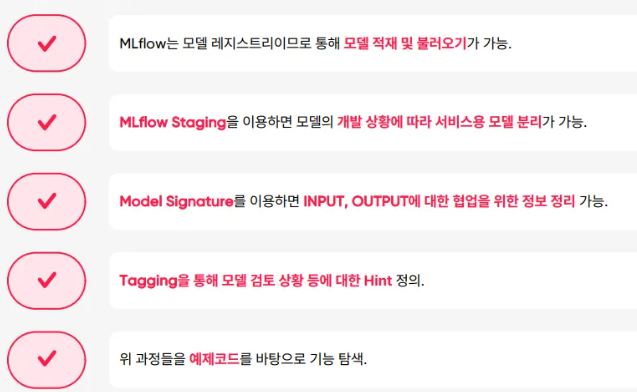
MLflow의 주요 기능
1. 모델 추적 및 분리 (Model Tracking & Isolation):
import mlflow

# 실험 시작
mlflow.set_experiment("ecommerce_recommendation")

with mlflow.start_run() as run:
    # 파라미터 로깅
    params = {
        "n_components": 100,
        "learning_rate": 0.01,
        "batch_size": 64
    }
    mlflow.log_params(params)

    # 모델 학습 중 메트릭 로깅
    for epoch in range(10):
        metrics = {
            "train_loss": 0.567 - epoch * 0.05,
            "validation_accuracy": 0.85 + epoch * 0.01
        }
        mlflow.log_metrics(metrics, step=epoch)

    # 모델 아티팩트 저장
    mlflow.pytorch.log_model(model, "recommendation_model")
2. MLflow Staging을 통한 서비스용 모델 분리:
from mlflow.tracking import MlflowClient

client = MlflowClient()

# 모델 스테이징 예시
model_name = "recommendation_model"
model_version = 1

# 개발 단계별 모델 관리
# 1. 개발 단계
client.transition_model_version_stage(
    name=model_name,
    version=model_version,
    stage="Staging"  # 테스트 환경
)

# 2. 검증 후 프로덕션 이동
client.transition_model_version_stage(
    name=model_name,
    version=model_version,
    stage="Production"  # 실제 서비스
)
3. Model Signature를 통한 입출력 정보 정의:
from mlflow.models import infer_signature
import numpy as np

# 입력 예시 데이터
input_example = np.array([[1, 0, 1, 0, 1],  # 사용자-아이템 상호작용
                         [0, 1, 0, 1, 0]])

# 모델 예측
output_example = model.predict(input_example)

# 시그니처 생성
signature = infer_signature(
    input_example,  # 입력 형식: (batch_size, n_items)
    output_example  # 출력 형식: (batch_size, n_recommendations)
)

# 시그니처와 함께 모델 저장
mlflow.pytorch.log_model(
    model,
    "recommendation_model",
    signature=signature,
    input_example=input_example
)
4. Tagging을 통한 모델 정보 관리:
# 실험에 태그 추가
with mlflow.start_run() as run:
    mlflow.set_tag("model_type", "collaborative_filtering")
    mlflow.set_tag("dataset_version", "v2.0")
    mlflow.set_tag("target_users", "electronics_category")

    # 모델 버전에 태그 추가
    client = MlflowClient()
    client.set_model_version_tag(
        name="recommendation_model",
        version=1,
        key="performance_status",
        value="high_precision"
    )

    # 실험 검색을 위한 태그 활용
    runs = client.search_runs(
        experiment_ids=["123"],
        filter_string="tags.model_type = 'collaborative_filtering'"
    )
5. 메타데이터 기반 실험 관리:
# 메타데이터 로깅
with mlflow.start_run() as run:
    # 실험 환경 메타데이터
    mlflow.set_tags({
        "developer": "kim.data.scientist",
        "dataset_date": "2024-03-21",
        "purpose": "ab_test_candidate"
    })

    # 모델 성능 메타데이터 로깅
    metrics = {
        "precision@10": 0.85,
        "recall@10": 0.76,
        "ndcg@10": 0.82
    }
    mlflow.log_metrics(metrics)

    # 학습 아티팩트 저장
    mlflow.log_artifact("feature_importance.png")
    mlflow.log_artifact("confusion_matrix.png")
예시 사용 시나리오:
# 1. 모델 개발 단계
with mlflow.start_run(run_name="model_development") as run:
    # 파라미터 설정
    params = {...}
    mlflow.log_params(params)

    # 모델 학습
    model = train_model(params)

    # 성능 평가
    metrics = evaluate_model(model)
    mlflow.log_metrics(metrics)

    # 모델 저장
    signature = infer_signature(X_example, y_example)
    mlflow.pytorch.log_model(model, "model", signature=signature)

    # 태깅
    mlflow.set_tags({
        "stage": "development",
        "version": "v1.0",
        "developer": "team_a"
    })

# 2. 스테이징 단계
client = MlflowClient()
client.transition_model_version_stage(
    name="recommendation_model",
    version=1,
    stage="Staging"
)

# 3. 프로덕션 배포
if validation_successful:
    client.transition_model_version_stage(
        name="recommendation_model",
        version=1,
        stage="Production"
    )
이런 방식으로 MLflow를 사용하면:
- 모델 개발 과정의 체계적 관리
- 실험 결과의 재현성 보장
- 모델 배포 프로세스 자동화
- 성능 모니터링 및 추적
- 팀 협업 효율성 향상
등의 이점을 얻을 수 있습니다.

시리즈를 기반으로 작성하였습니다.