
🍄 레이아웃을 분리하여 보자!
지금까지는 준비된 nodes 와 edges를 Reactflow 에 담아줬다면,
이제부터는 툴에서 직접 끌어다가 도형을 그리는 틀을 잡아보려고 한다.
기존의 하나의 컴포넌트에서 만들어진 코드를 다음과 같이 두 컴포넌트 영역으로 분리해보고자 한다.

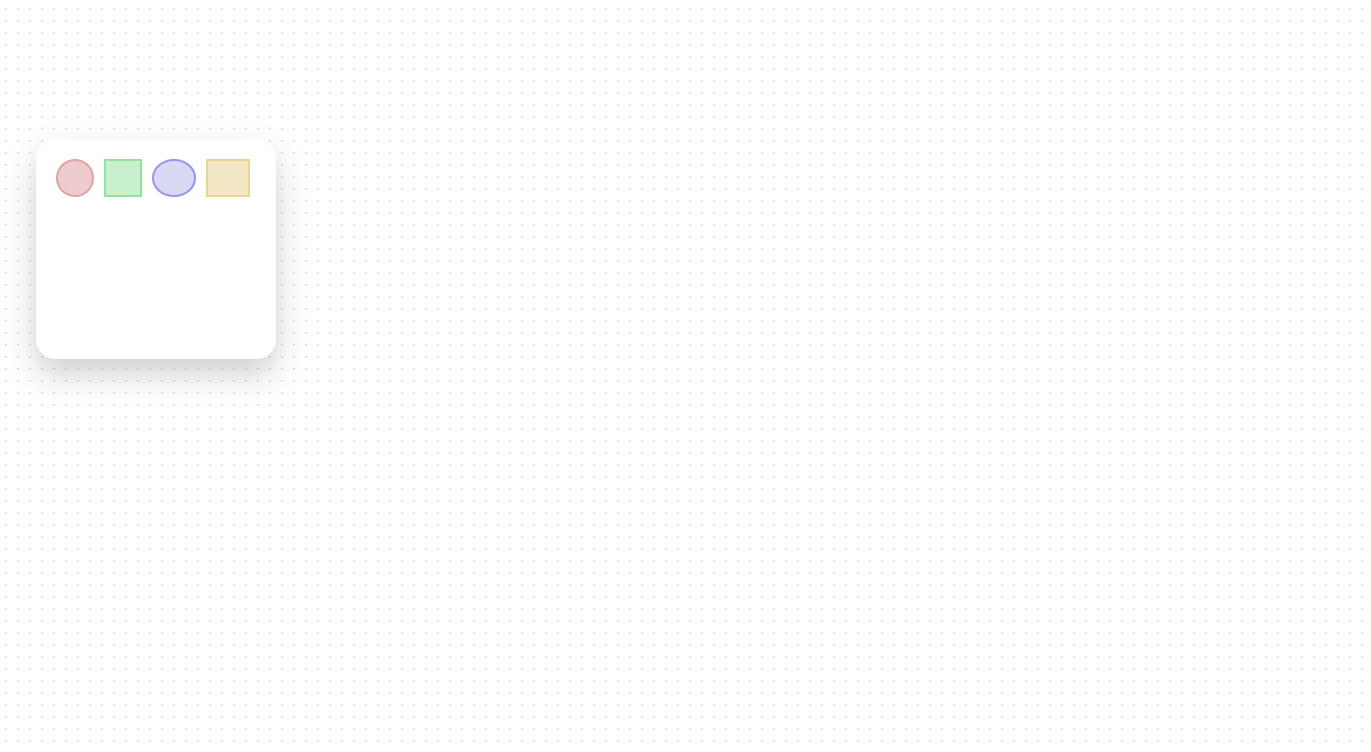
EditorTools 에는 간단한 모형 3가지를 두고,
해당 모형이 ReactFlowCanvas 에서 자유롭게 생성되도록 작업을 해볼 것이다.
먼저 파일을 분리하면서, EditorTools 에 대해 간단한 스타일링을 입히면 다음과 같이 표현해볼 수 있다.
🍄 EditorTools.tsx
import styled from "styled-components";

const EditorTools = () => {
  return (
    <Container>
      <div className="test1" />
      <div className="test2" />
      <div className="test3" />
      <div className="test4" />
    </Container>
  );
};
export default EditorTools;
const Container = styled.div`
  position: fixed;
  top: 150px;
  left: 50px;
  width: 200px;
  height: 180px;
  border-radius: 20px;
  background-color: #fff;
  box-shadow: 0 15px 30px 0 rgba(8, 7, 45, 0.2);
  z-index: 999;
  padding: 20px;
  display: flex;
  flex-wrap: wrap;
  gap: 10px;

  > div {
    width: 34px;
    height: 34px;
    border: 2px solid;
    cursor: pointer;
  }
  .test1 {
    border-radius: 100%;
    border-color: #e9acac;
    background-color: #f1d3d3;
  }
  .test2 {
    border-color: #99e7a0;
    background-color: #cff2d2;
  }
  .test3 {
    width: 40px;
    height: 34px;
    border-radius: 100%;
    border-color: #9d9df1;
    background-color: #ddddf6;
  }
  .test4 {
    width: 40px;
    height: 34px;
    border-color: #f1d996;
    background-color: #f5ebcc;
  }
`;
🍄 ReactFlowCanvas.tsx
/* eslint-disable @typescript-eslint/no-unused-vars */
import ReactFlow, {
  Background,
  Controls,
  MiniMap,
  Node,
  Edge,
  Connection,
  addEdge,
} from "reactflow";
import styled from "styled-components";
import CustomNode from "./CustomNode";
import { useCallback } from "react";

const NodeTypes = {
  custom: CustomNode,
};

interface IProps {
  nodesState: {
    nodes: Node<Node[], string | undefined>[];
    setNodes: React.Dispatch<
      React.SetStateAction<Node<Node[], string | undefined>[]>
    >;
    onNodesChange: unknown;
  };
  edgesState: {
    edges: Edge<Edge[]>[];
    setEdges: React.Dispatch<React.SetStateAction<Edge<Edge[]>[]>>;
    onEdgesChange: unknown;
  };
}

const ReactFlowCanvas = ({ nodesState, edgesState }: IProps) => {
  const { nodes, setNodes, onNodesChange } = nodesState;
  const { edges, setEdges, onEdgesChange } = edgesState;
  const onConnect = useCallback(
    (params: Edge | Connection) => setEdges((eds) => addEdge(params, eds)),
    [setEdges]
  );
  return (
    <ReactFlowStyled
      nodes={nodes}
      edges={edges}
      onNodesChange={onNodesChange}
      onEdgesChange={onEdgesChange}
      onConnect={onConnect}
      nodeTypes={NodeTypes}
    >
      <Controls />
      <MiniMap />
      <Background gap={12} size={1} />
    </ReactFlowStyled>
  );
};
export default ReactFlowCanvas;

const ReactFlowStyled = styled(ReactFlow)`
  .react-flow__node-custom {
    width: 120px;
    height: 120px;
    background: conic-gradient(
      from -160deg at 50% 50%,
      #e92a67 0deg,
      #a853ba 120deg,
      #2a8af6 240deg,
      #e92a67 360deg
    );
    border-radius: 100%;
    color: #fff;
    display: flex;
    align-items: center;
    justify-content: center;
  }
`;
🍄 ReactFlowExample.tsx
import { useNodesState, useEdgesState } from "reactflow";

import "reactflow/dist/style.css";

import EditorTools from "./EditorTools";
import ReactFlowCanvas from "./ReactFlowCanvas";

const ReactFlowExample = () => {
  const [nodes, setNodes, onNodesChange] = useNodesState([]);
  const [edges, setEdges, onEdgesChange] = useEdgesState([]);

  return (
    <div style={{ width: "100vw", height: "100vh" }}>
      <EditorTools />
      <ReactFlowCanvas
        nodesState={{
          nodes,
          setNodes,
          onNodesChange,
        }}
        edgesState={{
          edges,
          setEdges,
          onEdgesChange,
        }}
      />
    </div>
  );
};
export default ReactFlowExample;
위와같이 파일을 분리하면 아래 이미지와 같은 형태로 잡힌다.
다음 포스팅에서는 EditorTools에서 도형을 드롭 다운하여, nodes 를 추가하는 방법에 대해 다루어보겠다.

web developer