HTTP 헤더 정보 조회
@Slf4j
@RestController
public class RequestHeaderController {

    @RequestMapping("/headers")
    public String headers(HttpServletRequest request, HttpServletResponse response
            , HttpMethod httpMethod, Locale locale, @RequestHeader MultiValueMap<String, String> headerMap
            , @RequestHeader("host") String host, @CookieValue(value = "myCookie", required = false) String cookie) {
        log.info("request={}", request);
        log.info("response={}", response);
        log.info("httpMethod={}", httpMethod);
        log.info("locale={}", locale);
        log.info("headerMap={}", headerMap);
        log.info("header host={}", host);
        log.info("myCookie={}", cookie);

        return "OK";
    }
}- HttpServletRequest
- HttpServletResponse
- HttpMethod : HTTP 메서드를 조회한다. org.springframework.http.HttpMethod
- Locale : Locale 정보를 조회한다.
- @RequestHeader MultiValueMap<String, String> headerMap
- 모든 HTTP 헤더를 MultiValueMap 형식으로 조회한다.
- Map과 유사한데, 하나의 키에 여러 값을 받을 수 있다.
- HTTP header, HTTP 쿼리 파라미터와 같이 하나의 키에 여러 값을 받을 때 사용한다.
- KeyA=value1&KayA=value2
- @RequestHeader("host") String host
- 특정 HTTP 헤더를 조회한다.
- 속성
- 필수 값 여부 : required
- 기본 값 속성 : defaultValue
- @CookieValue(value = "myCookie", required = false) String cookie
- 특정 쿠키를 조회한다.
- 속성
- 필수 값 여부 : required
- 기본 값 : defaultValue
HTTP 요청 파라미터
HttpServletRequest - getParameter()
@RequestMapping("/request-param-v1")
    public void requestParamV1(HttpServletRequest request, HttpServletResponse response) throws IOException {
        String username = request.getParameter("username");
        int age = Integer.parseInt(request.getParameter("age"));
        log.info("username={}, age={}", username, age);

        response.getWriter().write("OK");
    }
⭐️ @RequestParam
	@ResponseBody
    @RequestMapping("/request-param-v2")
    public String requestParamV2(@RequestParam("username") String memberName, @RequestParam("age") int memberAge) {
        log.info("memberName={}, memberAge={}", memberName, memberAge);
        return "OK";
}- @ResponseBody를 작성하지 않으면 OK라는 view를 찾지만, 적어주면 HTTP message Body에 OK라는 값을 담아 반환 시켜준다. (@RestConotroller와 같은 역할)
- @RequestParam : 파라미터 이름으로 바인딩
- 파라미터 명과, 변수 명이 같을경우 ("username") 같은 것도 생략 가능하다.
요청 파라미터와 단순 타입 변수명이 같을 경우 생략 가능
	@ResponseBody
    @RequestMapping("/request-param-v4")
    public String requestParamV4(String username, int age) {
        log.info("memberName={}, memberAge={}", username, age);
        return "OK";
}- String, int, Integer 등의 단순 타입이면 @ReqeustParam도 생략 가능하다.
참고
@RequestParam, @PathVariable, @Autowired, @ConfigurationProperties
- 위 어노테이션 사용 시, Spring Boot 3.2버전 부터 매개변수의 이름을 인식하지 못하는 문제가 있다고 한다.
- Spring Boot 3.2버전 부터 자바 컴파일러에 -parameters 옵션을 넣어주어야 어노테이션의 이름을 생략할 수 있다.
해결 방안
- 컴파일 시점에 -parameters 옵션 적용
- IntelliJ IDEA에서 File -> Settings를 연다. (Mac은 IntelliJ IDEA -> Settings)
- Build, Execution, Deployment → Compiler → Java Compiler로 이동한다.
- Additional command line parameters라는 항목에 다음을 추가한다.
-parameters- out 폴더를 삭제하고 다시 실행한다. 꼭 out 폴더를 삭제해야 다시 컴파일이 일어난다.
- Gradle을 사용해서 빌드 및 실행한다.
Build, Execution, Deployment -> Build Tools -> Gradle에서
Build and run using를 IntelliJ IDEA로 선택한 경우에만 발생한다. Gradle로 선택한 경우에는 Gradle이 컴파일 시점에 해당 옵션을 자동으로 적용해준다.
@RequestParam.required
	@ResponseBody
    @RequestMapping("/request-param-required")
    public String requestParamRequired(@RequestParam(required = true) String username,
                                       @RequestParam(required = false) Integer age) {
        log.info("memberName={}, memberAge={}", username, age);
        return "OK";
}- @RequestParam.required
- 파라미터 필수 여부
- 기본값이 파라미터 필수("true")이다.
- username이 없으면 400 예외가 발생한다.
- 그러나 username= 이렇게 넘어오면 빈 문자열이 넘어온 것으로 인식하여 성공한다.
defaultValue
    @ResponseBody
    @RequestMapping("/request-param-default")
    public String requestParamDefault(@RequestParam(required = true, defaultValue = "guest") String username,
                                       @RequestParam(required = false, defaultValue = "-1") int age) {
        log.info("memberName={}, memberAge={}", username, age);
        return "OK";
}- 파라미터에 값이 없는경우 defaultValue를 사용하면 기본 값을 적용할 수 있다.
- 이미 기본 값이 있기 때문에 required는 의미가 없다.
- 빈 문자열이 넘어와도 defaultValue에 설정한 기본값이 적용된다.
파라미터를 Map으로 조회
    @ResponseBody
    @RequestMapping("/request-param-map")
    public String requestParamMap(@RequestParam Map<String, String> paramMap) {
        log.info("memberName={}, memberAge={}", paramMap.get("username"), paramMap.get("age"));
        return "OK";
}- 파라미터를 Map, MultiValueMap으로 조회할 수 있다.
- @RequestParam Map
- Map(key=value)
- @RequestParam MultiValueMap
- MultiValureMap(key=[value1, value2, ...]-> ex) (key=userIds, value=[id1, id2])
- 파라미터의 값이 1개가 확실하다면 Map을, 그렇지않다면 MultiValueMap을 사용하면 된다.
⭐️ @ModelAttribute
	@ResponseBody
    @RequestMapping("/model-attribute-v1")
    public String modelAttributeV1(@ModelAttribute HelloData helloData) {
        log.info("memberName={}, age={}", helloData.getUsername(), helloData.getAge());
        return "OK";
}- @ModelAttribute를 사용하면 객체가 생성되고, 요청 파라미터의 값이 들어간다.
동작 원리
- HelloData 객체를 생성한다.
- 요청 파라미터의 이름으로 HelloData 객체의 프로퍼티를 찾는다.
- 해당 프로퍼티의 setter를 호출해서 파라미터의 값을 입력(바인딩) 한다.
- ⚠️ 바인딩 된 타입이 다를경우 BindException이 발생한다.
@ModelAttribute 생략
   @ResponseBody
    @RequestMapping("/model-attribute-v2")
    public String modelAttributeV2(HelloData helloData) {
        log.info("memberName={}, age={}", helloData.getUsername(), helloData.getAge());
        return "OK";
}- @ModelAttribute는 argument resolver로 지정해준 타입 외 생략 가능하다.
⭐️ 참고 (name 필드)
public String addItemV2(@ModelAttribute("data") Item item) {
        itemRepository.save(item);
        return "basic/item";
}- @ModelAttribute에 ("name")속성을 사용하면 model에 @ModelAttribute로 지정한 객체를 자동으로 넣어준다
- model.addAttribute("data", item)과 같은 기능이다.
- 만약 name속성인 ("data")를 생략하면 기본적으로 클래스의 첫글자를 소문자로 바꾼후 모델에 넣어준다.
- ex) model.addAttribute("item", item)
- 물론 바로 위의 생략 처럼 @ModelAttribute를 아예 적지 않아도 같은 기능을 제공한다
단순 텍스트
HttpServletRequest 통해서 받기
    @PostMapping("/request-body-string-v1")
    public void requestBodyString(HttpServletRequest request, HttpServletResponse response) throws IOException {
        ServletInputStream inputStream = request.getInputStream();
        String messageBody = StreamUtils.copyToString(inputStream, StandardCharsets.UTF_8);

        log.info("messageBody={}", messageBody);

        response.getWriter().write("OK");
    }
InputStream, OutputStream
	@PostMapping("/request-body-string-v2")
    public void requestBodyStringV2(InputStream inputStream, Writer responseWriter) throws IOException {

        String messageBody = StreamUtils.copyToString(inputStream, StandardCharsets.UTF_8);
        log.info("messageBody={}", messageBody);
        responseWriter.write("OK");
}- InputStream(Reader) : HTTP 요청 메시지 바디의 내용을 직접 조회
- InputStream(Writer) : HTTP 응답 메시지 바디에 직접 결과 출력
HttpEntity
	@PostMapping("/request-body-string-v3")
    public HttpEntity<String> requestBodyStringV2(HttpEntity<String> httpEntity) throws IOException {

        String messageBody = httpEntity.getBody();
        log.info("messageBody={}", messageBody);
        return new ResponseEntity<>("OK", HttpStatus.OK);
}- HttpEntity : HTTP header, body 정보를 편리하게 조회
- 메시지 바디 정보를 직접 조회
- 요청 파라미터를 조회하는 기능과 관계 없음 (@RequestParam, @ModelAttibute)
- HttpEntity는 응답에도 사용 가능
- 메시지 바디 정보 직접 반환
- 헤더 정보 포함 가능
- view 조회X
- HttpEntity를 상속받은 다음 객체들도 같은 기능을 제공
- RequestEntity
- HttpMethod, url 정보가 추가, 요청에서 사용
- ResponseEntity
- HTTP 상태 코드 설정 가능, 응답에서 사용
- return new ResponseEntity<String>("Hello World", responseHeaders, HttpStatus.CREATED)
- RequestEntity
⭐️⭐️ @RequestBody
    @PostMapping("/request-body-string-v4")
    public String requestBodyStringV4(@RequestBody String messageBody) throws IOException {
        log.info("messageBody={}", messageBody);
        return "OK";
}- 실무에서 가장 많이 쓰는 방법이다.
- @RequestBody를 사용하면 HTTP 메시지 바디 정보를 편리하게 조회할 수 있다.
- ⚠️ 헤더 정보가 필요하다면 HttpEntity또는 @RequestHeader를 사용하면 된다.
- 메시지 바디를 직접 조회하는 기능은 요청 파라미터를 조회하는 (@ReqeustParam, @ModelAttribute) 와는 전혀 관계가 없다
JSON 데이터
HttpServletRequest로 받기
    @PostMapping("request-body-json-v1")
    public void requestBodyJsonV1(HttpServletRequest request, HttpServletResponse response) throws IOException {
        ServletInputStream inputStream = request.getInputStream();
        String messageBody = StreamUtils.copyToString(inputStream, StandardCharsets.UTF_8);

        log.info("messageBody: {}", messageBody);
        HelloData helloData = objectMapper.readValue(messageBody, HelloData.class);
        log.info("username={}, age={}", helloData.getUsername(), helloData.getAge());

        response.getWriter().write("OK");
    }
@ReqeustBody로 받기
String으로 받은 후 objectMapper 파싱
    @ResponseBody
    @PostMapping("request-body-json-v2")
    public String requestBodyJsonV2(@RequestBody String messageBody) throws IOException {

        log.info("messageBody: {}", messageBody);
        HelloData helloData = objectMapper.readValue(messageBody, HelloData.class);
        log.info("username={}, age={}", helloData.getUsername(), helloData.getAge());

        return "OK";
    }
⭐️ 바로 객체형태로 받기
@ResponseBody
@PostMapping("request-body-json-v3")
public String requestBodyJsonV3(@RequestBody HelloData helloData) {
log.info("username={}, age={}", helloData.getUsername(), helloData.getAge());
return "OK";
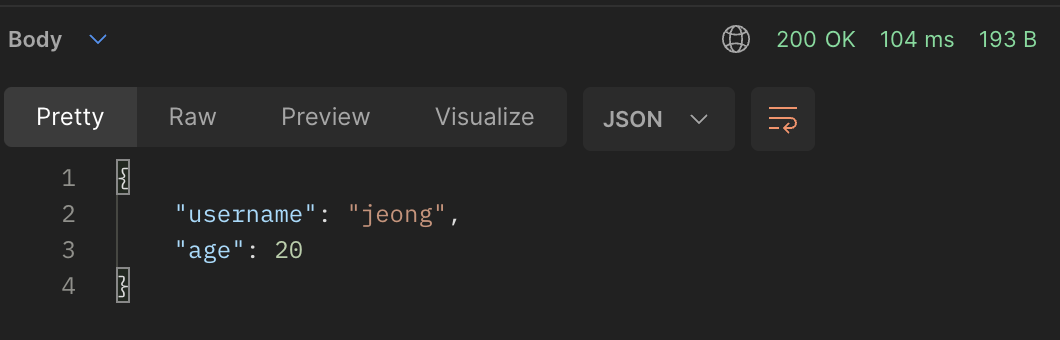
}⭐️ 리턴형식 동일
	@ResponseBody
    @PostMapping("request-body-json-v5")
    public HelloData requestBodyJsonV5(@RequestBody HelloData helloData) {
        log.info("username={}, age={}", helloData.getUsername(), helloData.getAge());
        return helloData;
}- 리턴 형식도 들어온 HelloData와 동일하게 할 수 있다.
- JSON형식으로 리턴된다
@RequestBody 객체 파라미터
- @RequestBody에 직접 만든 객체를 지정할 수 있다.
- HttpEntitym @RequestBody를 사용하면 HTTP 메시지 컨버터가 HTTP 메시지 바디의 내용을 우리가 원하는 문자나 객체등오로 변환해준다.
- ⚠️ @RequestBody는 생략이 불가능하다!
- 생략하면 @ModelAttribute가 적용되어서 파라미터에서 찾아 오려고 한다.
- ⚠️ HTTP 요청시 content-type이 application/json 인지 꼭 확인해야한다.
- 그래야 HTTP 메시지 컨버터가 실행 된다.
HttpEntity
	@ResponseBody
    @PostMapping("request-body-json-v4")
    public String requestBodyJsonV4(HttpEntity<HelloData> httpEntity) {
        HelloData data = httpEntity.getBody();
        log.info("username={}, age={}", data.getUsername(), data.getAge());
        return "OK";
    }
Java Back-End 2022.11.01 💻~ing