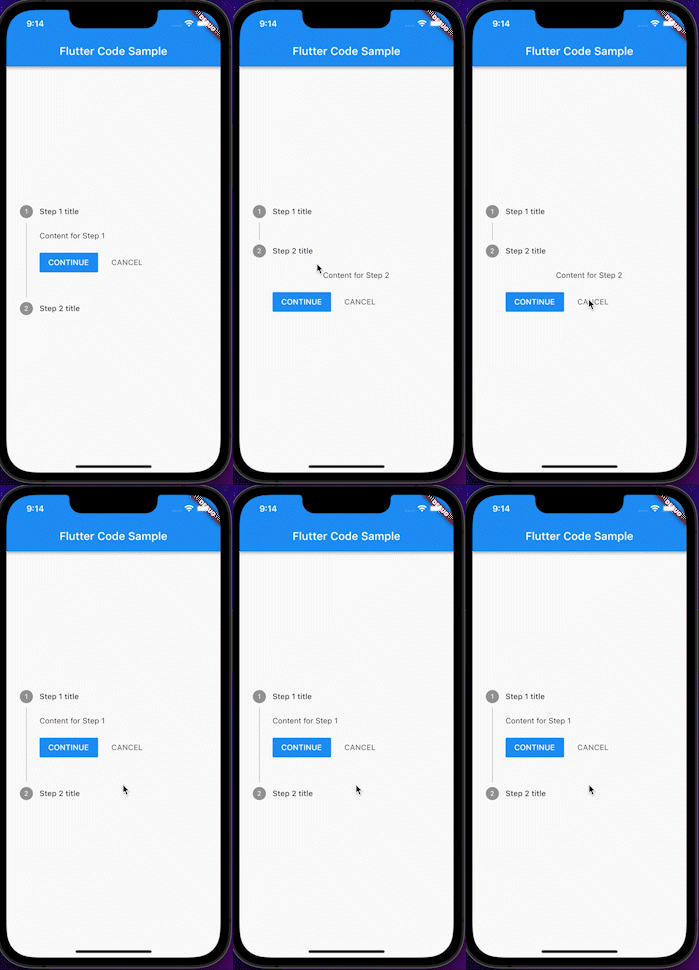
stepper class는 말 그대로 step 즉 순서를 나타낼 때 주로 사용한다.
- 순서나 절차를 나타낼 때 사용한다.
- 한 단계에서 다른 단계를 완료해야 하는 경우 유용하다.
- 전체 양식을 제출하기 위해 여러 단계를 거쳐야 하는 양식의 경우에 특히 유용하다.
바로 예시를 확인해보자
example
Widget build(BuildContext context) {
return Stepper(
currentStep: _index,
onStepCancel: () {
if (_index > 0) {
setState(() {
_index -= 1;
});
}
},
onStepContinue: () {
if (_index <= 0) {
setState(() {
_index += 1;
});
}
},
onStepTapped: (int index) {
setState(() {
_index = index;
});
},
steps: <Step>[
Step(
title: const Text('Step 1 title'),
content: Container(
alignment: Alignment.centerLeft,
child: const Text('Content for Step 1')),
),
const Step(
title: Text('Step 2 title'),
content: Text('Content for Step 2'),
),
],
);
}
}전체 코드: https://api.flutter.dev/flutter/material/Stepper-class.html
Out Put

이렇게 continue를 누르면 다음 단계로 넘어가고, cancel을 누르면 이전 단계로 넘어가는 것을 볼 수 있다.
코드를 자세히 설명해보면, _index 라는 이름의 변수를 설정하고 continue가 선택되면 1을 더한다.
만약 cancel이 선택되면 1을 뺀다.
해당 변수가 0보다 큰 경우, 작은 경우를 구분하여 다음 단계로 넘어갈지, 남아있을지를 결정하도록 하고 있다.
이러한 논리를 바탕으로 stepper를 사용해 단계를 나타낼 수 있다.
