
리스트 화면 출력
-
src/main/resources - mapper -
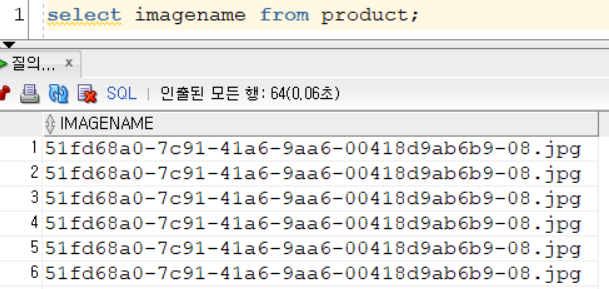
productMapper.xml수정화면 출력에 앞서 imagename을 출력 관련해 수정해 주어야 한다. DB에 저장된 imagename을 보면 아래처럼 우리가 UUID로 만들어 준 문자열만 들어가 있다.
그렇지만 우리가 이미지를 출력하려고 할 때 필요한 주소는
/images/imagename이다. 따라서mapper.xml에서 다음과 같이 해당 부분의 쿼리문을 바꿔 주어야 한다.<select id="findAll" resultType="com.example.demo.dto.ProductDto$ReadAll"> <![CDATA[ select * from ( select rownum as rnum, p.* from (select /*+ index_desc(product product_pk_pno)*/ pno, vendor, name, nvl(sumOfStar/nullif(countOfStar,0), 0.0) as star, #{imagePath} || imagename as imagename from product) p where rownum<=#{endRownum} ) where rnum>=#{startRownum} ]]> </select>
- 목록에 사진을 출력하기 위한 코드 수정
-
src/main/java - com.example.demo.service -
ProductServicepublic List<ProductDto.ReadAll> findAll(Integer startRownum, Integer endRownum, String imagePath); -
src/main/java - com.example.demo.dao;
List<ProductDto.ReadAll> products = productDao.findAll(startRownum, endRownum, imagePath);findAll 메소드에
imagePath파라미터를 추가해 준다.
- 목록 출력을 위한 컨트롤러 수정
- src/main/java - com.example.demo.controller.mvc -
ProductController@GetMapping({"/", "/product/list"}) public ModelAndView index(@RequestParam(defaultValue="1") Integer pageno) { Page page = service.readAll(pageno); return new ModelAndView("product/list").addObject(page); }
- 화면 출력
-
src/main/resources - templates - product -
list.html<!DOCTYPE html> <html> <head> <meta charset="UTF-8" xmlns:th="http://www.thymeleaf.org" xmlns:sec="http://www.thymeleaf.org/extras/spring-security"> <title>Insert title here</title> <meta name="viewport" content="width=device-width, initial-scale=1"> <link rel="stylesheet" href="https://maxcdn.bootstrapcdn.com/bootstrap/3.4.1/css/bootstrap.min.css"> <link rel="stylesheet" href="/css/main.css"> <link rel="stylesheet" href="https://www.w3schools.com/w3css/4/w3.css"> <script src="https://ajax.googleapis.com/ajax/libs/jquery/3.5.1/jquery.min.js"></script> <script src="https://maxcdn.bootstrapcdn.com/bootstrap/3.4.1/js/bootstrap.min.js"></script> <script src="//cdn.jsdelivr.net/npm/sweetalert2@11"></script> <script th:inline="javascript"> const page = /*[[${page}]]*/ function printProducts() { const $products = $("#products"); let $parent; $.each(page.products, function(idx, product) { if (idx%4 == 0) $parent = $('<div class="w3-row-padding w3-margin-top">').appendTo($products); const $outer = $('<div class="w3-quarter">').appendTo($parent); const $middle = $('<div class="w3-card">').appendTo($outer); const $a = $('<a>').attr('href', "/product/read?pno=" + product.pno).attr('title', product.name).appendTo($middle); $('<img>').attr('src', product.imagename).css('width', '100%').appendTo($a); const $inner = $('<div class="w3-container">').appendTo($middle); const str = product.vendor + "의 " + product.name + " " + product.star + "/5"; $('<h5>').text(str).appendTo($inner); }) } function printPagination() { const $pagination = $('#pagination'); const $ul = $('<ul class="pagination">').appendTo($pagination); if (page.prev > 0) { const $li = $('<li>').appendTo($ul); $('<a>').attr('href', '/product/list?pageno=' + page.prev).text("이전으로").appendTo($li); } for (let i = page.start; i <= page.end; i++) { const $li = $('<li>').appendTo($ul); $('<a>').attr('href', '/product/list?pageno=' + i).text(i).appendTo($li); if (i == page.pageno) $li.attr('class', 'active'); } if (page.next > page.end) { const $li = $('<li>').appendTo($ul); $('<a>').attr('href', '/product/list?pageno=' + page.next).text("다음으로").appendTo($li); } } $(document).ready(function() { printProducts(); printPagination(); }) </script> </head> <body> <div id="page"> <header th:replace="/fragments/header.html"> </header> <nav th:replace="/fragments/nav.html"> </nav> <div id="main"> <aside th:replace="/fragments/aside.html"> </aside> <section id="section"> <div id="products"> </div> <div id='pagination'> </div> </section> </div> <footer th:replace="/fragments/footer.html"> </footer> </div> </body> </html>상품 출력과 페이지네이션 모두 부트스트랩의 디자인을 이용했고, 이를 자바스크립트로 출력했다.
<ul class="pagination">
  <li><a href="#">1</a></li>
  <li class="active"><a href="#">2</a></li>
  <li><a href="#">3</a></li>
  <li><a href="#">4</a></li>
  <li><a href="#">5</a></li>
</ul>
이런 부트스트랩 식을 아래처럼 작성할 수 있다.
const $pagination = $('#pagination');
const $ul = $('<ul class="pagination">').appendTo($pagination);
for (let i = page.start; i <= page.end; i++) {
        const $li = $('<li>').appendTo($ul);
        $('<a>').attr('href', '/product/list?pageno=' + i).text(i).appendTo($li);
        if (i == page.pageno)
            $li.attr('class', 'active');
        }
🚨 부트스트랩을 사용할 때는 cdn 주소 가지고 오는 것을 잊지 않도록 주의한다.

못하다 보면 잘하게 되는 거야 ・ᴗ・̥̥̥