
🌱 Intro
- 리액트에서 Context를 사용해서 상태관리 할 수 있는 방법을 알아보도록 하겠습니다.
- Context는 컴포넌트가 중첩되어 있는 상황에서 상태 값을 전달하기 편리합니다.
- 예시를 살펴보면서 Context 개념에 대해서 자세히 보겠습니다.
🌱 1. Context
1-1. Context란?
- 어플리케이션에서 전반적으로 사용할 값을 관리합니다.
- 예) 사용자의 언어, 로그인 상태, UI 테마 등 환경 설정
- 주의 사항
- Context와 컴포넌트가 연동되면 컴포넌트를 재사용하기 어렵습니다.
- 자주 변경되는 상태인 경우, 사용하지 않는 것이 좋습니다.
❗ Context 내부의 값이 변경되면 Context를 사용하는 모든 자식 컴포넌트들이 리렌더링 됩니다.
1-2. 일반적인 전역 상태 관리 흐름
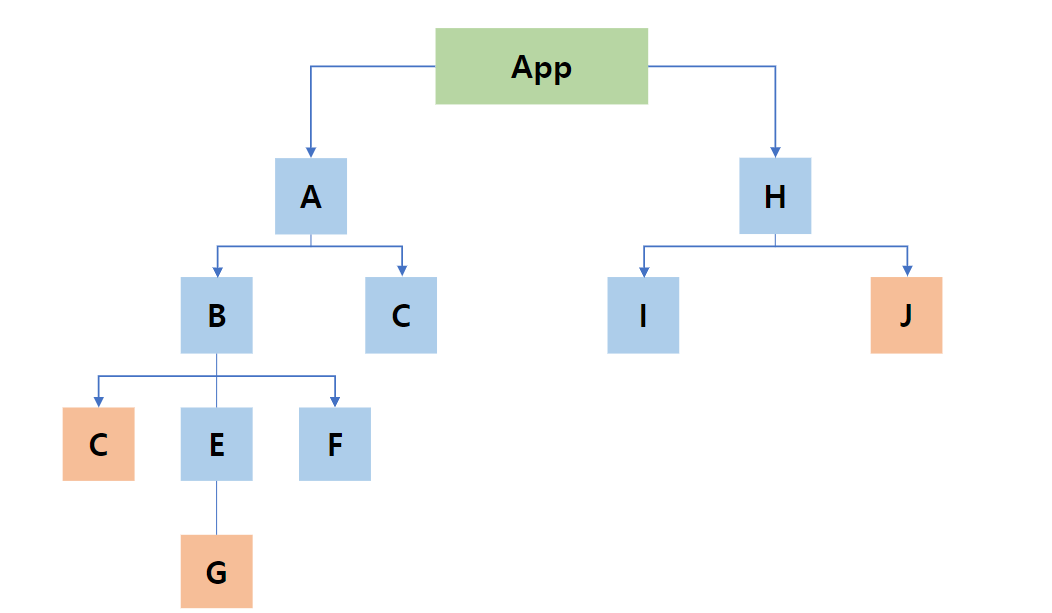
- 컴포넌트 여기저기서 필요한 데이터가 있는 경우
- 주로 최상위 컴포넌트인 App의 state에 넣어서 관리합니다.
- 주로 최상위 컴포넌트인 App의 state에 넣어서 관리합니다.
1-3. Props Drilling
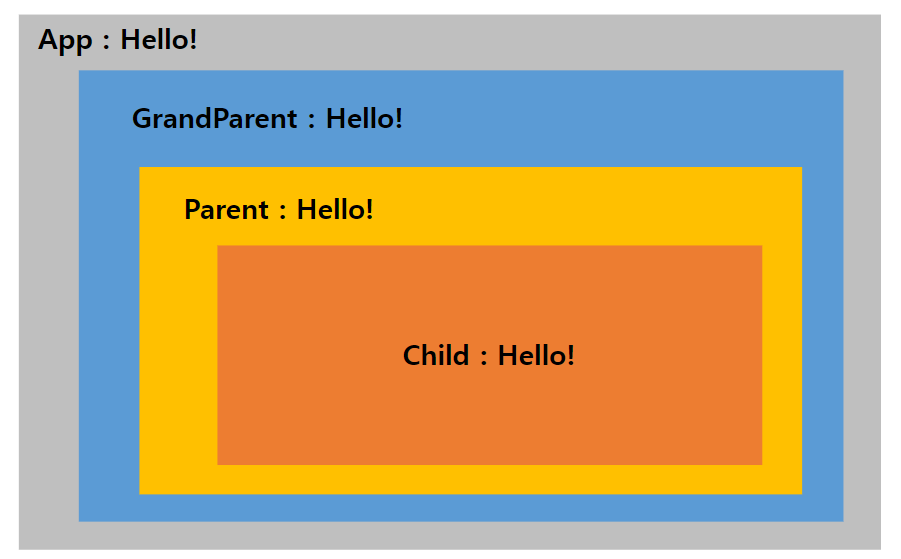
// App.js
function App() {
return <GrandParent value="Hello World!" /> // 출발
}
function GrandParent({ value }) {
return <Parent value={value} />
}
function Parent({ value }) {
return <Child value={value} />
}
function Child({ value }) {
return <Message value={value} />
}
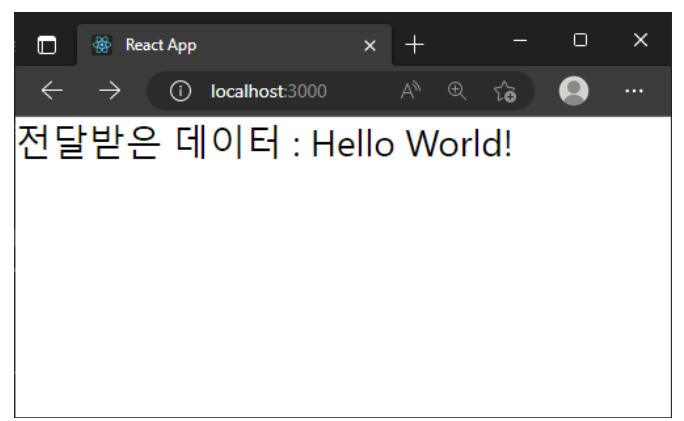
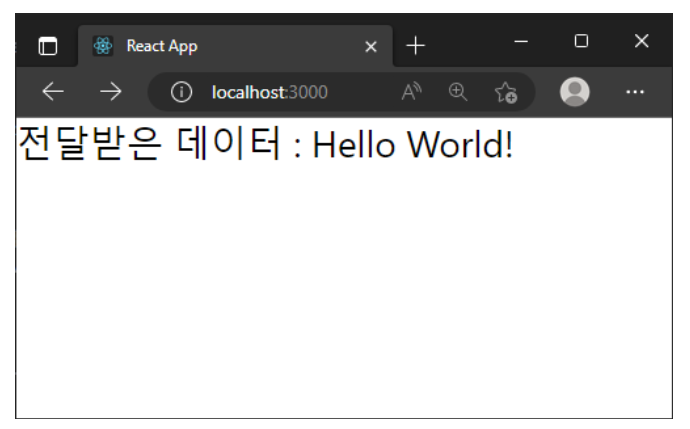
function Message({ value }) {
return <div>전달받은 데이터 : {value}</div> // 도착(😕)
}
export defualt App- 실행결과
1-4. Context를 사용한 전역 상태 관리 흐름
- 컴포넌트를 여기저기서 필요하 데이터가 있는 경우
- Context를 생성하여 한번에 원하는 값을 전달 받습니다.
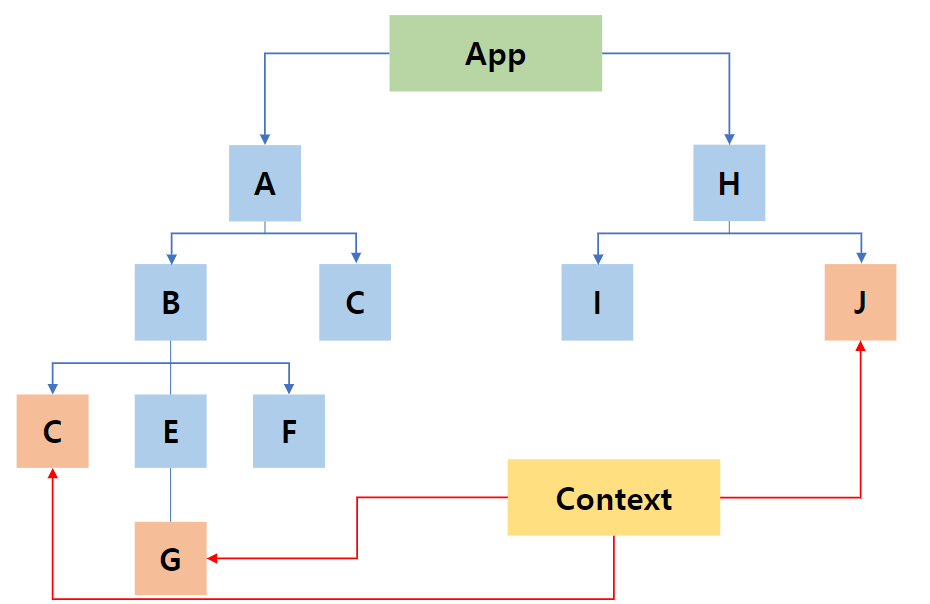
- Context를 생성하여 한번에 원하는 값을 전달 받습니다.
1-5. 사용방법
- Context 객체 생성
import { createContext } from 'react'

// MyContext 객체 생성
const MyContext = createContext()- Context 객체 내 Provider 컴포넌트를 통한 데이터 전달
- Provider 컴포넌트의 하위 컴포넌트는 Context의 데이터에 접근 가능합니다.
function App() {
  return (
    <MyContext.Provider value="Hello World!">
   	  <GrandParent /* (X) value="Hello World!" *//>
    </MyContext.Provider>
  )
}- Context 사용하기
// App.js
function App() { /* 생략 */ }

function GrandParent(/* (X) { value } */) {
  return <Parent /*(X) value={value} */ />
}

function Parent(/* (X) { value } */) {
  return <Child /*(X) value={value} */ />
}

function Child(/* (X) { value } */) {
  return <Message /*(X) value={value} */ />
}

function Message(/* (X) { value } */) {
  const value = useContext(MyContext) // 👈
  return <div>전달받은 데이터 : {value}</div>
}

export defualt App- 실행결과
1-6. 실습 - Context 파일 생성
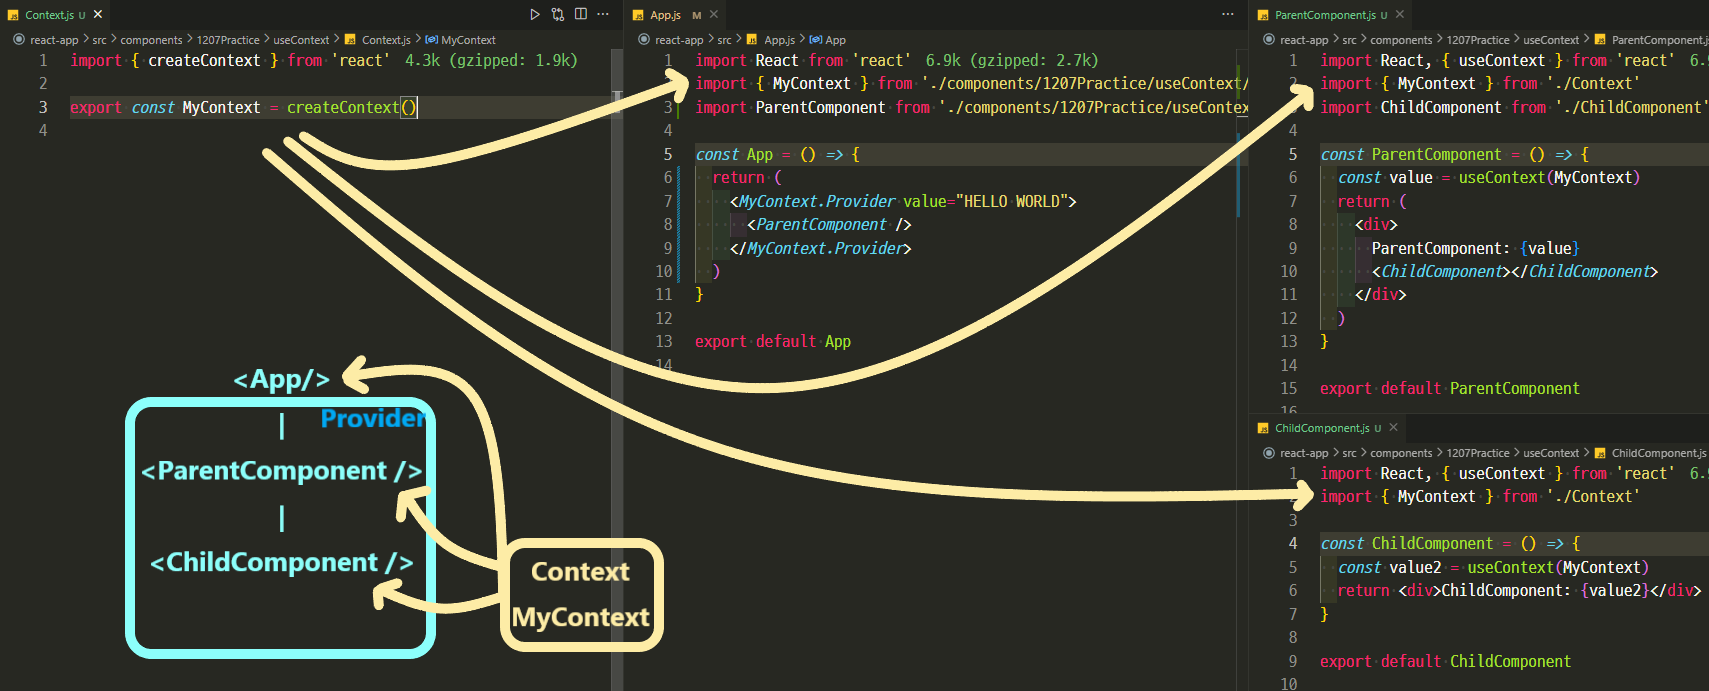
- Context.js
import { createContext } from 'react'
export const MyContext = createContext("")- ParentComponent.js
import ChildComponent from './ChildComponent'
import { MyContext } from './Context'
const ParentComponent = () => {
return (
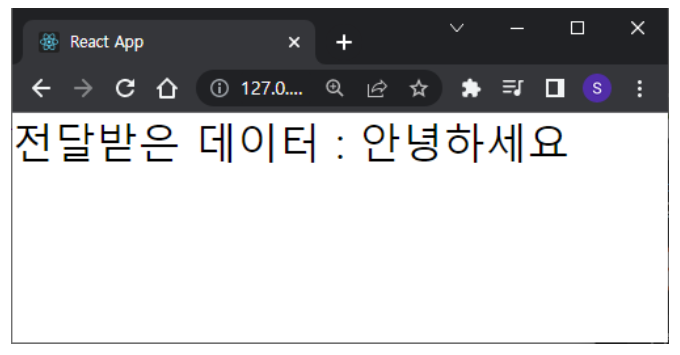
<MyContext.Provider value="안녕하세요">
<ChildComponent />
</MyContext.Provider>
)
}
export default ParentComponent- ChildComponent.js
import React, { useContext } from 'react'
import { MyContext } from './Context'

const ChildComponent = () => {
  const value = useContext(MyContext)
  return <div>전달받은 데이터 : {value}</div>
}-
실행결과
-
이미지로 이해하기
1-7. 기본값 지정
- createContext() 함수에 기본값 지정
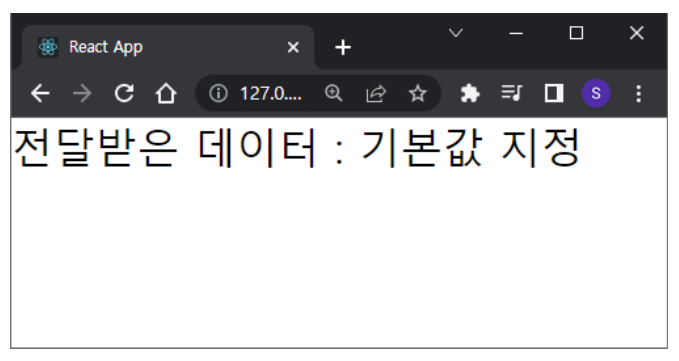
- 자식 컴포넌트에서 useContext() 함수를 사용하고 있는데, 부모 컴포넌트에서 Provider를 사용하지 않은 경우가 있습니다.
- value 값을 지정해주지 않았기 때문에 해당 값이 출력될 자리에 아무것도 나타나지 않습니다.
- 기본값을 설정하면 이러한 문제를 방지할 수 있습니다.
- 기본 값 지정 방법
const MyContext = createContext('Default Value')
기본값 지정 실습
- Context.js
import { createContext } from 'react'

export const MyContext = createContext("기본값 지정")- ParentComponent.js
import ChildComponent from './ChildComponent'
import { MyContext } from './Context'

const ParentComponent = () => {
  return (
    /*(X) <MyContext.Provider value="안녕하세요"> */
      <ChildComponent />
    /*(X) </MyContext.Provider> */
  )
}- 실행결과
- 이미지로 이해하기

1-8. 앱 전체 테마 변경
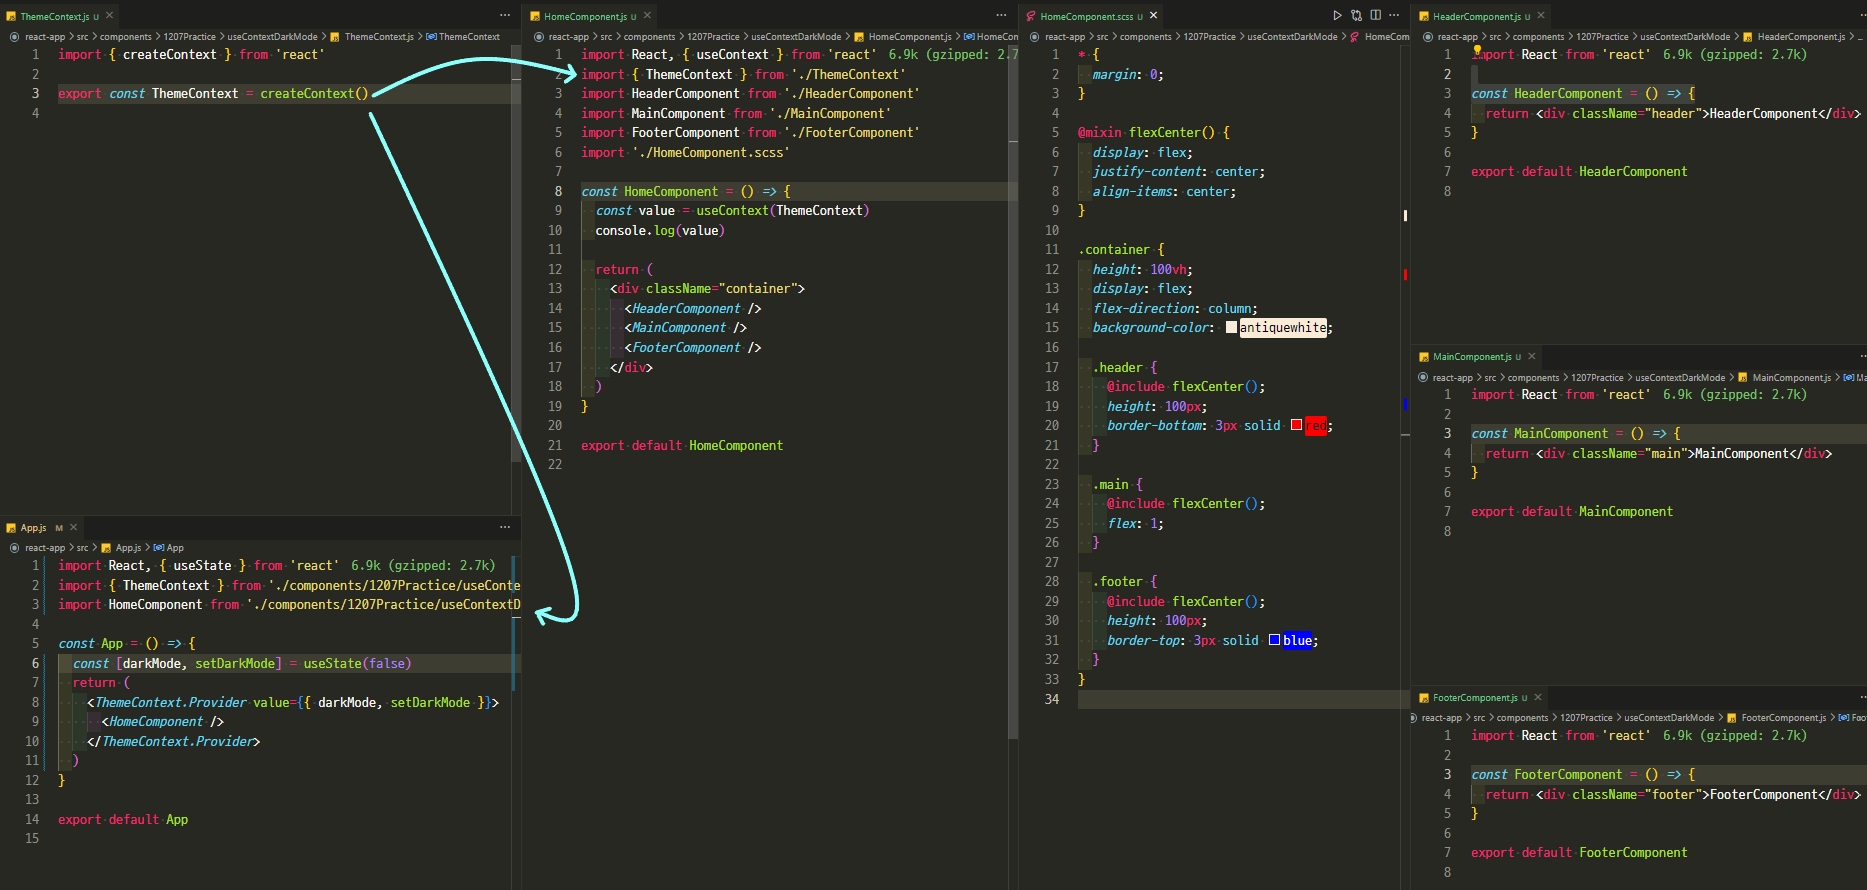
- ThemeContext.js
import { createContext } from 'react'

export const ThemeContext = createContext()- App.js
function App() {
  const [darkMode, setDarkMode] = useState(false)

  return (
    <ThemeContext.Provider value=({ darkMode, setDarkMode })>
      <HomeComponent />
    </ThemeContext.Provider>
  )
}- HomeComponent.js
import './HomeComponent.scss'
const HomeComponent = () => {
  const data = useContext(ThemeContext)
  console.log(data)

  return (
    <div className="container" >
      <HeaderComponent />
      <MainComponent />
      <FooterComponent />
    </div>
  )
}- HeaderComponent.js
const HeaderComponent = () => {
  return (
    <div>
      헤더
    </div>
  )
}

export default HeaderComponent- MainComponent.js
const MainComponent = () => {
  return (
    <div>
      메인
    </div>
  )
}

export default MainComponent- FooterComponent.js
const FooterComponent = () => {
  return (
    <div>
      푸터
    </div>
  )
}

export default FooterComponent- HomeComponent.scss
* {
  margin: 0;
}

.container {
  width: 100%;
  height: 100vh;
  display: flex;
  flex-direction: column;
}

@mixin flexCenter() {
  display: flex;
  justify-content: center;
  align-items: center;
  font-size: 30px;
}

.header {
  @include flexCenter();
  width: 100%;
  height: 100px;
  border-bottom: 3px solid gray;
}

.main {
  @include flexCenter();
  flex: 1;
}

.footer {
  @include flexCenter();
  width: 100%;
  height: 100px;
  border-top: 3px solid gray;
}-
실행결과
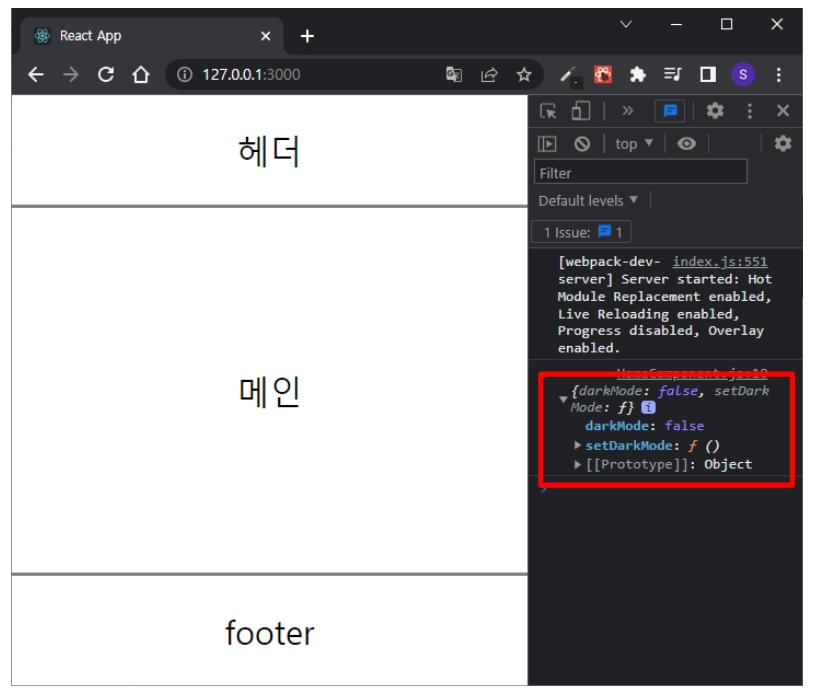
-
이미지로 이해하기
- HeaderComponent.js
const HeaderComponent = () => {
  const { darkMode, setDarkMode } = useContext(ThemeContext)

  const toggleDarkMode = () => {
    setDarkMode(!darkMode)
  }

  const theme = () => {
    backgroundColor : darkMode ? "black" : "white",
    color: darkMode ? "white" : "black",
  }

  return (
    <div className="header" style={theme}>
      헤더
      {
        darkMode
        ? (<button className="toggleBtn" onClick={toggleDarkMode}>
            😴
           </button>)
        : (<button className="toggleBtn" onClick={toggleDarkMode}>
            🤩
           </button>)
      }
    </div>
  )
}- HomeComponent.scss
.toggleBtn {
  background-color: transparent;
  border: none;
  font-size: 30px;
}- MainComponent.js
const MainComponent = () => {
  const { darkMode } = useContext(ThemeContext)

  const theme = {
    background: darkMode ? "black" : "white",
    color : darkMode ? "white" : "black",
  }

  return (
    <div className="main" style={theme}>
      메인
    </div>
  )
}- FooterComponent.js
const FooterComponent = () => {
  const { darkMode } = useContext(ThemeContext)

  const theme = {
    background: darkMode ? "black" : "white",
    color : darkMode ? "white" : "black",
  }

  return (
    <div className="footer" style={theme}>
      footer
    </div>
  )
}-
실행결과
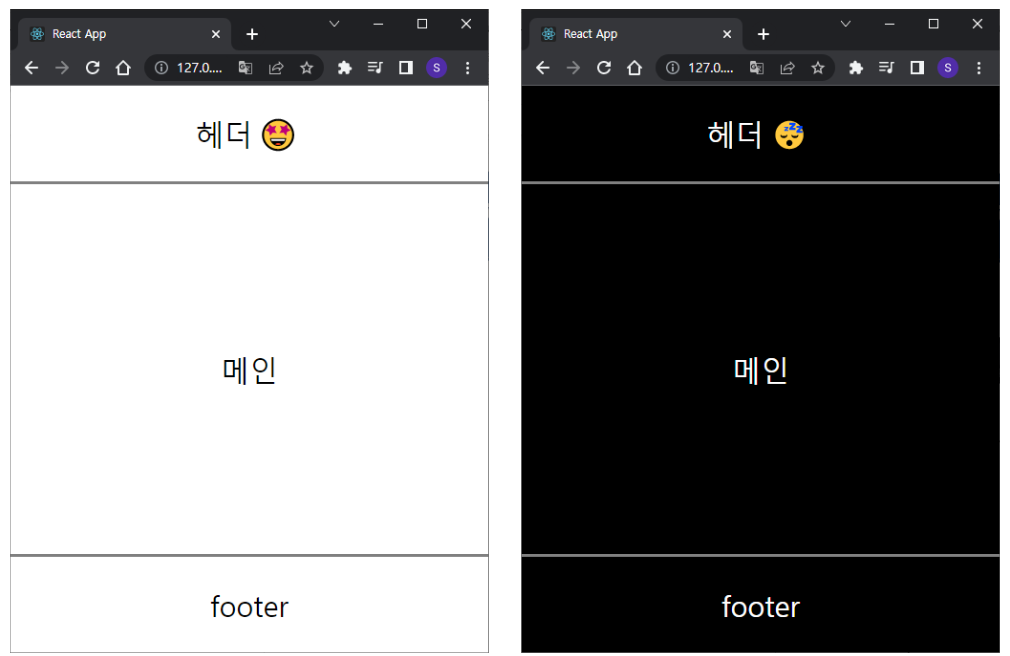
-
이미지로 이해하기
🌱 나가면서
- 지금까지 React의 상태 관리 방법 중에서 Context를 사용한 방법을 알아보았습니다.
- Context는 전역에서 상태관리할 수 있는 React Hook 입니다.
- 부모에서 자식, 자식의 자식 등으로 props가 전달 되는 props drilling이 코드를 관리하기 어렵게 만듭니다.
- 이때 Context를 사용하면 한번에 원하는 컴포넌트에서 Context의 statee 값을 사용할 수 있습니다.
- 그럼 모든 state를 전역에 설정하면 좋은가? 그건 아닙니다. 꼭 필요한 state만 전역에 설정해두고 사용하는 것이 코드 유지 관리하는 데에 유리합니다.
- 추가적인 context 설명은 참고란의 링크를 참조해 주시길 바랍니다. 수고하셨습니다🤗
🌱 참고
'새싹DT 기업연계형 프론트엔드 실무 프로젝트 과정 8주차 블로그 포스팅'

Here and Now. 🧗♂️