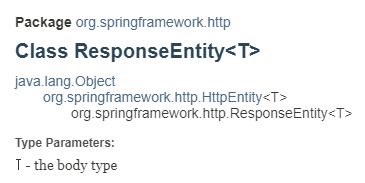
ResponseEntity는 Spring Framework에서 HTTP 응답을 세밀하게 제어할 수 있도록 제공하는 클래스로, 이를 사용하여 HTTP 상태 코드, 헤더, 응답 본문 등을 모두 커스터마이징할 수 있으며 주로 REST API 응답을 처리할 때 사용된다.
특징
-
HTTP 상태 코드 설정: ResponseEntity는 다양한 HTTP 상태 코드를 설정할 수 있다. 기본적으로는 200 OK 상태를 사용하지만, 상황에 따라 404 Not Found, 500 Internal Server Error 등 다양한 상태 코드를 사용할 수 있다.
-
응답 본문(Body) 설정: ResponseEntity는 응답 본문을 포함할 수 있다. 본문에는 객체를 JSON, XML 등 원하는 포맷으로 변환하여 담을 수 있다. Spring은 기본적으로 Jackson 라이브러리를 사용해 객체를 JSON으로 변환한다.
-
HTTP 헤더 설정: 추가적인 메타 정보를 제공하기 위해 HTTP 헤더를 설정할 수 있다. 예를 들어, CORS 설정, 캐싱 제어, Content-Type 등을 설정할 수 있다.
-
유연한 응답 생성: ResponseEntity를 사용하면 응답에 필요한 모든 정보를 명시적으로 설정할 수 있으므로, 더 유연한 API 응답을 만들 수 있다.
생성 방법
편리한 정적 메서드 사용 방식과 세밀한 컨트롤이 가능한 생성자 사용 방식으로 나뉜다.
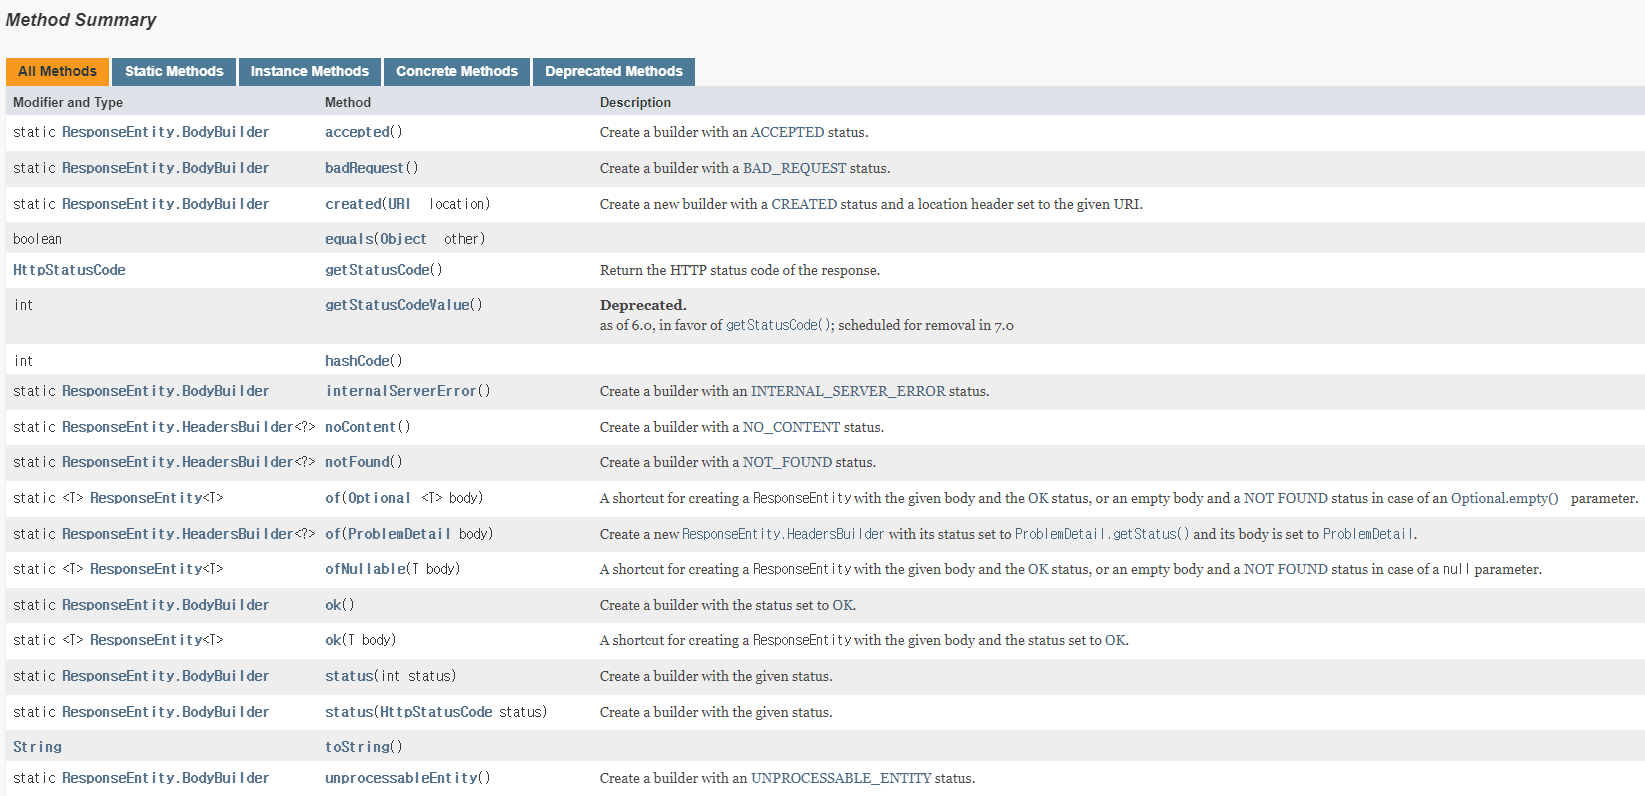
정적 메서드를 이용한 방식의 경우 Spring에서 제공하는 다양한 정적 메서드를 제공하여 쉽게 응답을 생성할 수 있다.
- ResponseEntity.ok() : 200 OK 상태와 함께 응답을 생성
- ResponseEntity.status(HttpStatus) : 상태 코드와 함께 응답을 생성
- ResponseEntity.badRequest() : 400 Bad Request 상태를 응답
- ResponseEntity.noContent() :204 No Content 상태 반환.
- headers(HttpHeaders headers) : 응답 헤더를 설정.
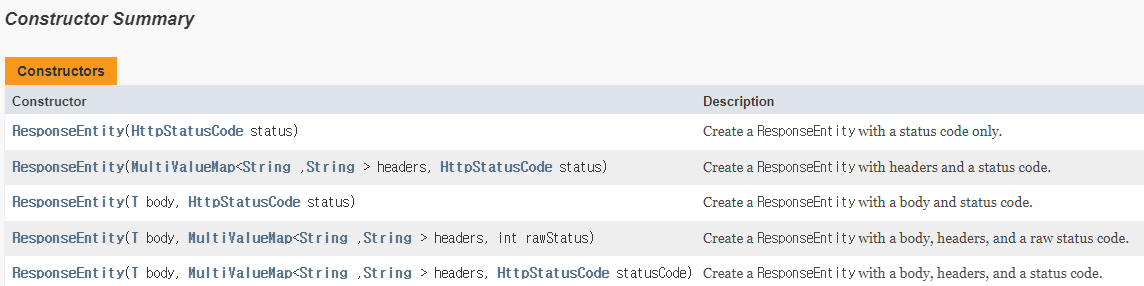
생성자 사용 방식의 경우 상태 코드, 헤더, 본문을 명시적으로 지정할 수도 있으므로 세밀한 제어가 가능하다.
- new ResponseEntity<>(user, HttpStatus.OK); //T body, HttpStatus status
- new ResponseEntity<>(user, headers, HttpStatus.CREATED); //T body, HttpHeaders headers, HttpStatus status
- new ResponseEntity<>(HttpStatus.NO_CONTENT); //HttpStatus status. 본문 없이 응답
-- 예시 --
//간단한 성공 응답
@GetMapping("/user")
public ResponseEntity<User> getUser() {
    User user = new User("John", "Doe");
    return ResponseEntity.ok(user);  // 200 OK와 함께 user 객체를 본문으로 반환
}

//상태 코드와 본문 함께 설정
@GetMapping("/user")
public ResponseEntity<String> getUser() {
    return new ResponseEntity<>("User not found", HttpStatus.NOT_FOUND);  // 404 Not Found와 본문 메시지
}

//응답 헤더 추가
@GetMapping("/download")
public ResponseEntity<byte[]> downloadFile() {
    byte[] fileContent = ...;  // 파일 내용
    HttpHeaders headers = new HttpHeaders();
    headers.setContentType(MediaType.APPLICATION_OCTET_STREAM);
    headers.setContentDispositionFormData("attachment", "file.pdf");
    return new ResponseEntity<>(fileContent, headers, HttpStatus.OK);  // 파일 데이터와 헤더 및 상태 코드
}

//빈응답
@DeleteMapping("/user/{id}")
public ResponseEntity<Void> deleteUser(@PathVariable Long id) {
    // 삭제 로직 수행
    return ResponseEntity.noContent().build();  // 204 No Content 상태를 반환, 본문 없이
}
생성자
메서드
주요 메서드 사용 방법 예시
//1.
// 200 OK와 함께 본문 전달
User user = new User("John", "Doe");
return ResponseEntity.ok(user);

// 200 OK, 본문 없이
return ResponseEntity.ok().build();

//2.
// 201 Created와 함께 응답 본문 전달
User user = new User("John", "Doe");
return ResponseEntity.status(HttpStatus.CREATED).body(user);

// 403 Forbidden 상태를 반환, 본문 없이
return ResponseEntity.status(HttpStatus.FORBIDDEN).build();

//3.
// 204 No Content, 본문 없음
return ResponseEntity.noContent().build();

//4.
// 400 Bad Request와 함께 오류 메시지 전달
String errorMessage = "Invalid input";
return ResponseEntity.badRequest().body(errorMessage);

//5.
// 404 Not Found와 함께 오류 메시지 전달
return ResponseEntity.notFound().build();

//6.
// 201 Created와 함께 생성된 리소스의 URI를 Location 헤더에 포함
URI location = URI.create("/users/1");
return ResponseEntity.created(location).build();

//7.
// 200 OK와 함께 커스텀 헤더 설정
HttpHeaders headers = new HttpHeaders();
headers.set("Custom-Header", "HeaderValue");
return ResponseEntity.ok().headers(headers).body("Success with custom header");

//8.
// 200 OK와 함께 본문 전달
User user = new User("John", "Doe");
return ResponseEntity.ok().body(user);

//9.
// 200 OK, 본문 없음
return ResponseEntity.ok().build();
